
Related Manuals for Nokia MEDIAMASTER 9761 C


Summary of Contents for Nokia MEDIAMASTER 9761 C
- Page 1 Bedienungsanleitung Mode d’emploi Istruzioni per l’uso Owner’s Manual MEDIAMASTER 9761 C...
-
Page 2: Declaration Of Conformity
Nokia dichiara che questo ricevitore digitale, Hereby, Nokia declares that this digital receiver, Mediamaster 9761 C, è conforme ai requisisti Mediamaster 9761 C, is in conformity with essential fondamentali e alle disposizioni della Direttiva 1999/5/EC. requirements and other relevant provisions of Questo Terminale Multimediale è... -
Page 3: Table Of Contents
Corporation. Other product and company names mentioned herein are trademarks or trade names of their owners. Nokia operates a policy of continuous development. Therefore we reserve the right to make changes and improvements to any of the products described in this manual without any prior notice. -
Page 4: General Operation
• Do not cover the Mediamaster or place it on a or humid conditions. unit that emits heat. • Service should be carried out only at a Nokia • Use a soft cloth and a mild solution of washing- Authorised Service Centre. -
Page 5: Remote Control
REMOTE CONTROL This section describes how to operate the Mediamaster using the buttons on the remote control. Some of the functions can also be carried out using the buttons on the front panel. To switch the Mediamaster in and out of standby mode. EXIT TV To return to the viewing mode from a menu without s t o r - ing settings (in menu mode). -
Page 6: Front And Rear Panel
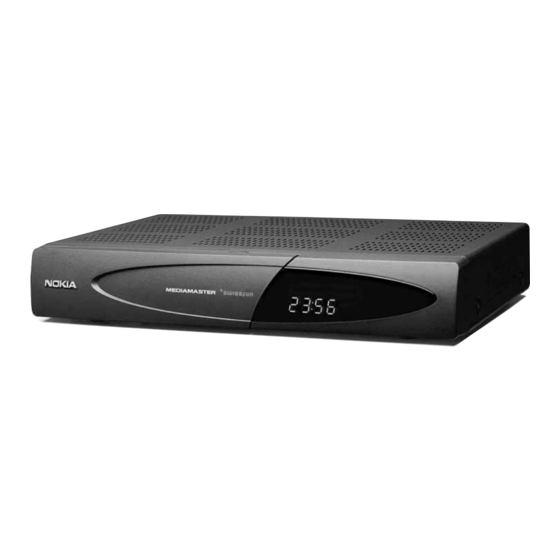
FRONT AND REAR PANEL Front Panel Slot Slot Display for a smartcard for for a CA module shows channel number, error messages, remote con- future services with a smartcard trol commands and time in standby mode Slot Button to put the Mediamaster to move up/down in for the smartcard from the to release the... -
Page 7: Smartcard And Ca Module
ABOUT THE SMARTCARD AND CA MODULE General The Mediamaster box has access to scrambled TV/Radio chan- nels based on the embedded Nagravision system. To be able to receive these scrambled digital channels you will need a special smartcard distributed by your Service Provider. smartcard The Service Provider is the programme distributor of the cable channels. -
Page 8: Installation Of The Mediamaster
INSTALLATION OF THE MEDIAMASTER The box for your Mediamaster should contain the following items: • the Mediamaster • a remote control with 2 AAA batteries • a SCART lead (fully featured 1,0 metre) • an Owner’s Manual • a software license agreement SCART lead Remote control Owner’s manual... -
Page 9: Connecting The Mediamaster To The Tv
INSTALLATION OF THE MEDIAMASTER Connecting the Mediamaster to the TV As most local cable network are distributing TV programmes from both digital and analogue sources, the signal from the wall net- work socket will be of the two different kinds: 1 Digital signal information to be handled by the Mediamaster. -
Page 10: Connecting A Satellite Receiver And Vcr
INSTALLATION OF THE MEDIAMASTER Connecting a Satellite Receiver and VCR 1 Connect a SCART lead between the main SCART socket on the TV and the TV SCART socket on the Mediamaster. Satellite dish 2 Connect a SCART lead between the TV SCART socket Network socket on the satellite receiver and the AUX SCART socket... -
Page 11: Connecting To The Mains Supply
INSTALLATION OF THE MEDIAMASTER Connecting to the mains supply Important Before you connect the box to the mains supply make sure the RF cable between the box and the cable network socket is con- nected. If not, the startup procedure will take about 10 minutes. During this time the box will not respond to any commands! When you connect the box to the mains supply it will always check if a new software*... -
Page 12: Tuning Procedure When Rf Connections Are Used
INSTALLATION OF THE MEDIAMASTER Tuning Procedure when RF Connections are used This procedure is necessary if your Mediamaster is con- nected to the TV with an RF lead only. To tune your TV to the RF signal you might also need your TV manual in addition to this manual. -
Page 13: First Time Installation
FIRST TIME INSTALLATION General Information Once you have correctly connected the Mediamaster, you also have to perform a “First Time Installation.” During this procedure, helpful information is displayed at the bot- tom of the menus. Please note! The OK button always confirms a selection within these menus, and pressing it will take you to the next step in the installation process. -
Page 14: Initialization
FIRST TIME INSTALLATION Initialization The Service Provider will supply you with a specific “Setup Iden- tifier” code number. This code contain all information necessary to start the channel search procedure. Please note that this code number is specific for the service provider and the area where the box is located. -
Page 15: Finishing The First Time Installation
FIRST TIME INSTALLATION Finishing the first time installation The channels found at the search procedure will now be saved. A message telling that the installation procedure is complete will be shown on the screen. Press OK in order to start watching channels from the box. If the smartcard is not inserted you will be informed to do so. -
Page 16: Viewing Mode
VIEWING MODE General Information The following describes the basic functions of your Mediamaster while watching TV or listening to radio channels from the cable network. Some of the functions described here can only be used if they are included in the transmitted programme information. If you select a programme to which you do not have access, you will get a message on the screen. -
Page 17: The "I" (Information) Button
VIEWING MODE The “i” (Information) Button The Mediamaster has the ability to display information about pro- grammes currently being broadcast as well as those being broad- cast next. This procedure is the same for both TV and Radio mode. By pressing the “i” button while watching TV you will get a spe- cial Programme Information Banner. -
Page 18: List Of Tv Or Radio Channels
VIEWING MODE List of TV or Radio Channels Name of the Indicates a At the channel search procedure, two Channel lists are created. Channel list locked channel One list named “All TV” containing all channels, and another named “Free TV” containing only free channels. In the “All TV”... -
Page 19: Tv Release (0)
VIEWING MODE Format If you have a TV set with a 4:3 picture format, and the transmis- sion is in 16:9, you can select Fullscreen or Letterbox to change display format. Fullscreen will fill up the screen vertically, but cut off some infor- mation from the left and right sides of the picture. -
Page 20: Main Menu
MAIN MENU General Information Many of the functions of the Mediamaster are available from the Main Menu. Press MENU to open it. Without affecting any settings, you can always return to watch TV by pressing the EXIT button. TV and Radio Channels Please refer to “List of TV and Radio channels”... - Page 21 MAIN MENU Create List From here you can create your own favourite lists, containing the channels you watch most frequently. You can give each list a spe- cific name, e.g. “Sport” or “Films.” When a favourite list is selected, you see only those channels defined in the list.
- Page 22 MAIN MENU Select Channels From this menu you add and remove the channels in your Favour- ite Lists. You use the “All TV” or “All Radio” list as basis to se- lect the channels from. A channel is added or removed by pressing the OK button. The square to the right on a line will be empty for removed channels, and will contain an “x”...
- Page 23 MAIN MENU Rearrange Channels From here you can arrange the sequence for the channels within your favourite lists. • With , mark the channel you want to move to a new posi- tion within the list. • Press again and the right side of the marked channel will change to •...
-
Page 24: Guide
MAIN MENU Guide By selecting Guide from the main menu you get access to the ordinary TV Guide (or Radio Guide if you are listening to radio channels) which will show the titles of the current and next pro- grammes on different channels. Use the buttons to move the cursor to another programme. -
Page 25: Tv Settings
MAIN MENU TV Settings From here you can adjust settings for your TV. TV screen format Select your TV screen format. The 4:3 format is the standard format for most TV screens. Select 16:9 for a wide screen TV. TV signal If the teletext function does not work when watching channels from an analogue satellite receiver connected to the Media- master, change this setting from RGB to PAL. -
Page 26: Modem Configuration
MAIN MENU Modem configuration The Mediamaster is equipped with a built in telephone modem. Via the modem so called “interactive services”, such as e.g. or- dering movies, can be performed. When configuring the modem, the following parameters have to be set. Pulse or tone: Select the alternative valid for your system. -
Page 27: Manually Receiver Upgrade
MAIN MENU Automatically channel check Every time you change channel with the arrow buttons or P+/P-, the box will check if any new channels have been added by your service provider. If so, the message “There may be new channel information in the network. A channel update will be per- formed in a few seconds. -
Page 28: Language Preferences
MAIN MENU Language Preferences Menu Language Here you may select in which language the menus will be shown . Main and Alternative audio Ianguage If more than one audio language is transmitted, you may select the main and an alternative language. Subtitles If you select the “Visible”... -
Page 29: Appearance Preferences
MAIN MENU Application Download (“Open TV” applications) From some channels it is possible to download specific pro- gramme applications such as games and various information. When you select the alternative ”Manual” below, channels which Symbol on the screen provide these services will show a symbol in the upper left cor- ner of the screen. -
Page 30: System Information
MAIN MENU System Information If you have to contact your service provider or a service center, they might ask for information available from this menu. There- fore, it is important that you first check the information in the following menus. System Information This gives general information about which hardware and soft- ware version your Mediamaster is running on. -
Page 31: Conditional Access
MAIN MENU Conditional Access Nagra embedded From here you get information about your smartcard. Common Interface If a CA module is mounted, you have access to its information from here. GB 31... -
Page 32: Reminder List
MAIN MENU Reminder List You can configure the Mediamaster to start and stop at a predefined time. Use this function when you want to record a programme on a VCR and you are unable to start/stop the recording event your- self. -
Page 33: Glossary
GLOSSARY OF TERMS Access Parental control Authorisation to use the coding system to purchase / A feature that allows parents to "lock" programmes that order TV programmes. they consider unsuitable for children. A "locked" channel Audio system or programme can only be "unlocked" with the special pa- With digital reception, the sound is transmitted in pack- rental access code. - Page 34 PROBLEM SOLVING Problem Possible causes What to do The display on the front panel does Mains cable is not connected. Check that the mains cable is not light up/is not lit. plugged in to the power socket. No sound or picture, but the front Press the standby button or any The Mediamaster is in standby panel shows the time or - - : - -.
-
Page 35: Problem Solving
PROBLEM SOLVING Problem Possible causes What to do You made a video recording of a The Mediamaster was not left on If you make a recording of digital cable digital cable channel and whole or the appropriate channel. TV your Mediamaster has to be left on parts of the programme was not the channel you like to record. -
Page 36: Technical Specifications
TECHNICAL SPECIFICATIONS Transmission Telephone (return channel on the phone line) Standards DVB, MPEG 2 Contact modular jack Protocol V32 bis, 14400 bits/sec RF input (QAM)/Modulator output Security information Loop through output The modem connection is made according to the TNV 3 Input/outp. - Page 37 Nokia is a registered trademark of Nokia Corporation www.nokia.com 66 76954-17 © 0106...
Need help?
Do you have a question about the MEDIAMASTER 9761 C and is the answer not in the manual?
Questions and answers