Table of Contents
Advertisement
Quick Links
Advertisement
Table of Contents

Related Manuals for Nokia MEDIAMASTER 9701 S GOLD BOX


Summary of Contents for Nokia MEDIAMASTER 9701 S GOLD BOX
- Page 1 Owner’s manual MEDIAMASTER 9701 S GOLD BOX...
-
Page 2: Table Of Contents
MEDIAMASTER 9701 S Table of contents First installation / tuning 18-20 Information about the operation Tuning the channels (PERS - 5) Information about safety Mediamaster with the Light Card Remote Control Mediamaster with the TELE DIGITALE Front and rear panel Smart Card Storing the settings Information about the Smart Card... -
Page 3: Information About The Operation
• Never connect or move the cables when Mediamaster is connected to the supply mains. Nokia and Nokia Connecting People are Nokia Corporation’s registered trademarks. Any other product and company name mentioned by this document may be the respective owners’ trademarks or registered trademarks. -
Page 4: Remote Control
REMOTE CONTROL This section is intended to describe the Mediamaster use by means of the remote control keys. Some of these functions can be also performed from the keys on the front panel. To power Mediamaster on and off (standby mode). TV SAT To go from the traditional TV view to the satellite TV view of Mediamaster and vice versa. -
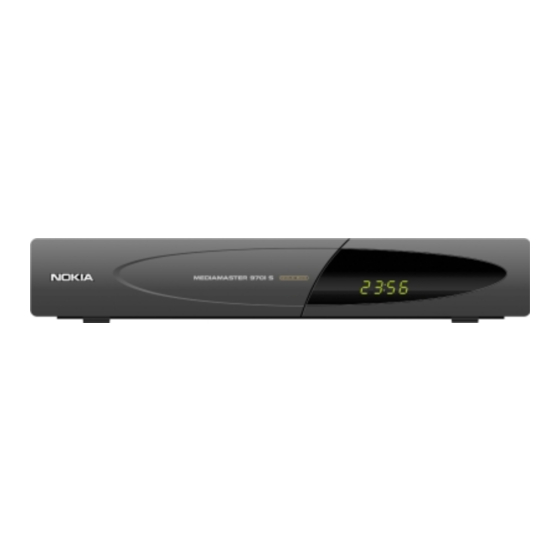
Page 5: Front And Rear Panel
FRONT AND REAR PANEL Front panel DISPLAY PERS SMART CARD 1 EXIT For the To display the channel For a credit card To power To exit from the main number, the clock (for future Mediamaster in menus. menu. and other information. services). -
Page 6: Information About The Smart Card And Conditional Access
INFORMATION ABOUT THE SMART CARD AND CONDITIONAL ACCESS General Information The Nokia Mediamaster 9701S receiver is complete with a conditional access system of a Mediaguard type (SECA). It is compatible for using the smart cards of the TELE DIGITALE operator and of other operators who use the same cryptography system (SECA). -
Page 7: Mediamaster Installation
MEDIAMASTER INSTALLATION The Mediamaster package shall include the following components: • Mediamaster • Remote control with 2 AAA batteries • SCART cable (type approved – 1 metre) • Antenna / RF cable (double screened– 1.5 metres) Mai n s cable •... -
Page 8: General Information
MEDIAMASTER INSTALLATION General information There are several types of TV sets or videorecorders and other devices which may be connected to Mediamaster. This manual is intended to show some of the commonest ways of connecting one’s own equipment. If RF cables are in use, it will be necessary to tune the TV set and the videorecorder to the Mediamaster output channel (see page 11). -
Page 9: Connection Of An Analogue Satellite Receiver And A Videorecorder
MEDIAMASTER INSTALLATION Connection of an analogue satellite receiver and a videorecorder • Connect a SCART cable to the main SCART socket on the TV With a Smart set and to the TV SCART socket on Mediamaster. Switch • Connect a SCART cable between the videorecorder and the AUX SCART socket on Mediamaster. -
Page 10: Tuning The Tv Set To Rf Connections
MEDIAMASTER INSTALLATION Tuning the TV set to RF connections This procedure is only required if Mediamaster is connected to the TV by means of an RF cable. To tune your own TV to the RF signal, you may have to refer not only to this manual, but also to the manual of the TV set. -
Page 11: First Installation / Settings
FIRST INSTALLATION / SETTINGS General information After having connected Mediamaster correctly, provide for the preliminary set-up as per item 4, 5 and 7 of the PERSONALIZ- ZAZIONE menu. Note: press OK to confirm a selection which has been made in these menus. -
Page 12: Tv/Video Screen Format (Pers - 4 - 2)
FIRST INSTALLATION / SETTINGS Subtitles (2) Select the priority language for the subtitles. The set-up language will be automatically selected if the events should be broadcast by the Operator in more than a language. TV audio (3) Select the volume level at the start-up. The volume may be adjusted afterwards by pressing the keys. -
Page 13: Modem Configuration (Pers - 4 - 3)
FIRST INSTALLATION / SETTINGS 4/3 (STANDARD) If your TV set has a 4/3 standard format and broadcasting should occur in the 16/9 format, it will be necessary to adjust the images on the screen. Select SCHERMO PIENO to cover the whole TV screen and lose the left and right part of the image. - Page 14 FIRST INSTALLATION / SETTINGS Connection Select DIRETTA if the phone cable is directly connected to the phone line. Select PABX if the phone line is connected to a telephone exchange. Only in this case move to the PREFISSO item to enter the code number and have access to the external line.
-
Page 15: Technical Parameters (Pers-7)
FIRST INSTALLATION / SETTINGS Technical parameters (PERS-7) This menu is intended to provide for the set-up required to match Mediamaster with the satellite antenna and to supply the information about the system. Select the various items of this menu to provide for the set-up. In the end press A to go back. Antenna setting (PERS-7-1) Select the various items of this menu to provide for the set-up. -
Page 16: Software Update (Pers-7-2)
FIRST INSTALLATION / SETTINGS Satellite Select Eutelsat for a monofeed installation. The other parameters of the same menu, described here below, will not be accessible because they have been preset by default. Select Others for a dualfeed installation. Set the parameters here below for the Astra satellite. -
Page 17: Software Release (Pers-7-3)
FIRST INSTALLATION / SETTINGS Software release (PERS-7-3) To check the software release which has been installed in the Mediamaster. A green window will appear on the screen and show the software release and the manufacturer name. The Aggiornamento produttore and Aggiornamento Software items are not active for this model. -
Page 18: Mediamaster With The Light Card
FIRST INSTALLATION / TUNING Numbering selection This menu will show two different search conditions, according to the type of smart card which has been inserted. Condition 1: Mediamaster with the Light Card. Press the B key to have access to the customised search for channels. -
Page 19: Mediamaster With The Tele + Digitale Smart Card
FIRST INSTALLATION / TUNING Condition 2: Mediamaster with the Tele Digitale smart card. The smart card will enable the user to search for the channels not only according to a customised list but also according to the TELE DIGITALE list. Select TELE DIGITALE and press OK.. -
Page 20: Viewing Mode
VIEWING MODE General information You will find a description of Mediamaster basic functions which may be performed while watching or listening to TV and Radio programmes via satellite. The availability and the features of the following functions will depend upon the TELE DIGITALE Operator. -
Page 21: Guida Key
VIEWING MODE GUIDA key Note: The GUIDA key will only act from the channels of the TELE+DIGITALE bouquet. If you come from another channel and you wish to select a channel of the TELE DIGITALE offer, you will have to wait some seconds for the loading of the information before the menu of the GUIDA function is displayed on the screen. -
Page 22: E Key
VIEWING MODE Radio and Music Radio Mosaic It will directly select the mosaic channel of the TELE DIGITALE RADIO bouquet. Follow the instructions on the screen to surf among the radio channels. Multimusic Mosaico It will directly select the mosaic channel of the TELE DIGITALE Multimusic RADIO bouquet. -
Page 23: Pref Key
VIEWING MODE PREF Key This function is active after having assigned to your favourite channels the symbol as described by paragraph “Selection of the favourite channels” on page 27. Press PREF to enable the favourite channels function. The white symbol will appear on the screen for some seconds (PREF function on). -
Page 24: Personalizzazione Menu
PERSONALIZZAZIONE MENU General information The Personalizzazione menu is the Mediamasters main menu. Many Mediamaster functions are made available by this menu. Press PERS to access it. Records Programming (PERS - 1) The Mediamaster is complete with a function which will enable it to power on automatically and to move to the channel you have selected at a pre-established date and time, only if the Mediamaster is in standby mode, i.e. - Page 25 PERSONALIZZAZIONE MENU Number of channels Enter the number of the channel you wish to record. Otherwise press the E key to consult the channels list. Use the arrow keys to select the channel in the list. Press OK to include it into this setting. If the channel you have selected is one of those view-locked (see paragraph “Family control code and view lock”), you will be required to type the secret code.
-
Page 26: Selection Of The Favourite Channels (Pers - 2)
PERSONALIZZAZIONE MENU If the Mediamaster is already on when you start a programming, it will inform you by displaying the PIU message which will flash on and off. Besides displaying the PIU message, it may also produce a BEEP (see paragraph Notice (5) on page 13). Press the + key to gather more information on the screen and to confirm whether to move to the programmed channel or to remain on the channel you are watching.. -
Page 27: Family Control Code And View Lock (Pers - 3)
PERSONALIZZAZIONE MENU Family control code and view lock (PERS - 3) Use the (secret) family control code to prevent the user from carrying out some operations with the Mediamaster and to acquire its complete and safe control. Those who do not know your secret code can not: - Purchase and watch PALCO programmes (Pay Per View) - Extend the subscription profile via modem - Watch the channels you have locked... -
Page 28: Tuning The Channels (Pers 5)
PERSONALIZZAZIONE MENU To unlock a channel of the list, select the channel with the padlock symbol you wish to remove. Press OK to remove the symbol Press A to go back to the Customisation menu. Press EXIT to quit. Switch-off (stand-by) and switch-on the Mediamaster to save the settings. - Page 29 PERSONALIZZAZIONE MENU Use the arrow keys to scroll the list and select the channel you wish to move. Press OK to confirm. The name of the selected channel will turn YELLOW. Use the arrow keys to scroll the list and search for a new position which shall be assigned to the channel selected before.
- Page 30 PERSONALIZZAZIONE MENU Deleting the channels (4) The channels at the position numbering from 1 to 500 are preset and they can not be deleted. The channels at the position numbering from 501 to 999 can be deleted. Use the arrow keys to scroll the list and select the channel you wish to delete.
-
Page 31: Checking Your Subscription State (Pers 6)
PERSONALIZZAZIONE MENU This operation is required when you wish to search for new channels which are not included in the list. Press PERS – 5 – 5 to display a yellow warning window. Press OK to start tuning or press A to quit. For further information about tuning refer to paragraph “Tuning the channels (PERS –... -
Page 32: Technical Parameters (Pers 7)
PERSONALIZZAZIONE MENU Your subscription state will be checked at the date shown. If the subscription continues, the smart card enable will be extended for a period which will be automatically updated. Press A twice to go back to the PERS menu. Press EXIT to quit. Mail Box (2) When the MESS message is displayed by the Mediamaster, it means that a new mail message has been sent by... - Page 33 PERSONALIZZAZIONE MENU Mediamaster update To update the Mediamaster, you may download new releases of the system software via satellite from the TELE DIGITALE channels. The new software’s may either include new functions or improve the existing ones. Select a channel of the TELE DIGITALE bouquet.
-
Page 34: Operator Functions And Services
OPERATOR FUNCTIONS AND SERVICES Guide to Programmes Guide to Programmes While watching the TELE DIGITALE channels, you may press the GUIDA key and select the “Guide to Programmes” function (also see paragraph “Viewing Mode, Guida Key” on page 22). If you activate this function, you may activate other useful subfunctions as well as gather some information about programming TELE DIGITALE Channels. - Page 35 OPERATOR FUNCTIONS AND SERVICES Press OK - to watch the current event - to program the powering on of the Mediamaster / recording of the events which will be broadcast Press A to go back. Press GUIDA or EXIT to quit. Your own choice To have access to a screen where you can set (by means of the D key) the parameters required to perform a selective search and...
-
Page 36: Purchase Of Pay Per View Events (Palco)
OPERATOR FUNCTIONS AND SERVICES Purchase of Pay Per View events (PALCO) Every single programme on PALCO may be easily purchased by using the Mediamaster remote control. To do this, use an internal modem after having connected it to the phone line and configured according to the instructions as per paragraph “Modem configuration (PERS –... - Page 37 OPERATOR FUNCTIONS AND SERVICES Purchase it as follows to watch it now or later, but always within its programming time. Make sure that the Mediamaster is connected to the phone line. Press OK. If you have entered the view and purchase lock code, you will be required to enter the secret code.
- Page 38 OPERATOR FUNCTIONS AND SERVICES Surfing inside the PALCO programming, selection and purchase of an event From the channels of the PALCO offer (e.g. P1, P2, P3 etc...) you may have access to the “RPROGRAMMAZIONE IN CORSO” menu to display a series of screens where you may get information about the PALCO programming and about the costs and times of the events, require further information about every single programme, have a look at the situation of one’s own...
-
Page 39: Extension Of One's Own Subscription
OPERATOR FUNCTIONS AND SERVICES PALCO offers Press C to know and purchase any promotion which may be offered, such as film packages, sports events and special events. State of ordered events Press D to watch the list of the events you have recently purchased. - Page 40 OPERATOR FUNCTIONS AND SERVICES The various screens will be available in the following order: Subscription (1) • Complete the subscription (1) • Consult your subscription (1) • Complete your subscription (2) Checking the smart card enable (2) • Practical information (3) •...
-
Page 41: Solution Of The Problems
SOLUTIONS OF THE PROBLEMS Possible causes Solution Problem Make sure the supply cable is The display on the front panel will not The supply cable is not connected. light up / power on. connected to the power outlet. Press the standby key or any other No sound or picture, but the time or The Mediamaster is in standby numeric key to power on the... -
Page 42: Front Panel Display
If you have attempted all possible solutions, but you have not been able to solve the problem, contact your own retailer or service provider. NOKIA HOME COMMUNICATIONS Customer Service: Tel. 199 11 55 22, Nokia Italia www.nokia.it FRONT PANEL DISPLAY To start a programming. -
Page 43: Technical Specifications
TECHNICAL SPECIFICATIONS Trasmission standard DVB, MPEG 2 Conditional Access system Embedded Media Guard LNB / Tuner input Slot PCMCIA (*) Multicrypt Connector 1 x F-type IEC Operating system Media Highway 169-24 - 75 ohm Out from F connector 13,5 / 18,5 V Smart card interface (max 500mA) Slot smart card 1... - Page 44 NOTE GB 45...
-
Page 45: Notes
Nokia and Nokia Connecting People are registered trademarks of Nokia Corporation www.nokia.it 66 76948-13 Italy © 0205...
Need help?
Do you have a question about the MEDIAMASTER 9701 S GOLD BOX and is the answer not in the manual?
Questions and answers