Table of Contents
Advertisement
Quick Links
Download this manual
See also:
Quick Manual
Advertisement
Table of Contents

Related Manuals for Nokia MEDIAMASTER 9780 S


Summary of Contents for Nokia MEDIAMASTER 9780 S
- Page 1 Owner’s Manual MEDIAMASTER 9780 S...
-
Page 3: Table Of Contents
Multisatellite/DiSEqC Switch Configuration Connection of a DiSEqC switch Channel Search Nokia and Nokia Connecting People are registered trademarks of Nokia Corporation. Other product and company names mentioned herein may be trademarks or trade names of their owners. Nokia Multimedia Terminals operates a policy of continuous development. -
Page 4: General Operation Of The Mediamaster
• Do not cover the Mediamaster or place it on cold or humid conditions. a unit that emits heat. • Service should be carried out only at a Nokia • Use a soft cloth and a mild solution of Authorised Service Centre. -
Page 5: Remote Control
REMOTE CONTROL This section describes how to operate the Mediamaster using the buttons on the remote control. Some of the functions can also be carried out using the buttons on the front panel. To switch the Mediamaster in and out of standby mode. EXIT TV To return to the viewing mode from a menu without s t o r - ing settings (in menu mode). -
Page 6: Front And Rear Panel
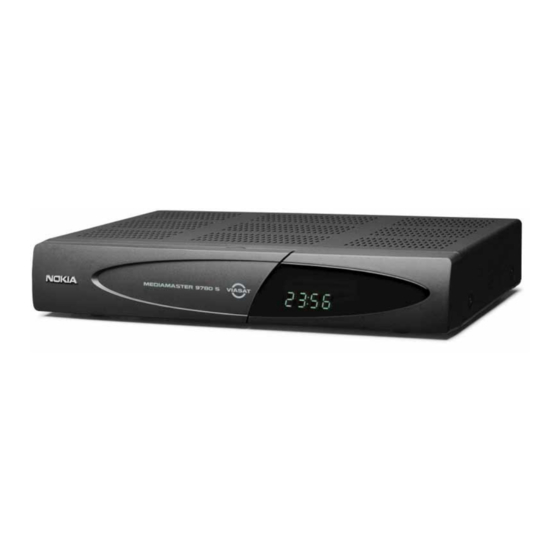
FRONT AND REAR PANEL Front Panel Display shows channel number, error messages, remote control commands and time in standby mode Slot to put the Mediamaster to move up/down in for a Smartcard in and out of standby the menus and to mode change channels. -
Page 7: About The Smartcard
ABOUT THE SMARTCARD General To be able to receive scrambled digital satellite channels you will need a Smartcard from your Service Provider Viasat. The Service Provider is the programme distributor. Important. To be able to use the box, the card has to be inserted in the slot. -
Page 8: Connection Of The Mediamaster
CONNECTION OF THE MEDIAMASTER The box for your Mediamaster should contain the following items: • the Mediamaster • a remote control with 2 AAA batteries • a SCART lead (fully featured 1,0 metre) • a mains lead SCART lead RF lead Phone cable •... -
Page 9: Connecting The Mediamaster
CONNECTION OF THE MEDIAMASTER Connecting the Mediamaster There are many different types of TV/VCR and other equipment that you can connect to the Mediamaster. In this manual you will see some of the most common ways to connect your equipment. If you use RF leads you will have to tune your TV and VCR to the Mediamaster output channel (see page 11). -
Page 10: Nokia Smart Switch
Mediamaster In order to switch the signal from the dish between the ana- logue and digital receivers, you need a Nokia Smart switch (at A B in the diagram) or a Universal Twin LNB. Analogue receiver Nokia Smart switch •... -
Page 11: Switching On For The First Time With Scart Connections
CONNECTION OF THE MEDIAMASTER Switching on for the First Time with SCART Connections • Plug in your Mediamaster • Now you will see the ”Welcome” menu on the screen. • Press OK on the Mediamaster remote control to start the First Time Installation procedure (see the next page). -
Page 12: First Time Installation
FIRST TIME INSTALLATION General Information Once you have correctly connected the Mediamaster, you also have to perform a “First Time Installation.” During this procedure, helpful information is displayed in the green field at the bottom of the menus. Please note! The OK button always confirms a selection within these menus, and pressing it will take you to the next step in the installation process. -
Page 13: Antenna/Satellite Selection
FIRST TIME INSTALLATION Antenna/Satellite Selection ISelect the alternative on the first line when you have anantenna equipped with one (1) LNB and intend to receive channels from the Sirius satellite. To acheive best possible reception you should use a Universal LNB. Select line 2 for other antenna and satellite combinations. -
Page 14: About Signal Strength (Agc) And Signal Quality (Snr)
FIRST TIME INSTALLATION About Signal Strength (AGC) and Signal Quality (SNR) The different signal indicators at the top of the menu provide in- formation about two things: AGC: The AGC, shown with a red bar, will indicate the average strength of any incoming signal, digital as well as ana- logue. -
Page 15: Multisatellite/Diseqc Switch Configuration
FIRST TIME INSTALLATION LNB Offset voltage If the cable down from the antenna is very long, the voltage at the LNB could be too low to change the polarization. You can in- crease the voltage to the LNB by 0,5 V. Satellite Select the satellite towards which you want to aim the antenna. - Page 16 FIRST TIME INSTALLATION For each LNB you connect to the DiSEqC switch, the fol- lowing configuration has to be performed. As an example the following part will describe how the LNB in- tended for Thor will be configured to input 1 (A) on the switch and the LNB intended for Sirius to input 2 (B).
-
Page 17: Channel Search
FIRST TIME INSTALLATION Channel Search This menu will be shown while the box is searching for channels to download. When two LNBs are connected via a DiSEqC switch, the box will search for channels from both. All channels found will be listed in two columns on the screen; with TV channels in one column and Radio channels in the other. -
Page 18: Viewing Mode
VIEWING MODE General Information The following describes the basic functions of your Mediamaster while watching satellite TV or listening to satellite radio. Some of the functions described here are dependent on the Service Provider and can only be used if they are included in the transmitted programme information. -
Page 19: The "I" (Information) Button
VIEWING MODE The “i” (Information) Button The Mediamaster has the ability to display information about pro- grammes currently being broadcast as well as those being broad- cast next. This procedure is the same for both TV and Radio mode. By pressing the “i” button while watching TV you will get a spe- cial Programme Information Banner. -
Page 20: List Of Tv And Radio Channels
VIEWING MODE List of TV and Radio Channels Name of the Channel found at a At the channel search procedure, two Channel lists are created. Channel list new channel search One list named “All TV” containing all TV channels, and another containing the radio channels. -
Page 21: Tv Release (Zero Button)
VIEWING MODE TV Release (Zero button) Channel number With the 0 button you can toggle between analogue terrestrial TV, video, analogue and digital satellite TV signals. Analogue TV mode (This is only valid if the units are connected via SCART cables, and not by a RF connection.) Video mode (The video must be turned ON) -
Page 22: Main Menu
MAIN MENU General Information Many of the functions of the Mediamaster are available from the Main Menu. Press MENU to open it. TV and Radio Channels Please refer to “List of TV and Radio channels” on page 20. Edit Channels From these menus you can create and edit channel lists. - Page 23 MAIN MENU Create list From here you can create your own favourite lists, containing the channels you watch most frequently. You can give each list a spe- cific name, e.g. “Sport” or “Films.” When a favourite list is selected, you see only those channels defined in the list.
- Page 24 MAIN MENU Select Channels From this menu you add and remove the channels in your Favour- ite Lists. You use the “All TV” or “All Radio” list as basis to se- lect the channels from. A channel is added or removed by pressing the OK button. The square to the right on a line will be empty for not selected chan- nels, and will contain an “x”...
- Page 25 MAIN MENU Rearrange Channels From here you can arrange the sequence for the channels within your favourite lists. • With , mark the channel you want to move to a new posi- tion within the list. • Press again and the right side of the marked channel will change to •...
-
Page 26: Update Channels
MAIN MENU Update Channels When new TV and radio channels are added to the different sat- ellites, you can check and automatically update the main chan- nel list. New channels will be marked with a star in the channel lists. After each download, check the channel lists for new channels marked with During the search procedure the old channels will be coloured... -
Page 27: System Configuration
MAIN MENU System Configuration You will be asked to enter your access code before you can en- ter this menu. The code is preset to 1234 from the factory. (The code can be changed from the Parental Control menu. Re- fer to page 31.) Please note that many of these functions are the same as in the “First Time Installation.”... -
Page 28: Antenna/Satellite Configuration
MAIN MENU Antenna/Satellite Configuration The procedure is the same as performed during the First Time In- stallation. Please refer to page 16. Only your current Antenna/Satellite configuration alternative will be selectable. Other alternatives will be dimmed. TV Settings From here you can adjust settings concerning your TV. TV screen format Select your TV screen format. -
Page 29: Modem Configuration
MAIN MENU Modem configuration The Mediamaster is equipped with a built in telephone modem. Via the modem so called “interactive services”, such as e.g. or- dering movies, can be performed. You will get more information concerning this service by your service provider. -
Page 30: Reinstall
MAIN MENU Reinstall Use this option only if you have to start the complete installation procedure from scratch. If you continue from here, all your pre- vious settings, parental code and favourite channels etc. will be erased! If you do not want to change any settings you can leave this menu when the warning is displayed by pressing BACK or EXIT. -
Page 31: Parental Control
1234. DO NOT FORGET IT! Without it you do not have ac- cess to any of the functions where the code is required! If you forget it, you have to contact an Authorized Nokia Service Center to get help. -
Page 32: System Information
MAIN MENU System Information If you have to contact your service provider or a service center, they might ask for information available from this menu. There- fore, it is important that you first check the information in the following menus. System Information This gives general information about which hardware and soft- ware version is installed in your Mediamaster. -
Page 33: Conditional Access
MAIN MENU Conditional Access Select this alternative from the main menu to get information from the smartcard. Viaccess Embedded Abonnemangsinformation Get information about the channels you subscribe to. Smartcard settings Age Rating Control This is an age rating control function which is connected to your smartcard. -
Page 34: Glossary
GLOSSARY OF TERMS Access Parental Access code Authorisation to use the coding system to purchase / A four-digit code stored in the Mediamaster. Used to order TV programmes. lock the Mediamaster. Automatic Gain Control. Program Clock Reference. PIN code Conditional Access. A system to control subscriber ac- Personal Identification Number. - Page 35 PROBLEM SOLVING Problem Possible causes What to do The display on the front panel does Mains cable is not connected. Check that the mains cable is not light up/is not lit. plugged into the power socket. No sound or picture, but the front The Mediamaster is in standby Press the standby button or any panel shows the time or - - : - -.
-
Page 36: Problem Solving
PROBLEM SOLVING Problem Possible causes What to do The remote control is not working. Battery exhausted. Change the batteries (both). Remote control is incorrectly Aim the remote control at box. aimed. Check that nothing blocks the front panel. The Mediamaster is in standby Check if (.) is flashing on the front mode. -
Page 37: Technical Specifications
TECHNICAL SPECIFICATIONS Transmission Standards Telephone (return channel on the phone line) DVB, MPEG 2 Contact modular 6-pin jack Protocol V22, 1200 bits/sec LNB / Tuner input Security information Connector 1x F-type (LNB) The modem connection is made according to the TNV 3 RF input frequency 920-2150 MHz RF input power level -20 to -70 dBm... -
Page 38: Menu Screen Structure
MENUS SCREEN STRUCTURE First time installation Language Antenna/Satellite Selection Channel Search Progress English Antenna Adjustment: Welcome TV Channels Radio Channels Time Adjustment Signal Check: Svenska Antenna with one LNB for SIRIUS TV3 Sverige Power FM Dansk menu Other Antenna / Satellite TV3 Sverige TV3 Norge Radio Rix... - Page 40 Nokia is a registered trademark of Nokia Corporation www.nokia.com 66 76966-10 © 0040...
Need help?
Do you have a question about the MEDIAMASTER 9780 S and is the answer not in the manual?
Questions and answers