Chapters
Table of Contents

Related Manuals for Kenmore Kenmore 580.73089


Summary of Contents for Kenmore Kenmore 580.73089
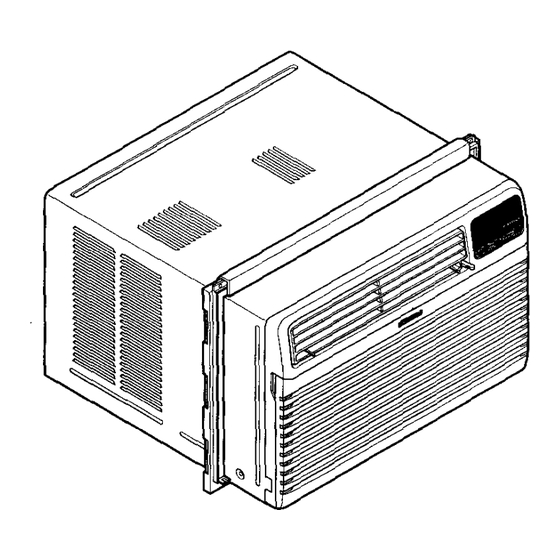
- Page 1 Owner's Manual Manual del Propietario ® ROOM AIR CONDITIONER ACONDICIONADOR DE AIRE DE VENTANA Model, Modelo 580. 73089 Sears, Roebuck and Co., Hoffman Estates, IL 60179 U.S.A. www.sears.com...
-
Page 2: Table Of Contents
Sears will repair this air conditioner, free of charge, if defective in material or This warranty applies only while this product is in workmanship. -
Page 3: Safety
IMPORTANT SAFETY INSTRUCTIONS The safety instructions below will tell you how to use your room air conditioner to avoid harm to yourself or damage to your ROOM AIR CONDITIONER. FOR YOUR SAFETY Do not store or use gasoline or other flammable Avoid fire hazard or electric shock. -
Page 4: Electrical Requirements
OBSERVE ALL LOCAL CODES AND ORDINANCES. DO NOT, UNDER ANY CIRCUMSTANCES, REMOVE THE POWER SUPPLY CORD GROUND PRONG. ELECTRICAL GROUND IS REQUIRED ON THIS APPLIANCE. A 115-volt 60 Hz, AC only, 15A fused and Electrical Shock Hazard properly grounded electrical supply is required, Plug into a grounded 3 prong outlet. -
Page 5: Installation
INSTALLATION REQUIREMENTS INSTALLATION HARDWARE Yourair conditionerwill installintostandarddoublehung windowswith actual clear openingwidthsof25 to 36 inches (635mm to 914mm) (FIG. f). Lower sash must open sufficiently to allow a clear vertical opening of 15 inches (381mm). Side louvers and the rear of the air conditioner must have clear air space to allow enough airflow through the condenser for heat removal. -
Page 6: Installation
INSTALLATION Upper g uide Pick a location which will allow you to blow the cold ITEM E air into the area you want. Windows used for installation must be strong enough to support the weight of the air conditioner. Good installation with special attention to the proper position of the unit will lessen the chance that service will be needed. - Page 7 Attach the L BRACKET (ITEM J) with screw I_1 Select the position that will place the sill supports near the outermost point on sill (FIG. 10). (ITEM G). (FIG. 14) Attach the sill supports to the cabinet track hole closest to the selected position using screw (ITEM E). _J DRAINAGE Be sure to insert the drain pipe into base pan before installation.
-
Page 8: Removal From Window
FRONT INSTALLATION Top of wood strip shouldbe approximately 3/4" higher than the storm window frame to help Insta, the front grille(packed separately) onto the condensation to drain properly to the outside. cabinet as follows: • Install a second wood stdp (approximately 6" long by •... -
Page 9: Operation
HOW AND WHY Your room air conditioner provides the following Compressor functions to make hot weather living more The modem high efficiency comfortable: compressor may have a high pitched hum or pulsating • Cools and circulates room air. noise that cycles on and off. •... -
Page 10: Features
FEATURES USING THE AIR CONDITIONER To reduce the risk of fire, etectdc shock, or injury to persons, read the important SAFETY instructions section before operating this appliance To begin operating the air conditioner after installation, follow these steps= 1. Plug in the air conditioner. (To prevent electrical hazards, do not use an extension cord or an adapter plug.) 2. -
Page 11: Display
DISPLAY AN SPEED • Every time youpush this button, itadvances thesetting as follows: { High --," L ow _"Meal --,High} REMOTECONTROL SIGNAL RECEIVER POWER • To turntheair conditioner ON,pushthe button. To turntheair conditioner OFF,push thebuttonagain. • Thisbutton takespriority overany other button. •... -
Page 12: Remote Control
REMOTE CONTROL NOTE: The Remote Control will not operate properly if strong light shines on the sensor window of the Air Conditioner or if there are obstacles between the Remote Control and the Air Conditioner. Every time you push button, you will hear a beep from the Air Conditioner. POWER •... -
Page 13: Maintenance
AIR FILTER CLEANING To ensure continued peak efficiency, the condenser The Air Filter will become dirty as it removes dust coils (outdoor side at the unit) should be checked from the inside air. It should be washed at least pedodically and cleaned if they become clogged even/2 weeks. -
Page 14: Troubleshooting
BEFORE CALLING FOR SERVICE Check the following list to be sure a service call is really necessary. A quick reference to this manual may help you avoid an unneeded service call. THE AIR CONDITIONER WILL NOT OPERATE Check if... Then... Wallplu o disconnected. -
Page 15: Espai;Iol
La proteccion de garantia cubre unicamente a los indicadas en este manual del propietario, Sears equipos de aire acondicionado usados para uso reparard gratuitamente este equipo de aire domestico y no para uso comercial. -
Page 16: Seguridad
IMPORTANTES INSTRUCClONES DE SEGURIDAD Las siguientes instrucciones de seguridad le indicardn cbmo usar su equipo de aire acondicionado de habitacibn para evitar dafios para usted mismo y para su EQUIPO DE AIRE ACONDICIONADO. POR SU SEGURIDAD No almacene ni use gasolina u otros vapores y Ifquidos inflamables cerca de _ste o cualquier otto Evitelos peligros de incendios y electmdom_stico. - Page 17 RESPETE TODOS LOS C6DIGOS Y REGLAMENTOS. BAJO NINGUNA ClRCUNSTANCIA CORTE, QUITE O EVITE EL USO DE LA CONEXK_N A TIERRA DE ESTA CLAVIJA, ESTE APARATO NECESITA SER CONECTADO A TIERRA, Se requiere una alimentaci6n el6ctricaCA, adecuadamente conectada a tierra con un fusible Peligrode choque el_ctdco de 15 A, de 60 Hz y de 115 V.
-
Page 18: Instalaci
INSTALACI(_N PIEZAS DE MONTAJE REQUERIMI.ENTOS PARA INSTALACION Su equipode aire acondicionadose instalarden ventanas estdndarde doble panel conanchosde abertura librede 635 mm a 914 mm (25 a 36 pulgadas). (Figura 1) El marco inferiordebe abrirseIo suficientepara permit_r unaabertura verticallibrede 381 mm (15 pulgadas).Las rejillasdesviadoraslateralesy la parte posteriordel equipode aire acondicionado deben tener un espacio librede aire para permitirsuficienteflujo de... -
Page 19: Installaei6N
INSTALACION Guiasupe_or Escoja un lugarque le permita Ilevar el aim frfoal drea iTEM E que desea. Las ventanas que se usen para la instalacibndeben tener la resistencia suficientepara soportarel peso del equipode aire acondicionado. Una buena instalacibncon atencibn especial a la correcta pesicibn de la unidad disminuirdla probabilidadde que sea necesado efectuar reparaciones. - Page 20 Seleccionela posici6nen la quecolocardel soporte Corte la cintade espumapara que tenga la Iongitud de antepechocoma del puntom_.sextemo an el correcta e ins_rtela entre el marco supedor de la ventana antepecho(Figure 10). Fijeel soportede antepecho al y el marco inferior de la ventana. (Figura 14) oriflcio del cardtdel gabineteen relaci6ncon la posicibn seleccionadausandoel tornillo(ITEM E).
-
Page 21: La Eliminacion De La Ventana
de la contraventana.Yea la Figura22. INSTALACI6N FRONTAL La parte superiordel list6n de maderadebe ser aproximadamente 3/4" mds altoque el marco de la Instale la rejilla frontal con el gabinete de la siguiente manera: contraventana o el Iistbnde madera (fuerade la casa) para que el vapor emanado de la unidadpueda drenar •... -
Page 22: Operaci6N
COMO Y POR QUF-. Enocaslones, el osode MED FANparahacerdrcutar e l airepot lahabitadbn hacequeelambiente searnds confutable aun Su equipo de aire acondicionado de habitacibn cuando elequipo noest_enfdando el aire.Mientras r ods tiempo brinda las siguientes funciones para hacer que la y conmayor f recuendaluncione elequipo de aire vida en climas c_lidos sea mds confortable: acondidonade, r n_s eleclzieldad c onsumira y mayoresse_n los... -
Page 23: Caracterfsticas
CARACTER TICAS USO DEL EQUIPO DE AIRE ACONDICIONADO _Para reducir el riesgo de incendio, descargas el_ctrica o lesiones personales, lea las IMPORTANTES INSTRUCCIONES SEGURIDAD antes de operar este aparato. Pare comenzar a utilizer el equipo de aire acondicionado, siga eetos pesos: 1. -
Page 24: Despliegue
DESPLIEGUE I VELOCIDAD DEL VENTILADOR Cada vezquepresione e stebot6nelajuste es como sigue: {Alto Bsjo Medis Alto_} SENAL • ParaENCENDER el sistemapresioneel botbn, y para APAGARLO presione el botbnotrs vez. • Estebot6ntieneprioridadsobretodoslosotros botones. • CuandoUd.Io enciendeporprimeravez, el sistemaesta en ely latemperaturaesde 72'F. AJUSTE DE LA TEMPERATURA •... -
Page 25: Contro Remoto
CONTROL REMOTO Precauci6n: El dispositiovo de control remoto no funcionard adecuadamente si )a ventana sensora del acondicionador de airs es expuesta a luz fuerte, o si hay obstdculos entre el dispositivo de control remoto y el acondicionador de aire. Cuando opere el aire acondicionado con el control remoto, deberd oir un pro. ENECNDIDO/APAGADO •... -
Page 26: Mantenimiento
LIMPIEZA DEL FILTRO DEL AIRE La rejilla frontal y la rejilla de entrada del aire puedenlavarse con un paso humedecidoen una solucibn de detergente El filtrodel aire se ird ensuciando a medida que va suave. El gabineta puedelavarse con un jabbno detargente atrapandoel polvoprovenientedel aire interior,Es suave y agua tibia, seguidamentepuedepulirse con sere precisolavar el firm det aire al menos cada dos... -
Page 27: Correcci6N De Fallas
ANTES DE LLAMAR PARA SERVICIO Cheque la siguiente lista para asegurarse si en realidad es necesario Ilamar para servicio, Una referencia rapida a este manual puede evitar una Ilamada para servicio innecesaria. EL EQUlPO DE AIRE ACONDIClONADO NO FUNClONA. Corlecte ele_chufe f imiemente eftlatomadecorriente depared. E1 enchufe _ estdconectadoen latomadecorde_e de pared. - Page 28 i 281...
- Page 29 - 2g-...
- Page 30 :30-...
-
Page 31: Master Protection Agreements
Sears has over 12,000 professional repair Sears cuenla con mas de 12.000 t_cnicosprofesionales specialists, who have access to over 4.5 million especialistas en reparaciones, con acceso a m_s de 4,5 quality parts and accessories. -
Page 32: Para Pedir Servicio
® Registered Trademark / TMTrademark / SMService Mark of Seam, Roebuck and Co. ® Marca Registrada / TMMarc_ de F_bdca ! s_ Marca de Servicio de Sears, Roebuck and Co. "_cMarque de commerce / M_ Marque d_pos6e de Sears, Roebuck and Co, ®...
Need help?
Do you have a question about the Kenmore 580.73089 and is the answer not in the manual?
Questions and answers