
Related Manuals for Kenmore 580,73069


Summary of Contents for Kenmore 580,73069
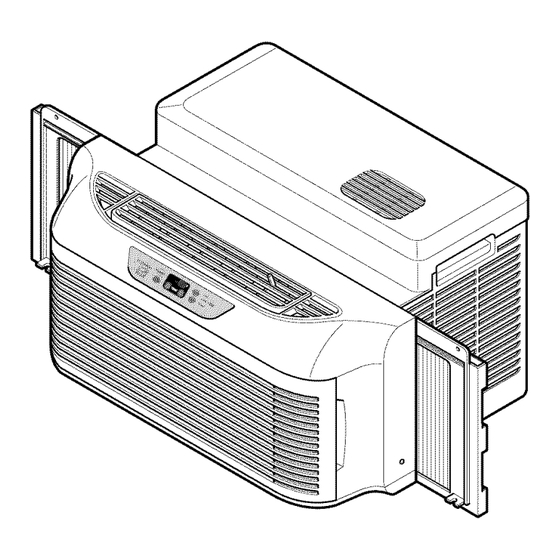
- Page 1 Owner's Manual Manual del Propietario ® ROOM AIR CONDITIONER ACONDICIONADOR DE AIRE DE VENTANA Model, Modelo 580.73069 Sears, Roebuck and Co., Hoffman Estates, IL 60179 U.S.A. www.sears.com...
-
Page 2: Table Of Contents
TABLE OF CONTENTS ......2 Air Direction Adjustment ......11 Remote Control ........WARRANTY ..........2 How to Insert Batteries into SAFETY .............3 remote control ........Important Safety Instructions ...... 3 MAINTENANCE ........13 ELECTRICAL REQUIREMENTS ..4 Air Filter Cleaning ........13 INSTALLATION ........5 Air Conditioner Cleaning ...... -
Page 3: Safety
IMPORTANT SAFETY INSTRUCTIONS The safety instructions below will tell you how to use your room air conditioner to avoid harm to yourself damage to your ROOM AIR CONDITIONER. YOUR SAFETY Do not store or use gasoline or other flammable Avoid fire hazard or electric shock. - Page 4 OBSERVE A LL LOCAL CODES AND ORDINANCES. DO NOT, UNDER ANY CIRCUMSTANCES, REMOVE THE POWER SUPPLY CORD GROUND PRONG. ELECTRICAL GROUND IS REQUIRED ON THIS APPLIANCE. A 115-volt 60 Hz, AC only, 15A fused and Electrical Shock Hazard properly grounded electrical supply is required. Plug into a grounded 3 prong outlet.
-
Page 5: Installation
INSTALLATION REQUIREMENTS ITEM NAME OF PARTS Q'TY SUPPORT, BRACKET To avoid installation difficulties, read instructions LEVELING BOLT completely before starting. This publication contains important information for the installation LEVELING BOLT operation of your room air conditioner. Your air SCREW: 5/8" conditioner will install into standard... -
Page 6: Installation
INSTALLATION Install support bracket on window. See FIG. 5. Install leveling bolt up through bottom side of support bracket. You can choose a short bolt (ITEM C) or a long one (ITEM B) according to window type. Also, you To avoid the possibiity of personal injury, unplug power to unit before installing or servicing. - Page 7 INSTALL THE AIR CONDITIONER SECURE THE CURTAIN FRAMES WINDOW Expand the curtain frames and secure them using 5 screws (ITEM E) as shown in FIG. 9. • Carefully lift the air conditioner and slide it into the When curtain frame opens or closes, you may feel a...
-
Page 8: Removal From Window
IF AIR CONDITIONER IS BLOCKED BY (a) When window frame is located on inner sill, STORM WINDOW FRAME • Install a wood strip (window width long and • If storm window presents interference, fasten a window frame height high) on the inner sill. 2"(51mm) wide wood strip to the inner window sill... -
Page 9: Operation
HOW AND WHY Compressor Your room air conditioner provides the following The modern high efficiency functions to make hot weather living more compressor may have a high comfortable: pitched hum or pulsating noise that cycles on and off. • Cools and circulates room air. -
Page 10: Features
FEATURES USING THE AIR CONDITIONER To reduce the risk of fire, electric shock, or injury to persons, read the important SAFETY instructions section before operating this appliance To begin operating the air conditioner after installation, follow these steps: 1. Plug in the air conditioner.(To prevent electrical hazards,... -
Page 11: Display
DISPLAY POWER MODE • To turn the air conditioner ON, push this button. To - Every time you push this button, it will shift among turn the air conditioner OFF, push the button again. COOL, ENERGY SAVER and FAN. • This button takes priority over any other buttons. - ENERGY SAVER •... -
Page 12: Remote Control
REMOTE CONTROL 5. TIMER - SHUT-OFF TIME Note: The Remote Control wiII not operate properly if • You will usually use shut-off time while you sleep. strong light shines on the sensor window of the Air • With unit running, use Timer to set number of hours Conditioner or if there are obstacles between the Remote until shut-off. -
Page 13: Air Filter Cleaning
AIR FILTER CLEANING HOW TO REMOVE THE FRONT GRILLE The Air Filter will become dirty as it removes dust from the inside air. It should be washed at least every 2 weeks. If the Air Filter remains full of dust, •... -
Page 14: Maintenance
BEFORE CALLING FOR SERVICE Check the following list to be sure a service call is really necessary. A quick reference to this manual help you avoid an unneeded service call. THE AIR CONDITIONER WILL NOT OPERATE Check if... Then... Wall plug disconnected. Push plug firmIy into wall outlet. -
Page 15: Contenido
CONTENIDO ...........15 Ajuste de la direcci6n del aire ....24 Control remoto ........GARANTJA ..........15 Como colocar las baterias dentro del SEGURIDAD ...........16 control remoto ........Instrucciones importantes de seguridad ---16 IMIANTENIIMIIENTO ........26 REQUERIMIENTOS ELECTRICOS----17 Limpieza de filtro de aire ......26 INSTALACION ........18 Limpieza de aire acondicionado ..... -
Page 16: Seguridad
Instrucciones importantes de seguridad Las instrucciones de seguddad a continuaci6n le indicaran como debe utilizar su aire acondicionado para evitar daSos personales o a su sistema de AIRE ACONDICIONADO. [F,w_'JJlV_ll=_r:! INFORMACION PARA8U 8EGURIDAD No almacene ni utilice gasolina no otros liquidos Evite los riesgos de incendio o descarga gases inflamables... -
Page 17: Electricos
OBSERVE ALL LOCAL CODES AND ORDINANCES. BAJO NINGUNA ClRCUNSTANClA QUITE LA CONEXION DE TIERRA DE LA CLAVlJA. SE REQUIERE UNA TIERRA FiSlCA PARA EL FUNClONAMIENTO DE ESTE APARATO. Se requiere un suministro electrico de 115 voltios a 60 Hz, solo CA, con fusible de 15A y Riesgo de cheque electrico. -
Page 18: Instalacion
REQUERIMIENTOS DE INSTALACION &RTiCUL0 NOMBREDE LA PARTE CANT SOPORTE,MENSULA Para evitar probJemas con la instalaci6n, PERNO NIVELADOR completamente las instrucciones antes de comenzar. Esta pubticaci6n contbne informaci6n importante para la PERNO NIVELADOR instalaci6n y operaci6n de su aire acondicionado. Su aire TORNILLO: 5/8"... - Page 19 INSTALACION Instale la mensula de soporte sobre la ventana. Ver FIG. 5. Instate eI pemo de nivetaci6n en ta parte superior a traves de la parte inferior de Ia mensula de soporte. Puede escoger un perno corto (ARTiCULO C) o uno largo (ARTiCULO B) de Para evitar u na p0sible l esi6n personal, desconecte la unidad delacorriente antes deinstalarla o darle mantenimiento.
- Page 20 ASEGURE LOS BASTIDORES DE LA INSTALE EL AIRE ACONDICIONADO EN LA VENTANA CORTINA Expanda los bastidores de la cortina y asegurelos usando • Levante con cuidado Ia unidad de aire acondicionado 4 tomillos (ARTiCULO E) como Io muestra en la FIG 9. deslicela en la ventana abierta.
-
Page 21: Retiro De La Ventana
atmacenamiento. Puede haber condensaci6n de agua en la SI EL AIRE ACONDICIONADO ESTA base. Retire la unidad con cuidado para evitar satpicaduras en OBSTRUIDO POR UN MARCO DE VENTANA su piso, siempre guarde la unidad bien asentada en su base. No PARA TORMENTA la recargue en tos costados. -
Page 22: Operaclon
COMO Y POR QUI AI tiempo que se usa el ajuste de MED (VENTILAClON MEDIA) para circular al aire de la habitacion puede realizarlo m&s conformable Su unidad de aire acondicionado proporciona aunque no tenga ajustado el aire acondicionado siguientes caracteristicas que haran m&s placentera... -
Page 23: Caracteristicas
CARACTERISTICAS UTILIZANDO DELAIRE ACONDICIONADO _Para minimizar el riesgo de incendio, choque electrico, lesiones personales o daSos al usar su aire acondicionado, lea la secci6n instrucciones de SEGURIDAD antes de hacer funcionar este aparato. Para comenzar el funcionamiento del aire acondicionado despu_s de su instalaci6n, siga... -
Page 24: Pantalla
PANTALLA. MODO ENERGJA - Cada vez que oprime este bot6n, cambiar_entre • Para encender el aire acondicionado, optima et bot6n. Para apagare] aire acondicionado,vuelva a oprimir el bot6n. COOL, ENERGYSAVER y FAN (ENFRIAMIENTO, . Este bot6n tiene la prioridad sobrecaalesquiera otros AHORRODE ENERGIAy VENTtLADOR). -
Page 25: Control Remoto
CONTROL REMOTO 4. VELOCIDAD DEL VENTILADOR • Cada vez que oprima este boton, se avanza en el ajuste Nota: El Control remoto podria no funcionar come sigue: {High(F3) -* Low(F1) -* Med(F2) -* apropiadamente si hay un reflejo de luz sobre el sensor High(F3)} del aire acondicionado o si hay obst_lculos entre el control... -
Page 26: Imianteniimiiento
LIMPIEZA DE FILTRO DE AIRE PARA RETIRAR LA REJILLA FRONTAL El filtro de aire se ensucia ya que retira el polvo del aire interior. Debe lavarse al menos cada 2 • Retire el tornillo que sujeta la rejilla frontal. semanas. Si el filtro de aire se queda Ileno de polvo, el flujo de aire disminuye... -
Page 27: De Problemas
Antes de Ilamar al Servicio Revise la siguiente lista para asegurarse de que realmente es necesario Ilamar al servicio. Una referencia r&pida a este manual podria ayudarle a evitar llamadas innecesarias a servicio. EL AIRE ACONDIClONADO NO FUNClONA Revise si... Entonces... -
Page 31: Master Protection Agreements
Acuerdos de Proteccion Especializada iEnhorabuena! Ha realizado una compra inteligente. Congratulations on making a smart purchase. Su nuevo aparato Kenmore® esta diseSado y fabricado Your new Kenmore ® product is designed para ofrecerle aSos de buen funcionamiento. manufactured for years of dependable operation. - Page 32 Your Home For repair- in your home-of all major brand appliances, lawn and garden equipment, or heating and cooling systems, no matter who made it, no matter who sold it! For the replacement parts, accessories owner's manuals that you need to do-it-yourself. For Sears professional installation of home appliances and items like garage door openers and water heaters.
Need help?
Do you have a question about the 580,73069 and is the answer not in the manual?
Questions and answers