Table of Contents
Advertisement
Available languages
Available languages
Quick Links
Advertisement
Chapters
Table of Contents

Related Manuals for Kenmore 580.73083


Summary of Contents for Kenmore 580.73083
- Page 1 Owner's Manual Manual del Propietario ® THROUGH-THE-WALL AIR CONDITIONER ACONDICIONADO DEAIRE A TRAVESDE PARED Model, Modelo 580.73083 580.74103 580.74123 Sears, Roebuck and Co., Hoffman Estates, IL 60179 U.S.A. www.sears.com...
-
Page 2: Table Of Contents
TABLE OF CONTENTS ......2 Features ..........Using the Air Conditioner ....... 13 WARRANTY ..........2 Air Conditioner Features ......14 SAFETY .............3 MAINTENANCE ........ImportantSafety Instructions ...... Air Filter Cleaning ........17 ELECTRICAL REQUIREMENTS ..4 Air Conditioner Cleaning ......17 INSTALLATION ........5 How to Remove the Front Grille ..... -
Page 3: Safety
IMPORTANT SAFETY INSTRUCTIONS The safety instructions below will tell you how to use your room air conditioner to avoid harm to yourself or damage to your ROOM AIR CONDITIONER. FOR YOUR SAFETY Do not store or use gasoline or other flammable Avoid fire hazard or electric shock. -
Page 4: Electrical Requirements
OBSERVE ALL LOCAL CODES AND ORDINANCES. DO NOT, UNDER ANY CIRCUMSTANCES, REMOVE THE POWER SUPPLY CORD GROUND PRONG, ELECTRICAL GROUND IS REQUIRED ON THIS APPLIANCE. A 208/230-volt 60 Hz, AC only, 15A fused and Electrical Shock Hazard properly grounded electrical supply is required. Plug into a grounded 3 prong outlet. -
Page 5: Installation
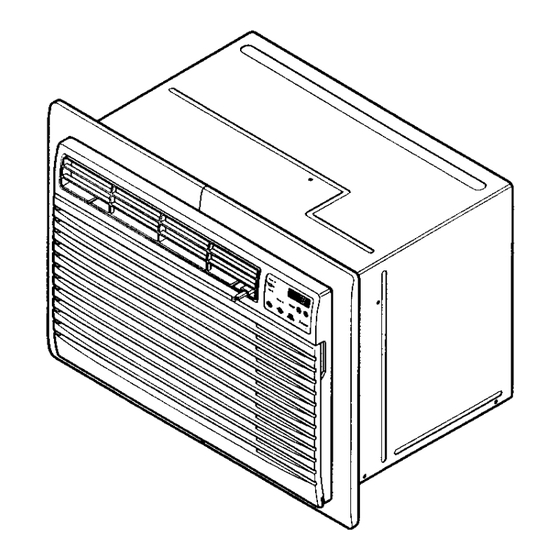
A ll wall sleevesusedto mountthe new air conditioner mustbe in goodstructural condition and have a rear grilleto securelyattach the new air conditioner.(FIG. 1) With the Kenmore sleeve, youcan maintainthe bestperformanceofthe new air conditioner. (FIG. 2) ITEM NAME OF PARTS... -
Page 6: Installation
Good installation unit. If you plan to use your existing wall sleeve, with special attention to the proper position of the and it is not Kenmore, use procedure B or C unit will lessen the chance that service will be below. -
Page 7: Procedurea
PROCEDURE Install the new unit into the wall sleeve. IL_To assemble trim, snap the tab of each piece If you are using the new sleeve supplied with your unit, skip to step 3. Otherwise, install the into the slot of the other piece as shown below. Slide trim over the front of the air conditioner plastic grilla from the kit. - Page 8 PROCEDURE Remove the backing from the Horizontal Insulation strip 13/8x % x 273/lS and attach that Redirsct the louvers at the back of the wall to the inside bottom of the sleeve as shown sleeve to 60 ° angle as shown in the FIG 8. The below.
-
Page 9: Procedureb
PROCEDURE _lTo assemble trim, snap thetab of each piece intothe slotof the otherpiece as shownbelow. Slidetrim over thefrontof the air conditioner untiltrim isflush with sleeve as shownbelow. Trim (2 ea) Wall FIG. 14 • Air conditioners coveredin this manual pose an excessiveweight hazard. - Page 10 PROCEDURE L_! Remove the backing from the Horizontal Insulation stdp 13/8x 13/ex 273j16and attach that to the inside bottom of the sleeve as shown Redirect the louvers at the back of the wall sleeve to 60 ° angle as shown in the FIG 15. below.
-
Page 11: Procedurec
PROCEDURE _'ITo assemble trim, snap the tab of each piece into the slot of the other piece as shown below. Slide trim over the front of the air conditioner Remove the backing from the 13" shim strips and attach them as shown below in Fig. 22. until trim is flush with sleeve as shown below. -
Page 12: Operation
HOW AND WHY - Unit Vibration Your room air conditioner provides the following The unit may vibrate functions to make hot weather living more and make noise comfortable: because of poor wall or window • Cools and circulates room air. construction. -
Page 13: Features
FEATURES USING THE AIR CONDITIONER THE UNIT reduce the risk of fire, electric shock, or injury to persons, read the important SAFETY instructions section before operating this appliance. To begin operating the air conditioner after installation, follow these steps: 1. Plug in the air conditioner. (To prevent electrical hazards, do not use an extension cord or an adapter plug.) 2. -
Page 14: Air Conditioner Features
DISPLAY REMOTE CONTROL SIGNAL RECEIVER Cool • Energy == Saver w TEMPERATURE SETTING Fan • Usethisbutton toautomaticalty control the temperature o fthe room. TEMP O Timer • Thetemperature canbe setwithina range of60°Fto86°F byincrements of I°F. POWER To turntheair conditioner O N, pushthis button. - Page 15 REMOTE CONTROL NOTE: The Remote Control will not operate properly if strong light shines on the sensor window of the Air Conditioner or if there are obstacles between the Remote Control and the Air Conditioner. Every time you push button, you will hear a beep from the Air Conditioner. POWER •...
- Page 16 INSERTING THE REMOTE CONTROL HORIZONTAL AIR-DIRECTION BA'n'ERIES ADJUSTMENT 1. Remove the cover from the back of the remote • The hodzontal air direction is adjusted by moving controller. vertical louver. • The vertical louver control levers are located in the 2.
-
Page 17: Maintenance
AIR FILTER CLEANING HOW TO REMOVE THE FRONT GRILLE The Air Filter will become dirty as it removes dust from the inside air. it should be washed at least • Open the inlet gdlle. every 2 weeks. If the Air Filter remains full of dust, •... -
Page 18: Troubleshooting
BEFORE CALLING FOR SERVICE Check the following list to be sure a service call is really necessary. A quick reference to this manual may help you avoid an unneeded service call. THE AIR CONDITIONER WILL NOT OPERATE Check if... Then... Wallplug disconnected. - Page 19 -19-...
-
Page 20: Ndice
|NDICE ............Caracterfsticas ........31 Uso del aparato de aire acondicionado.---.31 GARANT|A ..........Caracterfsticas del aparato de aire SEGURIDAD ........... acondicionado ........32 Instruccionesimportantesde seguridad ...21 MANTENIMIENTO ........ 35 REQUISITOS ELECTRICOS ..... 22 Limpieza del filtro de aire ....... 35 INSTALACI(_N ........ -
Page 21: Seguridad
INSTRUCClONES IMPORTANTES DE SEGURIDAD Las instrucciones de seguridad que se indican abajo le dirdn cbmo utilizar su aparato de aire acondicionado para evitar dahos a sf mismo y dafios a su APARATO DE AIRE ACONDICIONADO. PARA SU SEGURIDAD No almacene ni utilicegasolina ni otros liquidos ni gases Evitelospeligros deincendio o deelectrocuc_. -
Page 22: Requisitos Electricos
CLIMPLA TODAS LAS NORMAS Y C6DIGOS LOCALES NUNCA ELIMINE LA CLAVIJA DE TOMA DE TIERRA DEL CABLE DE ALIMENTACI(_N. LA TOMA DE TIERRA ELECTRICA EN ESTE ELECTRODOMI_STICO ES NECESARIA. Se necesita una alimentacibn el_ctrica de 208/230-volt 60 Hz, s61ode CA, con fusible de 15A y con una toma de tierra adecuada. -
Page 23: Instalaci
Tedoslosalojarnientos d eparedutilizedos paramontarel nuevo aparato deaireacoedieionado debentenersu estructura e n buenas condiciones ytenerunarejillaposterior parafijar con seguridad e lnuevoaparatodeaireacondicionade. (FIG.l) Conel alojarniento Kenmore, puedemantener elm_irno reedimiento desunuevoaparato de aireacondicionado. (FIG.2) /_CULC NOMBRE DE!.AS PIEZAS ._ITIOAD... -
Page 24: Instalacibn
BoCqueseexplican acontinuacidn. rendimiento pobre o defallodel preducto. Estehechonoesta Procedimiento M arca Profundidad cubierto bajolosterminos d e lagamnt[a deKENMORE Sears/Kenmore 42,44(16-23/32) ART{CULOS EN EL EQUIPO DE INSTALACI(_N White-Westinghouse 40,64, 4 4,45 0 55,88 Puede queno necesite todaslaspartesdelequipo de... -
Page 25: Procedimiento A
PROCEDIMIENTO L_lj Instalela nueva unidadenel alojamiento de la pared. _J_ Para montar el reborde, inserteel salientede cada _lSi est_ utilizandoel nuevoalojamiento que asomparia a su unidad, p ase directamente a l paso 3. Encaso pieza en la ranura de la otra pieza seg_n se muestra contrario,instale la rejillapl_stica del equipo.Corte la abajo. -
Page 26: Procedimientob
PROCEDIMIENTO Extraigalaparteposterior dela liradeAislamiento horizontal de 3,5 x 1,60x 69,06cm(13/B xs/8 x 273h6) y fijela a laparteinferior i ntema delalolamiento segunsemuestra _11 Coloquela direcci6n dela rejillaen ta parteposterior del alojamientode la pared en un _ingulode 60° segOnse abajo. E xtraiga laparteposterior delatiradeAislamiento muestra en la FIG 8. - Page 27 PROCEDIMIENTO B Paramontar el reborde, i nserteel saliente de cada piezaen la ranura de la otra piezasegunse muestra abajo.Desticeel reborde sobrela partefrontaldel aparatode aim acondicionado h astaque el reborde este unido a pasoconel alojamiento segt_n se muestra a continuaci6n. Adorno (2ea)"_._ Pared FIG.
-
Page 28: Procedimiento C
PROCEDIMIENTO _J_ Extraigala parteposterior de latirade Aislamiento horizontalde 3,5 x 3,5 x 69,06 cm (13/8x 13/8x 273/16) y fijela a lapade inferiorintema del alojamiento Coloque la direcci6nde larejilla en la parteposterior del aiojamiento de la pareden un _ngulode 60° seg_nse segdnse muestra abajo. - Page 29 PROCEDIMIENTO IEI Para montarel reborde, inserte el salientedecada piezaen la ranura de la otrapiezaseg0nse muestra abajo. Desliceel reborde sobrela parlefrontaldel Extraigael refuerzode lastirasde reborde 33,02 (13)y fi]elas segt]nse muestra abajoen la FIG22. La parte aparatode aireacondicionado h astaque el mborde supedor d el reborde debecolocarse enfrentedel est6 unidoa pasoconel alojamiento segOn se muestm a continuaci6n.
-
Page 30: C6Mo Y Pot Qu
COMO Y PORQUE - Vibtaciones Este aire acondicionado i ncluyeun manual d e instrucciones Es posible quela unidad vibrey emitaruidos debido a la para hacer rndsagradableslascondicionesde habitabilidad construcciSn deficiente delas en estacionescalurosas. paredes o de lasventanas. • Refrigeray hace circular elaire de la habitaci6n. •... -
Page 31: Caracterfsticas
UTILIZACIONDELAPARATODE CARACTERISTICAS AIRE ACONDICIONADO LA UNIDAD Antesde utilizar esta unidad, l ea las instruccionesacercade la seguridad para evitar riesgos de Iuegos,sacudidael_=ct ricao da5os a personas. Siga estos pasos para empezara utilizarel aire acondicionadodespu6sde su instalaci6n: 1, Conecte el aireacondicionade. ( Paraevitarpeligros electncos n o utilice alargaderasniadaptadores). - Page 32 PANTALLA SENAL DEL CONTROLREMOTO Cool • Energy Saver • DE TEMPERATURA (TEMP) Fan • • Utilice e stebot6n para controlar automdticamente temperatura delahabitaci6n. Latemperatura TEMP O Tlmero puede fijarse enuntango de15,6°K a30°K(60°F a 86°F) e nincrementos deI°F. ENCENDIDO (POWER) • Paraencendedor elaparato deaire aconclicionade, opdma e lbot6n ON.Para...
- Page 33 CONTROL REMOTO NOTA:El control remoto nofuncionar& de mode adecuadosiunaluzfuerte est_bnllandosobmlapantalladel sensoron la unidad de aireacondicionado o siexisten obstdculon entreel Controlrerontoy elaparatode aireacondicionade. Cadavez queoprimeun bot6n,seescuchar_, un pitido procedente del aparatodeaireacondieionado. ENCENDIDO (POWER) • Paraencender elaparato deaireacondicionade, opdma e lbot6n ON.Para apagar elaparato deaireacondicionado, oprima elbot6n denuevo.
- Page 34 COLOCACI6N DELASPILASDELMANDO AJUSTE DE LA DIRECCI(_N HORIZONTAL A DISTANCIA DEL AIRE 1. Extraiga la tapa de la parte trasera del control • Ladireccibn horizontal del aireseajuste moviendo la remoto. persiana vertical. 2. Inserte dos pilas. • Los elevadoresdelcontrol d e la persiana vertical s e ubican •...
-
Page 35: Acondicionado
COMO EXTRAER LA REJILLA LIMPIEZA DEL FILTRO DE AIRE FRONTAL Ei filtrode airese podra ensuciaral quitar el polvo de la parte intema.Se deberd lavar al menoscada dos semanas.Si el • Abrala rejilladeentrada. filtro de airesigue estandosucio, el flujo de aire disminuirdy •... -
Page 36: Resoluci
ANTES DE LLAMAR PARA SERVIClO Cheque la siguiente lista para asegurarse si en realidad es necesario Ilamar para servicio. Una referencia rapida a este manual puede evitar una Ilamada para servicio innecesada. EL EQUIPO DE AIRE ACONDIClONADO NO FUNClONA. Ele_;hufenoest,,conectade e nla toma de (x)_ientedepared. Conecte el endaufe fimlemeflle e n latomadecorriente depared. - Page 37 - 37-...
- Page 38 m38 _...
-
Page 39: Master Protection Agreements
Congratulations on making a smart purchase. Su nuevo aparato Kenmore_ estddiseSadoy fabricado Your new Kenmore ® product is designed and para otrecedea_osde buen funcionamiento. manufactured for years of dependable operation. Sin embargo,al igualquetodos losproductos,puede But like all products, it may require preventive precisar un mantenimiento preventivoo inclosealguna maintenance or repair from time to time. - Page 40 Your Home For repair - in your home-of all major brand appliances, lawn and garden equipment, or heating and cooling systems, no matter who made it, no matter who sold it! For the replacement parts, accessories owner's manuals that you need to do-it-yourself. For Sears professional installation of home appliances and items like garage door openers and water heaters.
Need help?
Do you have a question about the 580.73083 and is the answer not in the manual?
Questions and answers