
Related Manuals for THOMSON THS810


Summary of Contents for THOMSON THS810
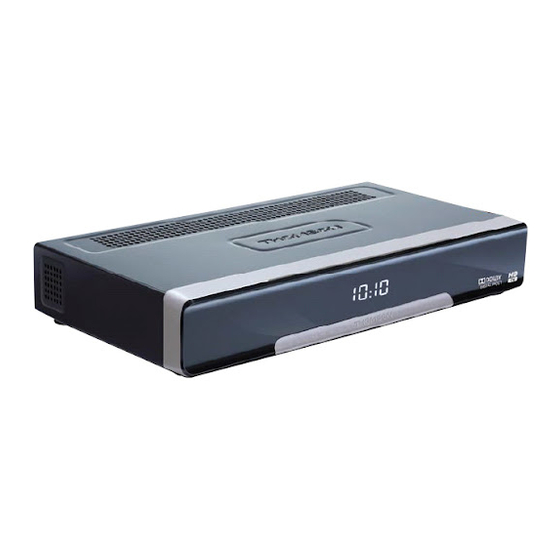
- Page 1 THS 810 Digitaler High Defi nition Satelliten Receiver Look, Listen & Live Bedienungsanleitung www.thomsonstb.net User manual...
- Page 4 Licenses ANY USE OF THIS PRODUCT IN ANY MANNER OTHER THAN PERSONAL USE THAT COMPLIES WITH THE MPEG-2 STANDARD FOR ENCODING VIDEO INFORMATION FOR PACKAGED MEDIA IS EXPRESSLY PROHIBITED WITHOUT A LICENSE UNDER APPLICABLE PATENTS IN THE MPEG-2 PATENT PORTFOLIO, WHICH LICENSE IS AVAILABLE FROM MPeGLA,LLc, 6312 S.
- Page 5 ...
-
Page 6: Table Of Contents
ThoMsondeclaresthatthisitemcomplieswiththebasicrequirementsandotherrelevantregulationsofdirectives ce2004/108/ecand73/23/ec,Rohs2002/95/ec THOMSON is a trademark of TECHNICOLOR S.A. used under license to STRONG Europe Subject to alterations. In consequence of continuous research and development technical specifications, design and appearance of products may change. ASTRA is a registered trade mark of SES ASTRA, Eutelsat and HOT BIRD are registered trademarks of Eutelsat Communications, all other product names are trademarks or registered trademarks of their respective owners. -
Page 7: Introduction
1.0inTRoDUcTion 1.1safetyinstructions DonoTinsTALLYoURReceiveR: In a closed or poorly ventilated cabinet; directly on top of or under any other equipment; on a surface which might obstruct the ventilation slots. DonoTeXPoseTheReceiveRoRiTsAccessoRies: To direct sunlight or any other equipment that generates heat; to rain or intense moisture; to intense vibration and to any shock which may cause permanent damage to your receiver or to any magnetic objects, such as loudspeakers, transformers, etc. -
Page 8: Accessories
It is advised not to store important information on USB storage devices used with the receiver. Always make backups of data on your USB storage device before using it with this receiver. THOMSON will not take responsibility for any loss of information or circumstances caused by loss of information. -
Page 9: Rear Panel
2.3RearPanel Fig. 2 1. iR To connect the IR extender 2. oPTicALs/PDif To connect to a digital amplifier or home theatre 3. sATin To connect to the LNB of your satellite antenna for reception of satellite broadcast signal 4. sAToUT To loop through the satellite signal to a second receiver 5. -
Page 10: Installing The Batteries
30. GReen In menu for specific functions. 31. YeLLoW In menu for specific functions. 32. bLUe In menu for specific functions. 2.5installingthebatteries Fig. 4 Remove the battery cover from the remote control and put 2x AAA size batteries inside the compartment. -
Page 11: Connecting And Using The Ir Extender
3.4connectingandusingtheiRextender Fig. 7 With the IR extender you can place the receiver out of sight (e.g. a closed cabinet) while still being able to control it. Plug the IR extender into the IR connector on the back of the receiver. Locate the extender at a position allowing a direct sight to the remote control. -
Page 12: Audio And Subtitle Setup
After all settings are adjusted following to your preference, choose Save with and press ok. The receiver returns to the selection screen and you can go to the next screen by pressing the bLUe Next button. 4.2Audioandsubtitlesetup Here you can set the Audio Languages, Audio output, Subtitle Display and Subtitle Language. for selection and to change settings. -
Page 13: Preset Channels And Scan Selection
4.3.1.1sATedit This submenu allows to rename the chosen satellite and also to change its orbital position. Use to choose Satellite or Position. Satellite: Press ok to open the keyboard and use the 0~9 buttons, like common from your mobile, to enter a new name (max. 9 signs). Once the desired name is entered, use to choose OK in order to rename or choose Cancel to discard. -
Page 14: Scan Options
(depending on how it was setup). 5.0QUickGUiDeToUsinGYoURReceiveR We at THOMSON understand that you can’t wait to enjoy your new HD receiver. The following quick guide will make you familiar with the basic operation of this device. We do, however, advice you to read the full manual to get the best performance from your THOMSON HD receiver. -
Page 15: Operation
6.0oPeRATion In viewing mode, several features are available to make watching TV a true pleasure. This chapter describes these features. Please also read chapter 7 .0 to get familiar with the menu of your new receiver. 6.1changingchannels Your new receiver is equipped with three ways to change channels. 1. -
Page 16: Teletext
6.4Teletext Your receiver includes a fully featured Teletext. To access Teletext, press the TXT button in viewing mode and use the 0~9 buttons to input the number of the page you wish to see. You can use the buttons like described on screen for selection and scrolling through pq tu Teletext pages. -
Page 17: Instant Recording
TV screen. As soon as you receive the live broadcast (through FFWD), the usual infobanner will be shown displaying tShF. To open the Timeshift info press . To stop Timeshift, press 3. Timeshift only works correctly when a fast USB storage device such as a USB2.0 HDD is noTe: connected to the receiver. Distorted picture and/or audio during Timeshift indicate a too slow USB device speed. THOMSON cannot guarantee for USB devices used. Especially when Timeshift is activated at channels with high data rate (High quality SD/HD), THOMSON cannot guarantee an accurate playback of the Timeshift file. Within Irdeto encrypted services some events may be protected and fast forward/rewind WARninG: respectively Timeshift will be limited or might not be possible. -
Page 18: Mainmenu
7.0MAinMenU Press MenU in viewing mode to display the Main Menu. All important settings and features of your receiver can be operated from the Main Menu. It consists of the following sub-menus: Installation, Update & Info, Conditional Access, Channel Manager and Timer. to select a sub-menu and to choose an option. - Page 19 7.1.1.2newTP This submenu allows adding one or more transponders to the database of the selected satellite. This enables you to check the signal respectively adjust the antenna for this satellite. Further you can perform a NIT Search on the new satellite once you have added the appropriate TP.
- Page 20 Once all settings are made, press ok on the desired scan method to start this scan process or eXiT/soRTie to quit without scanning. All newly found channels will be stored at the end of the channel list. *Only available in case more than one satellite has been setup. We only recommend switching the LCN (Logical Channel Numbering) setting to ON, if you want noTe: to load the Austrian broadcaster’s defined LCN list into your receiver. The corresponding channels are then...
- Page 21 7.1.3.1hDMi In this submenu you can set following parameters: TV Ratio: 16:9 or 4:3, depending on the kind of your TV set. Conversion: Letterbox, PanScan or Combined, to choose the preferred picture format. Video Output: Only selectable for Scart Resolution: 576p, 720p or 1080i, to adjust the optimum resolution your TV set supports.
-
Page 22: Update & Info
After all settings are adjusted following to your preference, choose Save with and press ok. The receiver returns to the menu. DVB subtitles on Astra 19.2 are available for example on following channels: Das Erste HD, noTe: ZDF HD, 3sat HD, arte HD and TV5MONDE EUROPE (range continually expanding). Is the Subtitle Setting set to ON, subtitles will be displayed automatically if available for this channel or movie. When the setting is OFF the DVB subtitles can be temporary opened by pressing sUb. 7.1.4ParentalLock This menu enables you to define and edit your PIN code, set Installation or Parental Lock. Choose the desired setting with and press ok to list the possibilities up or use change the value of the highlighted setting. -
Page 23: Conditional Access
The OTA (Over the Air) function allows you to search for software updates available on satellite. Please ask your local THOMSON dealer or visit our website www.thomsonstb.net for information. After pressing ok on OTA Software Update to execute your receiver will start looking for new software. - Page 24 7.3.1irdetostatus This menu gives access to following submenus which can be opened to find detailed information about these items: Smart Card Status, EMM Status, ECM Status, Loader Status, Product List Status and PVR DRM Service. 7.3.2Mail This menu allows access to Irdeto mail. 7.3.3MaturityRating In this menu you can define a new maturity rating group or delete an existing maturity rating group. Enter the MATURiTYRATinGPin:0000 in order to access this menu.
-
Page 25: Channel Manager
7.4channelManager Within this menu you can manage channels and configure favourites, define an auto channel update or playback recorded files from a connected USB storage device. The menu consists of the following sub-menus: TV Channels, Radio Channels, Auto Channel Update, TV Programme Guide and HDD Manager. Choose the desired sub menu with and press ok to advance. - Page 26 These further functions are available in this menu: Deletethedesiredrecord to select a file that you want to delete. Press the ReD button to execute. formathDD Use the GReen button to format your connected USB storage device. The format function will delete all recordings, data and information from your USB device. WARninG: THOMSON will not take any responsibility for damaged or lost data on the USB device. Please make a backup copy from important data on your USB device before using it with your receiver. MAinMenU...
-
Page 27: Timer
RemoveUsb Press the YeLLoW button to safely remove the USB storage device from your receiver. We recommend to use this function especially for bigger sized HDDs. noTe: selectPartition Press bLUe to open the selection in case you have more than one partition available on your to select the desired partition and then select ok to change it. In USB storage device. - Page 28 Auto Standby: This function is a new, power saving feature that helps you reducing the power consumption. It switches the receiver to Standby when no RCU command has been given for at least the set time. Possible settings are: 1H- 12H and OFF to deactivate this function.
-
Page 29: Troubleshooting
If the receiver does not work properly after checking it, please contact your local Service line or THOMSON dealer. Alternatively you can send a support mail via our website: www.thomsonstb.net. NEVER open or disassemble your receiver. - Page 30 symptom cause Remedy The receiver Auto Standby function is In the menu Timer --> Time Adjust you can switches activated and reached the adjust the Auto Standby time or disable it. to Standby adjusted time (default 3h). automatically. For encrypted channels, This can also happen when recording some programmes can via the analogue Scart output (VCR or be limited or otherwise...
-
Page 31: Specifications
9.0sPecificATions video Profile level: MPEG-2, MPEG-4 H.264/AVC Aspect ratio: 4:3 and 16:9, Pan & Scan, Letterbox, combined Video resolution: 576p, 720p, 1080i Audio Audio mode: Mono L/R, Stereo, Dolby Digital Plus* *Dolby Digital Plus and the double-D symbol are registered trademarks of Dolby Laboratories Tuner LNB power: 13/18 V DC (+/- 1 V), max.
Need help?
Do you have a question about the THS810 and is the answer not in the manual?
Questions and answers