Table of Contents
Advertisement
Advertisement
Table of Contents

Related Manuals for THOMSON THT503


Summary of Contents for THOMSON THT503
- Page 1 THT503 Digital Terrestrial HD Receiver User manual Bedienungsanleitung Manuel d’Utilisateur Manual del usuario Manual do Utilizador Uživatelská příručka Návod k obsluze Instrukcja obsługi Manuale utente Evolution. Emotion. Passion. Ръководство на потребителя www.thomsonstb.net...
-
Page 4: Table Of Contents
Amplifier 3.7ConnectingaUSBstoragedevice 4.0 STaRTINg up fOR THE fIRST TIME 5.0 QuICk guIdE TO uSINg YOuR RECEIvER THOMSON declares that this item complies with the basic requirements and other relevant regulations of directives 2004/108/EC and 73/23/ EC, RoHS 2002/95/EC Subjecttoalterations.Inconsequenceofcontinuousresearchanddevelopmenttechnicalspecifications,designandappearanceofproductsmay change.HDMI,theHDMIlogoandHigh-DefinitionMultimediaInterfacearetrademarksorregisteredtrademarksofHDMILicensingLLCinthe... -
Page 5: Introduction
1.0 INTROduCTION 1.1 Safety Instructions dO NOT INSTall YOuR RECEIvER: Inaclosedorpoorlyventilatedcabinet;directlyontopoforunderanyotherequipment;ona surfacewhichmightobstructtheventilationslots. dO NOT EXpOSE THE RECEIvER OR ITS aCCESSORIES: • Todirectsunlightoranyotherequipmentthatgeneratesheat;torainorintensemoisture;to intensevibrationandtoanyshockwhichmaycausepermanentdamagetoyourreceiverortoany magneticobjects,suchasloudspeakers,transformers,etc. • Donotuseadamagedpowercord.Itmaycauseafireoranelectricshock.Donottouchapower cordwithwethands.Itmaycauseanelectricshock. • Whenthereceiverisnotusedforalongperiodoftime,youshouldunplugthepowercordfrom thewallsocket. • Donotusealcoholorammoniabasedliquidstocleanthereceiver.Ifyouwish,youmayclean yourreceiverwithasoftlint-freeclothslightlymadedampwithamildsoapsolution,andonly afterdisconnectingfromthemainsvoltagesupply.Makesurenoforeignobjectsfallthroughthe ventilationslotsbecausethiscouldcausefireoranelectricshock. • Donotplaceanyobjectsontopofthereceiverbecausethismightpreventpropercoolingofthe componentsinside. -
Page 6: Equipment Set-Up
1.5 usage of external uSb devices • ItisrecommendedtouseUSB2.0storagedevicesorhigher.Ifyourdeviceisnotcompatibleto USB2.0specifications,recording,playbackandothermultimediafunctionsofthereceivermight notworkproperly. • ToensurebestperformanceofyourUSBstoragedevicepleaseformatitviayourreceiver(through themenu“Media”)toFAT32system.Otherfilesystemsarenotsupportedbythereceiver.However, itispossibletousealreadyNTFSformatteddisks. • THOMSONcannotguaranteecompatibilitywithalltypesofUSBstoragedevices. • IfyouaregoingtouseexternalUSBHDDs(HardDiskDrives),pleaseconsiderthatpower specificationsmayexceedthesupportedoutputofyourreceiver(max.5V/500mA).Ifso,please connectyourUSBHDDtoanaccordingexternalpoweradapter. • ItisadvisednottostoreimportantinformationonUSBstoragedevicesusedwiththereceiver. AlwaysmakebackupsofdataonyourUSBstoragedevicebeforeusingitwiththisreceiver. THOMSONwillnottakeresponsibilityforanylossofinformationorcircumstancescausedbyloss ofinformation. INTRODUCTION... -
Page 7: Your Receiver
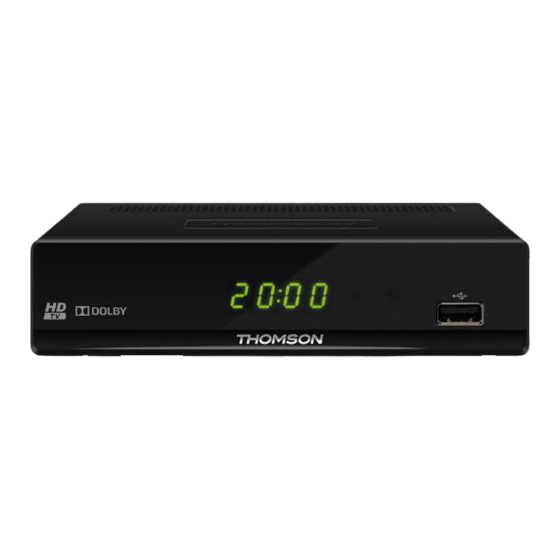
2.0 YOuR RECEIvER 2.1 dEfaulT pIN: 1234 2.2 front panel Fig. 1 1. display I ndicatescurrenttimeinSTANDBYmodeorcurrentchannelnumberin OPERATINGmode 2. Mode indicator R EDindicatesthatthereceiverisinSTANDBYmode. GREENindicatesthatthereceiverisinOPERATINGmode. 3. IR sensor P ointyourremotecontroltowardsthissensor. 4. uSb C onnectorforUSBstoragedevices. 2.3 Rear panel Fig. 2 1.... -
Page 8: Connection
9. Sub S howslistofavailablesubtitlelanguages Temporaryoverrideofthesubtitlesettinginthemainmenu 10.TTX S howsTeletextonOSD(OnScreenDisplay) 11.fav F avouritegroupselection 12.5 F astrewind 13.6 F astforward 14.7 J umpstopreviousiteminplaylist 15.8 J umptonextiteminplaylist 16.u S tartplaybackfromselectedfileorresumeTimeshift 17.TIMESHIfT/2 S tartTimeshiftmodeorpause 18.3 S topofplaybackorTimeshift 19.4... -
Page 9: Connecting To Tv With Hdmi Cable
3.2 Connecting to Tv with HdMI cable Fig. 4 TheTVsetshallbeconnectedwiththereceiverusingagoodqualityHDMI1.3orhighercable.This connectiongivesthehighestpossiblequality. 3.3 Connecting to Tv with SCaRT cable Fig. 4 YourreceiverisalsoequippedwithaSCARTconnector;alternatively,theTVsetcanbeconnected tothereceiverusingagoodqualitySCARTcable. 3.4 Connecting to a digital audio amplifier with S / pdIf Fig. 4 Byconnectingyourreceivertoadigitalamplifierorhometheatresystem,youcanenjoythebest possiblesoundqualityandmulti-channelaudio(dependingonbroadcast).ConnectyourDigital AudioAmplifierorhometheatresystemwithasuitablecinchcabletotheS / P DIFconnectoron thebackofthereceiver. -
Page 10: Starting Up For The First Time
If the Welcome menu should not appear after switching on the receiver for the first time, reset the receiver to factory settings by pressing the MENu button and selecting Restore Factory Default in the submenu System. (dEfaulT pIN: 1234). 5.0 QuICk guIdE TO uSINg YOuR RECEIvER WeatTHOMSONunderstandthatyoucan’twaittoenjoyyournewhighdefinitiondigital terrestrialreceiver.Thefollowingquickguidewillmakeyoufamiliarwiththebasicoperationof thisdevice.Wedo,however,adviceyoutoreadthefullmanualtogetthebestperformancefrom yourreceiver. ToturnyourreceiverONortoStandby,usetheqbuttonontheremotecontrol. -
Page 11: Operation
6.0 OpERaTION YournewreceiverisequippedwithseveralfeaturestomakewatchingTVatruepleasure.This paragraphdescribesthesefeatures.Pleasealsoreadchapter7.0togetfamiliarwiththemenuof yourreceiver. 6.1 Changing channels Followingwaysarepossibleforchangingchannelswithyournewreceiver: • Viadirectaccessusingthe0~9buttons. • ViathechannellistthroughOkandthepg+/pg-buttons. • Viathepqbuttons. 6.1.1 direct access via the 0~9 buttons Togaindirectaccesstoacertainchannel,simplyinputitsnumberwiththe0~9buttonsonthe remotecontrol.Channelnumberscanbeuptothreedigitslong.Enteringanumberwithless thanthreedigitsispossible.Justwaitafewsecondsandyourreceiverwillswitchtotheselected channelorpressOkimmediatelyafterselectingthechannelnumber. 6.1.2 Channel list PressOkinviewingmodetodisplaytheChannel List.Usepqinthechannellisttohighlightyour channelofchoiceandpressOkoncetoselectthehighlightedchannel.Insidethechannellistitis possibletousethepg+/pg-buttonsaswellinordertoscrollpage-wisethroughthelist. TIp: Use tu to toggle between the All TV List list and All Radio List or press fav in viewing mode for available favourite lists. -
Page 12: Teletext
6.4 Teletext YourreceiverincludesafullyfeaturedTeletext.ToaccessTeletext,presstheTTXbuttoninviewing modeandusethe0~9buttonstoinputthenumberofthepageyouwishtosee.Thecoloured buttonsoftheremotecontrolallowyoutojumptoselectedpagesdirectly,asindicatedonthe bottomoftheTeletextscreen.Usethepqbuttonstoselectonepageupordown,usetu buttonstoselectsubpages.PressEXITorTTXtogetbacktoviewingmode. 6.5 Subtitles Somechannelssupportachoiceofsubtitlelanguages.PressSubinviewingmodetodisplayalist ofavailablesubtitlelanguages.SelectyoursubtitleofchoicewithpqandpressOktoconfirm. PressEXITtoleavewithoutmakingchanges.* TheSubbuttonprovidesatemporaryoverrideofthesubtitlesettinginthemainmenuLanguage. *AvailabilityofDVB/HoHsubtitlesdependsonthebroadcast.Ifsuchsubtitlesarenotsupported,thenmostlikelysubtitlescanbeactivatedvia Teletextifavailable. 6.6 Timeshift Timeshiftallowsyoupausingoflivebroadcastsandresumingplaybacklater.PressTIMESHIfT inviewingmodetoactivateTimeshift.Theprogressinformationbannerappearsonscreen. LiveTVkeepsplayingforabriefmomentandwillthenpause.Press1orTIMESHIfTtoresume Timeshiftedplayback.Press3toreturntoliveTV.TochangeTimeshiftparametersgotothePVR Configure menu. NOTE: Timeshift and its playback only work properly when a fast USB storage device such as a USB2.0 HDD is connected to the receiver. Timeshift and playback of HD content requires sufficient read/write speed of the used USB storage device. -
Page 13: Main Menu
Atthebeginningoftherecordingarecordingsignwillbeshownforashortwhileontheupper leftcornerofyourTVscreen.Tostoptherecording,press3.SelectYesandpressOkagaintostop therecording. YoucanaccesstheRecordManagerviatheshortcutREdbutton,orenterviatheUSBmenu, multimedia,PVR.Seechapter7.6.1fordetails. *PleaseconnectaUSBstoragedevicewithsufficientfreespacebeforeyoustartarecording. 7.0 MaIN MENu Themainmenugivesyouaccesstosettingsandmultimediafunctions.Toaccessthemainmenu, pressMENuinviewingmode.Themainmenuconsistsofthefollowingsubmenus:Programme, Picture,Channel search,Time,LanguageSystemandMedia. Throughoutthemainmenu,MENuorEXITcanbeusedtogetbacktothepreviousscreen. 7.1 programme UsetutoselectProgrammeandpressOk. UsepqtohighlightthesubmenuofchoiceandpressOktoselect. PressEXITtogetbacktothemainmenu. 7.1.1 programme Edit IntheProgrammemenuselectProgramme EditwithpqandpressOkorutoenter.Enteryour PIN.(dEfaulT pIN: 1234) PresstutochangethechannelgroupbetweenAll TVandAll Radio. Selectthechannelofchoicewithpq.PressOktoviewtheselectedchannelinthepreviewbox. 7.1.1.1 adding channels to favourite lists ChannelsfromtheAll TVcanbeaddedtoupto4differentfavouritecategories(Movie,News, Sport,Music).PressfavinAll TVorAll Radiotoaccessthisfunction.Presspqtoselectachannel youwishtoaddtoafavouritegroup.Whenthehighlightisonthechannelofyourchoice,press... -
Page 14: Epg (Electronic Programme Guide)
7.1.1.3 Skipping channels ChannelsmarkedwithSkipwillbeskippedwhenzappingchannelswiththepqbuttons. However,thechannelswillstillbeavailablefromthechannellist. Tomarkchannelsforskipping,pressgREENwhileinAll TVorAll Radio.Channelssetforskipping willbemarkedwiththesymbol.Whenallchangeshavebeenmade,pressEXIT.Asavescreen willpopup 7.2 Epg (Electronic programme guide) ViathismenuitemyoucanentertheEPGorbypressingthebuttonEpgontheremotecontrol. See6.7fordetails. 7.3 lCN. (logical Channel Numbering) Somecountriesandbroadcastersuseapre-definedchannelorder.IfLCN(LogicalChannel Numbering)isactivatedandanLCNsignalisprovidedbytheoperator,channelswillbestored inthisoperatordefinedorder.WithLCNsettooff,thisorderisignored,butdoingsocanleadto missingchannelsorillogicalchannelorder. 7.4 picture Thismenuallowsyoutochangedefaultsettingsaccordingtoyourscreenpreferences. PresstutoselectPictureandpressOk.Presspqtohighlightthesubmenuofchoiceandpress Oktoselect.PressEXITorMENutogetbacktothemainmenu. Aspect Ratio: U sethisoptiontoselecttheaspectratioofyourTVandthepreferred conversionmethod.Theoptionsare:16:9PS, 4:3LB, 4:3 PS, 4:3 Full, 16:9 WS, Auto, 16:9PB,Auto(automaticdetectionofaspectratio),4:3 Panscan(Displays... -
Page 15: Time
Auto search: S electAuto searchifyouwanttodoanautomaticscanofallavailable channels. WaRNINg: All previously stored channels and Favourites are lost. Manual Search: I fyouwanttoscanforaparticularprogramme,orwanttomanuallyupdate existingchannels,youcanusethemanualscan.Selectthechannelnumber ofthewantedchannelwithtuandpressOk.Ifavalidchannelischosen, theQualitybarwillhaveread-out,alsousefulforadjustingyour(indoor) antenna.Afterthescaniscompletedthefoundchannelswillbeaddedor updatedintheTVand/orRadiolist. Country: S electthecountryinwhichthereceiverissituated.Thissettingisimportant tothescanprocesswhichisexecutedwhensearchingfor(new)channels. Defaultsforfrequencybandplan,LCNandtimezonearecoupledtothis setting. Country Region: S omecountrieshavemorethanonetimezone,ifapplicable,youcanchange thecountriesregionandtimezone. Antenna Power: ... -
Page 16: Language
Start Date (D/M/Y): U sethe0~9buttonstoenterthedateforthetimedevent. Start Time: U sethe0~9buttonstoenterthestarttimefortheevent. End Time: U sethe0~9buttonstoentertheendtimefortheevent. Repeat: C hoosebetweenOnce,Daily(thetimerwillbeexecutedeverydayatsame time)orWeekly(thetimerwillbeexecutedeveryweek,samedayatthesame time. Mode: C hoosebetweenView(thetimerwillwakeupthereceiver)orRecord(the timerwillstarttorecordthescheduledevent). Whenallsettingsareaccordingtoyourwishes,pressOktoconfirm.Toquitthetimerwithout savingyoursettings,pressEXIT. NOTE: The bluE button on the remote control serves as a shortcut to the Timer menu. 7.7 language Thismenuallowsyoutosetseveralitemsforlanguageandaudioandchangedefaultsettings... -
Page 17: Restore Factory Default
Age: C hoosebetween:Off,04yearsandupto18years.Channelswithaparental ratingequalorabovethechosenagewillbeprotectedwithaPINcode(if availableinyourlocalbroadcast.) Set Password: E nteryouroldPINcode(4digits).EnteryournewPIN.Re-enteryourPINcode toconfirm.PressEXITtoleavethemenuitem. 7.8.2 Restore factory default Thisoptionallowsyoutoresetthereceivertofactorysettings,whichclearsallstoredchannels. PresspqtoselectRestore Factory Default intheSystemmenuandpressOk.Youareaskedto enteryourPINcode.EnterthecorrectPINcodeusingthe0~9 buttons.(dEfaulT pIN: 1234).A confirmationquestionisdisplayed.SelectOktorestarttofactorysettingsorpressEXITtoleave. WaRNINg! By resetting your receiver to factory default, all your settings and stored channels will be permanently deleted. Please use this option with care. 7.8.3 Information Thissubmenushowsreceiverspecificinformationsuchashardwareversionandsoftwareversion.... -
Page 18: Media
NOTE: USB upgrade can only be done from HDD or USB pen drive which is formatted in FAT32. NOTE: If, after a software upgrade, the receiver should behave in an unexpected way, please perform a factory reset as well. Restore Factory Default. See chapter 7.8.2. -
Page 19: Troubleshooting
Formatting will permanently delete ALL data stored on the connected device. Please make a backup copy of all data you wish to keep before entering the Format menu. THOMSON cannot be held responsible for loss of data from USB devices used with this receiver. -
Page 20: Technical Specifications
problem possible cause What to do ForgottenPINcode DefaultPINis1234 Forgottenchannellockcode ContactlocalServiceHotline orsendemailtoourSupport viawww . t homsonstb . n et Aftermovingthereceiverto Antennasignalsaretooweak PresstheINfObuttonon anotherroom/areayouareno Thesignalstrength/quality remote2xtocallupsignal longerabletoreceivedigital mightbelessthanbefore,if barsandadjustantennafor reception usinganindoorantenna. (maximum)reception orrescanchannels Whenusinganactive antenna,checkantenna power. Trytouseanoutdoor antenna. Thereceiverswitchesoff AutoStandbyfunction Disableautostandby.See... - Page 21 Flashmemory: 4 MBytes SDRAM: 6 4MBytes Multimedia Videoplayback: M PEG-1andMPEG-2encoded(mpg),VOB,AVI,MKV,TS, M2TS,MPEG-4andMOV* Audioplayback: M P3andOGG Pictureview: B MPandJPEG *THOMSONcannotguaranteetheplaybackofvideofilesalthoughextensionsarelisted,asitdependsoncodecused,databitrateandresolution (allMPEGcodecformatsaresupported). Connectors ANTIN–IECFemale ANTOUT–IECMale TVSCART(RGB,CVBS,AudioL&R) HDMI1.3 S / P DIF(coax.) 3.5mmstereoaudiojack(audioleft/right) USB2.0port:5V/500mA(max.)supported general data Supplyvoltage: 2 20–240VAC(SMPS),50/60Hz Powerconsumption:...
Need help?
Do you have a question about the THT503 and is the answer not in the manual?
Questions and answers