
Related Manuals for THOMSON THS816


Summary of Contents for THOMSON THS816
- Page 1 Digitaler HD Satelliten Receiver simpli mehr hd! THS816 User Manual Bedienungsanleitung...
- Page 2 Fig. 1 Fig. 2 USB: 5 V 500 mA max. MODEL DIGITAL HD SATELLITE RECEIVER THS816 13/18 V 400 mA COAXIAL ETHERNET 12 V 1. 5 A, S/PDIF 18 W max. SAT IN MANUFACTURED UNDER LICENSE FROM DOLBY LABORATORIES. DOLBY AUDIO AND THE DOUBLE-D SYMBOL ARE TRADEMARKS OF DOLBY LABORATORIES Fig.
- Page 3 Satelliten Schüssel HDMI Kabel 100-240 V~ Scart Kabel Koaxial-Kabel / 12 V USB: 5 V 500 mA max. MODEL DIGITAL HD SATELLITE RECEIVER THS816 13/18 V 400 mA COAXIAL ETHERNET 12 V 1. 5 A, S/PDIF 18 W max. SAT IN MANUFACTURED UNDER LICENSE FROM DOLBY LABORATORIES.
- Page 4 Dieses Produkt wurde unter der Zuständigkeit der STRONG Group hergestellt und verkauft. THOMSON und das THOMSON Logo sind Warenzeichen von Technicolor (S.A.) oder seinen Vertretern, welche unter lizenzierter Nutzung der STRONG Group geführt werden. Vertreten durch STRONG Ges.m.b.H. Franz-Josefs-Kai 1 1010 Wien, Österreich...
- Page 5 STRONG declares that this item complies with the basic requirements and other relevant regulations of directives EMC 2014/30/ EU, LVD 2014/35/EU and RoHS 2011/65/EU. THOMSON is a trademark of Technicolor (S.A.) or its affiliates used under license by STRONG Group. Subject to alterations. In consequence of continuous research and development technical specifications, design and appearance of products may change.
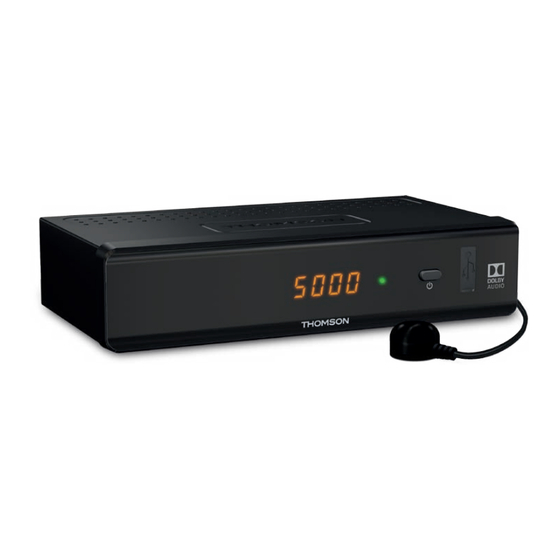
- Page 6 TABLE OF CONTENTS 1.0 INTRODUCTION 1.1 Safety Instructions 1.2 Storage 1.3 Equipment Set-up 1.4 Accessories 1.5 Usage of external USB devices 2.0 YOUR RECEIVER 2.1 DEFAULT PIN-CODE: 0000 2.2 Front Panel 2.3 Rear Panel 2.4 Remote Control 2.5 Inserting the batteries 2.6 Using the remote control 3.0 CONNECTIONS 3.1 Connection via HDMI or SCART...
-
Page 7: Introduction
1.0 INTRODUCTION 1.1 Safety Instructions Read all of the instructions before operating the device. Keep these instructions well for later use. - Only use attachments/accessories specified or provided by the manufacturer (such as the exclusive supply adapter, battery etc.). - Please refer to the information on the product enclosure for electrical and safety information before installing or operating the apparatus. -
Page 8: Storage
- Do not attach candle to accessible opening area, to avoid flammable foreign material from entering the device. WEEE Directive Correct Disposal of this product. This marking indicates that this product should not be disposed with other household wastes throughout the EU. To prevent possible harm to the environment or human health from uncontrolled waste disposal, recycle it responsibly to promote the sustainable reuse of material resources. -
Page 9: Your Receiver
- If you are going to use external USB HDD (Hard Disk Drive) please consider that it might be the case that the power specifications exceed the supported output of your receiver (5 V/500 mA). If so, please connect your USB HDD to an according external power adapter. - STRONG cannot guarantee compatibility with all types of USB storage devices. -
Page 10: Inserting The Batteries
11. pq Menu Off: Change channel to next/previous. Menu On: Moves the cursor up/down 12. t u Menu Off: Decreases/increases the volume level. Menu On: Change settings and navigation in menu 13. OK Menu Off: Displays the current channel list. Menu On: Opens the highlighted setting or for confirmation. -
Page 11: Optional Connection Via Diseqc 1.0 Switch For Up To 4 Lnbs
Optional: Connect one end of a good quality Scart cable to the TV SCART of your receiver and the other end to the SCART input of your TV set. 3.2 Optional connection via DiSEqC 1.0 switch for up to 4 LNBs Fig. -
Page 12: Antenna Setup
5.0 QUICK GUIDE TO USING YOUR RECEIVER We understand that you eagerly anticipate enjoying your new HD receiver. We do, however, recommend reading the full user manual to get the best performance of your THOMSON HD receiver. To switch your receiver ON or to Standby, use the q button on the remote control. Choose a channel with pq or the CH+/CH- buttons. -
Page 13: Operation
videotext mode. P+/P- enables you to scroll page wise in all lists, which allows you to select channels or other items as conveniently as possible. To open the channel and programme* information, press the INFO button in viewing mode. In this state it is possible to use t u to display channel and programme information about other channels without switching channels, but however in this mode you can also switch to the selected channel by pressing OK. -
Page 14: Info Banner
LIST: Opens the satellite list selection in viewing and list mode in case there is more than 1 satellite installed. FAV: Displays the favourite list selection in both modes. Details about creating favourite lists can be found in chapter 7.2.1 TV Channel Manager. To return to the original respectively to the previous channel list /mode use TV/R or LIST. -
Page 15: Changing The Video Settings
NOTE: DVB subtitles on Astra 19.2 are currently available on different German channels: Das Erste HD, ZDF HD, 3sat HD, arteHD, WDR HD and other popular channels. If you switch the Subtitles Display to On, the according subtitles will be displayed automatically in case of availability for this channel/movie. -
Page 16: Installation
Use t u to select a sub-menu and pq to choose an option. Press OK to open the chosen submenu. 7.1 Installation Press MENU and select Installation with t u. The following sub-menus are available: Antenna Setup, Motor Setting, Channel Search and Factory Reset. 7.1.1 Antenna Setup In this menu, you can change and adapt settings for the antenna(s) and their transponders. - Page 17 You can store this position between 0 and 63, OK can be used again as Save to this position described above. Save/Recalculation With Save and Recalculate, you can set whether the position should be saved or a new calculation should be made after setting this position. Press OK to move the motor to the centre position.
- Page 18 After choosing the desired settings, press OK to start the channel search, or press to exit the menu without scanning. * Only available if more than one satellite has been setup. NOTE: Network Data/NIT Table (Network Identification Table): This function allows you to search for the NIT data of the corresponding satellite to receive newly appeared channels.
-
Page 19: Channels
7.2 Channels Press MENU and use t u to select the Channels menu. The following sub-menus are available: TV Channel Manager, Radio Channel Manager, Electronic Programme Guide and Parental Control. 7.2.1 TV Channel Manager This menu allows you to customize your channel list or create favourite lists. To perform the desired action, proceed as described below. -
Page 20: Settings
NOTE: The simpliTV list contains channels in the sequence and numbering of the broadcaster. Added/additional channels which are not included in the list are listed from channel number 400 and cannot be edited. The channels can be edited in My TV List, see chapter 7.2.1 TV Channel Manager 7.2.2 Radio Channel Manager Please refer to the previous chapter TV Channel Manager to find out how it works in radio mode. - Page 21 Subtitle language: Set the language for the subtitles, if available, subtitles are displayed in the selected language. Volume settings: Here, you can set whether channels should use a unite volume control or if this should be controlled seperately Per Service. Try to find out which setting works best for you.
-
Page 22: Multimedia
Auto Standby: This function allows you to set the hours after which the receiver should automatically switch to standby mode. Available settings are: 1 hour, 2 hours, 3 hours, 4 hours, 5 hours, 6 hours and Off. If the receiver has not been operated during the set time, it automatically switches to standby mode. -
Page 23: Update
Press OK on this icon to move from a selected subdirectory to the next directory. Displays a folder. Press OK on this icon to open it. Displays a file. Press OK on this icon to start playback in the preview mode. ... - Page 24 With the OTA (Over The Air) function, you can search for software updates via satellite. Ask your THOMSON dealer or visit our website www.thomsonstb.net for more information. Only in the case of an available update and appropriate handling the option will be available in the menu. It is possible that you can also receive an update request after starting up the receiver.
-
Page 25: Network
7.6.1 Service Status This menu provides information about the decryption status. 7.6.2 Loader Status This menu provides information about the loader status. 7.6.3 Product Status The product status shows the current status of entitlements by operator. Each product is marked with date and duration. -
Page 26: Troubleshooting
If the receiver does not work properly after checking it, please contact your local service line or THOMSON dealer. Alternatively, you can send a support e-mail via our website: www.thomsonstb.net. NEVER open or disassemble your receiver. This may cause a dangerous situation and will void the warranty. -
Page 27: Technical Specifications
The remote control The batteries of the remote Check whether the batteries are does not work control are not inserted, wrongly inserted correctly or exhausted, if so inserted or exhausted. replace the batteries in the remote control. The USB storage device Formatted incorrectly. - Page 28 Digital Audio S/PDIF (coaxial) USB 2.0, Type A 5 V/500 mA (max.) DC main power (12 V/1.5 A) General Data Power supply: 100 - 240 V AC, 50/60 Hz Input voltage: 12 V DC, 1,5 A Power consumption: max. 18 W Power consumption in standby: max.
Need help?
Do you have a question about the THS816 and is the answer not in the manual?
Questions and answers