Table of Contents
Advertisement
Quick Links
THS222
Digital HD
Satellite
Receiver
User Manual
Bedieungsanleitung
Indice
Índice
Manual do Utilizador
Uživatelská příručka
Používateľská príručka
Instrukcja obsługi
Upute za korištenje
Felhasználói kézikönyv
Kullanıcı Kılavuzu
Руководство пользователя
Посібник користувача
Questo manuale d'istruzione è fornito da trovaprezzi.it. Scopri tutte le offerte per
prodotto tra le
migliori offerte di Decoder
Thomson THS 222
o cerca il tuo
www.thomsonstb.net
Advertisement
Table of Contents

Related Manuals for THOMSON THS222


Summary of Contents for THOMSON THS222
- Page 1 Questo manuale d’istruzione è fornito da trovaprezzi.it. Scopri tutte le offerte per Thomson THS 222 o cerca il tuo prodotto tra le migliori offerte di Decoder THS222 Digital HD Satellite Receiver User Manual Bedieungsanleitung Indice Índice Manual do Utilizador Uživatelská příručka Používateľská...
- Page 2 ETHERNET TV SCART S/PDIF SAT IN THOMSON IS A TRADEMARK OF TECHNICOLOR (S.A.) MANUFACTURED UNDER LICENSE FROM DOLBY LABORATORIES. DOLBY AUDIO OR ITS AFFILIATES USED UNDER LICENSE BY STRONG GROUP. AND THE DOUBLE-D SYMBOL ARE TRADEMARKS OF DOLBY LABORATORIES P–...
- Page 3 ETHERNET TV SCART S/PDIF SAT IN THOMSON IS A TRADEMARK OF TECHNICOLOR (S.A.) MANUFACTURED UNDER LICENSE FROM DOLBY LABORATORIES. DOLBY AUDIO OR ITS AFFILIATES USED UNDER LICENSE BY STRONG GROUP. AND THE DOUBLE-D SYMBOL ARE TRADEMARKS OF DOLBY LABORATORIES CAUTION...
- Page 4 This product has been manufactured and sold under the responsibility of STRONG Group. THOMSON and the THOMSON logo are trademarks of Technicolor (S.A.) or its affiliates and are used under license by STRONG Group. Represented by STRONG Ges.m.b.H. • Franz-Josefs-Kai 1 • 1010 Vienna • Austria Email: support_at@thomsonstb.net...
- Page 5 Your receiver is delivered with USB multimedia support. After downloading the software for recording via USB from the website www.thomsonstb.net, the receiver can be upgraded to support the recording and Timeshift function via USB. This user manual describes the full functionality including the recording function and may not be applicable if the software for recording via USB has not yet been installed.
-
Page 6: Table Of Contents
TAbLE of ConTEnTs 1.0 InsTruCTIon 1.1 Safety Instructions 1.2 Storage 1.3 Equipment Set-up 1.4 Accessories 1.5 Usage of external USB devices 2.0 Your rECEIvEr 2.1 PIN code default: 0000 2.2 Front and side panel 2.3 Rear panel 2.4 Remote Control 2.5 Installing the batteries 2.6 Using the remote control 3.0 ConnECTIons... -
Page 7: Instruction
1.0 InsTruCTIon 1.1 safety Instructions Do noT InsTALL Your rECEIvEr: • In a closed or poorly ventilated cabinet; directly on top of or under any other equipment; on a surface which might obstruct the ventilation slots. Do noT EXPosE ThE rECEIvEr or ITs ACCEssorIEs: •... -
Page 8: Equipment Set-Up
• It is advised not to store important information on USB storage devices used with the receiver. Always make backups of data on your USB storage device before using it with this receiver. THOMSON will not take responsibility for any loss of information or circumstances caused by loss of information. -
Page 9: Your Receiver
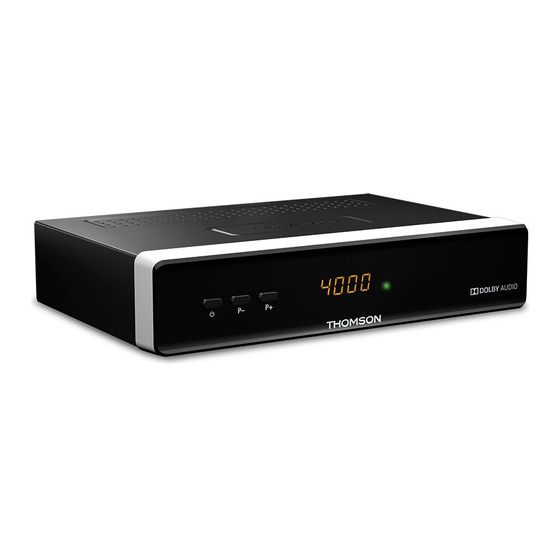
2.0 Your rECEIvEr 2.1 PIn code default: 0000 2.2 front and side panel Fig. 1 Switch the receiver to Standby or On. Power button: To change channels without using the remote control P-/P+: remote control sensor: Receives the signal from the remote control Shows channel number in operation and time in Standby LED display: standby indicator:... - Page 10 Flexible functions in OSD menu and Teletext. YELLoW 10. bLuE In viewing mode: displays the schedule menu for easy setup timers; Flexible functions in OSD menu and Teletext. Press once to display channel number/name and current/ coming information. Press twice to display detailed event information.
-
Page 11: Installing The Batteries
2.5 Installing the batteries Fig. 4 Remove the battery cover from the remote control and put 2x AAA size batteries inside the compartment. The diagram inside the battery compartment shows the correct way to install the batteries. Open the cover Install batteries Close the cover The batteries should not be recharged, disassembled, electrically short-... -
Page 12: Connecting To Digital Audio Amplifier
3.3 Connecting to digital audio amplifier Fig. 7 Connect one end of a good quality coaxial audio cable to the S/PDIF output of your receiver and the other end to the coaxial audio input of your home theatre, amplifier or any other device supporting digital audio. -
Page 13: Dish Setup
guide and press to proceed to the next Installation step. You can open and close the info page again by pressing the button. noTE: If German is selected as language, German preset channels from ASTRA 19.2E will be installed. You can continue with the Installation menu to scan and install further channels as described below or directly go to viewing mode by pressing ... -
Page 14: Quick Guide For Using Your Receiver
5.0 QuICk GuIDE for usInG Your rECEIvEr We at THOMSON understand that you can’t wait to enjoy your new HD receiver. The following quick guide will make you familiar with the basic operation of this device. We do, however, advice you to read the full manual to get the best performance from your THOMSON HD receiver. -
Page 15: Info Banner
6.1.4 using the 9 button Use the 9 button for switching between the last 8 viewed channels. Please refer to section 7.6 for more details. 6.2 Info banner At any time during viewing mode you can press the button to get information about the current channel as well as the current and following programme*. -
Page 16: Epg (Electronic Programme Guide)
6.8 EPG (Electronic Programme Guide) The Electronic Programme Guide is a very useful function that allows you to watch programme schedules and information on screen. Press the EPG button to activate this guide (you can also enter EPG via the menu too). Use tu to select a channel. In the programme list, use p/q to select or scroll through programmes to display programme information for the next/previous days. - Page 17 Disable favourite Tv or radio programme Repeat step 1 described above and select Disable in the Favourite Type window. view favourite programme In normal viewing mode (no menu mode) press the fAv button to display a list of favourite programmes. In the favourite list, use tu to switch between available favourite lists.
-
Page 18: Picture
rename a Tv or radio programme Select the programme you want to rename and press 9. A key table appears. In the key table select a character by using the navigation buttons. Press ok to enter the character. When you have entered the new name, navigate to the “OK” button on screen and press ok on the remote control to confirm the new name. -
Page 19: Channel Search
resolution If the video does not appear correctly, change the setting. These settings match the most common settings for HDMI. for NTSC system TV. 480i: for NTSC system TV. 480p: for PAL system TV. 576i: for PAL system TV. 576p: for NTSC or PAL system TV. - Page 20 DiSEqC1.1: To select the correct port from up to 16 (if available) for the corresponding LNB. Motor: If using a motor driven dish, press tu to choose between DiSEqC1.2 and DiSEqC 1.3 depending on the motor type you use. DisEqC 1.2 DiSEqC 1.2 is a protocol for motor-driven dishes, the dish/motor-combination itself needs to be aligned due South (North for Southern hemisphere) at its reference position at 0°.
- Page 21 Press ok to enter the GotoX menu. Select Goto Reference to move the dish to the reference position of 0°. Press OK twice to move. If your dish is physically obstructed to the East or West (example by a wall), you can limit its moving range by pressing the rED button to Set Limit to prevent it hitting the obstruction.
- Page 22 press ok. Press bLuE for Scan. A window with scanning settings will be displayed. After configuring the settings (explained in 7.3.1.3 above), press ok or bLuE again to start the scanning of the highlighted transponder. When the scan process has been completed, all found channels will be stored and the receiver will switch to the first found channel.
- Page 23 7.3.2 Db Management This menu allows you to save and reload the channel Data Base of your receiver from/to a USB- device. This very convenient feature enables you to save your personal settings like Channel-, Favourite-, Sat- and TP-lists on an USB storage device and load them back to the receiver later. This feature is especially helpful after unintentional changes or factory reset.
-
Page 24: Time And Date Settings
7.4 Time and date settings Press MEnu and select Time. The menu provides options to adjust the time and date settings. Press p/q to select an option and tu to adjust the setting. Press to exit the menu. Time Offset : Select Auto for automatic time and date updates from live signal or Manual for entering them manually. -
Page 25: System Settings
RAW (HDMI On)- As RAW, but also affects the HDMI output. OFF – digital audio output disabled 7.6 system settings Press MEnu and select System. The menu provides options to adjust the system settings. Press p/q to select an option and press tu to adjust the setting. Press to exit the menu. Some menu items can only be entered by entering the password. -
Page 26: Usb
**THOMSON cannot guarantee the playback of video files although extensions are listed here, as the correct playback depends on codec used, data bit rate and resolution as well. Please consult the THOMSON Hotline in your country to get more details. - Page 27 Opens a counter banner for entering the time moment you want to jump to. bLuE Use the 0~9 buttons for entering the time and ok to confirm. Start playback of the previous/next file. 7 8: Goes to the parent folder. To get back to the Multimedia menu.
- Page 28 7.7.2 Photo Configure You can adjust the slide show interval to 1~8 seconds. Slide Time: You can select one of the 60 slide show effects or Random (mixed effects). Slide Mode: Aspect Ratio: Keep - displays the picture as its original aspect Discard - displays the picture in full screen mode.
- Page 29 The format function will delete all data and information from your USB device WArnInG or selected partition. THOMSON will not take any responsibility for damaged or lost data on the USB device. If you have multiple partitions on your storage device, select the partition you would like to format and press ok to continue.
-
Page 30: Troubleshooting
If the receiver does not work properly after checking it, please contact your local Service line or THOMSON dealer. Alternatively you can send a support mail via our website: www.thomsonstb.net. NEVER open or disassemble your receiver. This may cause a dangerous situation and will void the warranty. -
Page 31: Specifications
ProbLEM PossIbLE CAusE WhAT To Do The external USB HDD does The power consumption is Connect an extra power supply not start. too high. adapter to your USB HDD device. The receiver switches to The Auto Standby function is Set the power down time or standby automatically. - Page 32 Dolby and the double-D symbol are trademarks of Dolby Laboratories. HDMI, the HDMI logo and High-Definition Multimedia Interface are trademarks or registered trademarks of HDMI Licensing LLC in the United States and other countries. All product names are trademarks or registered trademarks of their respective owners. © THOMSON 2016. All rights reserved. sPECIfICATIons...
Need help?
Do you have a question about the THS222 and is the answer not in the manual?
Questions and answers