
Subscribe to Our Youtube Channel
Related Manuals for Standard Horizon MAGNUM NAV-40


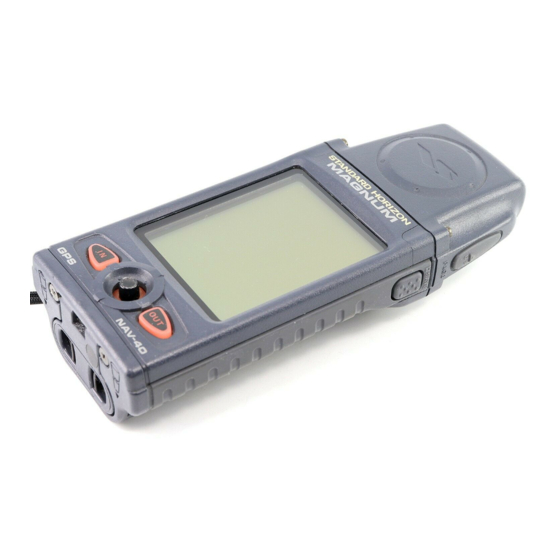
Summary of Contents for Standard Horizon MAGNUM NAV-40
- Page 1 Rugged GPS Navigator OWNER’S MANUAL Marine Division of VERTEX STANDARD 17210 Edwards Road, Cerritos, CA 90703, U.S.A.
-
Page 2: Table Of Contents
Table of Contents FCC Compliance Statement ........1 Using the TRACK Screen ............. 48 Using the HIGHWAY Page ........... 52 Introduction ..............2 Using the COMPASS Page ..........54 Before You Begin ..............4 Using the TREND Page ............56 Installation ................ -
Page 3: Fcc Compliance Statement
The MAGNUM NAV-40 does not contain any user-serviceable parts. Repairs should be made only by STANDARD HORIZON Factory Service (address shown below). Unauthorized repairs can void the warranty. -
Page 4: Introduction
Introduction The MAGNUM NAV-40 is a precision-crafted, high-performance receiver for the Global Positioning System (GPS) constellation of satellites, providing pre- cise location data and a host of navigation features. Ideal for outdoor use, and sealed against water ingress to the submersible standards of JIS-7/IPX-7, the MAG-... - Page 5 Introduction Important Notice To reduce the risk of unsafe navigation, this owner’s manual should be carefully reviewed and the information contained herein should be completely understood. When in actual use, be sure to compare the navigational data (lights, buoys, cities and airports) within the MAGNUM from all available navigation sources includ- ing the information from other NAVAID’s visual sightings, and approved charts as the data provided is effective only at the time the product was produced.
-
Page 6: Before You Begin
The system is subject to system operational status changes which could affect the accuracy and performance of all GPS equipment. Although the MAGNUM NAV-40 is a precision electronic navigation aid, any navigation aid can be misused or misinterpreted and, therefore, become unsafe. - Page 7 Introduction EFORE EGIN Belt Clip Mounting Hole External DC Input and NMEA Data Ports Battery Compartment...
-
Page 8: Installation
Introduction Battery Installation The MAGNUM operates on four “AA” batteries (not supplied). Battery life, us- NSTALLATION ing AA cells, can exceed 50 hours of continuous use (Battery Saver mode). To install the AA batteries: 1. Pinch the knobs of the battery cover on the bottom of the MAGNUM, then pivot the battery cover downward to open the battery cover. - Page 9 Introduction Quick-Draw Belt Clip (CLIP-14) Installation 1. Connect the hanger to the rear of the MAGNUM, with the notch pointing NSTALLATION directly up, using the supplied screw (Figure 1). Use only the screw included with the clip to mount the clip to the back of the MAGNUM! Hint: In order to prevent 2.
-
Page 10: Keypad Functions
[ PWR ] key Introduction This key has two functions, depending on how long it is pressed. Press and EYPAD UNCTIONS hold in the [ PWR ] key to turn to the MAGNUM on or off. Pressing the [ PWR ] key momentarily, while the MAGNUM is turned on, will switch the LCD’s illumination off (or back on). - Page 11 [ IN ] / [ OUT ] key Introduction Press the [ IN ] key to decrease the map scale (Zoom In), or press the [ OUT ] EYPAD UNCTIONS key to increase the map scale (Zoom Out) when on the Track Page. [ MENU ] key This key has two functions, depending on how long it is pressed.
-
Page 12: Operation Quick Start
Introduction 1. Insert batteries into the battery compartment (see page 6). 2. Press and hold in the [ PWR ] key until the MAGNUM turns On (about 2 PERATION UICK TART seconds). 3. The following “Sign-on Message” will be displayed: CAUTION ALL INFORMATION IS FOR REFERENCE ONLY. - Page 13 Introduction Move the Joystick knob down and select “CITIES” and click on that. Click once more, then use the Joystick knob to select the first letter of your city PERATION UICK TART (for example, “L” for the first letter in “LAS VEGAS.” Click on “L,” then highlight “A”...
-
Page 14: Terminology
Introduction The MAGNUM (NAV-40) is a high-performance Submersible Portable GPS re- ceiver, with a wide variety of operating features that may be new to you. Let’s ERMINOLOGY take a moment to discuss the terminology used in the operation of the MAGNUM Used for MAGNUM NAV-40. - Page 15 Introduction A “Mark” is similar to a “Waypoint,” except a “Mark” is a position not related to ERMINOLOGY a track or a route (i.e. something you might see in the distance, like a building, Used for MAGNUM NAV-40 Operation lighthouse, or mountain). If you save a “Mark,” it may be recalled without having to recall a Track associated with it (only Waypoints are tied to a Track in this manner).
- Page 16 Introduction ECALL EMORY The “Recall Memory” feature allows you to recall a Route or Track previously ERMINOLOGY stored into Memory. Used for MAGNUM NAV-40 Operation ECALL When the MAGNUM’s power is turned off, the last position at that moment will be stored into memory as a reference point.
-
Page 17: Operating Page Features & Functions
Operating Page GPS Status Features & Functions The GPS Status page provides display of the number of GPS satellites currently being displayed, along with a bar-graph representation of the relative signal GPS S TATUS strengths from these satellites. When GPS reception is marginal, it may not be possible to calculate your current Altitude accurately. -
Page 18: Track
Operating Page Track Features & Functions The Track page provides a track history, showing the path you have followed on your journey. This screen includes the capability to Zoom In and Zoom Out, to RACK provide the most meaningful display of position possible. During the journey, clicking on the Joystick knob will allow you to note Waypoints, for future refer- ence. -
Page 19: Navigation
Operating Page Navigation Features & Functions The Navigation “Page” actually consists of two pages. NAV1 is an abbreviated Navigation Page, containing 8 data boxes. NAV2 is a more comprehensive page, AVIGATION containing 16 data boxes. Use the [ IN ] or [ OUT ] keys to toggle between these pages. -
Page 20: Trend
Operating Page Trend Features & Functions This page shows the recent trend history of the altitude of a journey. Reception of the GPS satellites must be good in order for this feature to work correctly. REND Celestial The Celestial Page includes data from January 1, 2000 and ending December 31, 2040. -
Page 21: Notes
Operating Page Notes Features & Functions This page may be used as a “Note Pad” for trail or navigation notes, names and telephone numbers, or any other “Memo” information you might want to retain OTES for future reference. The MAGNUM is supplied with a database of hotels, rental car agencies, and airlines, for your convenience. -
Page 22: Menu System Contents
Menu System The Menu system of the MAGNUM is used for many start-up, configuration, and Contents customization purposes. Each option on the main Menu screen may have several different parameters involved in its utilization; for now, we’ll just discuss the main points of each Menu option, and details will follow in later chapters. -
Page 23: Menu System
Menu System RECALL MEMORY Contents Selecting this Menu item allows you to recall and navigate a Track or Route. GPS RECV ON/OFF To conserve battery life, you can turn the GPS Receiver circuitry completely off (if, for example, you just want to enter items into the “Notes” memo pad, or do calculations using the Conversion or Celestial pages, for example. - Page 24 Menu System TRACK SCREEN Contents Several aspects of the Track Page may be configured by the user: Orientation Selections include “Course Up,” “North Up,” and “Destination Up.” Clicking on the Icon in the bottom right corner will toggle among these three settings. Forward Wide When this selection is set to “Off,”...
-
Page 25: Simulation Mode
Menu System SIMULATION MODE Contents If you wish to practice the use of the MAGNUM’s features, without using GPS satellites for actual navigation (for example, to practice indoors), you may use the Simulation Mode. Waypoints or Marks that have previously been stored will be available for use during your practice. -
Page 26: Basic Operation
Basic Operation EARNING TO AVIGATE Our first chapter will guide you through your first minutes of operation of the EARNING TO AVIGATE MAGNUM. 1. After installing fresh batteries, press and hold in the [ PWR ] key until the The early discussions of MAGNUM turns on. - Page 27 on the screen). If the map scale is too large, use the [ IN ] key to Basic Operation (shown as “Zoom In” to a more useful scale. Note also that, your walking speed has EARNING TO AVIGATE appeared in the Track Data box at the top of the page (the MAGNUM up- dates your location every 1 second, and updates the track every 15 seconds as a default setting.
-
Page 28: Goto A Location
Basic Operation “GOTO” OCATION Now let’s pick a point away from our current location, and learn how to navigate “GOTO” TO A OCATION to this new point. 1. First, set the Scale to a “smaller-scale” value using the [ IN ] key (you should see “50 ft”... - Page 29 Basic Operation tors. The large arrow shows the direction you need to be moving in order to reach the new Mark, and the thin line shows your current direction of travel. TEERING TO A ISTANT OINT 7. Now press the [ OUT ] key once. The page will change to the COMPASS2 page, where a very large arrow will depict your current direction of travel, and the thin line will show the direction you must travel in order to reach the Mark.
-
Page 30: Navigating To A Point Of Interest
Basic Operation Let’s say you are in Los Angeles, California (USA), and want to find the most direct route (as the crow flies) to San Diego, California. The MAGNUM can do AVIGATING TO A this very easily. OINT OF NTEREST 1. - Page 31 Basic Operation 9. The MAGNUM will display the Track page showing San Diego, along with a Bearing line from your current position to San Diego. At the top of the track AVIGATING TO A page, data box’s show the Bearing to San Diego, the Distance to San Diego, OINT OF NTEREST and the Latitude/Longitude of San Diego!
-
Page 32: Creating A "Track" And Storing It Into Memory
Basic Operation One of the most powerful features of the MAGNUM is its ability to store and recall records of track, or convert tracks into routes. When using the “New Track” “T ” REATING A RACK feature, you can mark Waypoints that can help guide you to your starting point (if TORING IT INTO EMORY you are returning home from a day of fishing, for example), and this section will... - Page 33 Basic Operation tion. 9. You will now be prompted to create a name for the Waypoint. Click once, “T ” REATING A RACK and one of the characters below the current name (which is probably “002” TORING IT INTO EMORY or similar) will be high-lighted, as will the first character in the current name.
- Page 34 Basic Operation 14. Click on the first character, and assign “TEST” as the name of the Track. Highlight to, and click on, the letters “T” “E” “S” “T” in that order, then click “T ” REATING A RACK on “OK” when done. TORING IT INTO EMORY You have now stored a complete track into memory.
- Page 35 Basic Operation Finally, remember all the “S” turns that were in the original Track? That replicates what your journey might look like if you were trolling in a fishing “T ” REATING A RACK boat. When the day is done, however, and you’re low on fuel, how do you TORING IT INTO EMORY find the shortest way home?
- Page 36 Basic Operation to navigate the original journey, minus the turns not associated with the Waypoints. Click here. “T ” REATING A RACK 27. A ROUTE window is now shown, that has “FORWARD” and “REVERSE” TORING IT INTO EMORY options. If you choose FORWARD, you will be shown Bearing and Distance to the original Destination point;...
-
Page 37: Creating A "Route" And Storing It Into Memory
Basic Operation The MAGNUM has the capability to make a route from prevously stored marks and waypoints. “R ” REATING A OUTE 1. With the MAGNUM turned on press the [ MENU ] key, highlight “RECALL TORING IT INTO EMORY MEMORY”... -
Page 38: Mob (Man Overboard!)
Basic Operation In the event that you have a “Man Overboard” situation, or some other situation requiring quick, clear setting of a location so you can navigate back to it, the “MOB” (Man OverBoard) feature is provided. Begin on the Track page. ( MAN OVERBOARD! ) 1. -
Page 39: Saving/Recalling Mark/Waypoints
Basic Operation In the previous discussions, we discussed a method of marking, identifying, and naming a location. The MAGNUM includes special tools that help you remem- AVING ECALLING ber what the various Marks and Waypoints represent. AYPOINTS As you define Marks and Waypoints, you will assign different icons to aid in identification. -
Page 40: Goto A Destination Using Latitude/Longitude
Basic Operation Frequently you will know the Latitude and Longitude of a desired destination. You can enter position information directly so as to define a destination. GOTO ESTINATION 1. Press the [ MENU ] key, and highlight the “GOTO” selection; click on this USING ATITUDE ONGITUDE... -
Page 41: Locating A Mark Or Waypoint
Basic Operation It’s easy to determine your Distance and Bearing to a distant Mark or Waypoint. Select the Track page. OCATING A ARK OR 1. Press the [ MENU ] key, then highlight the “GOTO”; click on this selection. AYPOINT 2. -
Page 42: Determining Bearing/Distance Between Two Distant Points
Basic Operation There are times when it might be useful to be able to describe the Bearing and Distance between two points, neither of which is your current location. This is ETERMINING EARING easy to accomplish, using the “Cursor Mode” of the MAGNUM. ISTANCE ETWEEN 1. -
Page 43: Deleting A Mark
Basic Operation ELETING A If you decide you no longer need a Mark, it is easy to delete it. ELETING A 1. Press the [ MENU ] key, then highlight “MARK” and click on this selection. 2. In the “MARK” pop-up window, highlight “EDIT” and click on it. 3. -
Page 44: Changing The Units Of Measure
Basic Operation The units of measure may be changed, between three selections: “Statute,” “Met- ric,” and “Nautical.” HANGING THE NITS OF 1. Press the [ MENU ] key, then highlight “SETUP” selection; click on this se- EASURE lection. 2. Highlight the “GENERAL” selection, and click on it. 3. -
Page 45: Using The Navigation
Basic Operation Now that you’ve become familiar with the basic steps used in Navigation, let’s look at some of the data that is calculated by the MAGNUM to make your jour- SING THE ney even easier! NAVIGATION P AGES From the Track screen, press the [( p ) PAGE ] once; this will show on the “NAV1” screen, which is a subset of the total data available. - Page 46 Basic Operation Course Over Ground (your current direction). Both “True” (“T”) and “Magnetic (“M”) options are available. SING THE Bearing towards your destination (will show “- - -” if no NAVIGATION P AGES destination is defined). If there are Waypoints along the way, the Bearing shown will be toward the next Waypoint.
- Page 47 Basic Operation to see 8 of the above 16 data fields, in a larger font for easier viewing. The fields to be displayed in the NAV1 screen may be selected by you to provide the most SING THE useful data, and since NAV1 is the default Navigation page, the ability to select NAVIGATION P AGES these data fields is a tremendous convenience feature.
- Page 48 Basic Operation selections, with the “ P ” inside the box showing which fields are being dis- played (note also that the box by the TRIP LOG selection is now vacant). Now SING THE press the [ MENU ] key once, then click on “EXIT” the NAV1 screen will be NAVIGATION P AGES shown with one field missing in the bottom right-hand corner.
- Page 49 Basic Operation 11. If you wish to lock operation on either Navigation page, press and hold in the [ MENU ] key for about two seconds (until you hear a long beep). The “ ” SING THE icon will appear in the Title Bar at the top of the LCD. NAVIGATION P AGES...
-
Page 50: Using The Track Screen
Basic Operation We’ve already discussed the basic steps in navigating using the Track screen. In that exercise, we used the Joystick knob to move the cursor to a point away SING THE from our current location, and we also have used the [ IN ] / [ OUT ] keys to change TRACK S CREEN the map scale on the track screen. - Page 51 Basic Operation To change the parameters displayed on the Track page, use the following proce- dure, which is identical to that used for setting up the Navigation page, (a maxi- SING THE mum of four fields may be selected, however): TRACK S CREEN 1.
- Page 52 Basic Operation general category of “Points of Interest,” or “POI” (“LIGHTS” stands for “Lighthouses”). Besides the bottom three display options, one of the top six SING THE selections may also be chosen, using the same techniques as we have prac- TRACK S CREEN ticed earlier.
- Page 53 Basic Operation “ON” for the rectangular grid, “CIRCLE” for the con- centric circles, and “OFF” for no grid of any kind. SING THE AUTO ZOOM If this parameter is set to “ON,” the scale of the map will TRACK S CREEN be decreased (Zoom In) automatically when nearing a Waypoint.
-
Page 54: Using The Highway Page
Basic Operation The Highway page creates a “3D highway” that shows the most relevant naviga- tion information. Basically, it is a view similar to that experienced when driving SING THE on a highway to a destination. If you are navigating or a route with Waypoints HIGHWAY P stored, the Highway page will show the turns necessary to follow all the Waypoints to the final destination. - Page 55 Basic Operation 5. If you wish to lock operation on the Highway page, press and hold in the [ MENU ] key for about two seconds (until you hear a long beep). The “ ” SING THE icon will appear in the Title Bar at the top of the LCD. HIGHWAY P...
-
Page 56: Using The Compass Page
Basic Operation The Compass Page is a convenient, intuitive aid to navigation. Like the Naviga- tion Page, there actually are two Compass pages, COMPASS1 and COMPASS2. SING THE They will show your current direction of travel and, once a destination has been COMPASS P set, it will show the Bearing toward the desired destination. - Page 57 Basic Operation The four data fields at the top of the COMPASS1 page may be customized, as on the other pages. To do this: SING THE 1. Press the [ MENU ] key, then use the Joystick to select SETUP. Click on COMPASS P SETUP.
-
Page 58: Using The Trend Page
Basic Operation The Trend page is very simple. Presuming that you have satisfactorily been re- ceiving in the 3DNAV or WAAS GPS modes, the Trend page will show you the SING THE changes in your altitude. TREND P No data fields are available on the Trend page; it is a self-contained informa- tional page only. -
Page 59: Using The Celestial Page
Basic Operation The Celestial page is a highly useful resource, full of astronomical data that may be of help to you in your trip planning (especially when fishing). SING THE Included on the Celestial page are a calendar which is good through December CELESTIAL P 31, 2040;... - Page 60 Basic Operation You can also change the time zone of the time display at the bottom of the page. To do this: SING THE 1. Press and hold in the Joystick knob for about two seconds (until you hear a CELESTIAL P beep).
-
Page 61: Using The Conversion Page
Basic Operation The Conversion page is a handy reference tool which allows quick conversion among units of measure for Length, Area, Volume, Weight, Temperature, and SING THE Speed. CONVERSION P The default conversion window is “LENGTH,” which utilizes “US MILE” as its reference value. - Page 62 Basic Operation 9. Other conversions may be performed using the same technique. 10. If you wish to lock operation on the Conversion page, press and hold in the SING THE [ MENU ] key for about two seconds (until you hear a long beep). The “ ” CONVERSION P icon will appear in the bottom right-hand corner of the LCD.
-
Page 63: Using The Notes Page
Basic Operation The Notes page is a “scratchpad” which contains a database containing the names, addresses, and other information for a number of airline companies, hotels, and SING THE rental car companies. You may add entries to the database yourself, or edit the NOTES P database should a telephone number, Web site URL, or other data change. - Page 64 Basic Operation on the “OK” box. New entities are entered in exactly the same fashion. SING THE NOTES P 1. Click on the “NEW” box at the bottom of the LCD. 2. Enter the desired title for the new entry in the “SUBJECT” field, being care- ful to observe the navigations rules detailed above.
-
Page 65: Using The World Time Page
Basic Operation The MAGNUM includes a convenient World Time reference page, which can display both the time in your own time zone (“Home”) plus one more (“World”). SING THE The World Time clock also features a Wake-up Alarm clock with Snooze func- WORLD TIME P tion. - Page 66 Basic Operation ETTING THE The HOME time appears not just on the World Time page; it also is used on the SING THE Track, Navigation, Highway, and Compass pages. Although the Menu may be WORLD TIME P used to set the time (navigate to SETUP, click on it, then select and click on TIME), there is a quick path to the time setting process directly from the World Time page: 1.
- Page 67 Basic Operation Note: The Home time is not used as the reference for the Celestial page; that time zone may be set separately, so you can investigate celestial events in a distant SING THE place without affecting your Home time zone setting. WORLD TIME P ETTING THE ORLD...
- Page 68 Basic Operation ETTING AND SING THE LARM LOCK 1. Select the World Time page using the [( q ) PAGE ] / [( p ) PAGE ] keys. SING THE 2. Press and hold in the Joystick knob until the “WORLD TIME” pop-up box WORLD TIME P appears (about two seconds).
- Page 69 9. Press the Joystick knob for two seconds to go back into the WORLD TIME Basic Operation setup box, highlight “ALARM,” click on it, then select and click on “OFF” to SING THE turn off the Alarm. WORLD TIME P 10.
-
Page 70: Using The Time Page(S)
Basic Operation Five different Timers are provided in the MAGNUM. These can be used for a variety of time-keeping purposes. They include: SING THE TIMER P OUNT IMER AGE ( S ) This is a standard Stopwatch. An “interval” time may be set to sound an alarm at the interval desired (lowest value: 1 minute). - Page 71 Basic Operation OUNT IMER Somewhat similar to the Racing Down Timer, the Count-Down Timer is set to SING THE some time value (such as 10 minutes), and it will count down from that value; TIMER P AGE ( S ) when “00:00:00”...
-
Page 72: Advanced Operation
Advanced Operation IMULATION It frequently is helpful to practice your navigation skills under “simulated” condi- IMULATION tions. The “Simulation Mode” of the MAGNUM allows you to do practice with- out actually receiving signals form the GPS satellite constellation. Here’s the simple procedure for getting into the Simulation mode: 1. -
Page 73: Battery Saver Setup
Advanced Operation ATTERY AVER ETUP Several methods of battery capacity enhancement are available, allowing the life ATTERY AVER ETUP of a typical set of alkaline batteries to be extended to at least 50 hours. GPS Receiver On/Off Turning off the GPS receiver, when it is not needed (for example, if you are using the “Conversion”... -
Page 74: Disabling Waas Operation
Advanced Operation WAAS O ISABLING PERATION For higher resolution, the WAAS (Wide Area Augmentation System) mode (de- ISABLING fault setting is on) is enabled (by default), allowing resolution of your position WAAS O PERATION down to about ±3 meters. The WAAS feature configures the MAGNUM to search for a WAAS satellite, the data from which will be used to resolve your position with higher precision. -
Page 75: Setting The Back-Lighting
Advanced Operation ETTING THE LIGHTING The display back-lighting configuration may be customized to match your prefer- ETTING THE LIGHTING ences. r Press the [ MENU ] key, then highlight the “SETUP” selection; click on this selection. r Highlight the “GENERAL” selection, and click on it. r Highlight the “DISPLAY CONTRAST”... -
Page 76: Setting The Map Datum
Advanced Operation ETTING THE ATUM While most operations will utilize the default “WGS 84” database of locations, ETTING THE ATUM you may have a map or a chart that uses a different database. A number of com- monly-used databases are loaded onto your MAGNUM, and you may easily choose one of them: r Press the [ MENU ] key, then highlight the “SETUP”... -
Page 77: Setting The "True" Or "Magnetic North" Reference
Advanced Operation “T ” “M ” R ETTING THE AGNETIC ORTH EFERENCE You may configure the MAGNUM for either “True” North, or “Magnetic” North “T ” ETTING THE reference formats: “M ” AGNETIC ORTH r Press the [ MENU ] key, then highlight the “SETUP” selection; click on this EFERENCE selection. -
Page 78: Setting Up The Alarms
Advanced Operation ETTING P THE LARMS Several Alarms are available, to alert you to conditions of interest. These include: ETTING P THE LARMS ¦ Destination Alarm: Is engaged when you near your destination. ¦ Anchor Alarm: Is engaged when your position changes while you are at anchor. -
Page 79: Setting Up The Beeper
Advanced Operation ETTING P THE EEPER The MAGNUM’s Beeper provides an audible alert, useful for a number of functions. ETTING P THE EEPER ¦ It can alert you when an Alarm is engaged. ¦ It can confirm that a key has been successfully pressed. Here’s how to configure the Beeper of your MAGNUM: r Press the [ MENU ] key, then highlight the “SETUP”;... -
Page 80: Setting North Up/Course Up/Destination Up
Advanced Operation On the track page, you will notice an icon in the bottom right corner. This icon represents the display mode of the MAGNUM. “N” means the display is in the ETTING ORTH “North Up” mode; “C” indicates “Course UP;” and “D” indicates “Destination OURSE ESTINATION Up.”... -
Page 81: Resetting The Microprocessor
Advanced Operation ESETTING THE ICROPROCESSOR If you encounter erratic operation, or simply wish to clear out all tracking and ESETTING THE other data and start with factory default setting, you can perform a microproces- ICROPROCESSOR sor reset. Warning: this will erase all saved data, so only do this if you’re encoun- tering serious trouble that you need to recover from. -
Page 82: Turning The Track Data Box On/Off
Advanced Operation URNING THE RACK On the Track page, a small box which includes the current Speed and the Trip URNING THE Odometer appears by default. In order to make more room on the Track screen, RACK this data box may be disabled: r Press the [ MENU ] key, then highlight “TRACK PAGE DATA.”... -
Page 83: Auto-Zoom Feature (Track Screen)
Advanced Operation The Track page can also be modified to provide additional space by placing your current location at the bottom of the screen, instead of the middle of the screen. RACK CREEN To do this: RIENTATION r Press the [ MENU ] key, then highlight “TRACK SCREEN.” Click on this se- lection. -
Page 84: Connecting The Nmea Data Cable
Connecting the Connect the NMEA Data Cable (model CT-85) to the rear-panel NMEA connec- NMEA Data Cable tor of the MAGNUM. The color code for connection to your Standard Horizon transceiver, or other optional equipment, is shown below. 12VDC DATA OUT... - Page 85 DSC ( D Connecting the IGITAL ELECTIVE ALLING NMEA Data Cable Digital Selective Calling is a semi-automated method of establishing a radio call, it has been designed by the International Maritime Organization (IMO) as an interna- tional standard for establishing VHF, MF and HF radio calls. It had also been desig- nated part of the Global Maritime Distress and Safety System (GMDSS).
-
Page 86: Cloning Data To Another Magnum
Cloning Data to The settings for Tracks, Marks, etc. may be copied from one MAGNUM to an- another MAGNUM other, so as to allow them to be set up identically. r Turn both MAGNUM GPS units off. r Connect the Cloning Cable (CT-85 x 2; as shown below) between the rear- panel NMEA connectors of the two receivers. -
Page 87: Sending Nmea Data To Another Device
The MAGNUM is capable of sending an NMEA data stream to a compatible to Another Device Standard Horizon transceiver, or to another device capable of receiving an NMEA data stream. To do this: r Turn the MAGNUM off, then connect the NMEA Data Cable (model CT- 85) to the rear panel connector of the MAGNUM. -
Page 88: Downloading Program Updates
Downloading As firmware updates become available, they may be uploaded from your com- Program Updates puter to the MAGNUM. Software update when available can be downloaded from the following web site www.standardhorizon.com r With the MAGNUM turned off, connect the MAGNUM to your computer, using the supplied CT-84 PC Interface Cable. -
Page 89: Appendix
Appendix HYSICAL Case: Polycarbonate Waterproof to JIS class 7 PECIFICATIONS (similar to IPX7 standards, Waterproof to 1 m for 30 minutes) Size: 2.6 in (W) x 6.2 in (H) x 1.4 in (D) 65 mm (W) x 157 mm (H) x 36 mm (D) Weight (Approx.): 7.9 oz (w/o battery), 11.1 oz (w/4 AA batteries) 225 g (w/o battery), 315 g (w/4 AA batteries) -
Page 90: Map Datum List
Appendix ADIAN Adindan- Ethiopia, Mali, Senegal, EUROPEAN 1950 European 1950- Austria, Belgium, Den- Sudan mark, Finland, France, Germany, Afgooye- Somalia Gibraltar, Greece, Italy, Luxembourg, ATUM AIN EL ABD70 AIN EL AND 1970- Bahrain Island, Netherlands, Norway, Portugal, Spain, Saudi Arabia Sweden, Switzerland ANNA 1 AST65 Anna 1 Astro ‘65- Cocos I. - Page 91 Appendix MARCO ASTRO Marco Astro- Salvage Island PROV S AM‘56 Prov So Amricn ‘56- Bolivia, Chile, MASSAWA Masswa- Eritrea (Ethiopia) Colombia, Ecuador, Guyana, Peru, Ven- MERCHICH Merchich- Morocco ezuela ATUM MIDWAY AST61 Midway Astro ‘61- Midway PROV S CH‘63 So Chilean ‘63- S. Chile MINNA Minna- Nigeria PTCAIRN AST...
-
Page 92: Accessories & Options
Appendix UPPLIED CCESSORIES ¦ CLIP-14 Quick-Draw Belt Clip & O CCESSORIES PTIONS ¦ CT-84 PC Interface Cable ¦ Wrist Strap ¦ Owner’s Manual ¦ Quick Reference Guide VAILABLE PTIONS CT-84 PC Interface Cable CT-85 Data output Cable MMB-78 Universal Bracket... -
Page 93: Universal Bracket Installation & Operation
Appendix URFACE NSTALLATION Per the diagram below, and using the MMB-78 Universal Bracket as a template, MMB-78 U NIVERSAL drill two holes onto the surface to which the MMB-78 is to be mounted. Use the & RACKET NSTALLATION supplied self-tapping screws to mount the MMB-78 to the surface. PERATION PTION OUNTING TO... -
Page 94: Maintenance
Appendix TROUBLESHOOTING CHART SYMPTOM PROBABLE CAUSE REMEDY AINTENANCE Does not turn On. The Batteries may be low Check the polarity of all bat- or the polarity of the AA teries. cells may not be correct. For general troubleshoot- ing, please refer to this Does not get a valid fix. - Page 95 In the event of a defect, malfunction or failure of the Product during the warranty period, Standard Horizon’s liability for any breach of contract or any breach of express or implied warranties in connection with the sale of Products shall be limited solely to repair or replacement, at its option, of the Product or part(s) therein which, upon examination by STANDARD HORIZON, appear to be defective or not up to factory specifications.
-
Page 96: Index
Compass1 ............17,27,54 Appendix Compass2 ............17,27,54 GOTO ................20 Compass Page ............. 54 GOTO a Destination using Latitude/Longitude ..38 NDEX Connectiong the NMEA Data Cable ......82 GOTO a Location ............26 Conversion ............... 18,59 GOTO Pages ..............22 Count Down Timer ............ - Page 97 Mark ..............13,20,37 Appendix Master Reset ..............79 Racing Down Timer ............68 Max.Speed ..............43 Recall Last Data ............14 NDEX Memory ................13 Recall Memory ............14, 21 MENU ................20 Resetting the Microprocessor ........79 Menu key ..............4,9 Route ................
- Page 98 Note...
- Page 100 Copyright 2001 No portion of this manual VERTEX STANDARD CO., LTD. may be reproduced All rights reserved. without the permission of VERTEX STANDARD CO., LTD. Printed in Japan 0111o-0Y...
Need help?
Do you have a question about the MAGNUM NAV-40 and is the answer not in the manual?
Questions and answers