AMX DXLink Instruction Manual
Dxlink twisted pair transmitters/receiver dxlink multi-format wallplate transmitter dxlink multi-format decor style wallplate transmitter (us) dxlink multi-format transmitter module dxlink hdmi transmitter module dxlink hdmi receiver module
Hide thumbs
Also See for DXLink:
- Quick start manual (2 pages) ,
- Instruction manual (141 pages) ,
- Quick start manual (2 pages)
Table of Contents
Advertisement
Instruction Manual
DXLink
Twisted Pair
™
Transmitters/Receiver
DXLink Multi-Format Wallplate Transmitter
DXLink Multi-Format Decor Style Wallplate Transmitter (US)
DXLink Multi-Format Transmitter Module
DXLink HDMI Transmitter Module
DXLink HDMI Receiver Module
D X L i n k ™ T w i s t e d P a i r T r a n s m i t t e r s / R e c e i v e r
R E V J : 0 6 / 2 0 / 2 0 1 3
Advertisement
Table of Contents

Related Manuals for AMX DXLink


Summary of Contents for AMX DXLink
- Page 1 Twisted Pair ™ Transmitters/Receiver DXLink Multi-Format Wallplate Transmitter DXLink Multi-Format Decor Style Wallplate Transmitter (US) DXLink Multi-Format Transmitter Module DXLink HDMI Transmitter Module DXLink HDMI Receiver Module D X L i n k ™ T w i s t e d P a i r T r a n s m i t t e r s / R e c e i v e r...
- Page 2 LIMITED WARRANTY; RETURN, REPAIR AND REPLACEMENT 6.1 AMX warrants the Products to be free of material defects in materials and workmanship under normal use for three (3) years from the Shipping Date (or such other period as may be specified below), subject to the following limitations and exceptions (“Limited Warranty”).
-
Page 3: Table Of Contents
ID Pushbutton Functions ....................... 59 HDMI RX Scaling Button and Scaling Modes................. 59 Detailed NetLinx (Link/Act and Status) LED Behavior ............61 DXLink TX/RX in a Multiple-Stage Switching System ............62 Network Configuration..................63 Overview ..........................63 Factory Default Parameters....................65 Device IDs.......................... - Page 4 Preparing for IRL File Transfers in an Endpoint System ............74 Preparing for IRL File Transfers in an Extender System ............75 Transferring IRL Files ......................76 NetLinx Programming of DXLink Transmitters and Receivers ......79 Overview ..........................79 Device Numbering and Ports....................79 CHANNELs ...........................
- Page 5 Overview Virtual NetLinx Master (Masterless)..............121 Setting PC to Static IP Address ................... 121 Creating a Virtual Master ....................123 Preparing a DXLink Module to Work with a Virtual Master..........125 Appendix D – Cable Details and Pinout Info ...........127 Overview ..........................127 HDMI Connector Cable Pinout ....................
- Page 6 Contents Instruction Manual – DXLink™ Twisted Pair Transmitters/Receiver...
-
Page 7: Esd Warning
Grounding straps, conductive smocks, and conductive work mats are specifically designed for this purpose. Anyone performing field maintenance on AMX DXLink equipment should use an appropriate ESD field service kit complete with at least a dissipative work mat with a ground cord and a UL listed adjustable wrist strap with another ground cord. -
Page 8: Important Safety Information And Instructions
There are no user serviceable parts inside an AMX product; service should only be done by qualified personnel. If you see smoke or smell a strange odor coming from your AMX product, turn it off immediately and call technical support. -
Page 9: Information Et Directives De Sécurité Importantes
Veillez à ce que la prise de courant soit proche de l’appareil et facile d’accès. Veillez à ce que votre appareil AMX soit installé sur une surface stable ou qu’il y soit fermement maintenu. Fermez toutes les composantes de l’équipement avant de relier des pièces, à moins ... -
Page 10: Notices
No patent liability is assumed with respect to the use of information contained herein. Liability Notice While every precaution has been taken in the preparation of this publication, AMX assumes no responsibility for error or omissions. No liability is assumed for damages resulting from the use of the information contained herein. - Page 11 Lithium Batteries Notice Switzerland requires the following notice for products equipped with lithium batteries. This notice is not applicable for all AMX equipment. Upon shipment of the products to Switzerland, the requirements of the most up-to-date Swiss Ordinance Annex 2.15 of SR 814.81 will be met including provision of the necessary markings, documents, and annual reports relative to the disposal of the batteries to the Swiss Authorities.
- Page 12 Notices Instruction Manual – DXLink™ Twisted Pair Transmitters/Receiver...
-
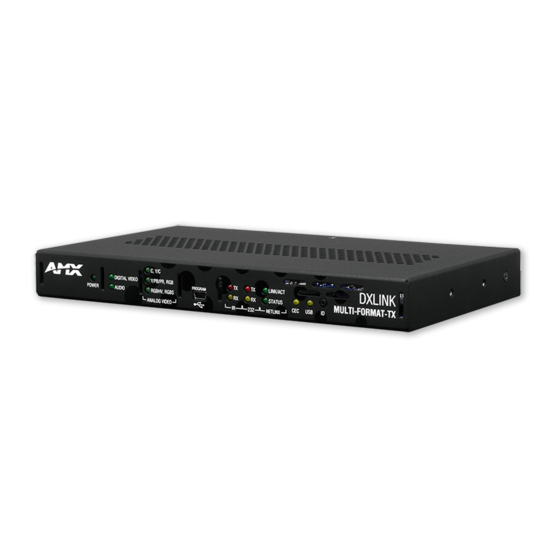
Page 13: Product Overview And Specifications
HDMI-RX AVB-RX-DXLINK-HDMI, DXLINK HDMI HDCP RX W SCALER * The DXLink HDMI TX Module has been discontinued. This manual contains information on it for support. Compatibility Note: The Transmitters and the Receiver listed above are compatible with a number of other DXLink products (see the section “Product Compatibility Tables” on page 8). All of the Transmitters are compatible with the Receiver. -
Page 14: Product Compatibility Tables
The audio can be either digital audio embedded with the HDMI signal or analog stereo audio. Either analog or digital video is transmitted out of the DXLink output. The active video selection is made using one of two methods: 1) Automatic, which selects digital video as the priority video input or analog video when no digital video is present. -
Page 15: Dxlink Transmitter And Receiver Features
The Wallplate TX and Decor Wallplate TX receive power from the switcher or can be used with a DXLink power injector (for power budget information, see page 38). The modules are compatible with all V Style, versatile mounting options including rack, ... -
Page 16: Common Applications
Product Overview and Specifications Common Applications DXLink Transmitters and Receivers are designed to send audio, video, and control to a remote display across the room, on the other side of the house, or to a classroom down the hall. The installation’s requirements dictate the system setup which generally takes one of the following three forms. - Page 17 Note: For detailed behavior of the NetLinx Link/Act and Status LEDs on the module’s front, see page 61. For detailed behavior of the RJ-45 connector LEDs on the module’s rear, see page 48. Instruction Manual – DXLink™ Twisted Pair Transmitters/Receiver...
- Page 18 LED (S = Status) indicates unit status – DXLink LEDs (bottom) Left yellow LED indicates HDCP status; right green LED indicates that a valid DXLink connection has been established. Instruction Manual – DXLink™ Twisted Pair Transmitters/Receiver...
- Page 19 (device only) and provides additional functionality, such as placing the device in Static IP Mode or DHCP Mode. – DXLink LEDs HDCP LED indicates HDCP status; DXLink LED indicates that a valid DXLink connection has been established. – NetLinx LEDs Status LED indicates unit status;...
- Page 20 The Wallplate TX and Decor Wallplate TX have been configured* to pass analog audio as the audio source being embedded on the DXLink output connection (coupled with either the analog or digital video input path); for SEND_COMMAND information, see page 90...
- Page 21 Note: When a digital video source cable is plugged into the HDMI connector, the Video LEDs on the front of the Multi-Format TX or HDMI TX and Receiver turn green to show that video is present through the system. Instruction Manual – DXLink™ Twisted Pair Transmitters/Receiver...
- Page 22 The DXLink (RJ-45) connectors transport digital video, embedded audio, Ethernet, and bidirectional control over twisted pair cable to DXLink devices or boards (or an HDMI RX), including digitally transcoded analog video signals. The DXLink path supports HDCP. The DXLink line also supports power from an Enova DGX Switcher and from some Enova DVX Solutions to power the module.
- Page 23 Located on the rear of the Wallplate TX are a DXLink (RJ-45) connector and a DIP switch. The Decor Wallplate TX also has its DXLink connector on the rear, but its DIP switch is on the front (see page 21). The front can be covered with a customer provided standard decor style front cover plate.
-
Page 24: Receiver
ID Pushbutton – Places the HDMI RX in ID Mode for setting the NetLinx ID (device only) and provides additional functionality, such as placing the device in Static IP Mode or DHCP Mode. Instruction Manual – DXLink™ Twisted Pair Transmitters/Receiver... - Page 25 The power receptacle is a 2.1 mm DC jack for connecting power. Power can come from a locally connected DC supply of 12 V. An automatically adjusting universal 110/220 IEC power supply is ® provided. The power supply is ENERGY STAR qualified to ensure maximum efficiency and savings. Instruction Manual – DXLink™ Twisted Pair Transmitters/Receiver...
- Page 26 Product Overview and Specifications Note: The HDMI RX can also be powered through the DXLink connector when it is attached to a DXLink Output Board in an Enova DGX Switcher. We recommend calculating the power budget for the switcher to maintain the redundancy of its power supplies (see page 38).
-
Page 27: Common Features/Functionality
Tip: For easiest access to the DIP switch toggles, we recommend setting them before installation. A four-toggle DIP switch is on the bottom of the DXLink Modules, on the rear of the Wallplate TX, and on the front of the Decor Wallplate TX (the front can be covered with a customer provided standard decor style front cover plate). - Page 28 USB device. This port is considered the Host port, which is used in conjunction with the USB-A port on the rear of the HDMI RX. As the Host port, it is connected to a PC and passes through information via the DXLink connection to the HDMI Receiver. HDMI Receiver...
-
Page 29: Quick Reference Tables For Modes
Product Overview and Specifications Quick Reference Tables for Modes The modes listed in the following three tables are those supported by DXLink Transmitters and Receivers. The Quick Reference Tables are intended to help users navigate the many modes available for system setup and use. For complete information on any of the modes listed, see the relevant sections or chapter referenced at the end of the Description. - Page 30 • UDP; the Master is specified via URL. NDP Mode (Default): • UDP; utilizes the NDP binding process to assign the DXLink Module (the physical device) to a Master (or Virtual Master) via NetLinx Studio. Once bound, communications are conducted via UDP.
-
Page 31: Dxlink Transmitters And Receiver Specifications
• 0.6 A @ 115 VAC max. DXLink Power • TX and RX Modules: Power can also be supplied by a DXLink Power sourcing device such as an Enova DGX 8/16/32 Digital Media Switcher or compatible Enova DVX All-In-One Presentation Switcher (e.g., -3155HD) or PS-POE-AT-TC High Power PoE... - Page 32 * For more details and helpful cabling information, reference the white paper titled “Cabling for Success with DXLink” available at www.amx.com or contact your AMX representative. AMX reserves the right to modify its products and their specifications without notice. Instruction Manual – DXLink™ Twisted Pair Transmitters/Receiver...
- Page 33 HDMI RX (Transmitters require firmware v1.2.40 or above; Receivers require firmware v1.0.80 or above). AMX does not support the use of power supplies other than the one provided or power injectors other than those listed as they may potentially damage DXLink equipment.
- Page 34 2 CH L-PCM, 6 CH L-PCM, 8 CH L-PCM ^ Only supported when the DXLink RX scaler is in Bypass mode and the format is 1080p60 or less. ^^ Input signal support for YCbCr 4:4:4 and 4:2:2; output color-space is converted to RGB 4:4:4.
- Page 35 1.0 Vpp differential Output Re-clocking +5 V DDC Pin Output 50 mA when using DXLink power, 500 mA when using local 12 V supply +5 V USB Output 150 mA when using DXLink power, 500 mA when using local 12 V supply...
- Page 36 * Interlaced video is supported into the Transmitters; progressive is only supported out of the Receiver unless it is in Scaler Bypass mode. AMX reserves the right to modify its products and their specifications without notice. Instruction Manual – DXLink™ Twisted Pair Transmitters/Receiver...
- Page 37 3.5 mm mini-stereo jack (analog stereo) * S/PDIF specifications do not apply to the Wallplate TX or to the Decor Wallplate TX. AMX reserves the right to modify its products and their specifications without notice. Instruction Manual – DXLink™ Twisted Pair Transmitters/Receiver...
- Page 38 Product Overview and Specifications Instruction Manual – DXLink™ Twisted Pair Transmitters/Receiver...
-
Page 39: Installation And Setup
Enova DGX Digital Media Switcher or Enova DVX Solution via a DXLink line). When using DXLink Power from a switcher, we recommend wiring a technical ground for the ungrounded sources/destinations with respect to the DXLink Transmitters/Receivers and switcher (see page 45). -
Page 40: Setup Information
Setup Requirements A PC with NetLinx Studio (v3.3 or later) installed. An understanding of which DXLink Mode the system will be used in (see below and page 38). An understanding of the DIP switch settings (see page 41). - Page 41 In a system where DXLink Transmitters and Receivers are used in conjunction with a switcher (e.g., the Enova DGX 16), the cable runs from a Transmitter to a DXLink Input Board and from a Receiver to DXLink Output Board can each be up to 328 feet (100 m).
- Page 42 The following table contains options for using DXLink Transmitters and Receivers in conjunction with DXLink Input and Output connectors on Enova DVX Solutions. Note that on the input side, four Transmitter options are available. The Transmitters used with the inputs can be of the same type or different, depending on the installation needs.
- Page 43 Endpoint Mode (Standalone): Example of Typical System Setup A standalone DXLink TX/RX pair are connected directly to each other but, in addition, either the TX or RX is connected to a NetLinx Central Controller via a LAN or directly to the Controller.
- Page 44 In Extender systems with a Wallplate TX or Decor Wallplate TX, power can be provided to the units via the DXLink line by connecting a DXLink power injector to the Wallplate and using either the desktop power supply or another DXLink power injector with the HDMI RX.
- Page 45 DXLink Transmitter and Receiver Modules with local power (desktop power supply) or remote power (DXLink power injector), which always overrides power from the switcher. If that power source is turned off, the DXLink Transmitters and Receivers will reboot and then start drawing power from the switcher.
-
Page 46: Avoiding Network (Ethernet) Loops
Decor Wallplate TX (right in FIG. 19). Note: DIP switch settings on any of these DXLink products are read only on reboot. After the settings are read, any adjustments of the toggles will not be implemented and will not affect the system. - Page 47 40. Setting DIP Switch #2 to Set the DXLink Mode The #2 Toggle can be set to automatically or manually select the DXLink Mode (to either Extender or Endpoint) for a given Transmitter/Receiver Module or pair. Note: #2 Toggle settings do not apply to Wallplate TX & Decor Wallplate TX – leave #2 Toggle OFF.
- Page 48 ON to place the modules in Endpoint Mode, and #3 Toggle needs to be ON to enable network connectivity. Note: On either setting, the DXLink Mode may be set via SEND_COMMANDs (see page 98). When #2 Toggle is set to the OFF position, the auto-discovery process will overwrite the DXLink Mode setting.
- Page 49 Ethernet pass through to networked device* * Connect the ICS LAN 10/100 port of the DXLink unit to the network device (e.g., laptop, IP controlled projector, AMX ICSLan EXB Device). In a standalone setup, connect the ICS LAN 10/100 port of the other DXLink unit to the network.
- Page 50 Decor Wallplate TX – The Decor Wallplate TX mounts in a standard US double-gang back box. Standard decor style cover plates are customer provided to allow matching the individual decor of an environment or matching other standard decor covers in a room/area. Instruction Manual – DXLink™ Twisted Pair Transmitters/Receiver...
- Page 51 Attaching a Ground Wire to a Common Earthed Ground Connect the running end of the ground wire (fixed end attached to a DXLink Transmitter or Receiver) to a common earthed ground (ideally, referenced to the Enova DGX Switcher or Enova DVX Solution).
- Page 52 The Wallplate TX and Decor Wallplate TX each have a designated ground screw on the rear; look for the grounding symbol. If the DXLink Wallplate does not have a designated screw, use the screw directly above the DXLink (RJ-45) connector on the rear for grounding.
- Page 53 Installation and Setup Ensure the ground wire is positioned so that it does not interfere with the DXLink connector. FIG. 25 Ground wire positioned so it does not interfere with DXLink connector (Wallplate TX shown) Attach the ground wire to a common earthed ground (see page 45).
- Page 54 The pinout in FIG. 26 is for twisted pair cable that connects to the ICS LAN 10/100 connector or to the DXLink connector on the Transmitters and Receivers. Use either the T568A or T568B pinout specification for termination of the twisted pair cable used between the modules in a standalone setup or between Transmitters and Receivers and an enclosure in a full system.
- Page 55 The following information applies to the LEDs located on the DXLink (RJ-45) connectors on the rear of all DXLink Transmitters and Receivers. It also applies to the DXLink LEDs on the bottom edge of the Wallplate TX and the DXLink LEDs on the front of the Decor Wallplate TX.
- Page 56 The audio selected by the Transmitters is embedded on the HDMI signal (if not already embedded) and sent to the switcher (or to an HDMI RX in a standalone pair) via the DXLink cable. * Audio precedence as specified in the table above is applicable when the AUDIN_FORMAT_AUTO command is set to ENABLE;...
-
Page 57: Wallplate Transmitters - Attaching Signal/Transport Cables
Attach bracket (arrows inside point up) to double-gang back box per illustrations on page 44. d. DXLink connector – Attach a twisted pair cable from the DXLink Input Board on the switcher through the mounting bracket to the DXLink (RJ-45) connector on the rear of the unit. - Page 58 Wallplate TX and Decor Wallplate TX – Indicator LEDs The Wallplate TX and Decor Wallplate TX receive power from a switcher through the DXLink (RJ-45) connection to a DXLink Input Board in the switcher. They can also receive power via either PDXL-2 (FG1090-170) or PS-POE-AT-TC (FG423-84).
-
Page 59: Multi-Format Tx Or Hdmi Tx - Attaching Signal, Transport, And Control Cables
(for pinouts for VGA, component, S-Video, and composite, see page 128). HDMI In connector – Attach the HDMI cable from the source device to the HDMI In connector.* DXLink connector – Attach a twisted pair cable to the DXLink connector for UTP transport to the switcher (or HDMI RX). -
Page 60: Multi-Format Tx Or Hdmi Tx - Applying Power
Remote power can only be provided via a switcher or a DXLink power injector. AMX does not support the use of any other power supplies or power injectors as these may potentially damage the DXLink equipment. -
Page 61: Hdmi Rx - Attaching Signal And Control Cables
FIG. 32 Attach signal and control cables to HDMI RX DXLink (input) connector – Attach a twisted pair cable from the switcher (or Multi-Format TX or HDMI TX) to the DXLink connector on the HDMI RX. HDMI Out connector – Attach the HDMI cable that goes to the destination device.* ICS LAN 10/100 connector (optional) –... -
Page 62: Hdmi Rx - Applying Power
Check the “Detailed NetLinx (Link/Act and Status) LED Behavior” section on page 61. Try the suggestions in the “Troubleshooting” chapter (see page 101). For information on restoring the module’s default settings on power up, see page 68. Instruction Manual – DXLink™ Twisted Pair Transmitters/Receiver... -
Page 63: Serial Data Transfer And Ir Flow Control
Serial Data Transfer and IR Flow Control The illustration in FIG. 33 shows the bidirectional serial data transfer and IR flow control when DXLink Modules are used in Endpoint Mode with an Enova Digital Media Switcher. The switcher has an integrated NetLinx Central Control Processor which provides native AMX control at each remote location fed by a DXLink Transmitter or Receiver. -
Page 64: Optional: Multi-Format Tx, Hdmi Tx, And Hdmi Rx - Ir Control
Extender Mode (the #2 Toggle must be set to OFF). When a Transmitter and Receiver are used with a switcher, the integrated Master handles the SEND_COMMANDs (the #2 Toggle on the DIP switch must be set to ON, which places the DXLink Mode in Endpoint for use with the switcher). -
Page 65: Id Pushbutton Functions
EDID. On power up without a valid EDID, the default preferred output resolution presented will be 1280x1024 @ 60 Hz until a different EDID is detected. Instruction Manual – DXLink™ Twisted Pair Transmitters/Receiver... - Page 66 DXLink Output Board; the DXLink Output Board sends the scaling resolution data to the HDMI RX. Note: The scaling mode (and the aspect ratio) can also be set on the DXLink Output Board using DGX Configuration Software. The data is persisted on the board and sent to the HDMI RX.
-
Page 67: Detailed Netlinx (Link/Act And Status) Led Behavior
Slow blink (1 Hz) Slow blink (1 Hz) not long enough for IP mode change. After boot: ID Pushbutton held down long Fast blink, then OFF Fast blink, then OFF enough for IP mode change. Instruction Manual – DXLink™ Twisted Pair Transmitters/Receiver... -
Page 68: Dxlink Tx/Rx In A Multiple-Stage Switching System
only video and audio will be passed through the DXLink connection. When a DXLink input or output on one switching system determines that it is connected to a DXLink input or output on another switching system, the DXLink port will automatically disable all Ethernet, power, and control on that connection port so that the only things passed down the DXLink line are the video and audio signals. -
Page 69: Network Configuration
Transmitter or Receiver can establish a network connection (see page 42). When #3 Toggle is ON, the DXLink Modules are automatically placed in DHCP Mode, but they can be configured for either of the IP Addressing Modes via two methods: The front-panel ID Pushbutton (see page 66) ... - Page 70 169.254.2.2. That address will be probed, and if unclaimed will be used by the DXLink Module. If 169.254.2.2 is already claimed, the DXLink Module will choose a random address within ...
-
Page 71: Factory Default Parameters
HDMI (on Port 7), VGA (on Port 8) VIDIN_RES_AUTO ENABLE VIDIN_RES_REF 1280x1024,60 VIDIN_PREF_EDID 1920x1080p,60 VIDIN_EDID MIRROR OUT 1 (on Port 7), ALL RESOLUTIONS (on Port 8) VIDIN_HDCP ENABLE VIDIN_VSHIFT VIDIN_HSHIFT VIDIN_PHASE AUDIN_FORMAT_AUTO ENABLE AUDIN_FORMAT Analog Instruction Manual – DXLink™ Twisted Pair Transmitters/Receiver... -
Page 72: Device Ids
Toggling Between IP Addressing Modes: DHCP and Static IP DXLink Transmitters and Receivers support both DHCP and static IP addresses. When the #3 Toggle is ON (see page 42), the modules automatically use DHCP with link-local fallback. However, you can use a static IP address which can be set via a Telnet command (SET IP), or you can use the factory default static IP address. - Page 73 Master). The device must first be placed in ID Mode in NetLinx Studio or the momentary press will be ignored. Note: The latest version of NetLinx Studio is available to download and install from www.amx.com. Refer to the NetLinx Studio online help for instructions on using the application.
- Page 74 Instructions for the modules are given first followed by the instructions for the Wallplate TX and the Decor Wallplate TX, which receive power over DXLink from the switcher. Important: If a Transmitter or Receiver Module is receiving power from a switcher, disconnect the DXLink connector on the module and reattach to apply power.
- Page 75 Press and hold the ID Pushbutton while plugging in the power connector (if the power source is a switcher, plug in the RJ-45 connector into the DXLink port instead). Start counting when the NetLinx LEDs begin to flash in unison, not when the power connector is inserted.
- Page 76 * For a complete list of factory parameters, see the table on page 65. Tip: To monitor the ID Pushbutton boot state of a module, see the “ID Pushbutton Boot and NetLinx LED Behavior” table on the next page. Instruction Manual – DXLink™ Twisted Pair Transmitters/Receiver...
- Page 77 Slow blink (1 Hz) Slow blink (1 Hz) not long enough for IP mode change After boot: ID Pushbutton held down long Fast blink, then OFF Fast blink, then OFF enough for IP mode change Instruction Manual – DXLink™ Twisted Pair Transmitters/Receiver...
- Page 78 Network Configuration Instruction Manual – DXLink™ Twisted Pair Transmitters/Receiver...
-
Page 79: Irl File Transfers
Overview The NetLinx Studio software application (available for free download from www.amx.com) provides the ability to transfer IR Library files to NetLinx devices such as DXLink Transmitters and Receivers. Endpoint System (with a Switcher) When a Transmitter and/or a Receiver are being used in conjunction with a switcher as an endpoint system, the switcher’s integrated Master is used for the IRL file transfer. -
Page 80: Preparing For Irl File Transfers In An Endpoint System
(e.g., from the LAN 100/1000 port on an Enova DGX 32 to a LAN). b. Verify that the target Transmitter or Receiver is connected via its DXLink connector to a DXLink Input or Output Board (respectively) on the switcher. -
Page 81: Preparing For Irl File Transfers In An Extender System
NetLinx Studio open to the OnLine Tree when done). b. Apply power to the DXLink Module and set it to Static IP Mode.* The default static IP address is 192.168.1.2. (Note that when the DXLink Module is in Static IP Mode, the Link/Act LED will be OFF and the Status LED will be ON.) -
Page 82: Transferring Irl Files
IRL File Transfers Transferring IRL Files The File Transfer tool in NetLinx Studio is used to map IRL files to DXLink Transmitters and Receivers. The instructions below assume that the preparations on the previous pages for either an endpoint system or an extender system have been completed. - Page 83 If the device’s assigned device number has been changed, use the OnLine Tree to determine it. 9. Click OK to return to the Select Files for File Transfer dialog box. The selected IRL file and its mapping information are indicated in the File and Mapping lists. Instruction Manual – DXLink™ Twisted Pair Transmitters/Receiver...
- Page 84 11. Click Send to transfer the file to the Transmitter or Receiver that the file is mapped to. Additional Documentation For additional information on using NetLinx Studio, refer to the Operation/Reference Guide – NetLinx Studio v3.3 and the WebConsole & Programming Guide – NetLinx Integrated Controllers (available at www.amx.com). Instruction Manual – DXLink™ Twisted Pair Transmitters/Receiver...
-
Page 85: Netlinx Programming Of Dxlink Transmitters And Receivers
Note: For a listing of all supported Telnet commands, see page 111. Device Numbering and Ports Each DXLink Transmitter and Receiver has its own Device Number (which is assigned when the unit is bound to a Master) and the following ports. - Page 86 Port 7 - Audio/Video Input FIG. 39 NetLinx Studio OnLine Tree - Ports 1 through 7 on a DXLink HDMI Transmitter and Receiver Note: For additional information on using NetLinx Studio, refer to the “Operation/Reference Guide – NetLinx Studio v3.3” and the “WebConsole & Programming Guide – NetLinx Integrated Controllers”...
-
Page 87: Channels
NetLinx Programming of DXLink Transmitters and Receivers CHANNELs Channel Function This channel On indicates that the DXLink Module has a valid UTP (twisted pair cable) connection to a switcher with an integrated Master. If the channel is Off, the DXLink Module is incorrectly connected. - Page 88 NetLinx Programming of DXLink Transmitters and Receivers Video SEND_COMMANDs (Receivers), continued ?VIDOUT_RES Syntax: Requests the resolution and SEND_COMMAND <DEV>,"'?VIDOUT_RES'" refresh rate of the video Variables: through the Receiver. • horizontal = An integer value representing the horizontal. Note: If the Scaling Mode is •...
- Page 89 NetLinx Programming of DXLink Transmitters and Receivers Video SEND_COMMANDs (Receivers), continued ?VIDOUT_MUTE Syntax: Requests the setting for the SEND_COMMAND <DEV>,"'?VIDOUT_MUTE'" Mute preference applied to Example: the image from the Receiver SEND_COMMAND dvRX,"'?VIDOUT_MUTE'" (Enable or Disable). Returns a COMMAND of the form: VIDOUT_MUTE-<ENABLE|DISABLE>...
-
Page 90: Dxlink Receiver Audio Send_Commands
NetLinx Programming of DXLink Transmitters and Receivers DXLink Receiver Audio SEND_COMMANDs DXLink Receiver Audio SEND_COMMANDs are sent to Port 6. Audio SEND_COMMANDs (Receivers) Command Description ?AUDOUT_DELAY Syntax: Requests the audio delay SEND_COMMAND <DEV>,"'?AUDOUT_DELAY'" setting for the Receiver. Example: SEND_COMMAND dvRX,"'?AUDOUT_DELAY'"... -
Page 91: Dxlink Transmitter Video Send_Commands
NetLinx Programming of DXLink Transmitters and Receivers DXLink Transmitter Video SEND_COMMANDs DXLink Transmitter Video SEND_COMMANDs are sent to Port 7 unless otherwise noted. Note: All text is based on a Unicode index. Video SEND_COMMANDs (Transmitters) Command Description ?VIDIN_AUTO_SELECT Important: This command must be sent to Port 1. - Page 92 NetLinx Programming of DXLink Transmitters and Receivers Video SEND_COMMANDs (Transmitters), continued Video SEND_COMMANDs (Transmitters), continued ?VIDIN_FORMAT Note: Send to Port 7 or Port 8. Requests the video format on the Syntax: Transmitter. SEND_COMMAND <DEV>,"'?VIDIN_FORMAT'" Note: All DXLink Transmitters Variable: except the HDMI TX support...
- Page 93 * “USER EDID 1” must be written to the TX using DGX Configuration Software (see page 147). ** The HDMI port mirrors downstream EDID of the connected DXLink device. Tip: For troubleshooting purposes, “MIRROR OUT 1” can be sent to Port 7 of the TX (or Port 6 of the RX), which effectively acts like a hotplug and refreshes the EDID.
- Page 94 NetLinx Programming of DXLink Transmitters and Receivers Video SEND_COMMANDs (Transmitters), continued ?VIDIN_HDCP Important: Send to Port 7. Syntax: Requests the video HDCP compliance of the video input SEND_COMMAND <DEV>,"'?VIDIN_HDCP'" port addressed by the D:P:S. Example: SEND_COMMAND dvTX,"'?VIDIN_HDCP'" Returns a COMMAND of the form: VIDIN_HDCP-<ENABLE|DISABLE>...
- Page 95 NetLinx Programming of DXLink Transmitters and Receivers Video SEND_COMMANDs (Transmitters), continued VIDIN_HSHIFT Important: Send to Port 8. Sets the horizontal shift value Syntax: of the analog video input port SEND_COMMAND <DEV>,"'VIDIN_HSHIFT-<value>'" addressed by the D:P:S. Variables: Note: This command applies value = -50.
-
Page 96: Dxlink Transmitter Audio Send_Commands
NetLinx Programming of DXLink Transmitters and Receivers DXLink Transmitter Audio SEND_COMMANDs DXLink Transmitter Audio SEND_COMMANDs are sent to Port 7. Audio SEND_COMMANDs (Transmitters) Command Description ?AUDIN_FORMAT_AUTO Syntax: Requests the setting (Enable SEND_COMMAND <DEV>,"'?AUDIN_FORMAT_AUTO'" or Disable) for automatically Example: detecting the audio source SEND_COMMAND dvTX,"'?AUDIN_FORMAT_AUTO'"... -
Page 97: Ir Send_Commands
NetLinx Programming of DXLink Transmitters and Receivers IR SEND_COMMANDs On the DXLink Transmitters and Receiver Modules, IR CHANNELS and SEND_COMMANDs are sent to Port 3 (IR output). IR CHANNELs Channel Function 1-255 Generate the IR or serial command assigned to that channel. - Page 98 NetLinx Programming of DXLink Transmitters and Receivers IR SEND_COMMANDs (Transmitters and Receivers), continued Command Description Pulse and Wait times can be set with the 'CTON' and 'CTOF' commands. Halt and clear all active or Syntax: buffered IR commands, SEND_COMMAND <DEV>,"'CP',<code>"...
- Page 99 NetLinx Programming of DXLink Transmitters and Receivers IR SEND_COMMANDs (Transmitters and Receivers), continued SET MODE Syntax: Set an IR port to either IR, SEND_COMMAND <DEV>,"'SET MODE',<mode>" Serial, or Data mode. Variable: mode = • IR (standard IR output with carrier) •...
- Page 100 NetLinx Programming of DXLink Transmitters and Receivers IR SEND_COMMANDs (Transmitters and Receivers), continued XCHM Syntax: Changes the IR output SEND_COMMAND <DEV>,"'XCHM <extended channel mode>'" pattern for the 'XCH' Send Variable: Command. extended channel mode = 0 to 4. Example: SEND_COMMAND IR_1,"'XCHM 3'"...
-
Page 101: Serial Send_Commands
NetLinx Programming of DXLink Transmitters and Receivers Serial SEND_COMMANDs On the DXLink Modules, SERIAL SEND_COMMANDs are sent to Port 1. Serial SEND_COMMANDs (Transmitters and Receivers) Command Description B9MOFF This command works in conjunction with the 'B9MON' command. Set the port’s communication •... - Page 102 NetLinx Programming of DXLink Transmitters and Receivers Serial SEND_COMMANDs (Transmitters and Receivers), continued GET BAUD The port sends the parameters to the device that requested the information. Get the RS-232 (serial) Syntax: port’s current communication SEND_COMMAND <DEV>,"'GET BAUD'" parameters. Example: SEND_COMMAND dvRXRS232,"'GET BAUD'"...
-
Page 103: Common Dxlink Transmitter / Receiver Send_Commands
NetLinx Programming of DXLink Transmitters and Receivers Common DXLink Transmitter / Receiver SEND_COMMANDs Common NetLinx SEND_COMMANDs for the DXLink Transmitters and Receivers are provided in the following table. These commands can be sent to any port (#3 Toggle must be set to ON). -
Page 104: Dxlink System Send_Commands
NetLinx Programming of DXLink Transmitters and Receivers DXLink System SEND_COMMANDs DXLink System SEND_COMMANDs are sent to Port 6 or 7 on the Transmitters or Receivers. DXLink System SEND_COMMANDs (Transmitters and Receivers) Command Description ?DXLINK Syntax: Requests the current mode for the TX SEND_COMMAND <DEV>,"'?DXLINK'"... -
Page 105: Send_String Escape Sequences
NetLinx Programming of DXLink Transmitters and Receivers SEND_STRING Escape Sequences The DXLink Modules support several special SEND_STRING escape sequences. If any of the character combinations listed below are found anywhere within a SEND_STRING program instruction, they will be treated as a command and not the literal characters. -
Page 106: Enova Dvx Switchers - Dxlink Send_Commands
NetLinx Programming of DXLink Transmitters and Receivers Enova DVX Switchers – DXLink SEND_COMMANDs The following table contains two DXLink SEND_COMMANDs that are specifically for Enova DVX Switchers. These commands persist during a power cycle, on reboot, or from a low power setting. -
Page 107: Troubleshooting
Additional Resources for Troubleshooting Endpoint Systems Enova DGX Digital Media Switchers When the DXLink units are used in conjunction with an Enova DGX Switcher, we suggest checking the troubleshooting information in that product’s Instruction Manual. Enova DVX Solutions... -
Page 108: Determining Hdcp Compliance
Troubleshooting Determining HDCP Compliance A dark red or an orange screen on an output display is the visual cue from DXLink devices that the display device cannot display the HDCP compliant signal from the source. Power Issues Upon power up, the Power indicator LED on the front of the DXLink units illuminates solid green. -
Page 109: Dxlink Connection Issues
DXLink LED Patterns When Connection is Failing If the green / yellow DXLink LEDs on a unit do not have one of the normal patterns as stated in the table above, check the patterns in the table below and then check the items listed in the corresponding Troubleshooting column. -
Page 110: Network Setup Issues
Troubleshooting Network Setup Issues The instructions below can be used for first time setup of DXLink Modules on a network with no NetLinx Master (integrated or standalone). Note: Before setting up the network, we recommend plugging all required Ethernet cables into the network before applying power to the DXLink Modules. -
Page 111: Appendix A - Upgrading The Firmware
The NetLinx Studio software application (available for free download from www.amx.com) provides the ability to transfer KIT files to NetLinx devices such as DXLink Transmitters and Receivers. The firmware on the Transmitters and Receiver can be upgraded in the field. -
Page 112: Preparing For Kit File Transfers In An Endpoint System
(e.g., from the LAN 100/1000 port on an Enova DGX 32 to a LAN). b. Verify that the target Transmitter or Receiver is connected via its DXLink connector to a DXLink Input or Output Board (respectively) on the switcher. - Page 113 Right-click in the workspace and select Refresh System OnLine Tree. The module will appear in the OnLine Tree and locate the DXLink Module and the virtual device ID assigned to it (32002 in the example). For the Device Number location, see FIG. 40 on page 105.
-
Page 114: Important Upgrade Information
Receiver and attempt to upgrade the firmware again, as the module is in an unknown state and cannot be guaranteed to be operational. Firmware Versions The following table contains firmware version information for the DXLink units. DXLink Firmware Versions Applies to... -
Page 115: Transferring Kit Files
When the process is complete, cycle power using the new image on the DXLink Module: a. Unplug the desktop power supply from the AC power source and plug it back in, b. If the power source is the switcher, unplug the RJ-45 connector from the DXLink port on the module. - Page 116 Appendix A – Upgrading the Firmware Instruction Manual – DXLink™ Twisted Pair Transmitters/Receiver...
-
Page 117: Appendix B - Telnet (Terminal) Commands
Welcome Banner with and without Security Enabled: Without Telnet security enabled, a session will begin with a welcome banner similar to the following: Welcome to DXLINK-HDMI-RX 0.0.106.0 Copyright AMX LLC 2011 > If Telnet security is enabled, user credentials are required: ... -
Page 118: Telnet Username And Password
Appendix B – Telnet (Terminal) Commands To establish a terminal connection via NetLinx Studio: 1. In the Online Tree, select the DXLink unit and right-click to access the short-cut menu. Select Launch Telnet Window via NetLinx Studio. The Telnet window opens and the welcome banner appears. -
Page 119: Telnet Commands
? or Help Display the commands listed in this table. DEVICE STATUS Displays device status of a specified device, port, system (<D:P:S>). Note: Devices other than the DXLink Transmitter or Receiver itself will be ignored. Example: >device status 32002:1:0 Device Status ------------- Device 32002 AMX LLC,DXLINK-HDMI-RX, 0.0.106.0 contains... - Page 120 Entry 1: 192.168.40.7 Entry 2: 192.168.40.8 Note: When the DXLink Transmitter or Receiver is in DHCP Mode, these are active values, NOT the stored values that only apply to Static IP Mode. Instruction Manual – DXLink™ Twisted Pair Transmitters/Receiver...
- Page 121 The syntax matches the PING application in Windows or Linux. Example: >ping 192.168.29.209 192.168.29.209 is alive. REBOOT Reboots the DXLink Transmitter or Receiver. Example: >REBOOT Rebooting... RENEW DHCP Renews/Releases the current DHCP lease for the DXLink Transmitter or Receiver. Example: >RENEW DHCP Instruction Manual – DXLink™ Twisted Pair Transmitters/Receiver...
- Page 122 • If the user enters a number outside that range, then no change will be made and the DXLink Transmitter or Receiver will issue an error message. • A Device Number of ‘0’ means that the DXLink Transmitter or Receiver will accept the auto-assigned device number from the Master.
- Page 123 Is this correct? Type Y or N and Enter -> y Settings written. Device must be rebooted to enable new settings. Note: DXLink Modules can also be set to Static IP or DHCP Mode via the front panel ID Pushbutton. SET LOCATION Sets the location parameter for NDP.
- Page 124 Displays the message log. Syntax: SHOW LOG <start> • Use <start> to specify the message number to start displaying. • Use <all> to display all messages. SHOW VS100 STATS Displays DXLink transport information. Instruction Manual – DXLink™ Twisted Pair Transmitters/Receiver...
-
Page 125: Master Connection Modes
UDP URL – UDP; the Master is specified via URL. NDP – UDP; this mode utilizes the NDP binding process to assign the DXLink Module (the physical device) to a Master (or Virtual Master) via NetLinx Studio. Once bound, communications are conducted via UDP. -
Page 126: Notes On Specific Telnet Clients
If an “Alt 255” is entered, two of the “255” characters are sent (per the Telnet RAFT). If the code to return to Command mode is entered (Alt 29 which is ^]), the character is not sent, but the Telnet Command Mode is entered. Instruction Manual – DXLink™ Twisted Pair Transmitters/Receiver... -
Page 127: Appendix C - Virtual Netlinx Master
Setting PC to Static IP Address Important: When you change the PC’s settings to a static IP address, the address must be in the same subnet as the DXLink unit (the default static IP address for DXLink Transmitters and Receivers is 192.168.1.2). - Page 128 From the list of “This connection uses the following items,” select Internet Protocol (TCP/IP) and click Properties. The Internet Protocol (TCP/IP) Properties dialog box opens. Internet Protocol Properties dialog box Select “Use the following IP address.” Instruction Manual – DXLink™ Twisted Pair Transmitters/Receiver...
-
Page 129: Creating A Virtual Master
Step 5 back to “Obtain an IP address automatically.” Creating a Virtual Master To create a Virtual Master in NetLinx Studio: Open NetLinx Studio. From the Settings menu, select Master Communication Settings. Click to open the Communication Settings dialog box Instruction Manual – DXLink™ Twisted Pair Transmitters/Receiver... - Page 130 Select the desired IP Address in the Available Connections list (this will be the static IP address that the PC was set to in the previous instructions). Change Master System Number (optional) Select IP Address (PC’s static IP address) Instruction Manual – DXLink™ Twisted Pair Transmitters/Receiver...
-
Page 131: Preparing A Dxlink Module To Work With A Virtual Master
Master at a time because the static IP address is the same for all modules. To place a DXLink Module in Static IP Mode: Connect the DXLink Module via its ICS LAN 10/100 port to the PC acting as a Virtual Master. Set the DIP Switch’s #1, #2, and #3 Toggles to ON. - Page 132 Important: Once you have finished using the Virtual Master – If you disabled a network connection before setting the PC’s static IP address, be sure to disable the Virtual Master’s network connection and enable the original connection. Instruction Manual – DXLink™ Twisted Pair Transmitters/Receiver...
-
Page 133: Appendix D - Cable Details And Pinout Info
Precedence” on page 50. HDMI Connector Cable Pinout HDMI connectors are found on all DXLink units. These connectors are used to pass HDMI or DVI-D signals (using a DVI-to-HDMI cable adapter) from a source device to a DXLink Transmitter or from a DXLink Receiver to a destination device. -
Page 134: Hd-15 Connector Cable Pinout
GND - Green GND - Y GND - Luminance GND - CVBS GND - Blue GND - Pb GND - Chrominance +5 VDC DDC_SDA H Sync V Sync DDC_SCL FIG. 42 HD-15 Connector pins Instruction Manual – DXLink™ Twisted Pair Transmitters/Receiver... -
Page 135: Dvi Pinout For Dvi-To-Hdmi Cable Adapter
+5 VDC in +5 VDC out* Hot-Detect Hot-Detect Data 0- Data 0- Data 0+ Data 0+ CLK+ CLK+ CLK- CLK- *The +5 VDC on output pin 14 supplies a maximum of 55 mA. Instruction Manual – DXLink™ Twisted Pair Transmitters/Receiver... - Page 136 Appendix D – Cable Details and Pinout Info Instruction Manual – DXLink™ Twisted Pair Transmitters/Receiver...
-
Page 137: Appendix E - Supported Input Resolutions
The available pixel display and refresh rates for the input devices connected to the DXLink Transmitters are listed in this appendix. The resolutions in the following tables are supported on the DXLink Transmitters and can be set using a SEND_COMMAND. The horizontal/vertical/refresh information from the Resolution Name (in the first column) can be entered in a SEND_COMMAND (VIDIN_PREF_EDID) to specify the preferred resolution for the VGA video input for the Transmitters. - Page 138 1920x1080p@50 1920 1080 1080p CEA 861 1920x1080@60 1920 1080 VGA only VESA CVT 1920x1080p@60 1920 1080 1080p CEA 861 1920x1200@60 1920 1200 Reduced VESA CVT Blanking Instruction Manual – DXLink™ Twisted Pair Transmitters/Receiver...
- Page 139 SMPTE 274M 1920x1080is@50 1920 1080i_S295M SMPTE 295M 1920x1080i@60 1920 59.9 1080i SMPTE 274M CEA 770.3 1920x1080p@50 1920 1080 1080p50 SMPTE 274M 1920x1080ps@50 1920 1080 1080p_S295M SMPTE 295M 1920x1080p@60 1920 1080 59.9 1080p SMPTE 274M Instruction Manual – DXLink™ Twisted Pair Transmitters/Receiver...
- Page 140 Appendix E – Supported Input Resolutions Instruction Manual – DXLink™ Twisted Pair Transmitters/Receiver...
-
Page 141: Appendix F - Supported Output Resolutions
1200 VESA DMT 1680x1050@60 1680 1050 VESA CVT 1920x1080@60 1920 1080 1080 VESA CVT 1920x1080p@50 1920 1080 1080p CEA 861 1920x1080p@60 1920 1080 1080p CEA 861 1920x1200@60 1920 1200 Reduced VESA CVT-R Blanking Instruction Manual – DXLink™ Twisted Pair Transmitters/Receiver... -
Page 142: Digital Video Output Resolution Support
Digital Video Output Resolution Support Important: The resolutions and timings in the lists in this section can only be set using DGX Configuration Software via the Enova DGX Switcher when the DXLink Receiver is being used directly from a DXLink output board. - Page 143 768x480p@60Hz 800x600p@60Hz 800x600p@120Hz 848x480p@60Hz 960x600p@60Hz 1024x576p@60Hz 1024x640p@60Hz 1024x768p@60Hz 1024x768p@120Hz 1064x600p@60Hz 1152x720p@60Hz 1152x864p@60Hz 1224x768p@60Hz 1280x720p@60Hz 1280x768p@60Hz 1280x768p@120Hz 1280x800p@120Hz 1280x960p@60Hz 1280x1024p@60Hz 1360x768p@60Hz 1360x768p@120Hz 1400x1050p@60Hz 1440x900p@60Hz 1536x960p@60Hz 1600x1000p@60Hz 1600x1200p@60Hz 1680x1050p@60Hz 1704x960p@60Hz 1728x1080p@60Hz 1800x1350p@60Hz 1864x1050p@60Hz 1920x1080p@60Hz 1920x1200p@60Hz Instruction Manual – DXLink™ Twisted Pair Transmitters/Receiver...
- Page 144 1536x960p@50Hz 1024x768p@60Hz 1536x960p@60Hz 1024x768p@75Hz 1536x960p@75Hz 1024x768p@85Hz 1600x1000p@50Hz 1064x600p@50Hz 1600x1000p@60Hz 1064x600p@60Hz 1600x1200p@50Hz 1064x600p@75Hz 1600x1200p@60Hz 1064x600p@85Hz 1680x1050p@50Hz 1152x720p@50Hz 1680x1050p@60Hz 1152x720p@60Hz 1704x960p@50Hz 1152x720p@75Hz 1704x960p@60Hz 1152x720p@85Hz 1152x864p@60Hz 1728x1080p@50Hz 1728x1080p@60Hz 1224x768p@50Hz 1224x768p@60Hz 1864x1050p@50Hz 1224x768p@75Hz 1864x1050p@60Hz 1224x768p@85Hz 1920x1080p@50Hz 1920x1200p@50Hz Instruction Manual – DXLink™ Twisted Pair Transmitters/Receiver...
- Page 145 640x350p@85Hz 640x400p@85Hz 640x480p@60Hz 640x480p@72Hz 640x480p@75Hz 640x480p@85Hz 720x400p@85Hz 800x600p@56Hz 800x600p@60Hz 800x600p@72Hz 800x600p@75Hz 800x600p@85Hz 848x480p@60Hz 1024x768i@43Hz 1024x768p@60Hz 1024x768p@70Hz 1024x768p@75Hz 1024x768p@85Hz 1152x864p@70Hz 1152x864p@75Hz 1152x864p@85Hz 1280x800p@60Hz 1280x960p@60Hz 1280x960p@75Hz 1280x960p@85Hz 1280x1024i@43Hz 1280x1024p@60Hz 1280x1024p@75Hz 1280x1024p@85Hz 1360x768p@60Hz 1366x768p@60Hz 1600x1200i@48Hz 1600x1200p@60Hz Instruction Manual – DXLink™ Twisted Pair Transmitters/Receiver...
- Page 146 Appendix F – Supported Output Resolutions Instruction Manual – DXLink™ Twisted Pair Transmitters/Receiver...
-
Page 147: Appendix G - Ground Wire Attachment
DXLink Modules or DXLink Wallplates with a designated ground location, see page 45. Attaching a Ground Wire to a Common Earthed Ground Connect the running end of the ground wire (fixed end attached to DXLink Module or Wallplate) to a common earthed ground (ideally, referenced to the Enova DGX Switcher). -
Page 148: Attaching A Ground Wire To Module Without Designated Ground
Appendix G - Ground Wire Attachment Attaching a Ground Wire to Module without Designated Ground Earlier model DXLink Transmitter and Receiver Modules without a designated location support chassis ground attachment through the HDMI jackscrew on the rear of the chassis. -
Page 149: Appendix H - Edid Programming
EDID data that is stored on them. Note: The remaining tabbed views in the software do not apply to the DXLink units. Scaling and HDCP settings can be applied via SEND_COMMANDs (see the chapter “NetLinx Programming of DXLink Transmitters and Receivers”... -
Page 150: Dxlink Connection To Pc
Attach the open end of the USB mini-B cable to the PC where the DGX Configuration Software was installed. Apply power to the Transmitter. If power is via the DXLink connection, then apply power to the power sourcing device (i.e., switcher, PDXL-2, or PS-POE-AT-TC). -
Page 151: Edid Programmer View
Appendix H – EDID Programming General Notes for Working with DGX Configuration Software and DXLink TXs When the DXLink Multi-Format TX is connected to a PC running DGX Configuration Software, the following applies: DGX Configuration Software displays the connected Transmitter only. - Page 152 The AMX VGA EDID set consists of a number of common EDID settings (for VGA timing details, see page 131). In most cases, the DXLink Transmitter can be used as is from the factory with no adjustments. The DGX Configuration Software with EDID programming functionality has been provided for cases where a user defined VGA EDID set is desired (this must be a subset of the supported input resolutions shown in Appendix E;...
- Page 153 The instructions that follow tell how to use the EDID Programmer view to write user defined VGA EDID information to the HD-15 input connector on a DXLink Transmitter. User defined VGA EDIDs are currently available from technical support. A library of VGA EDID files will be available on at www.amx.com in conjunction with a future firmware release.
- Page 154 - Schedules and registration for any AMX University course - Travel and hotel information - Your individual certification requirements and progress 3000 RESEARCH DRIVE, RICHARDSON, TX 75082 USA • 800.222.0193 • 469.624.8000 • 469-624-7153 fax • 800.932.6993 technical support • www.amx.com...
Need help?
Do you have a question about the DXLink and is the answer not in the manual?
Questions and answers