Focus FireStore FS-4 Pro User Manual
Portable dte recorders
Hide thumbs
Also See for FOCUS FireStore FS-4 Pro:
- User manual (98 pages) ,
- Product support bulletin (2 pages) ,
- Specifications (2 pages)
Table of Contents
Advertisement
Advertisement
Table of Contents

Related Manuals for Focus FOCUS FireStore FS-4 Pro


Summary of Contents for Focus FOCUS FireStore FS-4 Pro
- Page 1 FS-4 HD and FS-4Pro HD Portable DTE Recorders User Guide MANL-0954-04...
-
Page 3: Legal Notices
LEGAL NOTICES THIS DOCUMENT CONTAINS CONFIDENTIAL AND TRADE SECRET INFORMATION OF FOCUS ENHANCEMENTS AND ITS RECEIPT OR POSSESSION DOES NOT CONVEY ANY RIGHTS TO REPRODUCE OR DISCLOSE ITS CONTENTS, OR TO MANUFACTURE, USE, OR SELL ANYTHING THAT IT MAY DESCRIBE. USE IN WHOLE OR IN PART WITHOUT THE SPECIFIC WRITTEN AUTHORIZATION OF FOCUS ENHANCEMENTS IS STRICTLY FORBIDDEN. - Page 4 9:00 AM to 5:00PM techsupport@como.com +49 4307 - 83 58 58 +49 4307 - 83 58 99 COMO Computer & Motion GmbHA A Focus Enhancements Company Lise-Meitner-Str. 15 24223 Raisdorf / Germany www.focusinfo.com FS-4 HD and FS-4Pro HD Portable DTE Recorders...
-
Page 5: Regulations And Safety
• Consult the dealer or an experienced radio/TV technician for help. FS-4 HD and FS-4Pro HD Portable DTE Recorders Focus Enhancements, Inc. 1370 Dell Avenue Campbell, CA. 95008 Model Number: FS-4 HD and FS-4Pro HD... - Page 6 Symbol Used In the FS-4 HD and FS-4Pro HD Unit This symbol indicates the presence of an uninsulated Dangerous Voltage within the product’s enclosure that may constitute a risk of electric shock to persons. Symbols Used in This Documentation Important Information the User Should Read This symbol indicates information about conditions or actions that could result in damage to the device or data.
- Page 7 Electrical Precautions Do Not Expose to Moisture Do not use this product near water or in an environment where it is exposed to dampness or there is the possibility of it getting wet. Do Not Remove Cover There are No User Serviceable Parts should be done by qualified service personnel.
-
Page 8: Outdoor Antenna Grounding
• Non-Use Period During extended periods when the device is not used, unplug it from the power source and retract the power-cord. Grounding or Polarization • Polarized If this product is equipped with a polarized alternating current line plug (a plug having one blade wider than the other), it will fit into the outlet only one way. -
Page 9: Power Lines
Power Lines Do not locate an outside antenna system in the vicinity of overhead power lines, electric light or power circuits, or where it can fall onto such lines or circuits. When installing an outside antenna system, extreme care should be taken to keep from touching such power lines or circuits as contact with them might be fatal. -
Page 10: Safety Check
Accessories and Replacement Parts Use only attachments and accessories recommended by Focus Enhancements. Use only replacement parts specified by the Focus Enhancements or of comparable quality and characteristics as the original parts. Unauthorized substitution of parts can result in fire, electrical shock, other hazards, and loss of warranty. -
Page 11: Table Of Contents
Introduction DTE Eliminates Pre-edit Processing Unpacking Features FS-4 HD Features FS-4Pro HD Features Quickstart Physical Description and Basic Controls Front Panel Controls LCD Display Function buttons (A, B, C) Power On Button Navigation Buttons Transport Control Buttons Record Back Search Play Forward Search Back Index... - Page 12 Installing a Battery Removing a Battery Charging the Battery Connecting a FS-4 HD to a DV/HD Camcorder Record and Playback with the FS-4 HD Power On the FS-4 HD Select HDD Recorder Mode Select a DV/HD File Format Set Time and Date Record With the FS-4 HD Manual Recording Creating a New File without Dropping Frames 29...
- Page 13 Table of Contents Time Lapse Record HDD Mode Screen Setting Up Master and Slave FS-4 HD Format Screen DV Formats HD Format Screen Setup Screens Date Time Version LCD Light ON, OFF, AUTO Alarm ON, OFF Stop Frame, Gray, No Video EXT CTL OFF, Pause, Frame, File TIME CODE EXT, REC RUN, FREE RUN, REGEN TC SET...
- Page 14 Using a Wired Remote Control Play Screen Play From Screen Control Screen LCD Display Symbols and Text Technical Specifications Physical Description Input/Outputs Power Audio/Video/Timecode Specification DTE File Formats Disk Information Log Files Error Messages Warranty Temperature Compatible Camcorders and Accessories FS-4 HD and FS-4Pro HD Portable DTE Recorders Table of Contents...
-
Page 17: Introduction
Thank you for purchasing this Focus Enhancements portable direct- to-edit ( ) disk recorder. The FS-4 HD and the professional version FS-4Pro HD are the first portable DV/HD disk recorders with DTE technology designed for hand held camcorders in a small, rugged and shock proof chassis. -
Page 18: Unpacking
5. Power cable (international only) 6. Power supply with cable and connector to the FS-4 HD Removable Li-Ion battery pack Missing or Damaged Components If there are missing or damaged items, contact Focus Enhancements Support for assistance. USA Email: support@focusinfo.com USA Telephone: +1 763-398-1658 EMEA Email: techsupport@como.com... -
Page 19: Features
Features FS-4 HD Features All FS-4 HD models offer the following features: • Tapeless acquisition Especially equipped camcorders permit the use of Direct To Edit (DTE) Technology to record directly from a camcorder while shooting and without the need of a tape. •... -
Page 20: Fs-4Pro Hd Features
Introduction • Compact, Lightweight, Rugged Design The FS-4 HD weighs about a pound including the battery and is only 1.5" thick. You can mount the FS-4 HD directly to your camcorder using the optional camera mount kit, or clip the FS-4 HD directly to your belt. - Page 21 • Pinnacle, Avid DV-OMF, and MXF OPatom DV support • Available with a 60GB, 80GB or 100GB hard drive and with equivalent record times of about 4.5, 6, or 7.5 hours respectively. • Free Run and Regen timecode modes • QUICKTIME HD DTE format •...
- Page 22 FS-4 HD and FS-4Pro HD Portable DTE Recorders...
-
Page 23: Quickstart
This section provides the following information necessary for using the FS-4 HD as quickly as possible. Physical Description and Basic Controls ... 8 The FS-4 HD Menu System ... 15 Connecting the FS-4 HD to AC Power ... 19 Installing / Removing the Battery Pack ... 20 Connecting a FS-4 HD to a DV/HD Camcorder ... -
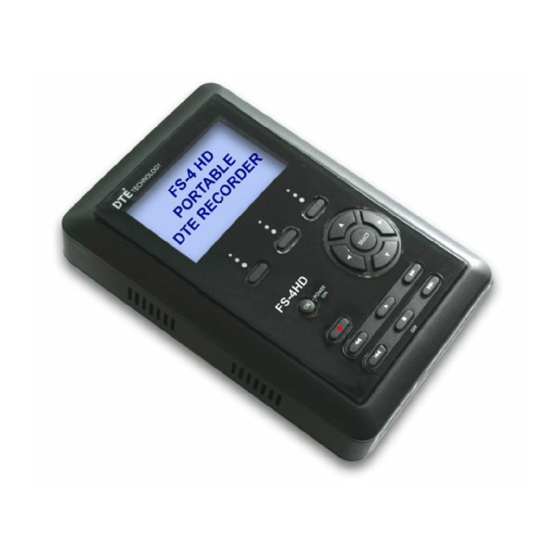
Page 24: Physical Description And Basic Controls
Quickstart Physical Description and Basic Controls Front Panel Controls Function buttons Power ON Record Button LCD Display This is a backlit, 14 character by 7 line dot matrix display. In event of a mild electrical discharge to the unit the LCD could go blank. To correct, hold the SELECT button down for 5 seconds. -
Page 25: Power On Button
Power On Button The Power ON button provides two functions. • Power ON FS-4 HD • Reset FS-4 HD • FS-4 HD first must be powered on. • Hold down the • Power OFF Hold down the During power off, the FS-4 HD beeps, indicating that it is turning off. -
Page 26: Record
Quickstart Record Press this button once when the FS-4 HD is in the FS-4 HD into REC-PAUSE Pressing the Record button while recording, causes the current clip to close and a new clip is created without dropping any frames. This button is the only button that has a red legend on the front panel. -
Page 27: Pause, Stop And Power Off
Pause, Stop and Power OFF While in the Home screen, and in any transport mode, press this button to the FS-4 HD. Press it again to stop the FS-4 HD. Pause Refer to the section, information. To power off the FS-4 HD, hold down the three seconds. -
Page 28: Computer Firewire Connector
Quickstart Status LED States Indicates Power OFF Green Power ON Orange, solid Playback Orange, fluttering Hard drive being accessed during playback. Red, solid Recording Mode Red, blinking Recording Pause Computer FireWire Connector • In/Out: 6-pin IEEE-1394a port x 1 • Asynchronous Data I/O Remote Control, Serial Connector •... -
Page 29: Rear Panel
Rear Panel The rear panel contains the following important items: Fan Intake Vent Do Not Block Side Panel The side panel contains cooling vents as illustrated below. Cooling Vents Do Not Block FS-4 HD and FS-4Pro HD Portable DTE Recorders Quickstart Belt Clip Post Battery... -
Page 30: Bottom Panel
Quickstart Bottom Panel The FS-4 HD bottom panel features a single 2-pin DC power connector. Connect the supplied AC power adapter here. Cooling Vent Cooling Vent Do Not Block Internal Speaker An internal speaker provides alarms and audible feedback. To disable the audible feedback, go to the Settings menu and select the ALARM OFF temperature, and disk capacity alarms are always active. -
Page 31: The Fs-4 Hd Menu System
The FS-4 HD Menu System The FS-4 HD menu system provides access to all the functions available in the unit. Each of the screens below (except the Welcome and Home screens which come up automatically when the unit starts) are accessed by pressing the navigation buttons. - Page 32 Quickstart • Reels FS-4Pro HD only Allows selected clips to be marked for placement in particular Reels Folders. • R0 0 • R1 1 • R2 2 • R3 3 • R4 4 • R5 5 • R6 6 • R7 7 •...
- Page 33 • Setup Contains the controls for setting and reviewing the FS-4 HD configuration: • Set Date (MM/DD/YY) • Set Time (HH:MM:SS) • View Firmware Version • LCDLight ON • LCDLight OFF • LCDLight AUTO • Alarm ON • Alarm OFF •...
- Page 34 Quickstart • DV or HD Formats Following HDD mode is a menu of formats available for the type recorder selected in HDD. DV Recorder shown: • Raw DV • AVI Type1 • AVI Type2 • Canopus AVI • Matrox AVI •...
-
Page 35: Powering The Fs-4 Hd
Powering the FS-4 HD • The FS-4 HD operation without a battery installed. To operate the FS-4 HD without a battery installed, connect the unit to an AC power source. • Before operating the FS-4 HD with battery power. It is first necessary to fully charge the battery. An uncharged battery, typically takes 2-3 hours to charge. -
Page 36: Installing / Removing The Battery Pack
Quickstart Installing / Removing the Battery Pack Installing a Battery Battery Battery Latch Hook Latch Hook Latch Slot Latch Slot Latch Latch Battery Pack Guides Battery Pack Guides Place the unit, so that the battery compartment is up. Position the battery pack, as shown above, so that the latch hook is almost in the latch slot, and touching the floor of the battery compartment. -
Page 37: Charging The Battery
Warning: Do Not Use Unapproved Battery Chargers Use of battery chargers not approved by Focus Enhancements could cause the battery to catch fire or explode. Use Only Original Focus Enhancements FS-BC Battery Chargers There are four versions of the optional FS-BC battery charger for use in various parts of the world. -
Page 38: Connecting A Fs-4 Hd To A Dv/Hd Camcorder
Quickstart Connecting a FS-4 HD to a DV/HD Camcorder Before performing this procedure, make sure you have installed and charged the battery, see on page 20. Battery Pack 1. Connect the supplied Firewire cable to the DV I/O connector on the top of the FS-4 HD. -
Page 39: Record And Playback With The Fs-4 Hd
Record and Playback with the FS-4 HD Before using the FS-4 HD, set up the unit as outlined in the following sections: Power On the FS-4 HD ... 23 Select HDD Recorder Mode ... 24 Select a DV/HD File Format ... 25 Set Time and Date ... -
Page 40: Select Hdd Recorder Mode
Quickstart 2. The screen appears and displays while the Welcome FS-4 HD initializes. Each FS-4 HD model has a unique welcome screen. 3. When the Home screen appears, proceed, see page 49 for more details. COUNTER 00:00:14:02 DISK 1 REEL FS-4Pro HD Only SYNC DISP LOCK... -
Page 41: Select A Dv/Hd File Format
Select a DV/HD File Format The formats displayed depend on the recorder mode selected in the previous step, for example following: RAW DV -AVI TYPE1 AVI TYPE2 CANOPUS AVI 1. Use the Down format that supports the preferred NLE system. A dash mark to the left of a list item indicates that it is the current selection. -
Page 42: Set Time And Date
Quickstart Set Time and Date Date and Time Must Be Set The date and time must be set because they are used in the FS-4 HD file naming function. 1. Press the navigation button several times until the Setup Right display appears on the screen as shown below: 09 / 15 / 05 11 : 21 : 13... - Page 43 5. Use the navigation button to select the time and press the Down navigation button. The following screen appears: Right 6. Use the Down highlighted value. Use the highlight the Hour, Minute, and Second. (Time is indicated in 24hr. mode.) 7.
-
Page 44: Record With The Fs-4 Hd
Quickstart Record With the FS-4 HD There are two modes of recording with the FS-4 HD. • Manual Recording Control with the FS-4 HD transport buttons. • Syncro Slave Recording or Tapeless Recording Control recording with the video camera controls. Before beginning recording, verify that: 1. -
Page 45: Manual Recording
Manual Recording Set the video camera to Verify that an image appears in the viewfinder. On the FS-4 HD, press Record This sets the FS-4 HD to Record On the FS-4 HD, press Record FS-4 HD begins to record. The timecode value is displayed on the screen. -
Page 46: Syncro Slave Recording
Quickstart Syncro Slave Recording Syncro slave recording allows the FS-4 HD to mimic camcorder operations by monitoring the state of the camcorder’s tape recorder controls. Verify that the FS-4 HD is in From the FS-4 HD Home screen, press the button several times until the Control screen appears: LOCAL AV / C... -
Page 47: Playback On The Fs-4 Hd
Playback on the FS-4 HD Verify that both the video camera and the FS-4 HD are powered on and that they are connected together with the FireWire cable from the FS-4 HD DV/IO port to the camcorder 1394 port. Feature Availability on PAL Cameras This feature is not available on some PAL cameras. - Page 48 FS-4 HD and FS-4Pro HD Portable DTE Recorders...
-
Page 49: Using The Fs-4 Hd With A Computer
OHCI compliant IEEE-1394 FireWire port and the necessary FireWire disk drive drivers. For More Information Go to the Focus Enhancements' website (www.focusinfo.com) for more compatibility information. • Use the FS-4 HDD Bypass mode, refer to page 34 for more information. -
Page 50: Initial Setup
Using the FS-4 HD with a Computer Initial Setup 1. Connect the FS-4 HD through its computer system using a standard 6-pin to 6-pin FireWire cable. 2. Enter HDD mode and enable DD Drive. This step is required before mounting the FS-4 HD to a computer. •... - Page 51 4. Open the folder with the most recent date code. This folder may contain several different files. The video clips. can appear as: • RawDV (.dv) • AVI Type1 - (YYYYMMDDHHMMSSa01) • AVI Type2 or 24p AVI Type2 - (YYYYMMDDHHMMSSb01) •...
- Page 52 Using the FS-4 HD with a Computer • MXF OPAtom - (YYYYMMDD-HHMMSSp01.mxf) (YYYYMMDD-HHMMSSL01.mxf), - (YYYYMMDDHHMMSSR01.mxf) where: is video, is the left audio channel, is the right audio channel, FS-4Pro HD Video Clips in Reel Folder FS-4Pro HD permits the storing of video clips in either the standard file folder or a Reel folder.
-
Page 53: Hd And Fat 32
FS-4 HD and FAT 32 The FAT32 file system limits file size to a maximum of 2GB or approximately, 9 minutes of recording time. Recording Time Depends on Recorder Mode and Resolution The number of minutes per 2G file depends upon the recorder mode and resolution: •... -
Page 54: Using Avid Omf Clips Fs-4Pro Hd Only
Using the FS-4 HD with a Computer Using Avid OMF Clips These steps are required when using Avid OMF formatted clips. The Avid OMF file format was developed for use with Avid editing products on Windows 2000, Windows XP or Mac 0SX. These products include Avid Xpress Pro, NewsCutter, and Media Composer Adrenaline (with the DV option). - Page 55 Locate and open the FS-4 HD drive folder. Create a new folder and name it To do this in Windows, select To do this with Macintosh, select type OMFI MediaFiles Drag all the OMF and AIF files into the new folder: Do Not Drag in the files titled Desktop DB or Desktop DF Launch Avid.
- Page 56 10. Verify that Master Clips is checked and press Media Tools Window, similar to the following, appears: 11. Create a new bin (select bin in Avid. 12. Select all items in the Media Tools window (select Select All 13. Drag the contents of the Media Tools Window into the bin. It is now possible to use these clips in the Avid timeline.
-
Page 57: Dismounting The Fs-4 Hd (Windows)
Dismounting the FS-4 HD (Windows) When finished working with the FS-4 HD and the computer, it is necessary to dismount FS-4 HD from the system Dismount FS-4 HD Before Powering Off It is important to dismount the FS-4 HD from the Windows system BEFORE powering down the unit. -
Page 58: Mounting The Fs-4 Hd (Macintosh)
Using the FS-4 HD with a Computer Mounting the FS-4 HD (Macintosh) 1. Start the Mac computer and connect the FS-4 HD’s port to the computer using a standard 6-pin to 6-pin FireWire cable. When mounted, the FS-4 HD should appear on the computer's desktop as shown below: The FS-4 HD appears as a FAT32 volume with a PC label. -
Page 59: Dismounting The Fs-4 Hd (Macintosh)
Dismounting the FS-4 HD (Macintosh) When finished working with the FS-4 HD and the Macintosh it is necessary to dismount the unit from the system. Dismount FS-4 HD Before Powering Off It is important to dismount the FS-4 HD from the Mac system BEFORE powering down the FS-4 HD. -
Page 60: Mounting Hardware
Campbell, CA. 95008 www.focusinfo.com techsupport@como.com +49 4307 - 83 58 58 +49 4307 - 83 58 99 COMO Computer & Motion GmbHA A Focus Enhancements Company Lise-Meitner-Str. 15 24223 Raisdorf / Germany www.focusinfo.com FS-4 HD and FS-4Pro HD Portable DTE Recorders... -
Page 61: Clipping To A Belt
Using the FS-4 HD with a Computer Clipping to a Belt Belt Mount Clip Front View Side View FS-4 HD Belt Clip Post A belt mount clip is included with the FS-4 HD. This mount is similar to those used with cellular telephones. Attach the belt mount to the belt clip post on the rear of the FS-4 HD and push it down to lock it in position. - Page 62 FS-4 HD and FS-4Pro HD Portable DTE Recorders...
-
Page 63: Fs Functions
This section contains information on the following LCD screens: General Screen Information ... 48 Record Screens ... 52 HDD Mode Screen ... 57 Format Screen ... 60 HD Format Screen ... 61 Setup Screens ... 62 Functions Screen ... 72 Utilities Screen ... -
Page 64: General Screen Information
FS Functions General Screen Information The FS-4 HD LCD screens are organized by function with each screen displaying a list of items. An item can be: • A value that can be set, such as the date. • A switch similar to a check box, that can be enabled along with other options in the display. -
Page 65: Home Screen
Home Screen The Home screen is read only and has no navigable items. To leave the Home screen use either the button. FS-4Pro HD only 1. Current Function: Symbol and Description Refer to LCD Display Symbols and Text 2. Volume Disk Number The volume number is always are connected. -
Page 66: Disp (Display) Information Fields
FS Functions Reel Display FS-4Pro HD only Record Playback REEL that a clip is located in or, has been marked to. If in > PLAY FROM brackets for example, <REEL>. This area is blank if NO REEL has been selected. information field that displays data type. -
Page 67: Fs-4 Hd System Information Screens
Displays an absolute timecode value for the particular session: the sum of all COUNTER timecodes on connected volumes. Absolute is primarily used when setting the FS-4 HD to AV/C mode and controlling it with an external FireWire device, such as a computer. DV (NTSC or PAL) and HD The information displayed in fields 11 and 12 depends, in part, on which Recorder Mode is set. -
Page 68: Record Screens
FS Functions Record Screens NORMAL -RETRO DISK RETRO CACHE LOOP RECORD The Record screen permits setting the FS-4 HD to various recording modes, depending on the model: • NORMAL • RETRO DISK • RETRO CACHE • LOOP RECORD • SNAP FS-4Pro HD DV modes only •... -
Page 69: Normal Record
For more about LCD display symbols and text, see on page 97. Symbols and Text Normal Record This is the standard recording mode. • All control is from the FS-4 HD front panel. Initially, the Home screen displays • Pressing Record mode. -
Page 70: Retro Disk Record Mode
FS Functions Retro Disk Record Mode RETRO DISK 00:00 HH:MM The Retro Disk mode records video in a continuous loop to a user-defined portion of disk space. Pressing Record seamlessly begins active recording. The Retro Disk session is appended to the beginning of the new clip. The result is a set of clips beginning with the cached video and continuing with the newly recorded video. -
Page 71: Saving Loop Record Clips
• The size of the video clip depends on the length of the loop. • Loops of 60 minutes or less are recorded in one-minute clips. • Loops greater than 60 minutes, are recorded in 2GB clips. • When the capacity of the disk is reached, one additional clip is created. -
Page 72: Time Lapse Record
FS Functions Time Lapse Record TIME LAPSE 00:00:00:00 HH:MM:SS:FF Time Lapse provides the ability to record a single frame at specific time intervals, for example one frame per minute, 00:01:00:00. Time Lapse applications can include capturing the traffic on city streets, the growth of a plant from seed to maturity, and construction projects. -
Page 73: Hdd Mode Screen
HDD Mode Screen -DV RECORDER HD RECORDER DD DRIVE USE EXT FS-4 Depending on the product, this screen displays the following items: • DV RECORDER This sets the FS-4 HD as a DV recorder. Connect the camera to the FS-4 HD DV I/O port using a FireWire cable. - Page 74 FS Functions • USE EXT FS-4 Use this option when longer recording times are needed. USE EXT FS-4 FS-4 HDs together to provide more disk storage for longer recording. One unit acts as the master with the other as a slave: the master records to itself until full and then continues recording on the slave unit.
-
Page 75: Setting Up Master And Slave Fs-4 Hd
Setting Up Master and Slave FS-4 HD Master FS-4 HD STOP 1 - 001 COUNTER 00 : 00 : 00 : 00 DISK 1 000min SYNC DISP LOCK 1. Connect the camcorder to the master FS-4 HD, using the supplied FireWire cable. Master Power on unit. -
Page 76: Format Screen
Formats for 25P Applications Use standard file formats for all 25P applications except AVID OMF. OMF is not compatible with 25P DV streams. The latest DTE supported applications and file formats are listed on the Focus Enhancements website: www.focusinfo.com. DV FORMATS NTSC only... -
Page 77: Hd Format Screen
-M2T QUICKTIME The FS-4Pro HD provides the additional HD DTE format QUICKTIME. The latest DTE supported applications and file formats are listed on the Focus Enhancements website: www.focusinfo.com. Check regularly for updates. FS-4 HD and FS-4Pro HD Portable DTE Recorders... -
Page 78: Setup Screens
FS Functions Setup Screens 10 / 10 / 05 21 : 10: 50 V 2. 0. 0 -LCDLIGHT ON The items on the Setup Screen are grouped by function. Within the function the items act like radio buttons, i.e. when one is active the others are not. -
Page 79: Date
• EXT CTL FRAME • EXT CTL FILE • TC EXT Group Default • TC REC RUN • TC FREE RUN • TC REGEN FS-4Pro HD only • TC SET • UB SET • TC DROP NTSC only • TC NON-DROP •... -
Page 80: Time
FS Functions Time Version 2.0.0.04070406 FS-4Pro HD This screen displays: • FS-4 HD Firmware version • SD video of the unit. • FS-4 HD model SET TIME 1 0 : 5 0 : 4 0 HH : MM : SS BACK VERSION NTSC... -
Page 81: Lcd Light On, Off, Auto
LCD Light ON, OFF, AUTO These items enable or disable the FS-4 HD's LCD backlight. • LCDLIGHT ON Keeps the backlight on permanently. • LCDLIGHT OFF Keeps the backlight off permanently. • LCDLIGHT AUTO Turns off the backlight after one minute. On the FS-4 HD, pressing any button pad button turns the backlight back on. -
Page 82: Ext Ctl Off, Pause, Frame, File
FS Functions EXT CTL OFF, Pause, Frame, File These options permit the use of an external device to control the FS-4 HD through the optional RS-232 cable. RS-232 Cable Available from Focus Online Store The RS-232 cable required to connect the FS-4 HD to an external control device is Focus part number CBLA-0113-01. -
Page 83: Time Code Ext, Rec Run, Free Run, Regen
TIME CODE EXT, REC RUN, FREE RUN, REGEN The FS-4Pro HD provides additional functionality in HD RECORDER mode. This TC REGEN functionality is only active when HD FORMAT is set to . In M2T mode, all TC modes act as QUICKTIME The following are timecode ( •... -
Page 84: Tc Set
FS Functions • TC REGEN FS-4Pro HD only When the FS-4Pro HD powers up in • Reads the timecode of the last track recorded. • Adds 1 to the number. • Stores the new timecode as the number that will be assigned to the first frame of the next recording session. -
Page 85: Ub Set
FS Functions UB SET FS-4Pro HD only UB SET FF : FF : FF : FF BACK The User Bit Set function provides the ability to change the user bits in the timecode recorded in the video files. • Timecode values are not set when in mode. -
Page 86: Tc Drop, Non-Drop
FS Functions TC DROP, NON-DROP These parameters are only available for NTSC and only one may be enabled at a time. Drop and non-drop enable and disable the drop-frame function that modifies how the timecode is calculated during recording. • TC DROP Group Default Enables the drop-frame function and frames 00 and 01... -
Page 87: Lcd Contrast
Each NLE utilizes a different HDV TC TYPE for its workflow. Use the following table to determine which HDV TC TYPE is utilized by a particular NLE: Avid Edius See your NLE users guide for more information. LCD CONTRAST VALUE: 00 Use this function to adjust the contrast of the LCD display for easier viewing. -
Page 88: Functions Screen
FS Functions Functions Screen The Functions buttons FA, FB, and FC provide convenient Home screen shortcuts by acting as toggle switches for specific system settings. The Home screen below is an example of the information displayed. Reel receiving clips. Function Keys Function settings are user-assignable and available in the Functions screen. -
Page 89: Functions List
Functions List A list of the Function button menu is below. In each group, the default selection is listed first. MENU Appears on LCD as… FA SYNC SYNC Toggles between SYNCRO and LOCAL record control. FA AV/C AV/C (Toggles between AV/C and LOCAL control) FA Tapeless TAPE (Toggles between Tapeless TRIGGER and LOCAL control) Default... - Page 90 FS Functions MENU Appears on LCD as… FB R3-3 R3 Marks Current Clip to Reel 3, FB R4-4 R4 Marks Current Clip to Reel 4, FB R5-5 R5 Marks Current Clip to Reel 5, FB R6-6 R6 Marks Current Clip to Reel 6, FB R7-7 R7 Marks Current Clip to Reel 7, FB R8-8...
-
Page 91: Lock/Unlk
LOCK/UNLK: This function is a toggle switch that locks and unlocks the keys on the FS-4 HD’s front panel. The prevent accidental unlocking of the front panel, there is an unlock confirmation screen: Press the UNLK Press SELECT FS-4 HD and FS-4Pro HD Portable DTE Recorders UNLOCK KEYS PRESS SELECT TO CONFIRM... -
Page 92: Assigning Clips To Reels
FS Functions Assigning Clips to Reels Currently Selected Reel Function FA set to FA REELS set to FB R2-2 The function buttons are a quick way to mark video clips during recording. The Functions menu offers two types of markers to use, as an example •... -
Page 93: Utilities Screen
Utilities Screen ORGANIZE REEL ORGANIZE OMF ORGANIZE MXF ORGANIZE PINN The Utilities available are: • ORGANIZE REEL • ORGANIZE OMF • ORGANIZE MXF • ORGANIZE PINN • DELETE CLIP • FORMAT • REPAIR DISK • REPAIR CLIP • FILE NAME •... -
Page 94: Organize Reel
FS Functions Organize Functions are Mutually Exclusive Once one organize utility is performed on a set of files, another organize function can not be applied. For example, if the Organize OMF is used on a set of files, then Organize Reel can not be applied to them. Organize Reel FS-4Pro HD only This selection places all files identified as a REEL clip during... -
Page 95: Organize Pinn
FS Functions Organize Pinn FS-4Pro HD only This selection organizes clips for use with Pinnacle Liquid series NLE systems. Products such as the Pinnacle AVI file format were created for use with products such as Pinnacle Liquid Edition. The Pinnacle AVI file format creates three files simultaneously during a recording;... -
Page 96: Delete Clip
FS Functions Delete Clip Use this item to delete a selected clip. 1. From the Utilities screen, go to the 2. Enter the number of the clip to be deleted using the navigation buttons. 3. Press the function key. The selected clip is deleted. 4. -
Page 97: Format Disk
Format Disk Prevent lost frames due to file fragmentation by formatting the FS-4 HD before each recording session. Save Files Before Formatting The formatting process erases all data on the disk and is not reversible. Backup all files and clips on the FS-4 HD before formatting. This selection formats the disk as follows: 1. -
Page 98: Repair Disk
FS Functions Repair Disk Use this function if a recording session does not complete properly and there is a question that the file may be damaged. For example, recording terminates due to a loss of power to the FS-4 HD. Repair Disk scans the entire disk drive checking for and repairing file errors and incomplete files. -
Page 99: Repair Clip
Repair Clip DV mode only Use this function to repair a specific file that may be damaged or incomplete. For example, recording terminates due to a loss of power to the FS-4 HD and a specific file may be damaged. Repair Clip scans the specified file checking for and repairing file errors and incomplete files. -
Page 100: File Name
FS Functions File Name 20041101 - 165423 This function Displays 1. From the Utilities screen, go to 2. Enter the file’s clip number using the buttons. The base file name is dynamically displayed as a function of the clip number. When a clip has multiple files, the first Base file name is displayed 3. -
Page 101: Upgrade
Upgrade Check Focus Enhancements website for upgrades and latest software updates, go to www.focusinfo.com. To upgrade system software: 1. Set the FS-4 HD to connect it to a computer. 2. On your computer, rename the XXX.bin file as 3. Copy or drag the FS4.bin file to the FS-4 HD while it is in DD DRIVE mode. - Page 102 FS Functions 9. Up on successful completion of the upgrade, the FS-4 HD displays the message: PLEASE RESTART 10.Hold down the STOP / POWER OFF shuts down. 11. Power up the FS-4 HD. UPGRADE COMPLETE button until the FS-4 HD FS-4 HD and FS-4Pro HD Portable DTE Recorders...
-
Page 103: Upgrade Error
Upgrade Error If the upgrade fails, the FS-4 HD displays one of the following messages: WRONG PRODUCT • Wrong Product ID Verify that the upgrade is for the model of FS-4 HD it is being installed on. An upgrade is not cross- platform and must be installed on the model for which it is intended. -
Page 104: System Reset
FS Functions System Reset The System Reset feature restores the factory default settings for the FS-4 HD unit. This feature is useful for diagnosing problems with the unit. System Reset A System Reset can not be reversed. Diagnostic DO NOT CHANGE THE SETTINGS OF THIS FUNCTION This function is included to assist Focus Enhancement Technical Support diagnose problems that may occur with the FS-4 HD. -
Page 105: Status
The FS-4 HD Status screen provides details of the systems power state as well as internal temperature. This screen may assist Focus Enhancements Technical Support in determining power and thermal problems with your unit. FS-4 HD and FS-4Pro HD Portable DTE Recorders STATUS 1.83V... -
Page 106: Reels Screen
FS Functions Reels Screen FS-4Pro HD only R0 0 R1 1 R2 2 R3 3 When a disk is formatted, the FS-4Pro HD creates 10 folders, numbered 0-9, on the disk. During recording or playback of a clip, it is possible to place it into folders or play it from up to 10 different reels. -
Page 107: Using A Wired Remote Control
REEL’s name on the left side of the second to the last line of the screen, refer to LOCAL Optional Wired Remote Control (p/n ACSS-0019-01) To order the Wired Remote Control, go to Focus Enhancements website, www.focusinfo.com/sales/store/. FS-4 HD and FS-4Pro HD Portable DTE Recorders Organize REEL on page 94. -
Page 108: Play Screen
FS Functions Play Screen PLAY CLIP LOOP CLIP LOOP ALL PLAY ALL • Play Clip In this mode, the FS-4 HD plays the selected clip from start to finish when you press the PLAY button. At the end of the particular clip, the FS-4 HD pauses. •... -
Page 109: Play From Screen
Play From Screen TRACK LIST REEL LIST This screen permits the selection of from where clips playback. There are two choices: • Track List Clips playback in the order in which they were recorded. Playback order is based on the order of the file names. -
Page 110: Control Screen
FS Functions Control Screen LOCAL AV/C -SYNCRO SLAVE TAPELESS The Control screen provides the capability of enabling the FS-4 HD to operate in four different control modes during record and playback. • LOCAL Local control mode ignores record triggers from the camcorder and is controlled exclusively from the FS-4 HD front panel or the optional wired remote control unit. - Page 111 Reels. For example, if the current Reel selection is 3. pressing Keeper To purchase the wired remote control, p/n , for the FS-4 HD, visit Focus Enhancements web site at www.focusinfo.com/sales/store/. • AV/C Do Not Use AV/C control in Record Mode...
- Page 112 FS Functions • Tapeless Trigger The Tapeless Trigger mode allows the FS-4 HD to be controlled from a camcorder if it features an external control setting separate from the tape transport. Typical camcorders like this include the Sony DSR 370, DSR- 390, DSR-400, DSR-450, DSR-570, Canon XL1s and XL2 and the Panasonic DVX-100/-100A.
-
Page 113: Lcd Display Symbols And Text
LCD Display Symbols and Text The table below shows the different symbols and states displayed on the top line of the LCD when used with different FS-4 HD control, record, play and stop modes: PLAY/REC MODE Stop Pause Play Rec (Pause) Normal Rec (Rec) Retro Disk (Stop) Retro Disk (Standby) - Page 114 LCD Display Symbols and Text CONTROLTYPE AV/C* (Stop) AV/C* (Rec Pause) AV/C* (Rec) AV/C* (Play Pause) AV/C* (Play) Syncro Slave (Pause) Syncro Slave (Rec) Tapeless (Pause) Tapeless (Rec) * AV/C is only for use when the FS-4 HD is connected to a computer system.
-
Page 115: Technical Specifications
Specifications are subject to change. Physical Description • Dimensions: 1.59" x 5.6" x 3.74" (40mm x 142mm x 95mm) (with normal 90 minute Battery) • Weight: 1 lb. (.45 kg) Input/Outputs • DV Video I/O - 25Mb/s (1x 6-pin IEEE-1394) On HD units this port can accept 720P and 1080i MPEG video from specially equipped camcorders. -
Page 116: Audio/Video/Timecode Specification
Technical Specifications Audio/Video/Timecode Specification • 25Mb/s, 8-bit 4:1:1 (NTSC-DV) or 4:2:0 (PAL-DV) video (model dependent). The HD models support 720p 24/ 25/30 and 1080i 50/60 from HDV camcorders with a 1394 interface. • DV Embedded Timecode (Drop or Non-Drop) • Embedded 2-ch (16-bit, 48kHz) or 4-ch (12-bit, 32kHz) Audio DTE File Formats •... -
Page 117: Log Files
Make sure the vent and fan intake holes are clear. Transfer files off the drive and format it before attempting to do more recording. Contact Focus Enhancements Technical Support. Contact Focus Enhancements Technical Support. Download correct software and perform upgrade again. -
Page 118: Warranty
Technical Specifications Warranty • 1 year, FS-4 HD • 2 years, FS-4Pro HD • 90 Days Accessories including the battery. Temperature • Operating: 0-40º C (32 - 104º F) • Operating humidity: 30% to 90% RH • Storage temperatures: -20 to 60° C (-4° to 140°F) •... - Page 120 FS-4 HD and FS-4Pro HD Portable DTE Recorders MANL-0954-04...
Need help?
Do you have a question about the FOCUS FireStore FS-4 Pro and is the answer not in the manual?
Questions and answers