Advertisement
Quick Links
CRIIFr3M FI N °
27742
41
instruction
manual
Please read these instructions care-
fully and make sure you understand
them before using this machine=
An_eitungshandbuch
Bitle lesen Sie diese Anleitungen
sorg-
faltig dutch und vergewissern
Sie sich,
dab Sie diese verstehen, bevor Sie die
Maschine in Betrieb nehmen.
Manuem d'instructions
Merci de lire tr_s attentivement
le
manuel d'instructions= Assurez-vous
d'avoir tout compris avant d'utiliser ce
tracteur=
Manua_
de las instrucciones
Por favor lea cuidadosamente
y com-
prenda estas intrucciones antes
de usar esta maquina=
ManuaJe
di istruzioni
Prima di utilizzare la macchina leggete
queste istruzioni con attenzione ed ac-
certatevi di averle comprese bene=
_nstructieboekje
Lees deze instructies aandachtig en
zorg dat u ze begrijpt voordat u deze
machine gebruikt=
Advertisement

Related Manuals for Craftsman 27742


Summary of Contents for Craftsman 27742
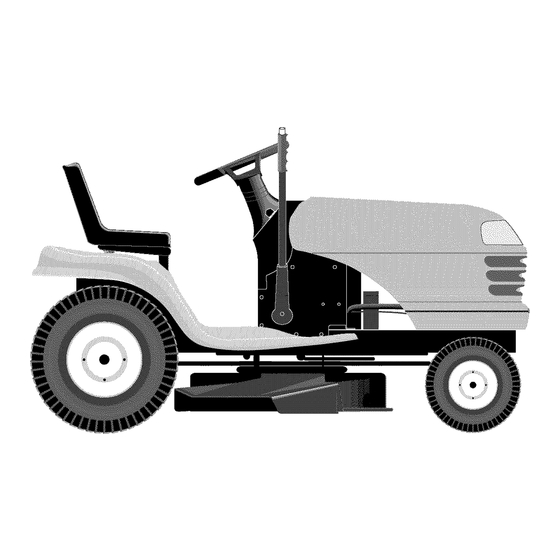
- Page 1 CRIIFr3M FI N ° 27742 instruction manual ManuaJe di istruzioni Manuem d'instructions Please read these instructions care- Merci de lire tr_s attentivement Prima di utilizzare la macchina leggete manuel d'instructions= Assurez-vous fully and make sure you understand queste istruzioni con attenzione ed ac- them before using this machine= certatevi di averle comprese bene= d'avoir tout compris avant d'utiliser ce...
- Page 2 Safety rules. Reglas de seguridad. Sicherheitsvorschriften. Norme antinfortunistiche. R_gles de s_curit& Veiligheidsregels. Assembly. Montaje. Zusammenbau. Montaggio. Montage. Montering. Functional description. Descripci6n del funcionamiento. Funzionamento. Funktionsbeschreibung. Description du fonctionnement. Beschrijving van functies. Before starting. Antes del arranque. Mal3nahmen vor dem Anlassen. Prima dell'avviamento.
- Page 3 1° Safety Rules Safe Operation Practices for Ride-On Mowers IMPORTANT: THIS CUTTING MACHINE IS CAPABLE OF AMPUTATING HANDS AND FEET AND THROWING OBJECTS. FAILURE TO OBSERVE THE FOLLOWING SAFETY INSTRUCTIONS COULD RESULT IN SERIOUS INJURY OR DEATH. Training III. Operation Read the instructions carefully.
- Page 4 • Reduce the throttle setting during engine run-out and, if the engine is provided with a shut-off valve, turn the fuel off at the conclusion of mowing. IV. Maintenance and Storage • Keep all nuts, bolts and screws tight to be sure the equip- ment is in safe working condition.
- Page 5 t, $icherheitsvorschriften Regeln far die sichere Bedienung von Rasentraktoren WICHTIG: DI ESE M,_HMASCHINE KANN H,_NDE UND FUSSEABTRENNEN UND GEGENST,ANDE MIT HOHER GESCHWINDIGKEIT SCHLEUDERN. NICHTBEACHTUNG DER FOLGENDEN SICHERHEITSVORSCHRIFTEN KONNTE SCHWERE ODER TODLICHE VERLETZUNGEN ZUR FOLGE HABEN. I. SCHULUNG • Schadhafte Schalld_mpfer ersetzen.
-
Page 6: Wartung
• Vor dem Verlassen der Bedienungsstation: Die Zapfwelle abstellen und alle AnbaugerAte absen- ken. In Leerlauf schalten und die Feststellbremse einle- gen. Den Motor abstellen und den ZQndschIQssel abzie- hen. • Alle Anbauger&te-Antriebe ausschalten, den Motor abstel- len und das (die) ZQndkerzenkabel abziehen bzw. - Page 7 1, R gies de $ curit & Conseils pour rutilisation en toute s_curit_ des tracteurs de pelouse ATTENTION: CE TRACTEUR DE PELOUSE EST CAPABLE D'AMPUTER MAINS OU PIEDS ET DE PROJETER OBJETS.I'INOBSERVATION DES REGLES DE SECURITE CI-DESSOUS PEUT Ft:TRE LA CAUSE DE BLESSURES SERIEUSES VOIRE MORTELLES.
-
Page 8: Entretien
• Avant de quitter le siege : debrayer les lames et abaisser le carter de coupe, mettre le levier de vitesse au point mort et enclencher le frein de parking, arr6ter le moteur et retirer les cles, • Debrayer les lames, arr6ter le moteur, et debrancher (s) fil (s) de (s) bougie (s) d'allumage ou retirer la clef de contact : avant de retirer I'insert broyeur ou avant de retirer la... - Page 9 t° Reglas De Seguridad Pr_cticas de Operacidn Seguras para las Segadoras Conducibles IMPORTANTE: ESTA MAQUINA CORTADORA ES CAPAZ DE AMPUTAR LAS MANOSY LOS PIESY DE LANZAR OBJETOS SI NO SE OBSERVAN LAS INSTRUCCIONES DE SEGURIDAD SIGUIENTES SE PUEDEN PRODUCIR LESIONES GRAVES O LA MUERTE I.
- Page 10 • Desenganche la transmision a los accesorios, pare el motor, y desconecte el (los) cable (s) de la bujfa o rem- ueva la Ilave de ignici6n antes de limpiar bloqueos o desatrancar del con- ducto; antes de inspeccionar, limpiar o trabajar sobre la segadora;...
-
Page 11: Funzionamento
1. Norse Antinfortunistiche Regole di sicurezza per trattorini da prato ATTENZIONE: OUESTO TRATTORINOTOSAERBA HA UNA POTENZA SUFFICIENTE AD AMPUTARE MANI E PIEDI E A SCAGLIARE OGGETTI. LA MANCATA OSSERVANZA DELLE SEGUENTI ISTRUZIONI ANTINFORTUNISTICHE POTREBBE CAUSARE LESIONI GRAVI E PERSINO IL DECESSO DELLA VITTIMA. •... -
Page 12: Manutenzione
• Disinnestare la trasmissione del moto agli accessori, spegnere il motore e scollegare i fill delle candele op- pure togliere la chiavetta di accensione: prima di pulire eventuali intasamenti e prima di stasare Io scivolo; prima di interventi o controlli sul tosaerba e prima delle operazioni di pulizia;... - Page 13 1, Veiiigheidsregeis Veilige bedieningsmethoden voor zittrekkers BELANGRIJK: DEZE MAAIMACHINE KAN HANDEN EN VOETEN AMPUTEREN EN VOORWERPEN WEGSLINGEREN. HET NIET OPVOLGEN VAN DEZE VEILIGHEIDSINSTRUCTIES KAN ERNSTIG OF DODELIJK LETSEL TOT GEVOLG HEBBEN. I. TRAINING III. BEDIENING Laat de motor niet draaien in een besloten ruimte waar •...
- Page 14 27742 nadat u een ongewenst voorwerp heeft geraakt. Inspecteer de maaimachine op schade en voer reparaties uit voordat u de machine weer start en gebruikt; als de machine abnormaal begint te trillen (onmid- hp/kw 17,5/13 dellijk controleren). vor dem Entfernen yon Verstopfungen aus dem M&h- werk oder dem Auswurf;...
- Page 15 These symbols may appear on your machine or in the literature supplied with the product. Learn and understand their meaning. Diese Symbole finden Sie auf Ihrer Maschine oder in Unterlagen, die mit dem Produkt ausgeh&ndigt wurden. Bitte machen Sie sich mit deren Bedeutung vertraut. (_Ces symboles peuvent figurer sur tracteur ou darts les publications fournies avec le produit.
- Page 16 These symbols may appear on your machine or in the literature supplied with the product. Learn and understand their meaning. Diese Symbole finden Sie auf Ihrer Maschine oder in Unterlagen, die mit dem Produkt ausgeh&ndigt wurden. Bitte machen Sie sich mit deren Bedeutung vertraut. machine darts les fournies...
- Page 17 PROVOQUER DES LESIONS. eClGARETTES BROLURES GRAVES. ® ® GEFAHR SCHWEFELSAURE AUGEN UNVER- ZUVERMEIDEN: ZUGLICH MIT WASSER AUGEN SCHOTZEN • FUNKEN KANN ERBLINDUNG AUSSPULEN. SOFORT EXPLOSIVE GASE ODER SCHWEREVERA_ ARZTLICHE HILFE KONNEN ERBLINDUNG • FEUER ZUNGENVERURSACHEN. UND KORPERVERLET- AUFSUCHEN. • RAUCHEN ZUNGEN VERURSAC- HEN.
-
Page 18: Montage
2. Assembly. 2. Zusammenbau. 2. Montage. 2. Montaje 2. Montaggio. 2. Montering. Before the tractor can be used certain parts must be as- Antes de poder utilizar el tractor, hay que montar algunas sembled, which for transportation reasons are enclosed in piezas que, pot razones de transporte, van empaquetadas the packing. - Page 19 VOLANTE DE DIRECCION • Introduzca el eje de extensi6n (1). Apriete en forma se- gura. • Montar la cubierta del eje del volant. Assegurarse de que las espigas de guia de la cubierta encajan en los orificios respectivos. • Remueva el adaptador del volante y deslice el adaptador sobre la extensi6n del eje de direccion.
- Page 20 Siege Retirer le bouton de reglage et la rondelle plate qui fixent le siege & I'emballage de carton, le conserver pour le montage du siege sur le tracteur. Basculer le siege vers le haut et le sortir de I'emballage de carton•...
- Page 21 NOTE! Check that the flex is correctly connected to the safety switch (3) on the seat holder. HINWEIS! PrQfen,dab das Kabel richtig an dem Sicherheitsschalter (3) auf dem Halter des Sitzes angeschlossen ist. REMARQUE: Verifier que le c&ble electrique est bien connecte sur le con- tacteur de securite (3) place sous I'embase du siege.
- Page 22 ® 1. Seat pan 2. Terminal Cover Install battery 3. Cable NOTE: If battery is put into service after month and year indicated on label, charge battery for minimum of one hour 4. Cable at 6-10 amps. A. Front of tractor _lb WARNING: Before installing battery remove metal bracelets, wrist watch bands, rings, etc.
- Page 23 1. Asiento 2. Cubierta Terminal Instalacion de la bateria 3. Cable NOTA: Si utiliza la bateria despues del mes y abe indicado 4. Cable sobre la etiqueta, cargue la bateria por un minimo de una hera a 6-10 amps. A. Frontal de tractor ADVERTENClA: Antes de instalar la bateria, desp6jese de brazaletes metalicos, correas de reloj, sortijas, etc.
- Page 24 WARNING: Positive terminal must be connected first to prevent sparks from accidental grounding. Remove terminal caps and discard. Connect the red cable to + and then the black earth cable to -. Screw tight the cables. Grease the battery poles with vaseline to prevent corrosion.
- Page 25 Instalacibn de la placa del triturador de basura • Levantar la pantalla del deflector (1) y colocar la placa del triturador de basura sebre la abertura. • Fijar el dep6sito de cierre anterior y posterior en el piano de trabajo de la segadora (2). ADVERTENClA: no remover la pantalla del deflector y averiguar que este apoyada sobre la placa del tritu rador...
- Page 26 02627 ® Positioning of controls Anordnung der Bedienungseinrichtungen Lichtschalter. Light Switch Position. Throttle control. Gashebel. Brake and clutch pedal. Brems- und Kupplungspedal. Motion control lever. Ein- und Ausschalten des Antriebes. 5. Connection/disconnection of the cutting unit. Ein-und Ausschalten des M_.haggregats. 6.
- Page 27 Comandi Emplacement des commandes Interruttore luci. Interrupteur de commande des phares Acceleratore. Commande des gaz (Accelerateur) Pedale freno/frizione. Pedale d'embrayage et de frein Leva del cambio. Levier de commande de la transmission hydrostatique Embrayage/debrayage du carter de coupe Inserimento/disinserimento del dispositivo di taglio. Relevage et abaissement du carter de coupe Sollevamento/abbassamento...
- Page 28 1. Light switch position 1. Lichtschalter 1. Interrupteur des phares 1. Interruptor de alumbrado 1. Interruttore luci 1. Schakelaar verlichting ® 2. Throttle control The throttle control regulates the engine revs and thus the rotation speed of the blades. = Full speed = Idling speed ®...
- Page 29 3. Pedale d'embrayage et de frein En appuyant sur cette pedale, la transmission se debraye et le frein entre en action simultanement. 3. Pedal de freno y de embrague AI apretarlo se frena el vehiculo y al mismo tiempo se desa copla el motor deteniendose la propulsi6n.
- Page 30 5. Connection/disconnection of the cutting unit Move the lever forward to connect the drive to the cutting unit, whereby the drive belt is tensioned and the blades begin to rotate. If the lever is moved backwards the drive will be disconnected and the rotation of the blades slowed clown by the action of the brake shoes on the pulley.
- Page 31 6. Relevage et abaissement du carter de coupe Tirer sur le levier vers I'arriere (1) pour relever rapidement le carter de coupe Iors du passage sur une surface accidentee. Pour le transport, le carter de coupe dolt _tre darts sa position la plus elevee (releve au maximum).
- Page 32 START 7. Ignition Lock 7. Cerradura de encendido There are three different positions for the ignition key: La Ilave de encendido puede hallarse en tres posiciones diferentes: All electric current broken. OFF: Corriente electrica cortada Electric current connected. Corriente electrica conectada START Start motor connected.
- Page 33 8. Parking brake Connect the parking brake in the following way: Press down the brake pedal to bottom position. Move the parking brake lever upwards and hold in this position. Release the brake pedal. To release the parking brake all that is necessary is to push down the brake pedal.
- Page 34 9. Blocage et deblocage de la roue libre Pour remorquer ou deplacer le tracteur sans I'aide du moteur, la commande de roue libre, qui se trouvesur le tablier arriere du ch&ssis du tracteur, dolt 6tre tireevers I'exterieur et bloquee dans cette position. 9.
- Page 35 Filling Reposicibn de combustible The engine should be run of pure (not oil mixed) unleaded El motor ha de funcionar con gasolina pura (sin mezcia de petrol. Do not fill beyond the lower edge of the filling hole. aceite), sin plomo. El nivel no ha de sobrepasar el borde Do not fill over max level.
- Page 36 Oil level Nivel de aceite La tapa combinada para el Ilenado de aceite y para la varilla The combined oil refilling cap and the oil stick is accessible de nivel queda accesible despues de haber levantado hacia when the bonnet is lifted forwards.The oil level in the engine should be checked before each run.
-
Page 37: Betrieb
5° Driving° 5° Betrieb° 5° Conduite° 5° Conducci6n° 5° Guida° 5° Rijden° Demarrage du moteur S'assurer prealablement, que le carter de coupe est en posi- tion de transport (c'est & dire : releve au maximum) et que le levier d'embrayage et de debrayage du carter de coupe est en position "debrayee"... - Page 38 Pull out the choke control (if engine is cold). @Den Kaltstarthebel herausziehen (nur bei kaltem Motor). (_) Si le moteur est froid :Tirer la commande de starter. Extraer el estrangulador (Qnicamente si el motor esta fifo). Estrarre il comando dello choke (in caso di partenza freddo).
- Page 39 Amener la cle de contact sur la position "Demarrage" ("START"). REMARQUE! Ne pas laisser tourner le demarreur plus de 5 secondes _. chaque fois. Si le moteur ne demarre pas immediatement, attendre une dizaine de secondes avant d'effectuer nouvelle tentative. Ponga la Ilave de encendido en la posicion de arranque "START".
- Page 40 • Disengage transmission by placing freewheel control in IMPORTANT! COLD STARTING FOR HYDRO freewheeling position. COLD STARTING FOR HYDRO (BELOW 40 ° F[4°C]) - AFTER • Start engine and move throttle control to slow position. STARTING ENGINEAND BEFORE DRIVING, LETTRANS- Be sure parking brake is not engaged.
- Page 41 • Placer l e tracteur surunesurface p lane afinqu'ilne SPURGO DELLATRASMISSlONE puisse p asfouler d arts aucune direction. Lefrein desta- Per assicurare il buon funzionamento prestazionale del trat- tionnement dolt 6 tre desserre pour e ffectuer les operations tore, si raccomanda di spurgare la trasmissione prima di met- suivantes.
- Page 42 ® NOTE! NOTA! The machine is equipped with a safety switch which La maquina tiene un interrupter de seguridad que corta la corriente al motor si el conductor sale del asiento con immediately breaks the current to the engine if the driver leaves the seat with engine running and with the connection/ el motor en marcha y con la palanca de acoplamiento/ disconnection lever in position "connection".
- Page 43 Cutting tips Nettoyer le carter de coupe, et en particulier le fond, au jet ou au nettoyeur & haute pression, apres chaque utili- • Clear the lawn from stones and other objects which can sation. Une raclette peut 6tre utile pour decoller I'herbe be thrown away by the blades.
- Page 44 ATTENTION! Ne jamais utiliser un tracteur sur des pentes excedant 10°. Les risques de renversement etant alors tres impor- tants. Ne jamais rouler parallelement &la pente du fait des risques de renversement. Toujours rouler perpendiculairement & la pente, aussi bien en montant, qu'en descendant. Ne jamais arr6ter ou demarrer un tracteur en pente.
- Page 45 Tondre en tournant vers la droite afin de rejeter I'herbe loin des massifs et des allees. Pour les grandes pelouses, changer de sens tousles 2 ou 3 tours pour que I'herbe soit rejetee sur la surface dej& tondue comme le montre la figure ci-dessus.
- Page 46 Switching off the engine Move the gas control to '"_". Disconnect the cutting unit by moving the connect/discon-nect lever downwards. Lift up the cutting unit and turn the ignition key to "OFF" position. Allow the engine to idle for 1-2 minutes to cool down before switching off after a hard work.
- Page 47 WARNING! ADVERTENCIA! Before servicing the engine or cutting unit the following Antes de proceder a efectuar el servicio en el motor o en shall be carried out: el equipo de corte, hay que hacer Io siguiente: • Press down the clutch/brake pedal and engage the •...
- Page 48 k5.2/ Cubierta del motor • Levante la cubierta. • Desenchufe el conector de cables de los faros delanteros. • Col6quese delante del tractor. Mueva la cubierta hacia ambos lados, inclfnela hacia delante y extraigala. • Para volver a ponerla, debe introducir los ejes de giro en las ranuras correspondientes del chasis.
- Page 49 Entretien Manutenzione NOTA: Effettuare interventi periodici di manutenzione, REMARQUE : Le tracteur dolt _tre entretenu regulierement afin de maintenir ses performances. ,_L conservare il trattore helle migliori condizioni di esercizio. ,_ATTENTION!Toujours debrancher le fil de la bougie, afin PERICOLO: Prima di ogni intervento di manutenzione, ripa- razione o ispezione, staccare sempre la candela per evitare d'eviter tout demarrage...
- Page 50 F_F_F_F_F_F_F_F_F_) Pour assurer I'entretien du moteur Se referer au manuel d'utilisation du moteur. Vidange de rhuile du moteur • Retirer le bouchon (1) et placer le tuyau de vidange (2). • Pour ouvrirla soupapedevidange, repousser legerement la soupape en la faisant tourner darts le sens contraire des aiguilles d'une montre pour sortir du cran, puis tirer sur la soupape pour liberer I'huile.
- Page 51 SERVICE RECORD Fill in dates as you complete regular service Every 8 Every Every. Every. Every Needed hours 25 hours 50 hours 100 hours 200 hours Change engine oil (without oil filter) ..........• Change engine oil (with oil filter) ................•...
- Page 52 SCHEMA D'ENTRETIEN Consigner les dates d'intervention apres chaque operation d'entretien. Selon les Toutes Toutes Toutes Toutes les Toutes les besoins les 8 H les 25 H les 50 H 100 H 200 H Vidange de I'huile moteur (sans filtre a huile) ..................•...
- Page 53 DATI DI SERVIZIO Compilare ogni qualvolta si esegue un regolare servizio Necessit& Ogni Ogni Ogni. Ogni. Ogni 8 ore 25 ore 50 ore 100 ore 200 ore Cambio dell'olio (Senza filtro dell'olio ..........• Cambio dell'olio (Con filtro dell'olio) ............... •...
- Page 54 Messerbalken FQr beste M_hergebnisse mQssen die Messerbalken immer opti mal geschliffen sein. Wechseln Sie verbogene oder bes- ch&digte Messerbalken sofort aus. Sie werden mit einer Feile oder einer Schleifscheibe gesch&rft. HINWEIS: Um eine Unwucht zu vermeiden, mQssen beide Seiten der Messerbalken gleichm&13ig gesch&rft und auf Unwucht geprQft werden.
- Page 55 Lame Per avere il migliore risultato di taglio, e necessario che le lame siano ben affilate. Sostituirle se usurate o danneggiate. A tale scopo utilizzare una lima o una mola. NOTA! E' importante affilare le due estremit& della lama in modo uniforme per non creare disequilibri.
- Page 56 Brakes The brakes are located inside the right rear wheel. The wheel should be dismantled for best access. • Press down the clutch/brake pedal and engage the park- ing brake. Bremse Die Bremse sitzt innerhalb des rechten Hinterrades. FQr beste Zug&nglichkeit ist das Rad auszubauen.
- Page 57 Depose du Carter de Coupe Effectuer I'intervention a partir du c6te droit du tracteur. 1. Sortir la courroie d'entrafnement de la gorge de la poulie motrice (1). Retirer le petit ressort de tension (2), et decrocher le res- sort d'embrayage des lames du cote du boulon servant d'axe &...
- Page 58 5. Quitar los resortes (5), (6), (7) y los ejes respectivos. 6. Tirar hacia atras de la palanca para la elevaci6n y de- scenso de la unidad de corte. Extraer la unidad de corte de la maquina. IMPORTANTE: Si cualquier otro accesorio qur no sea la segadora tiene que set montado en el tractor, se deben re-...
- Page 59 Replacement of drive belt for cutting unit Dismantle the cutting unit as described previously. Work off the belt from the unit's left pulley and then from the other wheels. Pull the belt away from the cutting unit. 4. The new belt is mounted in the reverse order. Check that the belt lies inside all the belt guides.
- Page 60 ® Adjustment of the cutting unit A. In the direction of travel 1. Check that the air pressure is correct in all four tires. To achieve best cutting results the cutting unit's front edge (B) Make sure that the machine is on a horizontal surface. should be about 10 mm (0.375") lower than the back edge (A).
- Page 61 REGLAGE TRANSVERSAL Relever le carter de coupe au maximum. A partir du milieu de chaque extremites laterales du carter de coupe, mesurer la distance du bord du carter par rap- port au sol. • La distance (A) dolt 6tre la m6me des deux c6tes & 6 mm pres.
- Page 62 Cambio de correa propulsora Desmontar el equipo de corte del tractor. Aplicar el freno de estacionamiento y tirar hacia arriba de la correa para sacarla de la rueda libre (1), de la acoplamiento (2) y de la propulsora del motor (3). Introducir la correa entre dos aspas del ventilador y hacer girar este a izquierdas hasta que queda libre la correa (4).
- Page 63 EINSTELLUNG DES STEUERKNOPPELS SCHALTGETRIEBES Der Steuerkn0ppel wird yon der Herstellerfirma im Werk vore- ingestellt und erfordert daher in der Regel keine weiteren Einstellungen. • Den vorne auf dem rechten Hinterrad befindlichen Ein- stellbolzen 16sen und wieder leicht anziehen; • Den Motoranlassen und den Steuerkn0ppelverschieben, bis sich der Traktor weder vorw_.rts noch r0ckw&rts bewegt;...
- Page 64 REGOLAZIONE DELLA LEVA DI COMANDO DEL MOVIMENTO DEL MECCANISMO CAMBIO La leva di comando del movimento del meccanismo cambio e stata impostata al momento della fabbricazione non richiede pertanto ulteriori regolazioni. • Allentare il bullone di regolazione di fronte alia ruota posteriore destra;...
- Page 65 TRANSAXLE COOLING ENFRIAMIENTO DELTRANSEJE The fan and cooling fins of transmission should be kept clean Las aletas de enfriamiento y el ventilador de la transmisi6n to assure proper cooling. tienen que mantenerse limpios para asegurar el enfriamiento adecuado. Do not attempt to clean fan or transmission while engine is running or while the transmission is hot.
- Page 66 7, Troubleshooting° 7, St rungssuche° ® Engine will not start Motor springt nicht an No fuel in fuel tank. Kraftstoff fehlt im Kraftstofftank. Defekte ZQndkerze. Plug defective. Defekter ZQndkerzenanschlul3. Plug connection defective. 4. Schmutz in Vergaser oder Kraftstoffleitung. Dirt in carburetor or fuel pipe. Anlasser dreht den Motor nicht durch Start motor will not turn engine Batterie entladen.
- Page 67 7, Recherche pannes° 7, B squeda de averias° (_Le moteur ne demarre pas El motor no arranca Manque de carburant dans le reservoir. No hay combustible en el dep6sito. Bougie d'allumage defectueuse. La bujia es err6nea. Le c&blage de la bougie d'allumage defectueux. La conexion de la bujfa esta defectuosa.
- Page 68 De motor start niet (_ II motore non parte Manca il carburante. Er is geen benzine in de tank. Difetto di candela. De bougie is defect. Collegamento della candela difettoso. De bougie-aansluiting is defect. 4. Vuil in carburateur of brandstofleiding. 4.
- Page 69 8° Storage. 8° Aufbewahrung° 8° Re isage° 8° Censervaci6n° The .following steps should be taken when mowing sea- Suivre la procedure suivante une fois la saison termi- nee: son is over: Clean the entire machine, especially underneath • En fin de saison, suivre la procedure suivante pour le remisage.
- Page 70 8, Ris essaggie° 8° Staiien° (_AI termine della stagione effettuare i seguenti inter- (_Aan het einde van elk maaisezoen moeten de volgende venti: maatregelen worden genomen: • Puiire tutto iitagiiaerba e particoiarmente sotto il coperchio • Maak de hele machine schoon, in het bijzonder de bin- della falciatrice.
-
Page 72: Declaration Of Conformity
Rotativa • Garantizado a un nivel • Category ...... Rotary Mower • Guaranteed Sound Power • Mama ........ Craftsman de sonido de ..... 100 dB (A) • Make ........Craftsman Level ......... 100 dB (A) • Tipo ........277422 •...
Need help?
Do you have a question about the 27742 and is the answer not in the manual?
Questions and answers