Avaya PARTNER Quick Reference Manual
Advanced communications system
Hide thumbs
Also See for PARTNER:
- Installation and use manual (466 pages) ,
- Administration manual (168 pages) ,
- User manual (38 pages)

Related Manuals for Avaya PARTNER


Summary of Contents for Avaya PARTNER
-
Page 1: Quick Reference Guide
® PARTNER Advanced Communications System Quick Reference Guide 518-456-804 Comcode 700217243 Issue 3 March 2002... -
Page 3: Issue
— an Avaya Inc. system administrator, your telecommunications peers, and your managers. Avaya Inc. does not warrant that this product or any of its networked equip- ment is either immune from or will prevent either unauthorized or malicious intrusions. -
Page 4: Issue 3, March
Lucent Technologies Inc. or Lucent should be interpreted as reference to Avaya Inc. The exception is cross references to books published prior to May 1, 2001, which may retain their original Lucent titles. Avaya Inc., formed as a result of Lucent's... -
Page 5: Important Safety Instructions
Important Safety Instructions The following list provides basic safety precautions that should always be followed when using your telephone equipment. 1. Read and understand all instructions. 2. Follow all warnings and instructions marked on the product. 3. Unplug all telephone connections before cleaning. DO NOT use liquid cleaners or aerosol cleaners. - Page 7 We'd like your opinion . . . We welcome your feedback on this document. Your comments can be of great value in helping us improve our documentation. ® PARTNER Advanced Communications System Quick Reference Issue 3, March 2002 518-456-804, Comcode 700217243 .
-
Page 9: Table Of Contents
Contents 1 Getting Acquainted Welcome ..........System Overview . - Page 10 Table of Contents Quick Reference Guide 5 Programming Telephone Features Overview ..........Automatic Line Selection .
-
Page 11: Getting Acquainted
Getting Acquainted Welcome ® This quick reference is designed to help you program the PARTNER Advanced Communications System (ACS). It provides procedures for customizing your system after it is initially installed and for programming everyday tasks you perform in order to manage your system. Prior to using this guide, you should become familiar with the PARTNER Advanced Communications System Installation, Programming, and Use guide, which describes the system in detail and provides procedures for programming... - Page 12 1 Getting Acquainted Quick Reference Guide Using these lines and extensions, you can add various devices and telephones to configure your system to meet your business needs (see the figure, “System Configurations,” that follows). For detailed information about PARTNER ACS hardware, see the PARTNER Advanced Communications System Installation, Programming, and Use guide.
-
Page 13: System Capacity
Quick Reference Guide 1 Getting Acquainted System Capacity The PARTNER ACS release you have, the carrier you use, and the combination of modules installed, determine the number of available lines and extensions: • PARTNER ACS Release 1.0 and 1.1 systems allow up to 15 lines and up to 32 extensions;... - Page 14 1 Getting Acquainted Quick Reference Guide System Components System Description Components Processor Provides the software intelligence that controls the system’s Module features. It has jacks for three outside lines and eight enhanced tip/ring extensions. The processor also has two PCMCIA slots for ASA/DXD, PARTNER Voice Mail Release 3.0, or Remote Administration cards.
- Page 15 Quick Reference Guide 1 Getting Acquainted Auxiliary Equipment The following table provides a list of other equipment that is available for use with the system. See the PARTNER Advanced Communications System Installation, Programming, and Use guide for more details. • Voice Messaging Systems •...
- Page 16 1 Getting Acquainted Quick Reference Guide System Components...
-
Page 17: Installing Your System
Installing Your System Overview This chapter explains how to install the PARTNER Advanced Communications System (ACS) Releases 5.0 or earlier. The information applies to all releases unless otherwise specified. The installation of the PARTNER ACS involves the following: • Evaluating the environmental requirements •... -
Page 18: Evaluating The Environment
2 Installing Your System Quick Reference Guide Evaluating the Environment Before you begin the physical installation of the system, you must check that all environmental factors are within the acceptable ranges. See the PARTNER Advanced Communications System Installation, Programming, and Use guide for more details. - Page 19 Quick Reference Guide 2 Installing Your System Follow these steps to wall-mount the module(s): Using the enclosed template, mark the screw locations on the wall. Hold the processor module against the wall with the line and extension jacks facing left. Leave at least 1 foot (0.3 meters) clearance at the top, front, and right side, and at least 2 feet (0.6 meter) at the bottom and left side.
- Page 20 2 Installing Your System Quick Reference Guide Wall-Mounting a 5-Slot Carrier and Modules Install the 5-slot carrier within 5 feet (1.5 meters) of a properly grounded wall outlet (not controlled by a switch) and the network interface jacks. When you mount the carrier on the wall, leave at least 1 foot (0.3 meter) of clearance at the top and sides and 2 feet (0.6 meter) at the front and bottom to ensure proper ventilation.
- Page 21 Quick Reference Guide 2 Installing Your System • If you use a 1600 DSL module, it must be in the first slot on the left. The 012E, 308EC, and 206 modules must be to the left of any 400 and 200 modules. •...
- Page 22 2 Installing Your System Quick Reference Guide • For a 5-slot carrier, label the line jacks on the other modules by starting with the leftmost module and ending with the rightmost module. Although a 1600 DSL module has only one line jack, it supports up to 16 lines.
- Page 23 Quick Reference Guide 2 Installing Your System CAUTION: Batteries and battery cover are packaged in a separate box. If you are replacing batteries, the old batteries must be removed with the power on or the system’s memory will be lost. Follow these steps to insert the batteries: Locate the battery compartment at the bottom of the PARTNER ACS processor module, below the extension jacks.
- Page 24 2 Installing Your System Quick Reference Guide Initializing the System To initialize the system, you must insert any PC Card before powering up the system. You must power down the system before you insert or remove a PC Card. Follow these steps to initialize a system: If your PC Card comes with a write-protect tab, verify that the write-protect tab on the PC Card is not in the write-protected position.
- Page 25 Quick Reference Guide 2 Installing Your System If this is the initial installation for a Release 3.0 system, follow these additional steps: Check the LEDs to make sure that the processor is on steady green for at least 15 seconds. f00ss#989 Press at extension 10...
-
Page 26: Connecting Lines And Extensions
2 Installing Your System Quick Reference Guide Connecting Lines and Extensions If extensions are not wired to any modular jacks, call a qualified service technician. Use the following procedure to connect lines and extensions: Test for a dial tone at the network interface jacks before connecting outside lines to the control unit. -
Page 27: Installing The Cover
Quick Reference Guide 2 Installing Your System Gather the line and extension cords hanging below the wire managers of the first two modules, and twist-tie or wire-wrap them. Repeat for the remaining cords. For the 5-slot carrier, place each bundle of wires in the indentations cut out of the bottom edge of the carrier. -
Page 28: Connecting Auxiliary Equipment
2 Installing Your System Quick Reference Guide Connecting Auxiliary Equipment You can connect many types of telecommunications devices to your system without expensive adapters or additional telephone lines–for example, answering machines, credit card scanners, and fax machines. Many tip/ring, single-line devices work with the system regardless of the manufacturer. See the PARTNER Advanced Communications System Installation, Programming, and Use guide for further details about connecting auxiliary equipment, including voice messaging systems. -
Page 29: Setting Up Your System
Setting Up Your System Overview This chapter explains the basics of programming and the programming of features involved in the setup of the system, including the programming of a voice messaging system. Refer to the PARTNER Advanced Communications System Installation, Programming, and Use guide for more detailed programming information. - Page 30 3 Setting Up Your System Quick Reference Guide • Telephone Programming allows telephones to be customized to meet individual users’ needs. There are two types of Telephone Programming, depending from where you program. – Centralized Telephone Programming–programming individual telephones from extension 10 or 11. –...
- Page 31 Quick Reference Guide 3 Setting Up Your System Programming Overlays To do System Programming, you place a Programming Overlay over the dialpad of the system display telephone at extension 10 or 11. (Overlays are provided with the system documentation.) You use the following special buttons while programming: •...
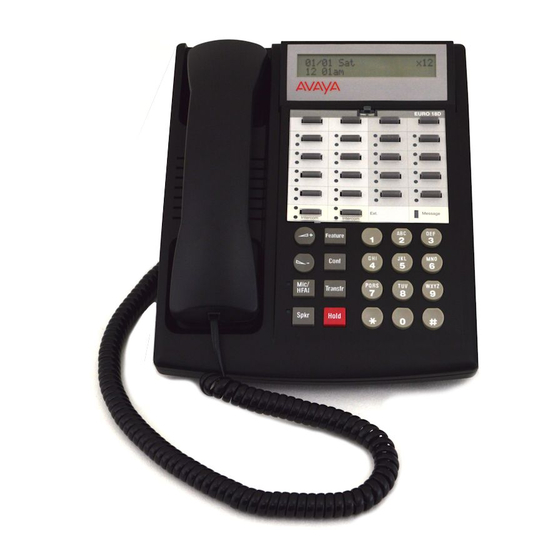
- Page 32 3 Setting Up Your System Quick Reference Guide Button Locations When you program from a PARTNER telephone at extension 10 or 11, the button you press on the telephone at the programming extension may be in a different location on the telephone being programmed. The following figure shows the relative location of buttons on each PARTNER telephone.
- Page 33 Quick Reference Guide 3 Setting Up Your System PARTNER-34D Phone Ext. Message Intercom Intercom PARTNER-18D/18 Phone PARTNER-6 Phone Intercom Intercom Ext. Message Ext. Message Intercom Intercom Button Locations on PARTNER Telephones System Programming Basics...
- Page 34 3 Setting Up Your System Quick Reference Guide Programming Mode When you are ready to program a system or telephone feature, you must enter programming mode. Follow these steps to enter programming mode. Place the Programming Overlay over the dialpad of the system display telephone at extension 10 or 11.
- Page 35 Quick Reference Guide 3 Setting Up Your System Using Centralized Telephone Programming Use Centralized Telephone Programming from extension 10 or 11 to program features or store telephone numbers for individual extensions. All features that can be programmed at an extension can also be programmed by using Centralized Telephone Programming.
-
Page 36: Setting The Date, Day, And Time
3 Setting Up Your System Quick Reference Guide Setting the Date, Day, and Time After supplying power to the control unit, use the following procedures to set the system clock: • System Date (#101) to set the month, day, and year •... - Page 37 Quick Reference Guide 3 Setting Up Your System To change the System Day: f00ss#102 Press at extension 10 or 11. Change the day by entering the corresponding digit below or by pressing until the day entry you want appears: ✔ •...
-
Page 38: Assigning Lines
3 Setting Up Your System Quick Reference Guide Automatic Daylight/Standard Times (#126) Available in Release 3.0 or later systems, this feature is turned on by default and automatically updates the system clock for annual Daylight Savings Time and Standard Time changes. If you are in an area that does not have daylight savings time, use the procedure below to turn off this feature. -
Page 39: Customizing Extensions
Quick Reference Guide 3 Setting Up Your System Customizing Extensions Use the following features to customize an extension: • Coverage features – Line Coverage Extension (#208), to identify an extension as the “owner” of a specific outside line. A user at the extension can activate Call Coverage or VMS Cover for the specified line. - Page 40 3 Setting Up Your System Quick Reference Guide • Call Waiting (#316), to identify tip/ring telephone extensions that can receive the system (not the local telephone company) call-waiting tone for a second incoming call when active on a call. • Outgoing Call Restriction (#401), to prevent the extension from making certain types of outgoing calls on all system lines.
-
Page 41: Changing Settings To Support Pbx Or Centrex Services
Quick Reference Guide 3 Setting Up Your System Changing Settings to Support PBX or Centrex Services Your system may work behind a PBX or Centrex system. Consider the following when setting up your system to work effectively behind a PBX or Centrex system: •... -
Page 42: Emergency Phone Number List (#406)
3 Setting Up Your System Quick Reference Guide Speed Dial and Auto Dial Numbers When you program numbers outside the PBX or Centrex system as Speed Dial and Auto Dial numbers, include the PBX or Centrex system dial-out code (9 on most systems), followed by one or more pauses, in the stored number. -
Page 43: Voice Messaging Systems
Quick Reference Guide 3 Setting Up Your System Voice Messaging Systems Four voice messaging systems are compatible with your system. • PARTNER Messaging resides in the control unit in a 2-, 4-, or 6-port configuration. • The PARTNER MAIL VS Voice Messaging System (PMVS) resides in the control unit in a 2- or 4-port configuration. - Page 44 3 Setting Up Your System Quick Reference Guide To program any of the other three voice messaging systems, perform the following tasks. See the PARTNER Advanced Communications System Installation, Programming, and Use guide for the procedures to program these tasks. •...
- Page 45 Quick Reference Guide 3 Setting Up Your System Additional Voice Messaging System Programming Following are additional features used to program the communication system for a voice messaging system. See Chapter 9, “Using Auxiliary Equipment” in the PARTNER Advanced Communications System Installation, Programming, and Use guide for the procedures to program these tasks.
- Page 46 3 Setting Up Your System Quick Reference Guide Voice Messaging Systems...
-
Page 47: Programming System Features
Programming System Features Overview This chapter describes the programming of a few of the most commonly used system-wide features: • System Speed Dial • Dialing Restrictions and Permissions • Groups of Extensions A table listing all the system-wide features (designated by a # code) appears later in this chapter. -
Page 48: Dialing Restrictions And Permissions
4 Programming System Features Quick Reference Guide To program System Speed Dial numbers: Press at extension 10 or 11. Select a three-digit code by pressing and dialing three digits between 600 and 699. Enter the number. For example, to program 555-4757, press 5554757 To mark the System Speed Dial number to override dialing restrictions, precede the number by a... - Page 49 Quick Reference Guide 4 Programming System Features SECURITY ALERT: While procedures that restrict dialing are very effective, absolute protection against misuse cannot be guaranteed. System telephones give you more protection against such misuse than single-line telephones. Therefore, you should install system telephones where restricting telephone use is important.
- Page 50 4 Programming System Features Quick Reference Guide Do one of the following: • To change the telephone number you just entered, press repeat Steps 4 and 5. • To delete the telephone number you just entered, press • To add other telephone numbers to this list, press and repeat Steps 4 and 5.
- Page 51 Quick Reference Guide 4 Programming System Features Select another procedure, or exit programming mode. Disallowed Phone Number Lists (#404) Use this feature to specify telephone numbers that users cannot dial. For example, you may want to prevent calls to a specific telephone number or to categories of numbers, such as international numbers.
- Page 52 4 Programming System Features Quick Reference Guide Disallowed List Assignments (#405) Use this feature to assign up to eight Disallowed Phone Number Lists to specific extensions. You must use Disallowed Phone Number Lists (#404) to create the lists of disallowed telephone numbers before you use this procedure. To assign Disallowed Phone Number Lists to an extension: f00ss#405 Press...
- Page 53 Quick Reference Guide 4 Programming System Features To restrict an extension from making calls on a specific line: f00ss#302 Press at extension 10 or 11. At the Extension : prompt, enter the extension number to be programmed. At the Line : prompt, enter the line number to be restricted at this extension.
- Page 54 4 Programming System Features Quick Reference Guide Outgoing Call Restriction (#401) Use this feature to specify the types of outgoing calls that can be made on all lines at an extension. To identify the types of outgoing calls that can be made on all lines at an extension: f00ss#401 Press...
-
Page 55: Groups Of Extensions
Quick Reference Guide 4 Programming System Features Groups of Extensions Placing extensions into groups allows users to help each other in answering calls. You can set up the groups shown in the following table. Groups of Extensions Group... Description... Calling Group # 502 Group of extensions that can be called at the same time. Any user in the system can ring or page the entire Calling Group;... - Page 56 4 Programming System Features Quick Reference Guide Groups of Extensions...
-
Page 57: Programming Telephone Features
Programming Telephone Features Overview As the System Administrator, you should program telephones at individual extensions with certain features. There are two types of telephone programming: • Centralized Telephone Programming–programming individual telephones from extension 10 or 11. • Extension Programming–programming an individual system telephone from the extension to which it is connected. - Page 58 5 Programming Telephone Features Quick Reference Guide intercom line. This order can be changed, however, to accommodate your business needs. For example, a telemarketing firm with a WATS line (line 5) to reduce telephone expenses would set Automatic Line Selection for all telemarketers’...
-
Page 59: Extension Name Display
Quick Reference Guide 5 Programming Telephone Features Extension Name Display You can assign a name to an extension: up to 20 characters long on PARTNER telephones or up to 12 characters long on MLS telephones. Then, when that extension is used to make an intercom, group, or transferred call, the name appears on the system display telephone receiving the call. -
Page 60: Line Ringing
5 Programming Telephone Features Quick Reference Guide Press left Enter the two-digit code for each character you want to enter. For example, 3231 the name “Ed” is If you make a mistake, press to clear the display. Repeat Step 4 to enter the correct name. - Page 61 Quick Reference Guide 5 Programming Telephone Features Press the line or pool button until the button light shows the correct setting (the setting for the currently selected line or pool also appears on the display). Continue programming, or exit programming mode. Line Ringing...
- Page 62 5 Programming Telephone Features Quick Reference Guide Line Ringing...
-
Page 63: Maintaining Your System
Maintaining Your System Overview Once you have set up your system, you will need to maintain it. For example, changes in your business may require additional lines or extensions. And to prepare for emergencies such as power failures, you will want to back up all your customized feature settings so you can restore the system quickly. -
Page 64: Backup And Restore
This requires a modem and additional software that must reside on your computer. See your Avaya representative or authorized dealer for more information about the software required for remote access. • In Release 4.0, using a PC card does not upgrade the configuration of the 1600 DSL module. - Page 65 Quick Reference Guide 6 Maintaining Your System Backup Programming–Automatic (#123) Use this feature to set up the automatic backup of all programming (except the system date, day, and time). When Backup Programming–Automatic is set to Active, the information is backed up at 2:00 a.m. on the first day of each month to a Backup/Restore PC Card.
- Page 66 6 Maintaining Your System Quick Reference Guide Backup Programming–Manual (#124) Use this feature to manually back up all the programming (except the system date, day, and time) to a Backup/Restore PC Card. To begin a manual backup of system settings: Verify that only one Backup/Restore Card is in the processor module.
- Page 67 Quick Reference Guide 6 Maintaining Your System Restore Programming (#125) Use this feature to reinstate your system and telephone programming (except the System Day, System Date, and System Time) to the settings saved on a PC Card at the last system backup (manual or automatic). You should restore the system settings if your system settings become corrupted, if you make changes and decide you would rather use the former settings, or if you replace your processor module and want to retain the system settings you had on the...
- Page 68 6 Maintaining Your System Quick Reference Guide • If the date of the file (AUTO. mmddyy or MAN. mmddyy) indicates that this is not the file you intended to use, see the instructions packaged with the PC Upgrade card for how to install the Backup/Restore PC Card.
-
Page 69: Battery Replacement
Quick Reference Guide 6 Maintaining Your System Battery Replacement The processor module uses two user-replaceable AAA alkaline batteries. These batteries provide enough power to retain the system programming settings during a power failure for 45 days to six months, depending on the freshness of the batteries. -
Page 70: Using A Pc Card
6 Maintaining Your System Quick Reference Guide Using a PC Card Follow these steps to upgrade your system’s software with a PC card: CAUTION: Before starting, verify that you have batteries installed in the processor module by viewing the display of the telephone at extension 10. If you have a 5-slot carrier, move the carrier’s On/Off switch to the “Off”... - Page 71 Quick Reference Guide 6 Maintaining Your System In Release 3.0 or later systems, the LEDs on the processor module (center slot) will alternate red/green while the upgrade is being performed. When the upgrade is finished, the LED will appear steady green. Make sure each module has a green LED in the same horizontal area, and that they all appear steady green.
-
Page 72: Upgrading 1600 Dsl And 012E Module Firmware
6 Maintaining Your System Quick Reference Guide Tighten the screw on the lower front of the cover. Upgrading 1600 DSL and 012E Module Firmware PARTNER ACS Release 5.0 or later provides a firmware upgrade capability for the 1600 DLS and 012E modules which are equipped with programmable flash memory. -
Page 73: Adding New Modules
Quick Reference Guide 6 Maintaining Your System The firmware upgrade process occurs for one module at a time. After successful completion of the upgrade for one module, the system resets after 3 to 10 seconds and begins the firmware upgrade of the next module, if required. The firmware upgrades begin with modules in the left-most slot to the right-most slot of the carrier. - Page 74 6 Maintaining Your System Quick Reference Guide Before you insert the new module, make sure that the 1600 DSL module (if used) is in the leftmost slot and that all 400 (or 200) modules are installed to the right of all 012E, 308EC, or 206 modules. If you need to move a module to accommodate the new one, see “Replacing Modules”...
-
Page 75: Replacing Modules
Quick Reference Guide 6 Maintaining Your System To replace the cover, grasp it by its upper edges and hold it squarely over the control unit. Place the cover over the modules and make sure it fits firmly in place. Tighten the screw on the lower front of the cover. Replacing Modules Replacing system modules is similar to how the modules were installed into the control unit. - Page 76 6 Maintaining Your System Quick Reference Guide For a 2-slot carrier configuration, do the following: Remove the long screw at the bottom of the modules. Remove the screws that attach the carrier to the modules. Pull the carrier to the right to remove it. Slide the top module to the left to disengage its interlocking mounting tracks from the processor module.
- Page 77 Quick Reference Guide 6 Maintaining Your System Replacing Modules in a 5-Slot Carrier Replacing a module in a 5-slot carrier involves many of the steps used in installing the modules. CAUTION: Before starting, verify that you have batteries installed in the processor module by viewing the display of the telephone at extension 10.
- Page 78 6 Maintaining Your System Quick Reference Guide To insert the replacement, once the module is properly seated, firmly push the center of the module until the connectors on the module lock into place, and the module is attached to the rear of the carrier. For proper engagement of the connectors, the module must be inserted straight into the carrier.
-
Page 79: Changing System Settings
Quick Reference Guide 6 Maintaining Your System Tighten the screw on the lower front of the cover. Changing System Settings If you are upgrading to PARTNER ACS Release 1.1 or 2.0 or later from an earlier release by using the PC Card upgrade, all of your system programming settings are converted to work with the new release. - Page 80 6 Maintaining Your System Quick Reference Guide Adding New Lines How you add new lines to the system depends upon the type of extension you are adding them to. Key Extensions You can add individual lines to pooled extensions or add new lines to key extensions (all extensions in Key mode;...
- Page 81 Quick Reference Guide 6 Maintaining Your System If you add an outside line to your system for use in an existing pool, use Dial Mode (#201) if the new line is a rotary line and Pool Line Assignment (#207) to add the line to an existing pool.
- Page 82 6 Maintaining Your System Quick Reference Guide Swapping Extensions If a user changes location but wants to keep the same extension number, you can make the change easily by changing the connection at the control unit. For example, if the users at extensions 29 and 32 switch offices, you can disconnect the modular plugs from those extension jacks in the control unit.
-
Page 83: If Something Doesn't Work
If Something Doesn’t Work Overview This chapter gives you some tips for fixing common problems fast. Your Release Number The software version you have installed on your processor partly determines what your system can do. Before you call the Helpline, identify your software version or release: f 5 9 From a system phone with an LED display, press... -
Page 84: Clearing A Backup-Failure Alarm
7 If Something Doesn’t Work Quick Reference Guide Clearing a Backup-Failure Alarm If you use Backup Programming–Automatic (#123) and the automatic backup fails, a Backup-Failure Alarm message appears (instead of the default day/date/time message) on the top line of the telephone display at idle extensions 10 and 11. -
Page 85: 012E Module Power Management
Quick Reference Guide 7 If Something Doesn’t Work 012E Module Power Management The power supply used in the 012E module is adequate to power the 12 ETR ports under normal conditions. However, if too many large PARTNER telephones (such as the PARTNER-34D) are off-hook with speakerphone volume set to high levels, the power supply could be overloaded. -
Page 86: Telephone Problems
7 If Something Doesn’t Work Quick Reference Guide Telephone Problems Telephone Problems Problem... Check this... Telephone doesn’t ring Ringer volume may be too low. Do Not Disturb or Call Forwarding may be turned on. Line Ringing may not be set to Immediate. Telephone may be faulty;... - Page 87 Quick Reference Guide 7 If Something Doesn’t Work Telephone Problems–Continued Problem... Check this... Intercom Autodialer Is the telephone cord plugged into the right jack of doesn’t work the DSS? Is the Intercom Autodialer plugged into an electric outlet? Telephone cord may be defective; switch cords and try again.
-
Page 88: Calling Problems
7 If Something Doesn’t Work Quick Reference Guide Calling Problems Calling Problems Problem... Check this... Can’t make outside Is Forced Account Code Entry assigned to this extension? calls Is your dial mode (touch-tone or rotary) incorrect? Use Dial Mode (#201) to reset it. Has someone changed the Outgoing Call Restriction for the extension? Did someone lock the extension with Station Lock? Use... - Page 89 Quick Reference Guide 7 If Something Doesn’t Work Calling Problems–Continued Problem... Check this... Calls are answered If Automatic System Answer and/or Direct Extension Dial automatically is turned on, turn it off. If an auxiliary device (fax, modem, voice messaging system, answering machine) answers when it should not; either: •...
-
Page 90: System Problems
7 If Something Doesn’t Work Quick Reference Guide System Problems System Problems Problem... Check this... Call rings continuously, You may be using Automatic System Answer or but no one at other end Direct Extension Dial on a system that doesn’t support far end disconnect;... -
Page 91: 1600 Dsl Module Problems
Quick Reference Guide 7 If Something Doesn’t Work 1600 DSL Module Problems 1600 DSL Module Problems Problem... Check this... The connection between The 1600 DSL module and the gateway used by the the 1600 DSL module service provider are not communicating properly. and the service Either something is faulty in the 1600 DSL module, or provider’s gateway is not... -
Page 92: Tip/Ring Device Problems
7 If Something Doesn’t Work Quick Reference Guide Tip/Ring Device Problems Tip/Ring Device Problems Problem... Check this... Tip/ring device does not Device does not recognize the distinctive ringing answer pattern used by the system. Set Distinctive Ring (#308) for that extension to Not Active. Tip/ring device does not Device does not recognize the intercom dial tone dial out properly... -
Page 93: System Programming Flow Charts
System Programming Flow Charts System Programming Flow Chart–How to Use To use the following sets of Flow Charts, follow these instructions first: Place the Programming Overlay on the dial pad of the system display phone at extension 10 or 11. •... - Page 94 System Flow Chart–System Automatic System Answer Mode Dial # 1 2 1 System Date Transfer Return Rings Direct Extension Dial Button Dial 1=Hold ✔ Dial Dial Dial # 1 0 1 # 1 0 5 # 1 1 3 2=Disconnect Dial 1=Assigned Dial the date (MMDDYY) Dial 1 digit (0–9) for # of rings before...
- Page 95 System Flow Chart–System Speed Dial Numbers To program a number: To remove a number: Press to enter programming mode Press to enter programming mode f 00 f 00 Press Press Dial a three-digit code (600–699) Dial the System Speed Dial number’s code (600-699) Dial the telephone number—up to 28 digits including special characters.
- Page 96 System Flow Chart–Extensions Line Assignment Automatic Extension Privacy Distinctive Ringing Dial Dial Dial # 3 0 1 # 3 0 4 # 3 0 8 Dial a system extension # Dial a system extension # Dial a system extension # To remove all existing line assignments, Dial 1=Assigned Dial 1=Active...
- Page 97 System Flow Chart–Extensions (Continued) Call Waiting Line Access Mode Dial Dial # 3 1 6 # 3 1 3 For Centralized Telephone Programming, see Dial a system extension # Dial a system extension # following pages Dial 1=Assigned Dial 1=Pooled ✔ all extensions except 10 2=Not Assigned ✔...
- Page 98 System Flow Chart–Dialing Restrictions and Permissions Outgoing Call Restriction Disallowed List Assignments Allowed List Assignments Dial Dial Dial # 4 0 1 # 4 0 5 # 4 0 8 Dial a system extension # Dial a system extension # Dial a system extension # Dial 1=No Restriction ✔...
- Page 99 System Flow Chart–Groups Pickup Group Extension Night Service Group Extensions VMS Hunt Schedule Dial Dial # 5 0 1 # 5 0 4 Dial # 5 0 7 Dial a group # (1–4) Dial a system extension # Release 2.0 and earlier: Dial an extension # (10–57) Dial 1=Assigned to group Dial 1=Always ✔...
- Page 100 System Flow Chart–Auxiliary Equipment Fax Machine Extensions Doorphone Alert Extension SMDR Talk Time Dial Dial Dial # 6 0 1 # 6 0 6 # 6 1 1 Dial a system extension # Dial any extension # (except a doorphone Dial 1=Active extension) Dial 1=Assigned...
- Page 101 Centralized Telephone Programming Flow Chart–How to Use To use the Centralized Telephone Programming Flow Chart, follow these instructions first: Place the Programming Overlay on the dialpad of the system display phone at extension 10 or 11. • To Enter Programming Mode: –...
- Page 102 Centralized Telephone Programming Flow Chart NOTE: Program Automatic Line Selection or Extension Name Display first...then Line Ringing. Call Forwarding/Call Follow-Me Press a programmable button Automatic Line Selection Personal Speed Dial Numbers Press f 1 1 Press Press Dial (optional) two-digit originating Press the line/pool/intercom buttons in the Dial a two-digit code (80–99) extension number...
- Page 103 Centralized Telephone Programming Flow Chart–Continued Group Calling—Ring/Page Manual Signaling Simultaneous Paging Contact Closure 1 For ringing group: Press a programmable button Press a programmable button Press Press a programmable button Press Press f 1 3 i * 7 0 Press a programmable button Press Dial a two-digit extension number Press...
- Page 104 Extension Telephone Programming Flow Chart–How to Use To use the Extension Telephone Programming Flow Chart, follow these instructions first: To Program at an extension, use the following procedure: • To Start programming: – Press f 0 0 – The green light next to buttons on which lines or pools are assigned for the extension show the current Line Ringing settings.
- Page 105 Extension Telephone Programming Flow Chart Account Code Entry Background Music Caller ID Call Logging & Dialing Press a programmable button Press a programmable button Press a programmable button with lights Press Press f 1 2 f 1 9 Press f 2 3 Extension Name Display Call Coverage Press...
- Page 106 Extension Telephone Programming Flow Chart–Continued Contact Closure 1 Group Calling—Ring/Page Manual Signaling Simultaneous Paging For ringing group: Press a programmable button Press a programmable button Press Press a programmable button Press Press Press a programmable button f 1 3 i * 7 0 Press Dial a two-digit extension number Press...
Need help?
Do you have a question about the PARTNER and is the answer not in the manual?
Questions and answers