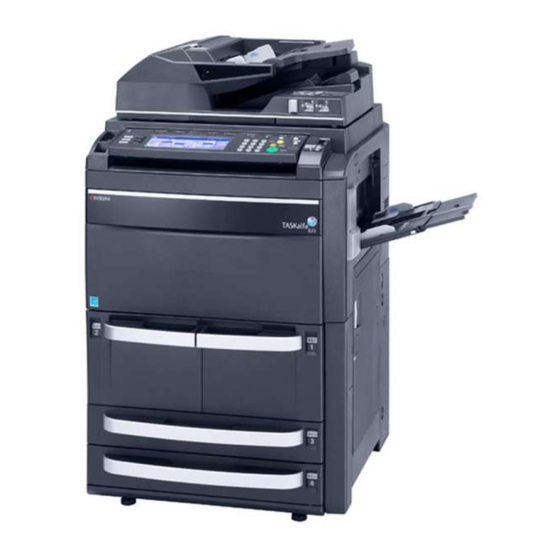
Kyocera TASKalfa 820 Operation Manual
Scan system (h) operation guide rev-1 (functions edition)
Hide thumbs
Also See for TASKalfa 820:
- User manual (95 pages) ,
- Operation manual (88 pages) ,
- Service manual (521 pages)
Table of Contents
Advertisement
Advertisement
Table of Contents

Subscribe to Our Youtube Channel
Related Manuals for Kyocera TASKalfa 820


Summary of Contents for Kyocera TASKalfa 820
- Page 1 Scan System (H) Operation Guide Function Edition...
-
Page 3: About This Operation Guide
Regarding Tradenames • Windows, Windows Server, Windows XP and Windows Vista are registered trademarks of Microsoft Corporation. • Windows NT is a trademark of Microsoft Corporation. • Adobe, Adobe Acrobat and Adobe Reader are registered trademarks of Adobe Systems Inc. •... -
Page 4: Conventions In This Guide
Conventions in This Guide The following conventions are used depending on the nature of the description. Convention Description Example Bold Indicates a message or button Press the Start key. displayed on the machine’s operation panel key or a computer screen. [Regular] Indicates touch panel keys. -
Page 5: Table Of Contents
Contents Regarding Tradenames ..........................i About this Operation Guide ..........................i Conventions in This Guide ..........................ii Scanner Settings ................... 1-1 Setting Scanner Functions ...................... 1-2 Scanner Default Settings ...................... 1-11 Confirming Sending History ....................1-17 Setting Scanner from a Web Browser ............2-1 Web Page Feature ......................... -
Page 7: Scanner Settings
Scanner Settings This chapter explains the scanner functions and settings that can be configured from the machine touch panel. For basic scanner operation, refer to the Scan System (H) Operation Guide Set up Edition. • Setting Scanner Functions...1-2 • Scanner Default Settings...1-11 •... -
Page 8: Setting Scanner Functions
Scanner Settings Setting Scanner Functions This section explains how to configure the scanner functions from the machine. NOTE: Refer to each scanner function operation procedure as explained in Scan System (H) Operation Guide Set up Edition for information how to display the scanner function settings screen. The available settings may vary depending on the sending method. -
Page 9: Select Sending Size
Scanner Settings Select Original Size Select the original size (scanning area). Item Original Size Select size Inch models Auto, 11 × 17", 8 × 14", 11 × 8 ", 8 × 11", 8 × 5 ", 5 × 8 ", ×... - Page 10 Scanner Settings Selecting Original Orientation Specify the top edge of the placed original. Item Description Top Edge Top Sets the top edge as the original's upper edge. Top Edge Left Sets the left edge as the original's upper edge. Placing originals on the platen Original [Top Edge Top] [Top Edge Left]...
-
Page 11: File Name Entry
Scanner Settings File Name Entry Specify a filename to assign to a scanned image. Item Description Auto Automatically assign a filename. Manual The file name can be changed. Press [Change Name] and input the filename. NOTE: This selection is not available for TWAIN and Database Connection. Enter the filename using less than 20 characters. -
Page 12: Original Image
Scanner Settings Setting Image Quality The following settings are available from the scanner function screen’s [Quality] tab. Ready to scan. Original Send 11×8½" 8½× 11" Place the original and select destination . 10/10/’08 10:10 Scan to PC -Sending Cont. TX to Cancel Density 4 Text... - Page 13 Scanner Settings Setting Edit Functions The following settings are available from the scanner function screen’s [Edit] tab. Ready to scan. Original Send 11×8½" 8½×11" Place the original and select destination . 10/10/’08 10:10 Scan to PC-Sending Cont. TX to Cancel Destination Border Mixed Size...
-
Page 14: Border Erase
Scanner Settings Border Erase Removes black borders from around the edges of originals. Function Value Description Border Erase Sheet Inch models Use this mode to erase black borders Border: 0 - 2" (1/8" increments) around single sheet originals. Metric models Border: 0 - 50 mm Book Erase Inch models... -
Page 15: Mixed Size Originals
Scanner Settings Mixed Size Originals Scan differently sized originals in one operation when placed in the optional document processor. Item Description Mixed Size Copies Enables Mixed Size Originals. Disables Mixed Size Originals. One Page Per File Creates and sends a separate file for each page of a scanned original. Item Description Enables One Page Per File. - Page 16 Scanner Settings Centering When scanning with zoom, by specifying the Original size and the Send size, blank borders around the bottom or left and right will be shown, depending on the sizes. When setting Centering, the image is moved to the center so that blank borders around the top and bottom or left and right become even.
-
Page 17: Scanner Default Settings
Scanner Settings Scanner Default Settings Change the default settings for the scanner function. Default Settings This section explains how to change default settings which are applied when the machine is powered up or the Reset key is pressed. Automatically configured details set in default setting mode are called default settings. - Page 18 Scanner Settings Original Image Set the image quality for default settings mode. The setting items are as follows. Item Description Text+Photo When scanning originals with mixed text and photos. Photo To reproduce depth of photo originals. Text To clearly reproduce penciled or fine lines. for OCR For use with OCR applications (software to convert optical characters to text data).
-
Page 19: File Name
Scanner Settings Continuous Scan Configure Continuous Scan for default settings mode. The setting items are as follows. Item Description Enables Continuous Scan. Disables Continuous Scan. For further details on Continuous Scan, refer to page 1-8. Referring to Accessing the Setting default function Screen on page 1-11, access the Setting default function screen. - Page 20 Scanner Settings Full scan Configure Full Scan for default settings mode. the setting items are as follows. Item Description Enables Full scan. Disables Full scan. For further details about Full scan, see page 1-9. Referring to Accessing the Setting default function Screen on page 1-11, access the Setting default function screen.
-
Page 21: Continuous Sending
Scanner Settings Continuous Sending Use the same settings from a previously completed transmission for the next transmission. The scan function screen is returned with the sender (user), destination and other settings remaining from the previous operation. Item Description Enables Continuous Sending. Disables Continuous Sending. -
Page 22: Selec. Of Senders (Users)
Scanner Settings Selec. of senders (Users) When using this scanner, a sender (user) must be first selected. Set Selec. of senders (users) to set the sender (user) to User No. 001 and skip the sender (user) selection step. Use this setting to limit scanner usage to certain users or to skip this operation step. -
Page 23: Confirming Sending History
Scanner Settings Confirming Sending History Confirm the sending history from the operation panel. Press the Scanner key. Press [History of Sending] ([Report of t scanner function. sent data]). 10/10/`05 10:10 Edit Change Scan to PC TWAIN addr. book user info. Scan to History of sending... - Page 24 Scanner Settings 1-18...
-
Page 25: Setting Scanner From A Web Browser
Setting Scanner from a Web Browser This chapter explains the scanner settings that can be configured from a web browser. The main configurable settings are as follows. • Web Page Feature...2-2 • System Setting...2-6 • Scan to PC Setting...2-15 • Send E-mail Setting...2-19 •... -
Page 26: Web
Setting Scanner from a Web Browser Web Page Feature Use the web page feature to manage the scanner functions from a web browser. Modifications to network settings, scanner default settings, Scan to PC, Send E-mail, and Scan to FTP can be easily made over the network. - Page 27 Setting Scanner from a Web Browser Page not found. error is displayed • The machine has not finished booting or rebooting. Please try again later. Access forbidden XXX error is displayed • The machine is in use. Try again after verifying that the scanner operation is complete and the display has returned to the startup screen.
- Page 28 Setting Scanner from a Web Browser Screen Layout The top page consists of 3 frames. 1 Top Frame 2 Menu Frame 3 Main Frame Top Frame: Displays the scanner IP address and scanner status. (See page 2-4) Menu Frame: Select the desired configuration items for the scanner. (See page 2-5) Main Frame: Displays the scanner system information.
- Page 29 Setting Scanner from a Web Browser Menu Frame From the menu frame, select the desired configuration items for the scanner. NOTE: Each item in the menu frame can be configured in succession. However, if the same item is selected during configuration, settings made until then are lost. Display Description Home...
-
Page 30: System Setting
Setting Scanner from a Web Browser System Setting Configure the scanner settings under System Setting. Each item may only be configured when the scanner is in Ready to Scan status, or the machine is in Low Power Mode or in Sleep Mode. Setting Method The administrator password is required to configure the scanner network interface and scanner related... - Page 31 Setting Scanner from a Web Browser Display Description Default Gateway Enter the scanner default gateway in ‘XXX.XXX.XXX.XXX’ notation. DHCP/BOOTP Set DHCP and BOOTP to either Enabled or Disabled. The default setting is Enabled. RARP Set RARP to either Enabled or Disabled. The default setting is Enabled. ARP/PING Set ARP/PING to either Enabled or Disabled.
-
Page 32: Smtp Authentication
Setting Scanner from a Web Browser Display Description Firmware update There is a great security risk if anyone could be allowed to update the firmware without administrator permission. Network instability may occur if someone other than the network were to intentionally or accidentally replace the firmware with an inappropriate firmware version. - Page 33 Setting Scanner from a Web Browser Verify the new password. Re-enter the password from Step 6 into the Confirm New Password field. Click the Registration button. IP-Filters This scanner includes a filtering feature to limit the IP addresses that can connect to each protocol, restricting access to specific profiles to only specified IP addresses.
- Page 34 Setting Scanner from a Web Browser Scanner Default Setting Configure image scanning related default settings for the scanner. The settings items are Basic Setting and Extension Setting. Click Extension button to show Scanner Default Setting (Extension). Basic The setting items are as follows. Setting Item Value Description...
- Page 35 Setting Scanner from a Web Browser Extension The setting items are as follows. Setting Item Value Description Full scan On, Off With this mode, you can scan the entire area of the selected original size as image when this function is set to “On”.
- Page 36 Setting Scanner from a Web Browser Sender List Configure the Sender (User) List for use with network scanner functions (Send E-mail, Scan to PC, Database Connection, Scan to FTP). Sender (User) List Click Sender List to display the Sender (User) List. Up to 40 entries (No.001 - 020, No.021 - 040) senders (users) can be added, verified, or edited.
- Page 37 Setting Scanner from a Web Browser Sender (User) Setting Click the user number from the Sender (User) List to show the Sender (User) Setting screen. Setting Item Description Registration The number selected from the Sender List is shown here. This is shown for Number to verify which number from the Sender Setting table is being added or modified, and cannot be modified itself.
- Page 38 Setting Scanner from a Web Browser Setting SMTP Description Authentication Login Account Enter the Login Account Name to use in SMTP Server Authentication by the Name user. When specifying SMTP Server Authentication for each user, first configure SMTP Server Authentication in System Basic Setting. (See page 2-8) Change Password Set to Yes to change the user's SMTP Server Authentication password or No to leave as-is.
-
Page 39: Scan To Pc Setting
Setting Scanner from a Web Browser Scan to PC Setting When using the scanner, you can send scanned image data to a specified folder on a pre-registered computer. This section explains how to register a destination PC for use with this feature. NOTE: For further details on the Scanner File Utility, see Scanner File Utility on page 3-3. - Page 40 Setting Scanner from a Web Browser Add Destination (PC) Select whether to add as Single Regist or Group Regist. Click the Single Regist button or Group Regist button to show the registration/edit screen. Add Destination (PC) Single Registration Add or edit registration name/destination PC/save number. Setting Item Description Registration Number...
- Page 41 Setting Scanner from a Web Browser Setting Item Description Save Number To select multiple save destinations on a single computer, enter the save number. Up to 100 save destinations (folders) can be specified for a single computer. (Use save numbers between 1 - 100) Registration Button Click the Registration button to save the settings to the scanner.
- Page 42 Setting Scanner from a Web Browser Setting Item Description Registration Button Click the Registration button to save the settings to the scanner. Entered information is lost if you browse to another page before clicking this button. Cancel the selection Click the Cancel the selection button to cancel the selection for the Button destination.
-
Page 43: Send E-Mail Setting
Setting Scanner from a Web Browser Send E-mail Setting This section explains the settings for sending scanned images to computers via e-mail. E-mail Basic Setting Set the basic components here for sending e-mail. IMPORTANT: Press the Registration button after making changes. Setting Item Description Item... - Page 44 Setting Scanner from a Web Browser Setting Item Description Character Code Here, specify the character code set to describe e-mail. Select code set from among US-ASCII (English)/SHIFT-JIS (Japanese)/ ISO-8859-1 (West Europe)/Windows-1252 (West Europe)/ Windows-1250 (Central Europe). The default setting is US-ASCII (English). Set the code set matching the computer environment of the e-mail recipient.
- Page 45 Setting Scanner from a Web Browser IMPORTANT: Always press the Registration button after making changes. Destination Registration (E-mail) Select whether to add as Single Regist or Group Regist. Click the Single Regist button or Group Regist button to show the registration/edit screen. Destination Registration (E-mail) Single Add or edit registration name/destination e-mail address for each individual number.
- Page 46 Setting Scanner from a Web Browser Setting Item Description Registration Button Click the Registration button to save the settings to the scanner. Entered data is lost if this button is not clicked. Reset Button Click the Reset button to reset any changes to the setting options. Delete Button Click the Delete button to delete the displayed destination.
- Page 47 Setting Scanner from a Web Browser Destination Registration (E-mail) Group Registration Add or edit the destination (E-mail) group. IMPORTANT: Destination Registration (E-mail) Group Registration cannot be performed until after Destination (E-mail) Single Registration has been performed. Select the destination to add to the group and click the checkbox next to the No. Enter the group registration name and password details and click the Registration button to add the destination group.
-
Page 48: Scan To Ftp Setting
Setting Scanner from a Web Browser Scan to FTP Setting Scanned image data can be uploaded to a pre-registered FTP server. This section explains how to register an FTP server for use with this feature. Destination List Destination List (FTP) Click this item to show the FTP server registration screen. - Page 49 Setting Scanner from a Web Browser Destination Registration (FTP) Add or edit an FTP server. Setting Item Description Registration Number The number selected from the Destination List is shown here. This is shown for to verify which number from the Destination Registration (FTP) Table is being added or modified, and cannot be modified itself.
- Page 50 Setting Scanner from a Web Browser 2-26...
-
Page 51: Included Scanner Tools
Included Scanner Tools This chapter introduces the scanner tools. • Introducing the Scanner Tools...3-2 • Scanner File Utility...3-3 • Address Editor...3-14 • Address Book for Scanner...3-33 • TWAIN Source...3-43 • DB Assistant...3-49... -
Page 52: Introducing The Scanner Tools
Included Scanner Tools Introducing the Scanner Tools • Scanner File Utility (See page 3-3) Scanner File Utility is a utility that enables a computer to receive images from the scanner and save in specified folders. Scanner File Utility saves the received images as files. •... -
Page 53: Scanner File Utility
Included Scanner Tools Scanner File Utility About the Scanner File Utility Scanner File Utility is a utility that enables a computer to receive images from the scanner and save in specified folders. Scanner File Utility saves the images received from the scanner onto a computer. - Page 54 Included Scanner Tools Register save destination computer using Address Editor, Address Book for Scanner, or a web browser Scan the original Transmit scanned data Receive image data into the save folder Operating Environment Hardware IBM PC/AT Compatible Interfaces 10BASE-T/100BASE-TX Operating System Windows 2000 Service Pack 2 or later, Windows Server 2003, Windows XP,Windows Vista Installing and Uninstalling...
- Page 55 Included Scanner Tools Follow the wizard to complete the installation. NOTE: For Windows 2000, Windows XP, Windows Server 2003 and Window Vista, a Setup Type selection dialog is shown. Select the following setup type and proceed to the next step. •...
- Page 56 Included Scanner Tools Uninstalling Scanner File Utility Click on the Start in the Task Bar and then select All Programs, Kyocera and Uninstall Product Library to display the Uninstall Wizard. lace a check in the check box of Kyocera Scanner File Util- ity to be deleted and click on Uninstall.
- Page 57 Included Scanner Tools About the Start Dialog Box Item Description Status Field The scanner’s status is shown. OK Button Click to close the start dialog box. Setup Button Click to set save folders or to change or set a password. (See page 3-8) When Scanner File Utility is running in Service Mode, the Setup button is only available after the Scanner File Utility service is set...
- Page 58 Included Scanner Tools File Save Folder Settings About the Setup Dialog Box To set save folders or to change or set a password, click the Setup button on the start dialog box. The Setup dialog box appears, where you can confirm previously set folders. Item Description New Button...
- Page 59 Included Scanner Tools Configuring a New Save Folder To specify a new save folder, click the New button on the Setup dialog box. The New Folder Setting dialog box is shown. Input a number (from 1 - 100) for the No. column. NOTE: The number input here is assigned to the save folder and used as the save number.
- Page 60 Included Scanner Tools Set programs to connect to the system in the System Connection Program field. Always choose if the image to be scanned will be integrated as below. NOTE: Use of this feature requires configuration of DB Assistant (see page 3-49) or Network FAX.
-
Page 61: Operation Overview
Included Scanner Tools To change a save folder comment, enter less than 32 characters into the Comment field. To change the details of the System Connection Program field, do so referring to Configuring a New Save Folder on page 3-9, Step 6. Click the OK button. -
Page 62: File Names
Included Scanner Tools File Names When saving data files at the computer, the details configured in advance from the web browser are added to the filename (character string less than 16 characters + file extension). If not specified, the filename will be automatically determined based on predefined rules. The file naming convention for automatic naming is as follows. - Page 63 Included Scanner Tools Service Mode (Windows 2000, Windows XP, Windows Server 2003 Windows Vista only) When Scanner File Utility is installed in Service Mode, the following settings are added. Even if a user is not logged on to the computer, the Scanner File Utility remains available to receive scanned data.
-
Page 64: Address Editor
CD-ROM main menu. Click Address Editor. Follow the wizard to complete the installation. Uninstalling Address Editor Click on the Start in the Task Bar and then select All Programs, Kyocera and Uninstall Product Library to display the Uninstall Wizard. 3-14... - Page 65 Included Scanner Tools Place a check in the check box of Kyocera Address Editor to be deleted and click on Uninstall. Follow the wizard to complete the installation. Kyocera Address Editor i s deleted. Launching Address Editor Launch Address Editor NOTE: Click the Windows start button, and on the menu that appears select All Programs...
-
Page 66: Scanner Search
Included Scanner Tools Scanner Address Setting Item Description Scanner Address Enter the address (hostname or IP address) of the scanner to connect. The dropdown list shows the most recently used 10 scanner addresses. Enter the hostname using less than 32 characters. Search Button Search for connected scanners. - Page 67 Included Scanner Tools Item Description Start Searching Begins searching for scanners. Button Scanner Address Click the search result list to show the scanner address. You can skip searching and select a scanner address that was discovered previously from the drop down menu. You can directly enter the scanner address.
-
Page 68: System Basic Setting
Included Scanner Tools System Setting Configure the scanner’s basic settings. System Basic Setting Set the scanner’s network settings such as the IP address. Network 1 Tab Item Description Network 1/Network Switch between Network 1, Network 2, and IP-Filters settings. 2/IP-Filters Tab Host Name Input a scanner host name no longer than 32 characters. - Page 69 Included Scanner Tools Network 2 Tab Item Description SMTP Server Name Enter into this field the SMTP server hostname in less than 32 characters or IP address in ‘XXX.XXX.XXX.XXX’ notation. SMTP Port No. Enter the SMTP port number in this field. The default port is 25. DB Assistant Enter the IP address or hostname (under 32 characters) of the computer with DB Assistant installed.
- Page 70 Included Scanner Tools SMTP TX Authentication (Administrator) Set the administrator SMTP Server Authentication. Choose SMTP Authentication or No Authentication. NOTE: POP before SMTP and POP before SMTP(APOP) are not supported with this scanner. Enter the Login Account Name to use in SMTP Server Authentication. Enter the password into the Password field.
- Page 71 Included Scanner Tools Scanner Default Configure image scanning related default settings for the scanner. The settings items are Basic Setting and Extension Setting. Click Extension button to show extended settings. Basic - Black and White mode The setting items are as follows. Setting Item Value Description...
- Page 72 Included Scanner Tools Basic - Universal mode The setting items are as follows. Setting Item Value Description Resolution 600dpi, 400dpi, 300dpi, 200dpi Select from the following four resolutions to scan an original. Multiple Scanning OFF, ON Select whether to scan originals in a continuous operation.
- Page 73 Included Scanner Tools Setting Item Value Description Continuous ON, OFF Use the same settings from a sending previously completed transmission for the next transmission. The scan function screen is returned with the sender (user), destination and other settings remaining from the previous operation.
- Page 74 Included Scanner Tools Item Description Edit Button Click this button to modify sender data. The sender editing dialog box is shown. (See page 3-24) Import Button Click this button to import sender data from an Address Editor file or CSV file. The Import dialog box is shown.
-
Page 75: E-Mail Send Setting
Included Scanner Tools E-mail Send Setting Set basic settings and register/edit destinations for sending scanned images to computers by e-mail. Mail Basic Setting Set the basic items here for sending e-mail. Item Description E-mail Select destination domain from Non-restricted sending/Permitted destination Transmission domain names/Restricted destination domain names. - Page 76 Included Scanner Tools E-mail Destination List Display or edit the E-mail Destination List for Send E-mail. Item Description Name As the E-mail destination, displays the name displayed at the top of the scanner operation panel. When the address associated with the Sender (User) List has been registered, a * is shown in this field.
- Page 77 Included Scanner Tools Destination Editing (E-mail) Display or edit destination e-mail address. Item Description Name Field to enter the Registration Name. Enter a registration name less than 16 characters long. Registration Enter the destination data registration number. Number E-mail Address Enter the destination e-mail address.
- Page 78 Included Scanner Tools Scan to PC Setting Set basic settings and register/edit destinations for sending scanned images to computers. Destination List(PC) Display or edit the Destination List for Scan to PC. Item Description Name As the Scan to PC destination, displays the name at the top of the scanner operation panel.
- Page 79 Included Scanner Tools Destination Editing (Scan to PC) Display or edit destination PC addresses. Item Description Name Field to enter the Registration Name. Enter a registration name less than 16 characters long. Registration Enter the destination PC registration number. Number PC address Enter the hostname or IP address of the destination PC.
- Page 80 Included Scanner Tools Toolbar A row of buttons is provided for easy access to write edited data to the scanner or other operations. Item Description Open Button Specify and open an Address Editor file. Save Button Save modified data to a file. Data Send Button Writes setting data for the edited page to the scanner.
- Page 81 Included Scanner Tools Field Settings If a CSV file has been selected, match the text fields with the Destination List items. Item Description Name The name displayed at the top of the scanner operation panel as the e-mail destination. E-mail Address The e-mail address for the destination list.
- Page 82 Included Scanner Tools Item Description Warning column Displays a warning mark for entries containing import errors. The warning marks are as follows. ? The name exceeds the maximum number of characters. This display is cleared by editing to reduce the number of characters. The name includes double byte (such as Japanese) characters.
-
Page 83: Address Book For Scanner
An icon is added to the Windows Taskbar to indicate running operation. Uninstalling Address Book for Scanner Click on the Start in the Task Bar and then select All Programs, Kyocera and Uninstall Product Library to display the Uninstall Wizard. - Page 84 Included Scanner Tools Place a check in the check box of Kyocera Address Book to be deleted and click on Uninstall. Follow the wizard to complete the installation. Kyocera Address Book i s deleted. Start Dialog Box Address Book for Scanner is launched automatically after installation. Use the start dialog box to close this program or register or edit a Destination List.
- Page 85 Included Scanner Tools Destination List Setting About Address Book Dialog Box To register or edit destination address for sending scanned images by e-mail or to other computers, press the Setup button on the start dialog box. The Address Book dialog box is shown. You can verify already registered destination addresses.
- Page 86 Included Scanner Tools E-mail Destination List In the Address Book dialog box, click the E-mail Address button. The destination list for e-mail sending is shown. Item Description Destination List field Shows a list of e-mail destinations saved to the destination list. Name Displays the destination (group) name.
- Page 87 Included Scanner Tools Registering and Editing E-mail Destination Group For adding an e-mail destination group to a destination list or editing details of an already registered e-mail destination group, use the Destination Group Registration (E-mail) dialog box. In the Address Book dialog box, click the New Group button.
- Page 88 Included Scanner Tools PC Destination List In the Address Book dialog box, click the PC Address button. The destination list for Scan to PC is shown. Item Description Destination List field Shows a list of destination PCs saved to the destination list. Name Displays the destination (group) name.
- Page 89 Included Scanner Tools In the Address Book dialog box, click the Save button. The changes to the destination list are saved. Registering and Editing Destination PC Groups For registering a destination PC group to a destination list or editing details of an already registered destination PC group, use the Destination Group Registration (PC) dialog box.
- Page 90 Included Scanner Tools Enter a new password under 8 digits (numeric characters). For verification, enter the new password again. Click the OK button. The display returns to the Destination Group Registration (PC) dialog box. Adding Destination PC to a Destination PC Group Add destinations to a destination PC group from the Edit member (PC) dialog box.
-
Page 91: Importing Csv Files
Included Scanner Tools Importing CSV files Open data created with other mail applications and saved as CSV files to use the address data with Address Book for Scanner. From the Address Book dialog box menu, select FileImportCSV file. The Open dialog box is shown. Select the folder containing the address data file in CSV format. - Page 92 Included Scanner Tools To edit the registration details of the selected e-mail address, click the Edit button. The Destination Registration (E-mail) dialog box is shown. (See page 3-36) Click the OK button. The selected e-mail address is added to the Address Book for Scanner E-mail Destination List.
-
Page 93: Twain Source
Included Scanner Tools TWAIN Source About TWAIN Source TWAIN Source is a utility used from a TWAIN-compliant application to scanned images from the scanner into the TWAIN-compliant application. This section explains how to import images using TWAIN-compliant general purpose applications. IMPORTANT: Install TWAIN Source onto the computer before importing images using this method. - Page 94 Follow the wizard to complete the installation. Uninstalling TWAIN Source Click on the Start in the Task Bar and then select All Programs, Kyocera and Uninstall Product Library to display the Uninstall Wizard. Place a check in the check box of Taskalfa620/820 TWAIN to be deleted and click on Uninstall.
-
Page 95: Importing Images
Included Scanner Tools Importing Images There are two main methods to use a TWAIN-compliant application to import images from the scanner, and the operation method is as follows. Perform the image scanning method suitable to your working requirements. NOTE: See Scan System (H) Operation Guide Set up Edition for operation procedure details. Starting Scanning from the Computer Launch TWAIN Source from the TWAIN-compliant application on the computer. - Page 96 Included Scanner Tools About the Main Dialog Box The items shown in the TWAIN Source main dialog box are as follows. Item Description Original Image Size Select the standard size for original scanning. The following sizes are available. Auto, A3 (297 × 420 mm), Computer Form (11 × 15"), A4 (210 ×...
- Page 97 Included Scanner Tools Item Description 2 sided Sets whether to scan both sides of an original with the optional document processor. None: Scan only 1 side of the original. 2 sided (Left/Right): Set to scan left/right binding 2-sided originals. 2 sided (Top): Set to scan top-binding 2-sided originals. Status Field The device status is displayed.
-
Page 98: Job Accounting Setting
Included Scanner Tools Job Accounting Setting If Job Accounting is configured for the device, the Job code must be entered when using the device. When Job Accounting is enabled, the job code sent by the computer is verified by the scanner. Therefore, the Job Accounting code must be configured in TWAIN Source at the computer. -
Page 99: Db Assistant
Included Scanner Tools DB Assistant About DB Assistant DB Assistant is a utility that configures 2 features: PDF Keyword Assist option, to add keywords searchable from a computer to scanned images, and Database Assist option, to create text information CSV files. These features are extremely useful when organizing scanned images or managing databases. - Page 100 Included Scanner Tools Operation Flow The operation flow for using DB Assistant to add text information to scanned images and save to specified folders is as follows. Scanner Administrator Save destination computer Use DB Assistant to add text information From a web browser or scanner, register the administrator PC’s IP address From Scanner File Utility, select whether to link to PDF Keyword Assist option or Database Assist option Select [Database Connect], set text information, and scan original...
- Page 101 An icon is added to the Windows Taskbar to indicate running operation. Uninstalling DB Assistant Click on the Start in the Task Bar and then select All Programs, Kyocera and Uninstall Product Library to display the Uninstall Wizard.
- Page 102 Included Scanner Tools About the Operation Window DB Assistant is launched automatically after installation. To configure PDF Keyword Assist option/Database Assist option, open the setting dialog box. Showing the Setting Dialog Box • When the program is running Double-click the taskbar icon. The DB Assistant start dialog box is displayed. Next, click the start dialog box Configuration button to show the DB Assistant setting dialog box.
- Page 103 Included Scanner Tools Setting PDF Keyword Assist Option This section explains setting and registering PDF Keyword Assist option (add text data keywords to scanned images) with DB Assistant. First, open the DB Assistant setting dialog box and follow the steps below. NOTE: Refer to the PDF Keyword Assist option setting information to configure Database Assist option (create CSV text data files for scanned images).
- Page 104 Included Scanner Tools NOTE: Refer to Setting Scanner Functions on page 1-2 for settings item details. These scan default settings can be changed later from the scanner operation panel. From the setting dialog box select Default Settings and right-click to show the Set, RegisterDefault, Return to default menu.
- Page 105 Included Scanner Tools Enter the keyword in the List Change field. Enter text less than 32 characters long. Click Apply (or press Enter key) to register the keyword to the Keyword. To change an entered keyword, select the keyword you would like to change (reverse display) and click the Edit button.
- Page 106 Included Scanner Tools To verify the Senders (Users) previously registered in the scanner, click the Browse... button. The Current Sender List dialog box is displayed. Enter the address of the scanner to connect (hostname or IP address) in the Scanner Address field.
-
Page 107: Troubleshooting
Troubleshooting This chapter explains how to solve problems when they occur. • Responding to Error Messages...4-2... -
Page 108: Responding To Error Messages
Troubleshooting Responding to Error Messages If the touch panel displays any of these messages, follow the corresponding procedure. Scanner Error Messages If the Scanner mode touch panel displays any of these messages after pressing the Scanner key, follow the corresponding procedure. Display Checkpoints Corrective Actions... - Page 109 Troubleshooting Display Checkpoints Corrective Actions Reference Page Communication error. Scan to PC: Try retransmitting. — Sending computer status. E-Mail Send: Contact your system administrator. — Is the SMTP server running? Database Connection: An unsupported response was — Save destination computer status. received from DB Assistant.
- Page 110 Troubleshooting Display Checkpoints Corrective Actions Reference Page DB Assistant Server version is Is the DB Assistant version Contact your system administrator — different. different? or support personnel. Contact administrator. DB Assistant Server error. — An error has occurred with DB —...
-
Page 111: Scanner Error Codes
Troubleshooting Scanner Error Codes Below is a list of scanner send log error codes and their corrective actions. Error Code Detail Contents Corrective Actions Reference Page E001 User initiated cancel during send. — — E010 Connection to destination PC lost during •... - Page 112 Troubleshooting Error Code Detail Contents Corrective Actions Reference Page E036 During scanned image compression, Decrease data size as follows and try again. — compressed data overran available • Decrease resolution. memory. • Set image quality to OCR. • Decrease number of pages scanned in one operation.
-
Page 113: Appendix
Appendix This chapter covers the following topic. • Glossary...Appendix-2 Appendix-1... -
Page 114: Glossary
Appendix Glossary Default gateway The address representing the computer or router used when accessing a computer outside the local network. If a specific gateway is not defined for the IP address being accessed, the data is sent to the host specified by the default gateway. DHCP (Dynamic Host Configuration Protocol) DHCP is a protocol to automatically resolve IP addresses, subnet masks, and gateway addresses on a TCP/IP network. - Page 115 Appendix TWAIN (Technology Without Any Interested Name) A technological standard for connecting computers and image input devices such as scanners and digital cameras. Images from a TWAIN-compliant device can be imported into any TWAIN-compliant software application. TWAIN functionality is included in Adobe Photoshop and many other graphic editing applications, and many OCR applications.
- Page 116 Appendix Appendix-4...
- Page 117 Index Index Address Book for Scanner 3-33 Grayscale Appendix-2 Description 3-33 Installing and uninstalling 3-33 Operation method 3-34 IEEE1284 Appendix-2 Address Editor 3-14 Image quality 1-6 Description 3-14 Default setting 1-12 Installing and uninstalling 3-14 IP address Appendix-2 Operation method 3-15 Legal and safety information Border erase 1-8 Regarding tradenames i...
- Page 118 Index Reset 2-14 Scanner default 2-10 Sender list 2-12 Setting method 2-6 System basic setting 2-6 TCP/IP Appendix-2 TWAIN Appendix-3 TWAIN Source 3-43 Description 3-43 Installing and uninstalling 3-44 Operation method 3-45 USB Appendix-3 Web browser Setting from a web browser 2-1 Web page feature 2-2 Index 2-2 Precautions 2-2...
-
Page 119: Index
Index Index-3... - Page 120 Index Index-4...
- Page 121 Index Index-5...
- Page 122 Index Index-6...
- Page 124 Rev. 1 2009.8...
Need help?
Do you have a question about the TASKalfa 820 and is the answer not in the manual?
Questions and answers