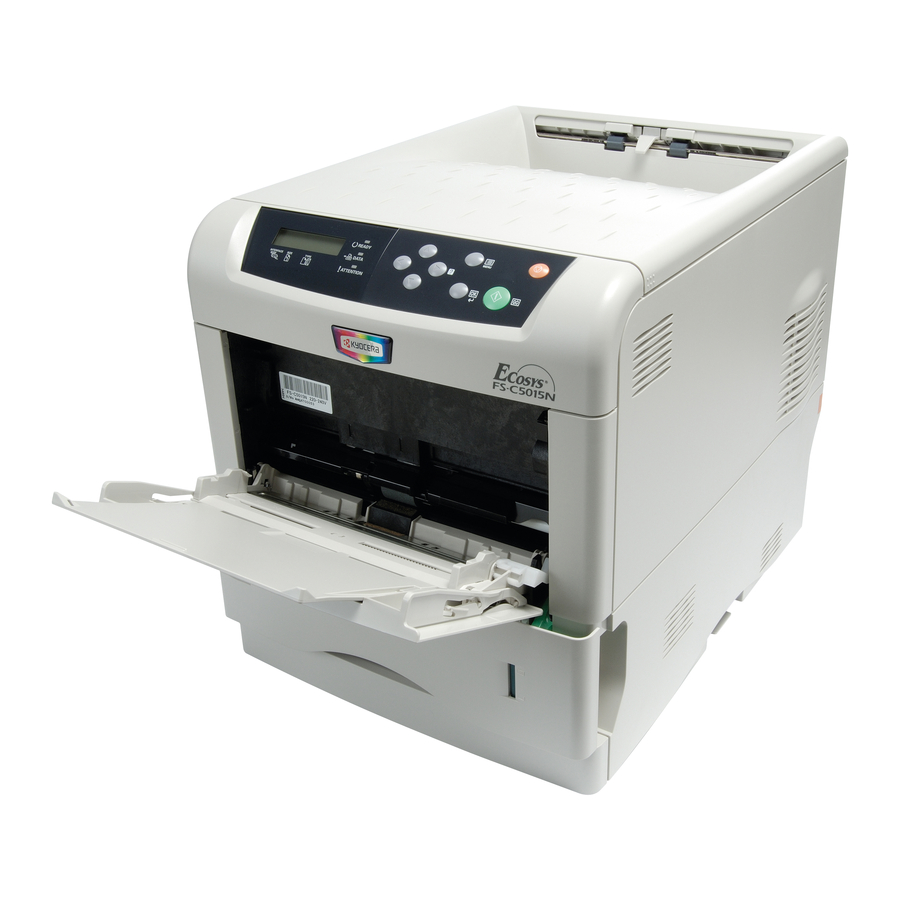
Kyocera FS C5015N - Color LED Printer Operation Manual
Kyocera command center operation guide rev 6.3
Hide thumbs
Also See for FS C5015N - Color LED Printer:
- User manual (105 pages) ,
- Operation manual (33 pages) ,
- Command reference manual (410 pages)
Table of Contents
Advertisement
Quick Links
Advertisement
Table of Contents

Related Manuals for Kyocera FS C5015N - Color LED Printer


Summary of Contents for Kyocera FS C5015N - Color LED Printer
- Page 1 KYOCERA COMMAND CENTER Operation Guide...
- Page 2 Examples of the operations given in this guide support the Windows 7 printing environment. Essentially the same operations are used for Microsoft Windows Vista, Windows XP, Windows Server 2003, and Windows Server 2008 environments. User Interface screen captures shown in this guide may differ depending on your printing device. © 2010 KYOCERA MITA Corporation...
-
Page 3: Table Of Contents
Table of Contents Chapter 1 Introduction Using COMMAND CENTER ......................1-1 System Requirements ........................1-1 Protocols ..........................1-1 Web browser ........................... 1-1 Chapter 2 Access Accessing COMMAND CENTER ....................2-1 Admin password ........................2-1 Authentication .......................... 2-1 Encryption ..........................2-2 Chapter 3 COMMAND CENTER Pages Start Page ............................. - Page 4 FAX / i-FAX Page ........................3-20 FAX / i-FAX > Common > Defaults ..................3-20 FAX / i-FAX > Common > Transmit ..................3-20 FAX / i-FAX > Common > Receive ..................3-20 FAX / i-FAX > Common RX/Forward Requirements > General ..........3-21 Setting Destinations ......................
-
Page 5: Chapter 1 Introduction
1 Introduction Using COMMAND CENTER KYOCERA COMMAND CENTER (hereinafter referred to as COMMAND CENTER) refers to the web home page that is installed in the machine from which you can verify the operating status of the machine and make settings related to security, network printing, E-mail transmission and advanced networking. -
Page 6: Chapter 2 Access
2 Access Accessing COMMAND CENTER Run the web browser. In Address or Location, enter the machine IP address as the URL, e.g. http://192.168.10.150. Select a category from the navigation bar on the left to view and set values for that category. Admin password Setting Administrator Password restricts general users' access to pages other than the Start page. -
Page 7: Encryption
Access Encryption You can encrypt communication between a PC and this machine using SSL encryption. When this encryption is enabled, the access URL must be specified as "https://..." For details on the setting procedure, refer to Advanced > Security > Secure Protocols on page 3-51. -
Page 8: Start Page
3 COMMAND CENTER Pages The COMMAND CENTER home page divides the following functions onto separate pages. You can jump to the desired pages by clicking the tab located at the top of each page. The following is an outline of each page accessed, described on the page as indicated below. -
Page 9: Start > Start
COMMAND CENTER Pages • Access linked home pages All users will have access to the Start page. Start > Start This page allows you to verify the machine’s operating status. This will be the first screen that appears after COMMAND CENTER has been started up. Select Language Appears if COMMAND CENTER pages support multiple languages. -
Page 10: Start > Status Pages
COMMAND CENTER Pages This shows paper size and media type for cassettes and MP tray. Start > Status Pages These pages allow you to verify the various settings (machine, printing, scanning, network and E-mail) that were made on the operation panel or using COMMAND CENTER. -
Page 11: Start > Information
3-12. About The model number of this printing system and Version of Firmware can be confirmed. Start > Links Links to the Kyocera Mita Corporation web sites. Visit the following web site for more information and downloads. COMMAND CENTER... -
Page 12: Basic Page
COMMAND CENTER Pages Download Drivers For downloading printer drivers, etc.: http://www.kyoceramita.com/download/ Kyocera Online For more information about products: http://www.kyoceramita.com/ Basic Page This section includes settings that apply to the machine, such as Device Defaults, Security, and basic Networking. Basic > Defaults > Network This page allows you to make the settings that are required for network printing and sending E-mail. -
Page 13: Basic > Defaults > Time
COMMAND CENTER Pages Assigns an IPv6 address to the printing system network component. The format of the IPv6 address is a sequence of numbers (128 bit in total) separated by colons, e.g. 2001:db8:3c4d:15::1a2c:1a1f. • Prefix Length Specifies the IPv6 prefix length of the hosts or network with which the print system is connecting. -
Page 14: Basic > Defaults > Device Defaults
COMMAND CENTER Pages Clicking Restart restarts this machine. Restart Network Clicking Restart allows restarting the network interface without restarting the machine. The network interface must be restarted whenever a change has been made to the network settings. Reset entire device to factory default When clicking the Reset button, the machine returns to the factory default settings. - Page 15 COMMAND CENTER Pages Error Clear Timer Specifies the time between 5 and 495 seconds after which errors are cleared automatically. Low Power Timer Specifies the time from 1 to 240 minutes after which the system enters the low power mode, where it reduces the power consumption. Interrupt Clear Time This determines the time of period before the machine reverts to normal mode, after the interrupt copy mode has been engaged.
-
Page 16: Basic > Defaults > Address Book > Contacts
COMMAND CENTER Pages Entry Check for New Dest(ination) When enabled, this prompts you to re-enter the password for confirmation when adding a new destination. Default Screen (Send/FAX) You can select either One Touch (keys), Destinations, Address Book, or External Address Book to be displayed by default on the print system's display while using send or FAX mode. -
Page 17: Basic > Defaults > Address Book > Groups
COMMAND CENTER Pages Basic > Defaults > Address Book > Groups This page allows you to add, edit or delete Groups. Adding a New Group Open the Address Book Groups page. Click Add Group. The Address Book Groups - Add page opens. Enter the number and name of the group. -
Page 18: Basic > Security > Device Security > General
COMMAND CENTER Pages Authentication, see Advanced > Management > Authentication > General page 3-47. Setting the Admin password is highly recommended to prevent unauthorized changes to the machine and networking configuration. With some models, the default Administrator password is factory-set as admin00. It is recommended to periodically change password. -
Page 19: Basic > Security > User Login
COMMAND CENTER Pages Specifies whether or not to restrict communication via each of the protocols on the left. The communication via the protocols that are set to Block is restricted. The settings made on this page affect the protocol settings on the Advanced page. - Page 20 COMMAND CENTER Pages Device Certificate - Self Issued The self-issued certificate is automatically issued by default. The automatically issued certificate has the country code, common name (in a form of "KMxxxxxx" as for model names), and a validity period of about 10 years already configured. Self Certificate Displays whether the certificate is active.
-
Page 21: Printer Page
COMMAND CENTER Pages Root Certificate Root Certificate Displays whether the certificate is active. Expiration Displays the validity period of the certificate. View Certificate Click View to view details on the certificate. Import Certificate Click Import to open the File Import window. Click Browse to open the file selection dialog box. -
Page 22: Printer > System
COMMAND CENTER Pages • AppleTalk Name Printer > System The table below provides a summary of the items displayed on the System page. Form Feed Timeout Adjusts the timeout between 5 and 495 seconds, after which a form feed will occur in the absence of data. -
Page 23: Printer > System > Apl.filter
COMMAND CENTER Pages Switches EcoPrint On or Off to control toner consumption for saving the printing costs. The default setting is Off. Available for some machines. Toner Save Level Selects Toner Save Level from 1(Low) [low saving, darker printing] to 5(High) [high saving, lighter printing] when EcoPrint Mode is On. -
Page 24: Printer > Document Output
COMMAND CENTER Pages Printer > Document Output This page lets you select an output tray. Paper Output Determines the default output tray. Scanner Page This section includes settings that apply to the scanning function of the machine, such as default scan resolution or original placement. In order to attach scanned data file to an E-mail and send it, the SMTP settings on the Advanced page must be completed. -
Page 25: Scanner > Ftp
COMMAND CENTER Pages Selects the file quality mode (1 [Low] to 5 [High]) in which the scanned data will be saved. High-Compression PDF Image Selects the compression rate for PDF files from 1 (Low), 2 (Medium), and 3 (High). High-Compression PDF Auto Color Sets whether to enable or disable the automatic color/ monochrome detection for the original to be scanned. -
Page 26: Scanner > Send And Forward
COMMAND CENTER Pages • %serial = Serial Number • %etheraddr = MAC Address • %host = Host Name • %ip = IP Address Body You can enter the information that you want to appear in the body of the E-mail. Scanner >... -
Page 27: Scanner > I-Fax
COMMAND CENTER Pages Scanner > i-FAX This sends scanned data in i-FAX mode. The subject and body contents for i-FAX must be specified. The contents displayed on this page are the same as in Scanner > E-mail, described above. FAX / i-FAX Page This section includes settings, such as FAX transmission and reception settings, that apply to the FAX function of the device. -
Page 28: Fax / I-Fax > Common Rx/Forward Requirements > General
COMMAND CENTER Pages Duplex Printing Specifies whether or not to use the Duplex mode. 2 in1 Receive Enables or disables 2 in1 reception. Receive Bulk Print Enables or disables FAX bulk reception. When enabled, the FAX system prints the received documents after its reception completes. It will be possible to make copies during that reception. - Page 29 COMMAND CENTER Pages Give the condition set here an easily recognizable name. Status Specify whether to enable or disable the condition. This item is set to Off for the condition that has just been added. To set this item to On, set the conditions and then click to select the desired condition on the Requirement List and change the setting.
- Page 30 COMMAND CENTER Pages The Requirement List page appears. Check that the condition you have set is added to the Requirement List. Click the name of the condition under which you want to execute the forwarding process. The Detail/Edit page opens. Set Status to On.
- Page 31 COMMAND CENTER Pages • Number of Destination Displays the number of registered destinations displayed for the next item. • Destination List Displays a list of registered forwarding destinations. Faxes are forwarded to all destinations displayed here. For how to add a destination, refer to Setting Destinations on page 3-25.
-
Page 32: Setting Destinations
COMMAND CENTER Pages The RX/Forward Requirements - Advanced page appears. Specify the forwarding process. The procedure is almost the same as the procedure for adding a condition. See steps 2 to 6 as a reference. Note: The process of saving faxes in a FAX box cannot be selected as the forwarding process to be applied without using a Requirement List. -
Page 33: Fax / I-Fax > Fax > Defaults
COMMAND CENTER Pages Addition from the Address Book There are two types of address book: address book contacts and address book groups. In address book contacts, each entry has an address of one person. In address book groups, each entry has multiple addresses. When an address of a group is added, faxes are forwarded to all addresses registered in the group. -
Page 34: Fax / I-Fax > Fax > Receive
COMMAND CENTER Pages Sets the volume of the internal speaker that allows you to listen to conditions on the telephone line when the [On-Hook] key was pressed. The choices are Off and levels 1, 2 or 3. Monitor Volume Sets the volume of the internal speaker that allows you to listen to conditions on the telephone line when the [On-Hook] key was not pressed. -
Page 35: Fax / I-Fax > Fax > Fax Restrictions > General
COMMAND CENTER Pages FAX / i-FAX > FAX > FAX Restrictions > General The table below provides a summary of the items displayed on the FAX Restrictions > General page. Transmit Restriction Selects the transmitting restriction between Off and Use Permit List + Address Book. -
Page 36: Fax / I-Fax > Fax > Encryption Key
COMMAND CENTER Pages FAX / i-FAX > FAX > Encryption Key Specifies the encryption key in hexadecimal. The length of the encryption key is 16 digits. Enter 16 characters using the numbers 0-9 and the letters A-F. FAX / i-FAX > i-FAX > Defaults The section below provides a summary of the item displayed on the Defaults page. -
Page 37: Fax / I-Fax > I-Fax > Pop3
COMMAND CENTER Pages Sender Address Displays the sender address used for E-mails sent from this machine. For how to change the sender address, set the Email address in E-mail Address on FAX / i-FAX > i-FAX > POP3 on page 3-30. Signature Displays the signature to be inserted in the end of the E-mail body. -
Page 38: Fax / I-Fax > I-Fax > Domain Restrictions > General
COMMAND CENTER Pages When no attached files exist, only the body of E-mail is printed. When this item is set to Off, only the attached files are printed. When no attached files exist, nothing is printed. FAX / i-FAX > i-FAX > Domain Restrictions > General The section below provides a summary of the items displayed on the Domain Restrictions page. -
Page 39: Document Box Page
COMMAND CENTER Pages Document Box Page This section includes addition and deletion of a document box, and deletion of documents in a document box. There are three types of document boxes: Custom Box, FAX Box (or Sub Address Box), and Polling Box. Document Box >... -
Page 40: Document Box > Fax Box
COMMAND CENTER Pages Document Box > FAX Box The section below provides a summary of the items displayed on the FAX Box page. Number of FAX Boxes Displays the number of registered FAX boxes. Displays a screen where you can add a new FAX box. Enter the required information and click the Submit button. -
Page 41: Document Box > Polling Box
COMMAND CENTER Pages Displays a screen where you can add a new Sub Address box. Enter the required information and click the Submit button. Delete Deletes the selected Sub Address box. You can add, edit or delete a Sub Address box as follows: Adding a New Sub Address Box Open the Sub Address Box page. -
Page 42: Advanced Page
COMMAND CENTER Pages Click Detail/Edit to delete or retain the document sent. Click Submit. Removing a document from the Poling Box Open the Polling Box page. Check the document to delete. When the check box on the left side of document is selected, all documents displayed on the page will be checked. - Page 43 COMMAND CENTER Pages Specifies a name for the printing system network component. This name is also used as the NetBEUI printer name. IPv4 Settings • DHCP/BOOTP Specifies whether or not to automatically obtain an IP address using DHCP or BOOTP. •...
-
Page 44: Advanced > Protocols > Tcp/Ip > Ip Filters
COMMAND CENTER Pages IPv6 Settings • IPv6 Specifies whether or not to enable the IPv6 protocol. Select On to use the IPv6 protocol. • IP Address Assigns an IPv6 address to the printing system network component. The format of the IPv6 address is a sequence of numbers (128 bit in total) separated by colons, e.g. -
Page 45: Advanced > Protocols > Tcp/Ip > Logical Printers
COMMAND CENTER Pages • LPD • FTP • IPP • ThinPrint • HTTP • Raw • SNMP • IPP over SSL • HTTPS IP Filters (IPv6) • IP Address (IPv6) Specifies the IP addresses to which access is granted. The number of addresses that can be specified varies depending on the model used. -
Page 46: Advanced > Protocols > Netware
COMMAND CENTER Pages from the printer returned to the client when printing with PostScript, PJL and other such commands, it is necessary to On bi-directional printing. Start of Job String Specifies the character string sent to the printer before output directly to the output port (lp port). -
Page 47: Advanced > Protocols > Ipp
COMMAND CENTER Pages Remote Print Mode Enables or disable Remote Print Mode. Print Server Name Enter the name of the printer server that the remote printer belongs to. Job Timeout Enter the timeout in seconds. Advanced > Protocols > IPP Using IPP (Internet Printing Protocol) or IPP over SSL, you can output to the printing system over the Internet or an intranet. -
Page 48: Advanced > Protocols > Netbeui
COMMAND CENTER Pages Specifies the name of the printing system in the AppleTalk network. Zone Name Specifies the name of the AppleTalk zone (network). An asterisk (*) means the default zone. Advanced > Protocols > NetBEUI Peer-to-peer printing is available using NetBEUI protocol. With this method, the printing system is located in Windows Network Neighborhood. -
Page 49: Advanced > E-Mail > Smtp > E-Mail Recipient
COMMAND CENTER Pages Login User Name When Other is selected for Authenticate as, the account name set here will be used for SMTP authentication. Login Password When Other is selected for Authenticate as, the password set here will be used for authentication. POP before SMTP Timeout Enter the timeout in seconds during which this machine tries to connect to the SMTP server when set POP before SMTP as the Authentication... -
Page 50: Advanced > E-Mail > Pop3 > General
COMMAND CENTER Pages • Add Paper • Low Toner • Add Toner • Cover Open • Paper Jam • All Other Errors Event Report Interval Enter the E-mail interval. An E-mail will be sent at the end of the interval only when at least one of the selected error conditions has occurred during the interval. -
Page 51: Advanced > Management > Snmp > Snmpv1/V2C
COMMAND CENTER Pages Enables or disables this user number. E-mail Address Enter the E-mail address. POP3 Server Name Enter the POP3 server name or IP address. If you use the server name, you must first specify the DNS server information. For details, refer to Advanced >... -
Page 52: Advanced > Management > Snmp > Snmpv3
COMMAND CENTER Pages Enter the community name for SNMP requests to read a value. The default name is 'public'. After you have changed the setting, you must restart the printing system. Write Community Enter the community name for SNMP requests to write (change) a value. The default name is 'public'. -
Page 53: Advanced > Management > Ldap
COMMAND CENTER Pages Sets whether to authenticate the user in SNMP communication. Hash Selects the hash algorithm. This item is displayed when the Authentication is On. Privacy Sets whether to encrypt the communicated data in SNMP communication. This becomes available when Authentication is enabled. Encryption Selects the encryption algorithm. -
Page 54: Advanced > Management > Authentication > General
COMMAND CENTER Pages LDAP Encryption Selects the type of encryption according to the type of security employed by the LDAP server. Select Off when encryption is not used. • LDAPv3/TLS Uses explicit mode for data communication. Select this if the server supports the startTLS command. -
Page 55: Advanced > Management > Authentication > Network User Property
COMMAND CENTER Pages Note: If the server type is [Kerberos (Win2000/2003)], only domain names entered in uppercase will be recognized. When a user sets authentication and accesses COMMAND CENTER, only the Start page is displayed. The Login button is displayed in the upper left of the screen. -
Page 56: Advanced > Management > Ic-Card Settings
COMMAND CENTER Pages Click Add and specify group information and Permit or Prohibit. Click Submit. Editing a Group Click Group Authorization Set., open the Group Authorization Set page. Click the desired Group ID or Group Name to edit the group and modify their information. -
Page 57: Advanced > Management > Maintenance Notification > Sending Log History
COMMAND CENTER Pages • %printer = Model • %serial = Serial Number • %etheraddr = MAC Address • %equipid = Equipment ID E-mail Interval Sets the time or interval for sending the status information. Events will be reported at the specified interval. •... -
Page 58: Advanced > Security > Secure Protocols
COMMAND CENTER Pages Advanced > Security > Secure Protocols You can encrypt communication between a PC and this machine using SSL encryption. For the changes made in the following to take effect, restart the machine as described in Basic > Defaults > Reset on page 3-6. -
Page 59: Advanced > Security > Ipsec > General
COMMAND CENTER Pages Authentication Type Selects either EAP-TLS or PEAP (EAP-MS-CHAPv2) for the authentication type. Login User Name Enter the name of the user who accesses the printing system. The IEEE802.1x client certificate of this user must be valid. Login Password You can set a PEAP-based password. -
Page 60: Advanced > Security > Ipsec > Rule1 (To Rule3)
COMMAND CENTER Pages Shows whether the set rule is enabled or disabled. To enable or disable the rule, refer to Advanced > Security > IPSec > Rule1 (to Rule3) on page 3-53. Advanced > Security > IPSec > Rule1 (to Rule3) These pages allow you to select or edit rules to use for IPSec protocol-based communication. - Page 61 COMMAND CENTER Pages This improves the safety, but imposes a heavy burden because of more key-generation processes. • Diffie-Hellman Group The Diffie-Hellman key-sharing algorithm allows two hosts on an unsecured network to share a private key securely. Select the Diffie-Hellman group to use for key sharing.
-
Page 62: Chapter 4 Troubleshooting
4 Troubleshooting Consult the table below to find basic solutions for problems you may encounter with COMMAND CENTER. Troubleshooting Symptom Check Items Corrective Action Reference I can’t access Is the power turned on to this Turn the power on to this Operation Guide COMMAND machine? - Page 63 Troubleshooting Is the same language as that Select the same language as Basic > Defaults > displayed on the operation that displayed on the Device Defaults panel selected? operation panel. page 3-7 I can’t access the Has the administrator set a Enter the password.
- Page 66 Rev. 6.3 2010.10...
Need help?
Do you have a question about the FS C5015N - Color LED Printer and is the answer not in the manual?
Questions and answers