Table of Contents
Troubleshooting

Related Manuals for Brother HL 5030 - B/W Laser Printer


Summary of Contents for Brother HL 5030 - B/W Laser Printer
-
Page 1: Service Manual
Brother Laser Printer SERVICE MANUAL MODEL: HL-5030/5040/5050/5070N Read this manual thoroughly before maintenance work. Keep this manual in a convenient place for quick and easy reference at all times. January 2003 SM-PRN035... - Page 2 © Copyright Brother Industries, Ltd. 2003 All rights reserved. No part of this publication may be reproduced in any form or by any means without permission in writing from the publisher. Specifications are subject to change without notice. Trademarks: The brother logo is a registered trademark of Brother Industries, Ltd. Apple, the Apple Logo, and Macintosh are trademarks, registered in the United States and other countries, and TrueType is a trademark of Apple computer, Inc.
- Page 3 HL-5030/5040/5050/5070N SERVICE MANUAL PREFACE This service manual contains basic information required for after-sales service of the laser printer (hereinafter referred to as "this machine" or "the printer"). This information is vital to the service technician to maintain the high printing quality and performance of the printer. This service manual covers the HL-5030/5040/5050/5070N printers.
-
Page 4: Table Of Contents
TABLE OF CONTENTS TABLE OF CONTENTS REGULATION....................vii SAFETY INFORMATION ................ix CHAPTER 1 GENERAL ................1-1 FEATURES ......................1-1 OVERVIEW ......................1-3 SPECIFICATIONS....................1-4 Printing..........................1-4 Functions ..........................1-5 Electrical and Mechanical ....................1-6 Network..........................1-7 Paper ..........................1-8 3.5.1 Feedable paper........................1-8 3.5.2 Paper cassette capacity....................1-10 3.5.3 Print delivery ........................ - Page 5 HL-5030/5040/5050/5070N SERVICE MANUAL Printing on Both Sides of the Paper (manual duplex printing) ........2-24 Guidelines for printing on both sides of the paper ............2-26 Paper orientation for printing on both sides of the paper..........2-27 CONTROL PANEL OPERATION ................2-28 Control Panel Buttons & LED functions ................2-28 5.1.1 LEDs ..........................
- Page 6 TABLE OF CONTENTS 2.2.3 Paper eject........................3-22 Sensors...........................3-23 2.3.1 Cover sensors........................3-23 2.3.2 Toner sensors ........................3-23 2.3.3 Cassette sensor / Paper empty sensor (HL-5040/5050/5070N only)........ 3-24 2.3.4 Paper eject sensor ......................3-24 2.3.5 MP PE sensor ........................3-25 Drum Unit........................3-26 2.4.1 Photosensitive drum ......................
- Page 7 HL-5030/5040/5050/5070N SERVICE MANUAL GUIDELINES FOR LEAD FREE SOLDER ............4-62 CHAPTER 5 PERIODIC MAINTENANCE ..........5-1 CONSUMABLE PARTS................... 5-1 Drum Unit..........................5-1 Toner Cartridge.........................5-3 PERIODICAL REPLACEMENT PARTS ..............5-8 2.1 Fixing Unit .........................5-9 2.2 Paper Feeding Kit......................5-12 PERIODICAL CLEANING..................5-14 Cleaning the Printer Exterior...................5-14 Cleaning the Drum Unit ....................5-14 Cleaning the Scanner Window ..................5-15 Cleaning the Electrical Terminals ...................5-16...
- Page 8 TABLE OF CONTENTS Installation Problem ......................6-48 Intermittent Problem .......................6-49 TCP/IP Troubleshooting ....................6-50 UNIX Troubleshooting ....................6-50 Windows NT/LAN Server (TCP/IP) Troubleshooting............6-51 Windows 95/98/Me (or later) Peer to Peer Print (LPR) Troubleshooting .......6-51 Windows 95/98/Me (or later) Peer to Peer (HP JetAdmin Compatible Method) Troubleshooting............................6-52 Windows 95/98/Me/NT 4.0/2000 (or later) Peer to Peer Print (NetBIOS) Troubleshooting ..
-
Page 9: Regulation
HL-5030/5040/5050/5070N SERVICE MANUAL REGULATION LASER SAFETY (110 - 120V MODEL ONLY) This printer is certified as a Class I laser product under the US Department of Health and Human Services (DHHS) Radiation Performance Standard according to the Radiation Control for Health and Safety Act of 1968. This means that the printer does not produce hazardous laser radiation. - Page 10 REGULATION IEC 825 (220-240V MODEL ONLY) This printer is a Class I laser product as defined in IEC 825 specifications. The label shown below is attached in countries where required. CLASS 1LASERP RODUCT APPAREIL Å LASER DE CLASSE 1 LASER KLASSE 1 PRODUKT This printer has a laser diode which emits invisible laser radiation in the Laser Unit.
-
Page 11: Safety Information
HL-5030/5040/5050/5070N SERVICE MANUAL SAFETY INFORMATION CAUTION FOR LASER PRODUCT (WARNHINWEIS FUR LASER DRUCKER) CAUTION: When the machine during servicing is operated with the cover open, the regulations of VBG 93 and the performance instructions for VBG 93 are valid. CAUTION: In case of any trouble with the laser unit, replace the laser unit itself. - Page 12 SAFETY INFORMATION DEFINITIONS OF WARNINGS, CAUTIONS AND NOTES The following conventions are used in this service manual: WARNING Indicates warnings that must be observed to prevent possible personal injury. CAUTION: Indicates cautions that must be observed to service the printer properly or prevent damage to the printer.
-
Page 13: Chapter 1 General
HL-5030/5040/5050/5070N SERVICE MANUAL CHAPTER 1 GENERAL FEATURES This printer has the following features; High Resolution and Fast Print Speed True 600 x 600 dots/ true 300 x 300 dots per inch (dpi) and HQ1200 (HL5040/5050/5070N only) for graphics with microfine toner and up to 16 pages per minute (ppm) print speed for A4 and 17 pages per minute (ppm) print speed for Letter- size paper. - Page 14 CHAPTER 1 GENERAL USB Interface (for Windows 98/Me/2000/XP, iMac and Power Macintosh) The printer can be connected using the Universal Serial Bus (USB) interface to a PC or Mac which has a USB interface. Drivers that allow you to use the USB port are provided on the CD-ROM supplied with the printer.
-
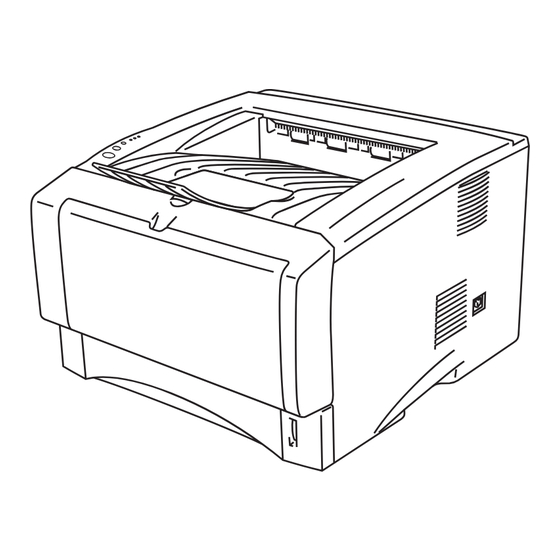
Page 15: Overview
HL-5030/5040/5050/5070N SERVICE MANUAL OVERVIEW <Front View> Face-down Output Tray (Top Output Support Flap S Control Panel Tray) Face-down Output Tray Support Flap (Support Flap) Front cover Front Cover Release Button Power Switch (HL-5030 and HL-5040) Manual Feed Tray (HL-5050 and HL-5070N) Multi-purpose Tray (MP Tray) Paper Tray... -
Page 16: Specifications
CHAPTER 1 GENERAL SPECIFICATIONS Printing Print method Electrophotography by semiconductor laser beam scanning Laser Wavelength: 780 nm Output: 5mW max Resolution (HL-5030) ® ® 600 dpi (for Windows 98/Me, Windows 2000/XP, and Mac OS) ® ® 300 dpi (for Windows 98/Me, Windows 2000/XP, and Mac OS) (HL-5040/5050/5070N) -
Page 17: Functions
HL-5030/5040/5050/5070N SERVICE MANUAL Functions Fujitsu SPARClite 133MHz Emulation <HL-5030> <HL-5040> HP LaserJet (PCL level 6) <HL-5050/5070N> Automatic emulation selection among HP LaserJet (PCL level 6), Brother BR-Script Level 3, EPSON FX-850 or IBM Proprinter XL Printer driver <PCL Driver> ... -
Page 18: Electrical And Mechanical
CHAPTER 1 GENERAL Electrical and Mechanical Power source U.S.A. and Canada: AC 110 to 120V, 50 Hz/60 Hz Europe and Australia: AC 220 to 240V, 50 Hz/60 Hz Power consumption Printing (average): 460 W or less Standing by: 75 W or less Sleep*: 5 W or less (for HL-5030/5040/5050) 6 W or less (for HL-5070N) -
Page 19: Network
HL-5030/5040/5050/5070N SERVICE MANUAL Network Type / Speed 10/100 Base TX Ethernet Automatic negotiation Protocols TCP/IP (RARP, BOOTP, DHCP, APIPA, NetBIOS, WINS, SSDP, Rendezvous, LPR/LPD, Port9100, POP3/SMTP, SMB, IPP, FTP, TELNET, SNMP, HTTP, TFTP), Netware IPX/SPX (Bindey and NDS), Appletalk, DLC/LLC Management Web Based Management (HTTPD) BRAdmin Professional (using TCP/IP protocol or IPX/SPX) -
Page 20: Paper
CHAPTER 1 GENERAL Paper 3.5.1 Feedable paper (1) Paper type Select the paper Manual Paper type Tray1 MP tray Tray 2 type from the feed tray printer driver Plain paper Plain paper 60 g/m to 105 g/m (16 to 28 lbs.) Recycled paper Plain paper Bond paper... - Page 21 HL-5030/5040/5050/5070N SERVICE MANUAL (3) Other paper specifications <Paper cassette> Cut sheet 60 to 105 g/m (16 to 28 lb.) Basis weight Caliper 0.08 to 0.13 mm (0.003 to 0.005 in.) Moisture content 4% to 6% by weight <Multi-purpose tray> Cut sheet Envelope 60 to 161 g/m (16 to 43 lb.)
-
Page 22: Paper Cassette Capacity
CHAPTER 1 GENERAL CAUTION: When you are choosing print media, be sure to follow the information given below to prevent any paper jams, print quality problems or printer damage; It is recommended to use long-grained paper for the best print quality. If short-grained paper is being used, it might be the cause of paper jams. - Page 23 HL-5030/5040/5050/5070N SERVICE MANUAL (3) We recommend the following print methods (output tray) for each paper media type. Paper output Media type Face down Face up Plain paper Thick paper Recycled paper Transparency Label Envelope Card 1-11...
-
Page 24: Pcl5E/Epson/Ibm Emulation
CHAPTER 1 GENERAL Printable Area 3.6.1 PCL5e/EPSON/IBM emulation The figure below shows the printable area each emulation guarantees when printing on Portrait and Landscape. 1-12... - Page 25 HL-5030/5040/5050/5070N SERVICE MANUAL The table below shows the printable areas when printing on Portrait for each paper size. Size 215.9 mm 279.4 mm 203.2 mm 279.4 mm 6.35 mm 4.2 mm 8.5” 11.0” 8.0” 11.0” 0.25” 0 mm 0.16” Letter (2,550 dots) (3,300 dots) (2,400 dots)
- Page 26 CHAPTER 1 GENERAL 1-14...
-
Page 27: Pcl6/Br-Script3 Emulation
HL-5030/5040/5050/5070N SERVICE MANUAL The table below shows the printable areas when printing on Landscape for each paper size. Size 279.4 mm 215.9 mm 269.3 mm 215.9 mm 5.0 mm 4.2 mm 11.0” 8.5” 10.6” 8.5” 0.2” 0 mm 0.16” Letter (3,300 dots) (2,550 dots) (3,180 dots) -
Page 28: Print Speeds With Various Settings
CHAPTER 1 GENERAL Print Speeds with Various Settings Print speed of the HL-5030/5040/5050/5070N printers is up to 16/17 ppm when loading A4 or Letter size paper from the paper tray in the plain paper mode. Actual print speed varies depending on the media type or paper size as shown in the tables below;... -
Page 29: Toner Cartridge Weight Information
HL-5030/5040/5050/5070N SERVICE MANUAL Toner Cartridge Weight Information Toner Cartridge Weight (approx weight) TN7600/TN560 TN7300/TN530 Brand new Toner Cartridge Weight 827.5g 772.5g Toner Weight at Brand New Toner Cartridge 197.5±2.5g 142.5±2.5g Toner Cartridge Weight at Toner Near Empty 720-725g 720-725g Remain Toner Weight at Toner Near Empty 90-95g 90-95g Toner Cartridge Weight at Toner Empty... -
Page 30: Serial No. Descriptions
CHAPTER 1 GENERAL SERIAL NO. DESCRIPTIONS The descriptions below show how to understand the meanings of the numbers printed on the labels or bag of the printer and printer parts: < ID for production month > January February March April June July August... - Page 31 HL-5030/5040/5050/5070N SERVICE MANUAL (4) Toner cartridge: Imprinted on the aluminum bag 3 A 3 0 YEAR MONTH DATE FACTORY ID NO. Printed on the bar code label attached on the toner cartridge CARTRIDGE M 3 9 A 0 0 0 1 9 9 A PRODUCTION INFO.
-
Page 32: Chapter 2 Installation And Basic Operation
HL-5030/5040/5050/5070N SERVICE MANUAL CHAPTER 2 INSTALLATION AND BASIC OPERATION CONDITIONS REQUIRED FOR INSTALLATION Power Supply • The source voltage must stay within ±10% of the rated voltage shown on the rating plate. • The power cord, including extensions, should not exceed 5 meters (16.5 feet). •... -
Page 33: System Requirements For Brother Printer Solution For Windows
CHAPTER 2 INSTALLATION AND BASIC OPERATION System Requirements for Brother Printer Solution for Windows Check the following system requirements to setup and operate the printer using Brother Printing Solution for Windows Operating system Computer / Processor Minimum Recommended Available Hard Disk Space ... -
Page 34: Unpacking
HL-5030/5040/5050/5070N SERVICE MANUAL UNPACKING When unpacking the printer, check to see that all of the following components are included in the carton. Printer Drum Unit Assembly (with Toner Cartridge included) CD-ROM AC power cord Quick Setup Guide Fig. 2-1 NOTE: Components may vary depending on the country. -
Page 35: Install The Printer
CHAPTER 2 INSTALLATION AND BASIC OPERATION INSTALL THE PRINTER You need to implement hardware setup and driver installation to use the printer. ® ® Firstly, identify the Operating System on your computer. (Windows 95/98/Me, Windows NT ® 4.0, Windows 2000/XP and Macintosh)Then, purchase the appropriate interface cable (Parallel, USB or Network) for your computer. -
Page 36: Install The Drum Unit Assembly
HL-5030/5040/5050/5070N SERVICE MANUAL 3.1.1 Install the drum unit assembly (1) Open the front cover by pressing the front cover release button. (2) Unpack the drum unit assembly. Remove the protective part. (3) Rock it from side to side several times to distribute the toner evenly inside the assembly. Fig. -
Page 37: Print A Test Page
CHAPTER 2 INSTALLATION AND BASIC OPERATION (3) Fan the stack of paper well to avoid paper jams and misfeeds. (4) Put paper in the paper tray. Check that the paper is flat in the tray and below the maximum paper mark. Fig. -
Page 38: For Windows Users
HL-5030/5040/5050/5070N SERVICE MANUAL Follows the instructions for your operating system and interface cable type. For Windows Users Connect the printer to the PC & install the driver For parallel interface cable users (for HL-5040/5050/5070N only) (1) Click “Connect the interface cable & Install the printer driver/utility” from the Initial Setup menu.. - Page 39 CHAPTER 2 INSTALLATION AND BASIC OPERATION ® For Windows 98/Me users: The setup is now complete. ® For Windows 2000/XP users: Follow the instructions below for setting the PC printer port. ® For Windows 2000/XP users only (1) Click Start, and then Printers and Faxes. Fig.
- Page 40 HL-5030/5040/5050/5070N SERVICE MANUAL NOTE: The default password for the print server is “access”. You can use the BRAdmin Professional software or a web browser to change this password. Brother has also developed Web BRAdmin, an enterprise network software utility that enables management of Brother and other SNMP compliant devices in larger LAN/WAN environments.
- Page 41 CHAPTER 2 INSTALLATION AND BASIC OPERATION 3. For Network shared printer users (1) Select Network Shared Printer, and then click the Next button. (2) Select the current printer’s queue, and then click the OK button. Fig. 2-9 (3) Click the Finish button. (4) The setup is now complete.
-
Page 42: For Macintosh Users
HL-5030/5040/5050/5070N SERVICE MANUAL (3) Select the IP address of your printer and LPR, and then click the Next button. Fig.2-11 (4) Click the Finish button. ® ® For WindowsNT 4.0 and Windows 2000/XP users: The setup is now complete. ® For Windows 95/98/ME users: After your PC has restarted, setup will be complete. - Page 43 CHAPTER 2 INSTALLATION AND BASIC OPERATION ® <For Mac OS 8.6 to 9.2 Users (HL-5050, HL-5070N Users)> (1) Make sure the printer power switch is on. (2) Connect the USB interface cable to your Macintosh, and then connect it to the printer. NOTE: Do not connect the USB cable to the keyboard USB Port or a non-powered USB Hub.
- Page 44 HL-5030/5040/5050/5070N SERVICE MANUAL For network users (HL-5070N only) Connect the printer to the Macintosh & install the BR-Script PPD file ® <For Mac OS 8.6 to 9.2 Users> (1) Click Connect the interface cable & Install the driver/utility from the Initial Setup menu.
-
Page 45: Printing Methods
CHAPTER 2 INSTALLATION AND BASIC OPERATION PRINTING METHODS The printer provides two types of printing method; printing from the paper tray and printing from the multi-purpose tray. Printing from the Paper Tray You can load plain paper, recycled paper or transparencies into the paper tray. If paper is loaded into the paper tray, the printer automatically feeds paper sheet by sheet and ejects the printed page into the output tray. -
Page 46: Printing From Multi-Purpose Tray (Mp Tray) (Hl-5050/5070N Only)
HL-5030/5040/5050/5070N SERVICE MANUAL (4) Using both hands to put paper in the manual feed tray until the front edge of the paper touches the paper feed roller. Hold the paper in this position until the printer automatically feeds the paper in for a short distance, and then let go of the printer. Fig.2-14 NOTE: Make sure the paper is neatly stacked and in the proper position on the manual feed tray. - Page 47 CHAPTER 2 INSTALLATION AND BASIC OPERATION (3) Pull out the MP tray support flap. Fig. 2-16 (4) When loading paper in the MP tray, make sure it touches the back of the tray and remains under the maximum paper height guides on both sides of the tray. NOTE: Note the following when placing paper on the multi-purpose tray: •...
-
Page 48: Printing On Envelopes
HL-5030/5040/5050/5070N SERVICE MANUAL Printing on envelopes Use of any of the envelopes listed below may cause damage to the printer. Such damage is not covered under any warranty or service agreement. • Envelopes that are damaged, curled, wrinkled, or irregularly shaped •... - Page 49 CHAPTER 2 INSTALLATION AND BASIC OPERATION (2) Open the back output tray. Fig.2-17 (3) Send the print data to the printer. NOTE: A NO PAPER status is shown by the control panel LEDs until you put a sheet of paper in the manual feed tray. Fig.2-18 (4) Open the manual feed tray.
- Page 50 HL-5030/5040/5050/5070N SERVICE MANUAL (5) Using both hands put the envelope in the manual feed tray until the front edge of the envelope touches the paper feed roller. Hold the envelope in this position until the printer automatically feeds it in for a short distance, and then let go of the envelope. Fig.2-21 NOTE;...
- Page 51 CHAPTER 2 INSTALLATION AND BASIC OPERATION NOTE: <Envelopes that have been creased after they have been printed> At the back of the printer, open the back output tray and push down the blue tabs at the left and right hand sides (as shown in the figure below). When you have finished printing your envelopes, close the back output tray to reset the two blue tabs back to their original position.
-
Page 52: Printing On Transparencies
HL-5030/5040/5050/5070N SERVICE MANUAL NOTE: When you put envelopes in the MP tray, please remember the following; *During printing, the inside tray rises to feed envelopes into the printer. *The side to be printed on must be face up. *Put the leading edge (top of the paper) in first and push it gently into the tray. Send the print data to the printer. - Page 53 CHAPTER 2 INSTALLATION AND BASIC OPERATION CAUTION: Remove each transparency immediately. Printing on transparencies from the manual feed tray (For HL-5030 and HL-5040) NOTE: When the back output tray is open, the printer has a straight paper path from the manual feed tray to the back output tray.
- Page 54 HL-5030/5040/5050/5070N SERVICE MANUAL Printing on transparencies from the MP tray (For HL-5050 and HL-5070N) NOTE: When the back output tray is open, the printer has a straight paper path from the MP tray to the back of the printer. (1) Select the Paper Size, Media Type, Paper Source, and other settings in the printer driver.
-
Page 55: Printing On Both Sides Of The Paper (Manual Duplex Printing)
CHAPTER 2 INSTALLATION AND BASIC OPERATION Printing on Both Sides of the Paper (manual duplex printing) The supplied printer drivers for Windows® 95/98/Me, Windows® NT 4.0, Windows® 2000/XP, Mac OS 8.6 to 9.2 and Mac OS X 10.1 or later (except for Mac OSX 10.2) all enable manual duplex printing. - Page 56 HL-5030/5040/5050/5070N SERVICE MANUAL (3) Remove the printed even-numbered pages from the output tray and put them in the same order back into the manual feed tray. Place the paper with the side that is going to be printed on (the blank side) face up. Follow the instructions on the computer screen. Fig.2-30 (4) Repeat Step 3 until you have printed all the odd-numbered pages on the other side of the paper.
-
Page 57: Guidelines For Printing On Both Sides Of The Paper
CHAPTER 2 INSTALLATION AND BASIC OPERATION (4) Repeat Step 3 until you have printed all the odd-numbered pages on the other side of the paper. Guidelines for printing on both sides of the paper • If the paper is thin, it may wrinkle. •... -
Page 58: Paper Orientation For Printing On Both Sides Of The Paper
HL-5030/5040/5050/5070N SERVICE MANUAL Paper orientation for printing on both sides of the paper The printer prints the second page first. If you print 10 pages on 5 sheets of paper, it will print page 2 then page 1 on the first sheet of paper. -
Page 59: Control Panel Operation
CHAPTER 2 INSTALLATION AND BASIC OPERATION CONTROL PANEL OPERATION There are four LEDs (Toner, Drum, Paper, Status) and the two control panel buttons (Job Cancel, Go) on the control panel. LEDs Control Panel Button Control Panel Button Fig. 2-33 Control Panel Buttons & LED functions 5.1.1 LEDs 1) Toner LED indicates when the Toner is low or empty. -
Page 60: Led Indications
HL-5030/5040/5050/5070N SERVICE MANUAL LED Indications NOTE: When the power switch is off or the printer is in Sleep mode, all the LEDs are off. Printer status Sleep mode Toner The power switch is off or the printer is in Sleep mode. Pressing the Go button wakes up the printer from Sleep mode to Warming up mode. - Page 61 CHAPTER 2 INSTALLATION AND BASIC OPERATION Toner low Toner Indicates that the toner cartridge is nearly empty. Purchase a new toner cartridge and have it ready for when Toner Empty is indicated. Drum Paper The Toner LED alternates turning on for 2 seconds and off for 3 seconds alternately.
-
Page 62: Service Call Indications
HL-5030/5040/5050/5070N SERVICE MANUAL Cover open Toner Drum Paper Status Fig.2-43 Service call indications If there is an error that can not be put right, the printer will show that a service call is needed by lighting up all the LEDs as shown in the figure below. Toner Drum Paper... -
Page 63: Control Panel Button Operations
CHAPTER 2 INSTALLATION AND BASIC OPERATION Table 1: LED indications after pressing Go and Job Cancel Fixing Main Engine Laser unit Main PCB DIMM LEDs unit motor failure failure failure failure failure failure Toner Drum Paper Status Control Panel Button Operations The control panel button is used for the following purposes depending on the situation. -
Page 64: Other Control Features
HL-5030/5040/5050/5070N SERVICE MANUAL Other Control Features The printer has the following useful features; 5.5.1 Sleep mode When the printer does not receive data for a certain period of time (timeout), it enters sleep mode. The default timeout is 5 minutes and it is automatically adjusted to the most suitable time-out setting depending on the frequency of your printer use (Intelligent Sleep Mode). -
Page 65: Print A Test Page
CHAPTER 2 INSTALLATION AND BASIC OPERATION 5.5.2 Print a test page You can use the Go button or the printer driver to print a test page. <Using control panel button> Turn off the printer. Make sure that the front cover is closed and the power cord is plugged in. Hold down the Go button as you turn on the power switch. -
Page 66: Print Fonts (For Hl-5040, Hl-5050 And Hl-5070N)
HL-5030/5040/5050/5070N SERVICE MANUAL 5.5.4 Print fonts (For HL-5040, HL-5050, and HL-5070N) You can print a list of the internal fonts using the control panel button or printer driver. <Using the control panel button> (1) Turn off the printer. (2) Make sure that the front cover is closed and the power cord is plugged in. (3) Hold down the Go button as you turn on the power switch. -
Page 67: Network Functions
CHAPTER 2 INSTALLATION AND BASIC OPERATION NETWORK FUNCTIONS LED functions Link/Speed LED Active LED Fig. 2-48 No light: If both of the two LEDs are off, then the print server is not connected to the network. Link/Speed LED is orange: Fast Ethernet Link/Speed LED is green: 10 Base T Ethernet This Link/Speed LED will be orange if the print server is connected to a 100BaseTX Fast Ethernet network. -
Page 68: Paper Cassette Information (For Europe Only)
HL-5030/5040/5050/5070N SERVICE MANUAL PAPER CASSETTE INFORMATION (FOR EUROPE ONLY) The paper cassette fitted to the printer is different from the service manual information for printers shipped to Europe as follows: (1) The paper cassette supplied with the HL- 5030/5040/5050/5070N printer does not have a paper path. -
Page 69: Chapter 3 Theory Of Operation
HL-5030/5040/5050/5070N SERVICE MANUAL CHAPTER 3 THEORY OF OPERATION ELECTRONICS General Block Diagram Fig. 3-1 shows a general block diagram. (HL-5030/5040/5050/5070N) RAM (DIMM)(max. 128MB) Ethernet (Option for HL-5040/5050/5070N) 10/100 Base TX (HL-5070N only) Control system Expansion PCI bus HL-5030:4MB memory I/O HL-5040:8MB HL-5050:16MB HL-5070N:16MB... -
Page 70: Main Pcb Block Diagram
CHAPTER 3 THEORY OF OPERATION Main PCB Block Diagram Fig. 3-2 shows the block diagram of the main PCB. (HL-5030/5040/5050/5070N) A S I C CPU Core (SPARClite 133MHz) Reset Circuit Oscillator 66.6MHz Address Decoder Program + Font ROM DRAM Control HL-5030:1MB HL-5040:4MB HL-5050/5070N:8MB... -
Page 71: Main Pcb
HL-5030/5040/5050/5070N SERVICE MANUAL Main PCB For the entire circuit diagram of the main PCB, see APPENDIX 1. to 7. ‘MAIN PCB CIRCUIT DIAGRAM’ in this manual. 1.3.1 A Fujitsu 32bit RISC CPU, SPARClite is built in the ASIC. While the CPU is driven with a clock frequency of 66.66 MHz in the user logic block, it itself runs at 133.33 MHz, which is generated by multiplying the source clock by two. - Page 72 CHAPTER 3 THEORY OF OPERATION <HL-5070N> VDD3 ADR[23-1] TP198 5F/6C/7F/3-2E/ TP728 TP35 DATA[0] ADR[1] RA11 R124 3-3D/4-6E/3-3C/ DATA00 ADR01/24 7A/7B/3-2D DATA[1] ADR[2] DATA01 ADR02 DATA[2] ADR[3] DATA02 ADR03 ADR[4] DATA[3] DATA03 ADR04 TP36 TP729 ADR[5] DATA[4] RA12 DATA04 ADR05 ADR[6] DATA[5] DATA05 ADR06...
-
Page 73: Usb
HL-5030/5040/5050/5070N SERVICE MANUAL The functions of the interface block communication with external devices are described below; 1.3.2 Stores the data received from the PC into DRAM as controlled by the DMA controller. The transmission speed is 480Mbps or 12Mbps. <HL-5030/5040/5050> UBR23-4K5200 TP1010 USBVCC... -
Page 74: Ieee1284
CHAPTER 3 THEORY OF OPERATION 1.3.3 IEEE1284 Stores the data received from the PC into DRAM as controlled by the DMA controller. It is applicable to both normal receiving and bi-directional communication (nibble mode, byte mode, ECP mode). 74LVX161284, 3.3V 5.0V level shifter IC stores the pull-up resistance in signal wire at the connector side <HL-5040/5050>... -
Page 75: Network Interface
HL-5030/5040/5050/5070N SERVICE MANUAL 1.3.4 Network Interface The National Semiconductor brand 10 Base-T/100 Base-TX network controller DP83816 is connected with the ASIC through the PCI bus. The pulse transformer and the Link/Active LED are built in the RJ-45 connector. <HL-5070N> @C46 @C45 C104 C100... -
Page 76: Rom
CHAPTER 3 THEORY OF OPERATION 1.3.5 A 8Mbit ROM (x 16bit) is fitted. (HL-5030) A 32Mbit ROM (x 16bit) is fitted. (HL-5040) A 64Mbit ROM (x 16bit) is fitted. (HL-5050) <HL-5030/5040/5050> FLASH for MAIN PROGRAM ADR[22] MASK ROM ADR[22] ADR[23] VDD3 ROMCSN0 VDD3... -
Page 77: Flash Rom
HL-5030/5040/5050/5070N SERVICE MANUAL 1.3.6 Flash ROM A 16Mbit flash ROM (x 16bit) is fitted. (HL-5070N) FLASH for NETWORK PROGRAM ADR[22] ROMCSN1 VDD3 1-4C IOWEN @C134 1-4C/1-6D C103 IORDN VSS27 TP151 1-4C/1-6D/1-7D ADR[20] @R132 RY/BY VSS46 BYTE @R133 VDD3 VDD3 RESET TP152 @C122 NC13... -
Page 78: Sdram
CHAPTER 3 THEORY OF OPERATION 1.3.7 SDRAM A 64Mbit SDRAM (x 16bit) is used as the RAM. (HL-5030/5040) A 128Mbit SDRAM (x 16bit) is used as the RAM. (HL-5050) <HL-5030/5040/5050> SDRAM VDD1 VDD3 SDCSN0 RASN ADR[17] VDDQ3 6F/7A/7C/7F/3-2E/3-4C CASN ADR[18] VDDQ9 6F/7A/7C/7F/3-2E/3-4C ADR[19]... -
Page 79: Optional Ram
HL-5030/5040/5050/5070N SERVICE MANUAL 1.3.8 Optional RAM A 32bit (100 pin) DIMM can be fitted as optional RAM. The main PCB has one slot and the capacity of DIMM can be from 16MB to 128MB. <HL-5040/5050> DQ[31-0] DQ[31-0] 7D/1-8C DIMM DQ[0] VDD3 DQ[1] DQ[2]... - Page 80 CHAPTER 3 THEORY OF OPERATION <HL-5070N> DQ[31-0] 1-8C/7D/4-7E DIMM DQ[0] VDD3 DQ[1] DQ[2] DQ[3] DQ[4] DQ[5] DQ[6] DQ[7] DQ[8] DQ[9] DQ[10] DQ10 DQ[11] DQ11 DQ[12] DQ12 DQ[13] DQ13 DQ[14] DQ14 DQ[15] DQ15 DQ[16] DQ16 DQ[17] DQ17 DQ[18] DQ18 DQ[19] DQ19 DQ[20] DQ20 DQ[21]...
-
Page 81: Eeprom
HL-5030/5040/5050/5070N SERVICE MANUAL 1.3.9 EEPROM The EEPROM is BR24C04 type of two-wire method with a 512 x 8bit configuration. <HL-5030/5040/5050> C103 VDD3 VDD3 4.7k TP58 TP67 EESCL TP59 TP68 EESDA TEST BR24C04F Aurora Fig. 3-17 The EEPROM is BR24C64 type of two-wire method with a 8192 x 8bit configuration. <HL-5070N>... -
Page 82: 1.3.11 Engine I/O
CHAPTER 3 THEORY OF OPERATION 1.3.11 Engine I/O The interface with the engine PCB is by full-duplex synchronous serial method, of which transfer rate is 520kbps. <HL-5030/5040/5050> VDD3 ENGINE VDD3 3.3V TP200 TP202 R104 RESET ENGRSTN TP203 TP201 R100 ENGDI ENGDI ENGDO TP204... -
Page 83: 1.3.13 Video I/O
HL-5030/5040/5050/5070N SERVICE MANUAL 1.3.13 Video I/O The video signal output from the ASIC is reversed through a transistor and output after being corrected by the buffer IC. <HL-5030/5040/5050> VDD3 VDD3 VDD3 VDD5 VDD5 C103 C103 TP233 C471 DATA1 TP230 TP231 TC7SH08FU VDON0 VDD5... -
Page 84: 1.3.14 Power Supply
CHAPTER 3 THEORY OF OPERATION 1.3.14 Power Supply +5V is generated by the 3-pin regulator from astable 7V supplied from the LVPS. +5V is used for the IEEE1284 interface, the LD PCB and the engine PCB. In addition, +1.9V is generated by the 3-pin regulator from 3.3V supplied from the LVPS. -
Page 85: Engine Pcb
HL-5030/5040/5050/5070N SERVICE MANUAL Engine PCB The gate array which transforms the serial signal from the main PCB into the parallel signal is mounted on the engine PCB. The engine PCB controls the following parts by using the transferred signal data; Solenoid Main motor •... -
Page 86: Power Supply
CHAPTER 3 THEORY OF OPERATION Power Supply 1.5.1 Low-voltage power supply The power supply uses a switching regulation system to generate the regulated DC power (+3.3V, +8V [non regulated] and +24V), which are converted from the AC line. The regulated output and the production code of each power supply are listed below; Regulated Output Production Code +3.3V / 1.5A... -
Page 87: High-Voltage Power Supply
HL-5030/5040/5050/5070N SERVICE MANUAL 1.5.2 High-voltage power supply The high-voltage power supply generates and outputs the voltages and currents for the charging, development and transfer functions. For the circuit diagram of the high-voltage power supply PCB, see APPENDIX 13. ‘HIGH- VOLTAGE POWER SUPPLY PCB CIRCUIT DIAGRAM’ in this manual. -
Page 88: Mechanics
CHAPTER 3 THEORY OF OPERATION MECHANICS Overview of Printing Mechanism Heat roller Corona wire LASER UNIT Second Eject roller Scanner motor Blade Outer chute MP DRUM UNIT Rear cover Development roller Supply roller Paper feed pinch roller First Eject roller Regist front actuator First feed pinch roller FIXING UNIT... -
Page 89: Paper Transfer
HL-5030/5040/5050/5070N SERVICE MANUAL Paper Transfer 2.2.1 Paper supply The paper pick-up roller picks up one sheet of paper from the paper cassette every time it is rotated and feeds it to the paper feed roller. First feed roller First feed pinch roller Paper feed pinch roller Paper feed roller Regist front... -
Page 90: Paper Eject
CHAPTER 3 THEORY OF OPERATION 2.2.3 Paper eject After the printing image on the photosensitive drum is transferred onto the paper, the paper is fed to the fixing unit to fix unfixed toner onto the paper. Afterwards, the paper is ejected from the fixing unit by the first eject roller in the fixing unit. The paper eject actuator detects whether the paper is ejected correctly or not. -
Page 91: Sensors
HL-5030/5040/5050/5070N SERVICE MANUAL Sensors 2.3.1 Cover sensors Detect opening and closing of the front cover. Front cover sensor Fig. 3-35 2.3.2 Toner sensors Detects if there is toner in the toner cartridge. The toner sensor at the left side emits light through the window on the left side of the toner cartridge, then the toner sensor at the right side receives it when the toner is low. -
Page 92: Cassette Sensor / Paper Empty Sensor (Hl-5040/5050/5070N Only)
CHAPTER 3 THEORY OF OPERATION 2.3.3 Cassette sensor / Paper empty sensor (HL-5040/5050/5070N) Detect if the paper cassette is installed. They also detect if there is paper in the paper cassette. Paper empty sensor Cassette sensor PCB ASSY Cassette sensor Fig. -
Page 93: Mp Pe Sensor
HL-5030/5040/5050/5070N SERVICE MANUAL 2.3.5 MP-PE sensor Detects if there is paper in the MP tray. MP-PE sensor PCB ASSY Feed MP unit Fig. 3-39 3-25... -
Page 94: Drum Unit
CHAPTER 3 THEORY OF OPERATION Drum Unit 2.4.1 Photosensitive drum Generates the latent electrostatic image and develops the image on the drum surface. 2.4.2 Primary charger Forms a uniform charge on the drum surface. (1) Corona wire Generates the ion charge on the drum. (2) Grid Spreads the ion charge evenly over the drum surface. -
Page 95: Exposure Stage
HL-5030/5040/5050/5070N SERVICE MANUAL 2.6.2 Exposure stage After the drum is positively charged, it is exposed to the light emitted from the laser unit. Drum Laser beam Paper Laser beam f θ lens Laser detector Polygon mirror Laser diode Motor Lens Fig. -
Page 96: Developing
CHAPTER 3 THEORY OF OPERATION 2.6.3 Developing Developing causes the toner to be attracted to the electrostatic image on the drum so as to transform it into a visible image. The developer consists of a non-magnetic toner. The development roller is made of conductive rubber and the supply roller (which is also made of conductive sponge) rotate against each other. -
Page 97: Fixing Stage
HL-5030/5040/5050/5070N SERVICE MANUAL 2.6.5 Fixing stage The image transferred to the paper by static electricity is fixed by heat and pressure when passing through the heat roller and the pressure roller in the fixing unit. The thermistor keeps the surface temperature of the heat roller constant by detecting the surface temperature of the heat roller and turning on or off the halogen heater lamp. -
Page 98: Chapter 4 Disassembly And Re-Assembly
HL-5030/5040/5050/5070N SERVICE MANUAL CHAPTER 4 DISASSEMBLY AND RE-ASSEMBLY SAFETY PRECAUTIONS To avoid creating secondary problems by mishandling, follow the warnings and precautions below during maintenance work. WARNING (1) Always turn off the power switch and unplug the power cord from the power outlet before accessing any parts inside the printer. -
Page 99: Disassembly Flow
CHAPTER 4 DISASSEMBLY AND RE-ASSEMBLY DISASSEMBLY FLOW AC CORD LASER UNIT DRUM UNIT BASE PLATE / LV INSULATION SHEET PAPER CASSETTE ENGINE PCB ACCESS COVER MAIN PCB HIGH-VOLTAGE PS PCB ASSY OUTER CHUTE LOW-VOLTAGE PS PCB ASSY REAR COVER MP ASSY / OUTER CHUTE MP ASSY REAR COVER C (FOR HL-5050/5070N ONLY) -
Page 100: Disassembly Procedure
HL-5030/5040/5050/5070N SERVICE MANUAL DISASSEMBLY PROCEDURE AC Cord (1) Disconnect the AC cord from the printer. Printer AC cord Fig. 4-1 Drum Unit (1) Open the front cover and remove the drum unit. Drum unit Front cover Fig. 4-2... -
Page 101: Paper Tray
CHAPTER 4 DISASSEMBLY AND RE-ASSEMBLY Paper Tray (1) Close the front cover and pull out the paper tray (2) Remove the paper from the paper tray Front cover Paper tray Fig. 4-3 (3) Remove the pad holder and the separation pad spring from the paper tray Pad holder Separation pad spring Paper tray... - Page 102 HL-5030/5040/5050/5070N SERVICE MANUAL NOTE: When replacing/re-assembling the pad holder ZL2 ASSY, remove the old grease and apply a suitable amount of grease referring to the figure below; Paper pick-up roller Grease: Molykote PG-662 Paper tray (4 mm dia.ball) Fig. 4-5 (4) Remove the four bind B M4x12 Taptite screws, and then remove the paper tray front cover.
- Page 103 CHAPTER 4 DISASSEMBLY AND RE-ASSEMBLY (5) Remove the two Taptite, cup B M3x10, and then remove the paper tray cover. Paper tray Tpatite, cup B M3x10 Paper tray cover Tpatite, cup B M3x10 Fig. 4-7 (6) Remove the pressure roller holder ASSY. Pressure roller holder ASSY Paper tray Flat screwdriver...
- Page 104 HL-5030/5040/5050/5070N SERVICE MANUAL (7) Remove the pressure roller collar. (8) Remove the pressure roller shaft. Pressure roller shaft Pressure roller collar Pressure roller holder ASSY Fig. 4-9 (9) Remove the scratch spongy holder ASSY from the pressure roller holder ASSY. (10) Remove the two scratch spongy springs.
- Page 105 CHAPTER 4 DISASSEMBLY AND RE-ASSEMBLY (12) Remove the two cup M2.6x5 Taptite screws. (13) Release the lock lever, and then unhook the catches of the two side guide racks. Taptite, cup M2.6x5 Side guide L Taptite, cup M2.6x5 Side guide rack Catches Paper tray Lock lever...
- Page 106 HL-5030/5040/5050/5070N SERVICE MANUAL (15) Unhook the two catches (A) of the pressure plate while pulling the plastic frame outwards, then unhook the other two catches (B) of the plate while pulling the plastic frame outwards to remove the pressure plate ASSY. Catches (A) Pressure plate ASSY Paper tray...
- Page 107 CHAPTER 4 DISASSEMBLY AND RE-ASSEMBLY NOTE: When re-assembling the pressure plate ASSY, ensure that the paper indicator arm is under the pressure plate. CAUTION: When unhooking the catches to remove the pressure plate, do not bend the pressure plate, gently ease the plastic cover. If the pressure plate is deformed, paper feeding problems may occur.
- Page 108 HL-5030/5040/5050/5070N SERVICE MANUAL (19) Remove the cup B M3x8 Taptite screw, and then remove the side guide gear and the friction spring. (20) Remove the two side guide racks. Taptite, cup B M3x8 Side guide gear Side guide rack Friction spring Side guide rack Fig.
- Page 109 CHAPTER 4 DISASSEMBLY AND RE-ASSEMBLY NOTE: • When re-assembling the side guide racks, they should both be aligned so that the wide end of the racks are in line with the inside edge of the paper guide release slots in the tray before refitting the spring and gear.
- Page 110 HL-5030/5040/5050/5070N SERVICE MANUAL (24) Remove the paper rear guide. Paper tray Paper rear guide Fig. 4-20 4-13...
-
Page 111: Access Cover
CHAPTER 4 DISASSEMBLY AND RE-ASSEMBLY Access Cover (1) Remove the access cover. Access cover Fig. 4-21 Rear Cover C (1) Remove the bind B M4x12 Taptite screw, and then remove the rear cover C. Rear cover C Taptite, bind B M4x12 Fig. -
Page 112: Outer Chute (For Hl-5030/5040 Only)
HL-5030/5040/5050/5070N SERVICE MANUAL Outer Chute (for HL-5030/5040 only) (1) Remove the outer chute. Hook Outer Chute Fig. 4-23 (2) Remove the outer chute tray. Outer Chute Outer chute tray Fig. 4-24 4-15... -
Page 113: Rear Cover Mp Assy /Outer Chute Mp Assy (For Hl-5050/5070N Only)
CHAPTER 4 DISASSEMBLY AND RE-ASSEMBLY Rear Cover MP ASSY / Outer Chute MP ASSY (for HL-5050/5070N only) (1) Remove the rear cover MP ASSY. Hook Rear cover MP ASSY Fig. 4-25 (2) Remove the outer chute MP ASSY. Hook Outer chute MP ASSY Fig. -
Page 114: Rear Cover L/R
HL-5030/5040/5050/5070N SERVICE MANUAL (3) Remove the rear cover MP tray. Rear cover MP ASSY Rear cover MP tray Fig. 4-27 Rear Cover L/R (1) Remove the two bind B M4x12 Taptite screws, and then remove the rear cover L. (2) Remove the two bind B M4x12 Taptite screws, and then remove the rear cover R. Taptite, bind B M4x12 Rear cover R... -
Page 115: Side Cover L/R
CHAPTER 4 DISASSEMBLY AND RE-ASSEMBLY Side Cover L/R (1) Remove the three bind B M4x12 Taptite screws, and then remove the side cover R. Hooks Taptite, bind B M4x12 Side cover R Hook Hooks Hook Taptite, bind B M4x12 Fig. 4-29 (2) Remove the four bind B M4x12 Taptite screws, and then remove the side cover L. -
Page 116: Top Cover
HL-5030/5040/5050/5070N SERVICE MANUAL 3.10 Top Cover (1) Remove the two bind B M4x12 Taptite screws, and then remove the top cover ASSY. (2) Disconnect the panel PCB harness from the panel PCB ASSY. Taptite, bind B M4x12 Top cover ASSY Hooks Hook Taptite, bind B... - Page 117 CHAPTER 4 DISASSEMBLY AND RE-ASSEMBLY (4) Remove the two cup B M3x8 Taptite screws, and then remove the panel PCB ASSY. (5) Remove the SW key A, the SW key B and the panel light guide from the top cover ASSY. Top cover ASSY SW key B SW key A...
- Page 118 HL-5030/5040/5050/5070N SERVICE MANUAL (7) Remove the five bind B M4x12 Taptite screws, and then remove the inner chute. Inner chute Taptite, bind B M4x12 Taptite, bind B M4x12 Hooks Taptite, bind B M4x12 Top cover printed ASSY Hook Fig. 4-35 (8) Remove the corrugation pinch roller W and pinch roller holder.
-
Page 119: Front Cover Assy (For Hl-5030/5040 Only)
CHAPTER 4 DISASSEMBLY AND RE-ASSEMBLY 3.11 Front Cover ASSY (for HL-5030/5040 only) (1) Release the link. (2) Remove the front cover ASSY. Frame Front cover ASSY Link Fig. 4-37 4-22... -
Page 120: Mp Unit (For Hl-5050/5070N Only)
HL-5030/5040/5050/5070N SERVICE MANUAL 3.12 MP Unit (for HL-5050/5070N only) (1) Disconnect the two connectors. (2) Remove the MP ground spring. (3) Remove the two bind B M3x10 and cup S M3x6 Taptite screws. (4) Remove the MP solenoid holder unit. MP ground spring MP solenoid holder unit Engine PCB... - Page 121 CHAPTER 4 DISASSEMBLY AND RE-ASSEMBLY (7) While pushing the MP pressure plate, remove the separation plate ASSY. Separation plate ASSY MP chute ASSY MP pressure plate Fig. 4-40 NOTE: When replacing with the new separation plate ASSY, attach it after peeling the cover paper of double-faced tape.
- Page 122 HL-5030/5040/5050/5070N SERVICE MANUAL (8) Remove the shaft of the MP front cover ASSY from the drive release link, and then remove the MP front cover ASSY from the MP chute ASSY. MP chute ASSY Drive release link Shaft MP front cover ASSY Shaft Fig.
- Page 123 CHAPTER 4 DISASSEMBLY AND RE-ASSEMBLY (10) Remove the MP tray ASSY. MP chute ASSY MP tray ASSY Fig. 4-44 (11) Remove the MP paper guide 2 and the MP paper guide 3 from the MP tray ASSY. MP paper guide 3 MP paper guide 2 MP tray ASSY Fig.
- Page 124 HL-5030/5040/5050/5070N SERVICE MANUAL (12) Open the MP chute ASSY cover. (13) Remove the MP-PE actuator. MP-PE actuator MP chute ASSY Fig. 4-46 (14) Remove the four bind B M4x12 Taptite screws, and then remove the MP chute ASSY. Taptite, bind B M4x12 MP chute ASSY Taptite, bind B M4x12 Fig.
- Page 125 CHAPTER 4 DISASSEMBLY AND RE-ASSEMBLY (15) Remove the MP-PE sensor PCB ASSY. MP-PE sensor PCB ASSY MP chute ASSY Hook Hooks Hooks Fig. 4-48 4-28...
-
Page 126: Fixing Unit
HL-5030/5040/5050/5070N SERVICE MANUAL 3.13 Fixing Unit (1) Disconnect the heater harness and thermistor harness. (2) Remove the bind B M4x12 Taptite screw and the shoulder screw, and then remove the fixing unit. Fixing unit Shoulder screw Heater harness Taptite, bind B M4x12 Thermistor harness Fig. - Page 127 CHAPTER 4 DISASSEMBLY AND RE-ASSEMBLY (4) Remove the three cup B M3x10 Taptite screws, and then remove the star wheel holder. Fixing unit Pins Taptite, cup B M3x10 Star wheel holder Fig. 4-51 (5) Remove the cup B M3x12 Taptite screw. (6) Release the thermistor ASSY harness from the four hooks.
- Page 128 HL-5030/5040/5050/5070N SERVICE MANUAL NOTE: When re-assembling the thermistor to the FU frame upper, ensure the direction of the thermistor is correct referring to the figure below; FU frame upper Thermistor Thermistor Taptite, cup B M3x12 Fig. 4-53 (8) Remove the two cup B M3x20 Taptite screws. (9) Remove the FU frame upper from the FU frame lower.
- Page 129 CHAPTER 4 DISASSEMBLY AND RE-ASSEMBLY (10) Remove the two pan (washer) M2.6x6 Taptite screws. (11) Remove the heat roller 25. (12) Remove the halogen lamp. Heat roller 25 Screw, pan (washer) M2.6x6 Halogen lamp Screw, pan (washer) M2.6x6 Colored side 115V:Orange 230V:Black Halogen lamp...
- Page 130 HL-5030/5040/5050/5070N SERVICE MANUAL (13) Remove the HR bearing 25. (14) Remove the HR gear 34. (15) Remove the HR retaining ring 25. (16) Remove the heat roller washer 25. (17) Remove the HR bearing 25. HR bearing 25 HR bearing 25 Heat roller 25 Heat roller washer 25 HR retaining ring 25...
- Page 131 CHAPTER 4 DISASSEMBLY AND RE-ASSEMBLY • When re-assembling the heat roller 25 to the FU frame upper, ensure you do not damage the heat roller 25 with the four separate claw ASSY on the FU frame upper. Heat roller 25 Separate claw ASSY Separate claw ASSY FU frame upper...
- Page 132 HL-5030/5040/5050/5070N SERVICE MANUAL (19) Remove the three cleaner spring S. (20) Remove the three cleaner pinch roller ASSY S. (21) Remove the cleaner spring L. (22) Remove the cleaner pinch roller ASSY L. Cleaner spring S Cleaner spring L Cleaner pinch roller ASSY S Cleaner spring S Cleaner pinch roller ASSY L Cleaner pinch roller ASSY S...
- Page 133 CHAPTER 4 DISASSEMBLY AND RE-ASSEMBLY (23) Disconnect the connector for the eject sensor harness from the thermistor relay PCB ASSY. (24) Release the eject sensor harness from the three hooks. (25) Remove the bind B M3x10 Taptite screw, and then remove the eject sensor PCB ASSY. (26) Remove the bind B M3x10 Taptite screw, and then remove the thermistor relay PCB ASSY.
- Page 134 HL-5030/5040/5050/5070N SERVICE MANUAL NOTE: When re-assembling the paper eject actuator and the eject actuator spring to the FU frame lower, ensure the paper eject actuator is seated correctly in the locating channel referring to the figure below; FU frame lower Eject actuator spring Paper eject actuator Fig.
-
Page 135: Laser Unit
CHAPTER 4 DISASSEMBLY AND RE-ASSEMBLY 3.14 Laser Unit (1) Remove the filter, and then remove the cup S M3x6 Taptite screw and the air duct. Filter Air duct Taptite, cup S M3x6 Fig. 4-67 (2) Disconnect the LD harness 5P from the laser unit. (3) Disconnect the polygon motor harness and remove the spongy from the laser unit. - Page 136 HL-5030/5040/5050/5070N SERVICE MANUAL (5) Remove the shutter arm C. Shutter arm C Frame L Fig. 4-69 4-39...
-
Page 137: Main Pcb
CHAPTER 4 DISASSEMBLY AND RE-ASSEMBLY 3.15 Main PCB (1) Loosen the two access plate screws. (2) Remove the access plate. Hooks Hooks Access plate Access plate screws Hook Hook Fig. 4-70 (3) Disconnect the LD harness 5P from the Main PCB ASSY. (4) Disconnect the three connectors from the Main PCB ASSY. - Page 138 HL-5030/5040/5050/5070N SERVICE MANUAL (5) Remove the three pan M3x6 screws. (6) Remove the four cup S M3x6 Taptite screws, and then remove the main PCB ASSY. Screw, pan M3x6 Taptite, cup S M3x6 Main PCB ASSY Taptite, cup S M3x6 Fig.
-
Page 139: Base Plate/ Lv Insulation Sheet
CHAPTER 4 DISASSEMBLY AND RE-ASSEMBLY 3.16 Base Plate / LV Insulation Sheet (1) Remove the eight bind B M4x12 Taptite screws. (2) Remove the four cup S M3x6 Taptite screws. (3) Remove the pan (washer) M3.5x6 Taptite screw, and then remove the ground wire. (4) Remove the base plate. -
Page 140: Engine Pcb
HL-5030/5040/5050/5070N SERVICE MANUAL 3.17 Engine PCB (1) Disconnect the fifteen connectors. Fan motor 60 unit connector Toner sensor (light reception) connector LT connector Thermistor relay PCB connector Polygon motor connector Main motor connector Fan motor 60 connector Main PCB connector LVPS connector Toner sensor (light emission) connector... -
Page 141: High-Voltage Ps Pcb Assy
CHAPTER 4 DISASSEMBLY AND RE-ASSEMBLY 3.18 High-voltage PS PCB ASSY (1) Remove the bind B M4x12 Taptite screw, and then remove the high-voltage PS PCB ASSY. (2) Disconnect the flat cable from the high-voltage PS PCB ASSY. Taptite, bind B M4x12 High-voltage PS PCB ASSY Flat cable Fig. -
Page 142: Low-Voltage Ps Pcb Assy
HL-5030/5040/5050/5070N SERVICE MANUAL 3.19 Low-voltage PS PCB ASSY (1) Remove the bind B M4x12 Taptite screw. (2) Disconnect the two connectors from the low-voltage PS PCB, and then remove the low- voltage PS PCB. Low-voltage PS PCB Main PCB/Engine PCB Connector Taptite, bind B M4x12 Heater Connector Fig. -
Page 143: Paper Feeder
CHAPTER 4 DISASSEMBLY AND RE-ASSEMBLY 3.20 Paper Feeder (1) Remove the bearing R. (2) Remove the paper pick-up roller ASSY. (3) Remove the two roller collars from the paper pick-up roller ASSY. Roller collar Paper pick-up roller ASSY Roller collar Bearing R Fig. - Page 144 HL-5030/5040/5050/5070N SERVICE MANUAL (6) Remove the PE actuator and the CA actuator from the frame. CA actuator PE actuator Frame Fig. 4-82 (7) Remove the spring, extension P/R from the gear 63P/R. (8) Remove the gear 63P/R. (9) Remove the ground wire from the conductor bearing. Hooks Conductor Bearing Gear 63P/R...
- Page 145 CHAPTER 4 DISASSEMBLY AND RE-ASSEMBLY (10) Remove the bearing L from the P/R shaft. (11) Remove the P/R shaft from the frame. P/R shaft Bearing L Fig. 4-84 (12) Remove the idle gear 22. (13) Remove the middle roller gear. (14) Remove the bind B M3x10 taptite screw and the conductor bearing.
- Page 146 HL-5030/5040/5050/5070N SERVICE MANUAL (16) Remove the two cup S M3x6 Taptite screws and the four bind B M4x12 Taptite screws. (17) Remove the front chute ASSY. Taptite, bind B M4x12 Front chute ASSY Taptite, cup S M3x6 Taptite, bind B M4x12 Taptite, cup S M3x6 Fig.
- Page 147 CHAPTER 4 DISASSEMBLY AND RE-ASSEMBLY (19) Remove the feed roller gear. (20) Remove the bearing F/R. (21) Remove the feed roller gear shaft from the frame. Bearing F/R Hook Feed roller gear shaft Bearing F/R Frame Feed roller gear Fig. 4-88 4-50...
- Page 148 HL-5030/5040/5050/5070N SERVICE MANUAL (22) Remove the hook of the bearing 5, and then slide the feed roller ASSY in the direction of the arrow. (23) Remove the feed roller ASSY. (24) Remove the joint 5 and the bearing 5 from the feed roller ASSY. Feed roller ASSY Bearing 5 Joint 5...
- Page 149 CHAPTER 4 DISASSEMBLY AND RE-ASSEMBLY (25) Remove the chute cover. Chute cover Hook Hook Fig. 4-91 (26) Remove the regist front actuator and regist front actuator spring. (27) Remove the regist rear actuator and regist rear actuator spring. Regist front actuator Regist front actuator spring Regist rear actuator Regist rear actuator spring...
- Page 150 HL-5030/5040/5050/5070N SERVICE MANUAL NOTE: When assembling the regist front actuator and the regist rear actuator, set the spring as shown in the figure. Regist rear actuator spring Regist rear actuator Hole Regist front actuator Hole Regist front actuator spring Fig. 4-93 4-53...
-
Page 151: Frame L/ Drive Unit
CHAPTER 4 DISASSEMBLY AND RE-ASSEMBLY 3.21 Frame L / Drive Unit (1) Remove the main PCB sheet from the frame L. (2) Remove the four bind B M4x12 Taptite screws. (3) Remove the two bind B M3x10 Taptite screws, and then remove the frame L. Frame L Under bar Main PCB... - Page 152 HL-5030/5040/5050/5070N SERVICE MANUAL (5) Remove the cup S M3x6 Taptite screw. (6) Remove the ground spring. (7) Remove the six bind B M4x12 Taptite screws. (8) Remove the cup S M3x10 Taptite screw. (9) Remove the cup S M3x6 Taptite screw, and then remove the sub gear plate. (10) Remove the LD harness 5P from the drive unit.
- Page 153 CHAPTER 4 DISASSEMBLY AND RE-ASSEMBLY (13) Remove the four cup S M3x6 Taptite screws, and then remove the main motor ASSY. Taptite, cup S M3x6 Main motor ASSY Taptite, cup S M3x6 Drive unit Fig. 4-97 (14) Remove the bind B M3x10 Taptite screw. (15) Remove the P/R solenoid ASSY, the P/R solenoid lever and the solenoid release spring P/R.
- Page 154 HL-5030/5040/5050/5070N SERVICE MANUAL (18) Disconnect the connector from the front cover sensor. (19) Remove the bind B M3x10 Taptite screw. (20) Remove the toner LED PCB unit ASSY. (21) Remove the sensor clip. (22) Remove the front cover sensor from the main frame R. Front cover sensor Main frame R Connector...
-
Page 155: Fan Motor 60 Unit Lv/ Fan Motor 60 Unit
CHAPTER 4 DISASSEMBLY AND RE-ASSEMBLY 3.22 Fan Motor 60 Unit LV / Fan Motor 60 Unit (1) Remove the fan motor 60 unit LV and the fan motor 60 unit from the main frame R. Main frame R Fan motor 60 unit Fan motor 60 unit LV Fig. -
Page 156: Frame R
HL-5030/5040/5050/5070N SERVICE MANUAL 3.23 Frame R (1) Remove the four bind B M4x12 Taptite screws. (2) Remove the two cup S M3x6 Taptite screws. (3) Remove the cup S M3x16 Taptite screw. (4) Remove the main frame R unit. Main frame R unit Taptite, bind B M4x12 Under bar Taptite, cup S M3x6... - Page 157 CHAPTER 4 DISASSEMBLY AND RE-ASSEMBLY (5) Remove the two bind B M4x12 Taptite screws. (6) Remove the cup S M3x6 Taptite screw. (7) Remove the drum spring R. (8) Remove the FG plate. Main frame R Taptite, cup S M3x6 FG plate Taptite, bind B M4x12 Drum spring R...
-
Page 158: Packing
HL-5030/5040/5050/5070N SERVICE MANUAL PACKING AC cords Accessory bag Accessory carton Drum unit Printer Carton Fig. 4-104 4-61... - Page 159 HL-5030/5040/5050/5070N SERVICE MANUAL LUBRICATION Flame L Gear 20 center F/R Idle gear 16A Gear 17 planetary Shaft idle gear 16 Gear 45 arm F/R Shaft idle gear 16 Gear, 40/54Y Idle gear 16A Pendulum gear 22 Drive unit Pendulum gear 22 Gear 58/88 Gear 58/88 * PG4: Grease PG662 4 mm dia.
-
Page 160: Guidelines For Lead Free Solder
CHAPTER 4 DISASSEMBLY AND RE-ASSEMBLY GUIDELINES FOR LEAD FREE SOLDER Information on Manually Repairing PCB Soldered with Lead-Free Solder This document provides information on how to correctly make manual repairs to a printed circuit board (PCB) soldered with lead-free solder. 1. - Page 161 HL-5030/5040/5050/5070N SERVICE MANUAL 5. Precautions for hand soldering operations 1) Soldering operations using lead-free solder are basically the same as those using tin- lead solder, however, due to the lead-free solder's characteristics of being difficult to melt, wet, and spread, as well as being hard, a soldering iron needs to be applied for a longer period of time than when soldering with conventional tin-lead solder.
- Page 162 CHAPTER 4 DISASSEMBLY AND RE-ASSEMBLY 7) A localized ventilation system and gloves are required for soldering operations. Lead-free solder does not contain the toxic substance lead, however, inhalation of the fumes may adversely affect the health of workers. The silver contained in lead- free solder is also a toxic substance, though it is not as toxic as lead, and, therefore, a localized ventilation system and gloves are required for lead-free solder soldering operations, as required for those with conventional solder.
-
Page 163: Chapter 5 Periodic Maintenance
HL-5030/5040/5050/5070N SERVICE MANUAL CHAPTER 5 PERIODIC MAINTENANCE To avoid creating secondary problems by mishandling, follow the warnings below during maintenance work. WARNING (1) Always turn off the power switch and unplug the power cord from the power outlet before accessing any parts inside the printer. (2) Some parts inside the printer are extremely hot immediately after the printer is used. - Page 164 CHAPTER 5 PERIODIC MAINTENANCE <Change Drum message> If the LED shows the message below, it means the drum unit is near the end of its life. We recommend that you replace the drum unit with a new one before there is a noticeable deterioration in the print quality.
-
Page 165: Toner Cartridge
HL-5030/5040/5050/5070N SERVICE MANUAL (3) While pressing the blue lock lever, take the toner cartridge out of the drum unit assembly. (Fig.5-4) Fig. 5-4 (4) Unpack the new drum unit. (5) Put the toner cartridge in the new drum unit until you hear it lock into place with a click. - Page 166 CHAPTER 5 PERIODIC MAINTENANCE NOTE: *There are many factors that determine the actual toner life, such as temperature, humidity, type of paper that you use, the number of pages per print job, etc. *The amount of toner used varies according to what is printed on the page and the print density setting.
- Page 167 HL-5030/5040/5050/5070N SERVICE MANUAL CAUTION: *It is recommended to place the drum unit assembly on a piece of disposable paper or cloth in case you accidentally spill or scatter toner. *To prevent damage to the printer from static electricity, do not touch the electrodes shown in the figure below.
- Page 168 CHAPTER 5 PERIODIC MAINTENANCE (7) Clean the primary corona wire inside the drum unit by gently sliding the blue tab from right to left several times. Return the tab to the home position before you put the drum unit back in the printer. If you do not, printed pages may have a vertical stripe. Home position Fig.
- Page 169 HL-5030/5040/5050/5070N SERVICE MANUAL NOTE: It is recommended to clean the printer when you replace the toner cartridge. Refer to subsection 3. ‘PERIODICAL CLEANING’ in this Chapter.
-
Page 170: Periodical Replacement Parts
CHAPTER 5 PERIODIC MAINTENANCE PERIODICAL REPLACEMENT PARTS Periodical replacement parts are the parts to be replaced periodically to maintain product quality. These parts would affect the product quality greatly if they lost their function even if they do not appear to be damaged or there is no change in their appearance.) The periodical replacement parts listed below should be replaced at the service center referring to the service life. -
Page 171: Fixing Unit
HL-5030/5040/5050/5070N SERVICE MANUAL Fixing Unit <Replacement procedure> 1) Disconnect the AC cord from the printer. Printer AC cord Fig.5-15 2) Close the front cover and pull out the paper tray. Front cover Paper Tray Fig.5-16... - Page 172 CHAPTER 5 PERIODIC MAINTENANCE 3) Remove the bind B M4x12 Taptite screw, and then remove the outer chute. Outer Chute Taptite, bind B M4x12 Fig.5-17 4) Remove the rear cover C. Hook Rear cover C Fig.5-18 5-10...
- Page 173 HL-5030/5040/5050/5070N SERVICE MANUAL 5) Remove the two bind B M4x12 Taptite screws, and then remove the rear cover L. 6) Remove the two bind B M4x12 Taptite screws, and then remove the rear cover R. Taptite, bind B Taptite, bind B M4x12 M4x12 Rear cover R...
-
Page 174: Paper Feeding Kit
CHAPTER 5 PERIODIC MAINTENANCE Paper Feeding Kit <Replacement procedure> 1) Disconnect the AC cord from the printer. Printer AC cord Fig.5-21 2) Close the front cover and pull out the paper tray. Front cover Paper tray Fig.5-22 5-12... - Page 175 HL-5030/5040/5050/5070N SERVICE MANUAL 3) Remove the pad holder and the separation pad spring from the paper tray. Pad holder Separation pad spring Fig.5-23 4) Remove the bearing R. 5) Remove the paper pick-up roller ASSY. 5) Remove the two roller collars from the paper pick-up roller ASSY. Roller collar Paper pick-up roller ASSY...
-
Page 176: Periodical Cleaning
CHAPTER 5 PERIODIC MAINTENANCE PERIODICAL CLEANING Clean the following parts periodically to avoid any printer problems or print image defects. CAUTION: While drum unit and scanner window cleaning basically can be implemented by the end user, the electrical terminals inside the printer and on the drum unit should be cleaned by a service technician. -
Page 177: Cleaning The Scanner Window
HL-5030/5040/5050/5070N SERVICE MANUAL Clean the primary corona wire inside the drum unit by gently sliding the blue tab from right to left several times. Return the tab to the home position before re-install the drum unit assembly. Home position Fig. 5-25 CAUTION: Make sure that the blue tab on the drum unit is returned to the home position ( mark... -
Page 178: Cleaning The Electrical Terminals
CHAPTER 5 PERIODIC MAINTENANCE Plug in the power cord, and then turn on the power switch. CAUTION: • Handle the drum unit carefully since it contains toner. If toner scatters and your hands or cloths get dirty, immediately wipe or wash it off with cold water. •... -
Page 179: Mtbf / Mttr
HL-5030/5040/5050/5070N SERVICE MANUAL MTBF / MTTR The meantime between failure (MTBF and the meantime to repair (MTTR) for this printer are as follows; MTBF: Up to 4,000 hours MTTR: Average 30 minutes except the periodical maintenance parts (the Paper Feeding Kit) and the printer control boards whose MTTR is average 10 minutes. -
Page 180: Chapter 6 Troubleshooting
HL-5030/5040/5050/5070N SERVICE MANUAL CHAPTER 6 TROUBLESHOOTING INTRODUCTION Initial Check (1) Operating environment Check if : • The source voltage stays within ±10% from the rated voltage shown on the rating plate. • The printer is installed on a solid, level surface. •... -
Page 181: Warnings For Maintenance Work
CHAPTER 6 TROUBLESHOOTING (4) Others Condensation: When the printer is moved from a cold room into a warm room in cold weather, condensation may occur inside the printer, causing various problems as listed below: • Condensation on the optical surfaces such as the scanning mirror, lenses, the reflection mirror and the protection glass may cause the print image to be light. -
Page 182: Identify The Problem
HL-5030/5040/5050/5070N SERVICE MANUAL Identify the Problem If you encounter any printer error or problem, first identify it referring to the chart below, then see the appropriate section. NOTE: The following troubleshooting sections contain both the actions which users should take or check and the ones which service technicians should perform. -
Page 183: Operator Calls & Service Calls
CHAPTER 6 TROUBLESHOOTING OPERATOR CALLS & SERVICE CALLS Operator Calls An ‘operator call’ which the printer indicates on the LEDs is user recoverable. Identify the error from the table below and take the corrective action described for each indication to correct it. -
Page 184: Service Calls
HL-5030/5040/5050/5070N SERVICE MANUAL Service Calls If service calls occur, all four LEDs (Status LED: Red) flash on and off to notice it. In this state execute the operation described on the top of Table 1 to notify a fault location from the specific combination of ON/OFF and status color of the LED. - Page 185 Further details of Service Errors As for Laser Unit Failure and Main PCB Failure, further details of these errors can be seen by pressing the Job Cancel button twice while holding down the Go button. Toner Toner Drum Drum Paper Paper Status Status...
-
Page 186: Error Message
CHAPTER 6 TROUBLESHOOTING ERROR MESSAGE Error Message in the Status Monitor The Status Monitor will report problems with the printer. Take the corrective actions listed in the following table for the error message that the Status Monitor reports. The default setting for the Status Monitor is off. If you would like to turn the status monitor on, you can change the setting of the Status Monitor in the Device Options of the Advanced tab. -
Page 187: Error Message Printouts
HL-5030/5040/5050/5070N SERVICE MANUAL Error message Remedy Resolution Reduced to • Reduce the complexity of your document before you Enable Printing print to prevent automatic reduction of the resolution. (The printer has printed the • Expand the printer memory by adding a commercially document at a reduced available DIMM memory module. -
Page 188: Paper Problems
CHAPTER 6 TROUBLESHOOTING PAPER PROBLEMS Paper Loading Problems First, make sure that you are using paper that meets Brother recommended paper specifications. See 3.5 Paper in Chapter 1. Problem Remedy The printer does not feed • If there is paper in the paper tray, make sure it is paper. -
Page 189: Paper Jams
HL-5030/5040/5050/5070N SERVICE MANUAL Paper Jams 4.2.1 Clearing jammed paper Clear the jammed paper following the procedures below; Pull the paper tray completely out of the printer. Fig. 6-1 Pull the jammed paper up and out of the printer. Fig. 6-2 Press the cover release button and then open the front cover. - Page 190 CHAPTER 6 TROUBLESHOOTING Pull out the drum unit assembly. Pull the jammed paper up and out of the printer. If you cannot remove the drum unit assembly easily at this time, do not use extra force. Instead, pull the edge of the jammed paper from the paper tray. Fig.
- Page 191 HL-5030/5040/5050/5070N SERVICE MANUAL Open the back output tray. Pull the jammed paper out of the fuser unit. If the paper jam can be cleared, go to Step 7. Fig. 6-6 NOTE: If you have to pull the paper toward the back of the printer, the fuser may get dirty with toner powder and it may scatter on the next printouts.
- Page 192 CHAPTER 6 TROUBLESHOOTING Close the jam clear cover. Close the back output tray. Push the lock lever down and take the toner cartridge out of the drum unit assembly. Take out the jammed paper if there is any inside the drum unit. Fig.
-
Page 193: Causes & Countermeasures
HL-5030/5040/5050/5070N SERVICE MANUAL 4.2.2 Causes & countermeasures The causes for paper jam problems vary depending on the location of the paper jam. When a paper jam occurs inside the printer, you have to find the location of the paper jam first, remove the jammed paper and then take the appropriate countermeasure referring to the table below;... -
Page 194: Paper Feeding Problems
CHAPTER 6 TROUBLESHOOTING Paper Feeding Problems Even if the paper is printed and ejected without any problems such as paper jams, paper feeding problems below may appear. Users can clear these problems by following the ‘User Check’ items for each problem. Even if the same problem occurs again, follow the procedures in the table below. - Page 195 HL-5030/5040/5050/5070N SERVICE MANUAL Curl or Wave User Check (1) Check the paper used meets the recommended paper specifications. Both high temperature and humidity will cause paper to curl. (2) If the printer is used infrequently, the paper may have sat for too long in the paper cassette. Turn over the stack of paper in the paper cassette.
-
Page 196: Software Setting Problems
CHAPTER 6 TROUBLESHOOTING SOFTWARE SETTING PROBLEMS The printer may not print the data correctly if there are incorrect software settings. “There was an error writing to LPT1: (or BRUSB) for the printer” error message appears. User Check (1) Check that the printer cable is not damaged or broken. Check also that the cable is connected to the correct interface connectors of both the printer and PC. - Page 197 HL-5030/5040/5050/5070N SERVICE MANUAL Although the USB driver is installed, it is unable to find the BRUSB: port. (Windows98/Me only) User Check (1) Re-install the USB driver by following the steps below; Turn the printer off. Double-click the file “Deins USB.exe” in the USB directory of the CD-ROM. iii) Re-boot the PC.
- Page 198 • Product ID: 0x15 (for HL- pair type and 5 m or less. 5030), 0x16 (for HL-5040) Try to connect the printer and • Vender: Brother International PC with the USB cable Corporation (or 0x4f9) directly. Driver...
-
Page 199: Malfunctions
HL-5030/5040/5050/5070N SERVICE MANUAL MALFUNCTIONS When taking countermeasures for malfunctions as described in this section, check connectors for contact failure before measuring the voltage at the specified connector pins. No AC power supplied Possible cause Step Check Result Remedy Supply voltage Is the correct voltage present Inform the user that the at the outlet? - Page 200 CHAPTER 6 TROUBLESHOOTING WARNING If you analyze malfunctions with the power plug inserted into the power outlet, special caution should be exercised even if the power switch is OFF because it is a single pole switch. Main motor failure Possible cause Step Check Result...
- Page 201 HL-5030/5040/5050/5070N SERVICE MANUAL Insufficient output from high-voltage power supply unit Possible cause Step Check Result Remedy High-voltage Do any of the terminals on the Clean the terminals. contact high-voltage contacts have dirt or contact burns? High-voltage Check the connections of the Replace the high-voltage power supply connector between the high-...
- Page 202 CHAPTER 6 TROUBLESHOOTING Fixing Unit failure Possible cause Step Check Result Remedy Poor thermistor Is the contact of connector Reconnect the connector. harness contact CN7 on the engine PCB good? Blown thermal Remove the fixing unit and Replace the fixing unit. fuse measure the resistance between the input connectors.
- Page 203 HL-5030/5040/5050/5070N SERVICE MANUAL M-12 Engine PCB error Possible cause Step Check Result Remedy Fixing unit Is the ground wire on the fixing Secure the ground wire ground wire unit secured with the shoulder correctly with the shoulder connection screw correctly? screw.
-
Page 204: Image Defects
CHAPTER 6 TROUBLESHOOTING IMAGE DEFECTS Image Defect Examples I-1 Light I-2 Dark I-2 Dark I-3 Completely blank I-5 Dirt on back of paper I-4 All black I-6 Black vertical I-6 Black vertical I-7 Black horizontal I-8 Black vertical I-9 White vertical streaks streaks stripes... -
Page 205: Troubleshooting Image Defect
HL-5030/5040/5050/5070N SERVICE MANUAL Troubleshooting Image Defect Several types of the image defects can be cleared by end users. For those defects, instruct the user to check the ‘User Check’ items described in each table. Even if the same image defect appears, the following procedures should be followed in the event of specific image defects. - Page 206 CHAPTER 6 TROUBLESHOOTING Dark User Check (1) Check the paper used meets the recommended paper specifications. (2) Check the printer’s environment. High temperature and high humidity conditions can increase the amount of background shading. (3) Clean the corona wire with the wire cleaner. (4) Try installing a new toner cartridge or drum unit.
- Page 207 HL-5030/5040/5050/5070N SERVICE MANUAL Completely blank Ground Possible cause Step Check Result Remedy contacts Developing bias Are the developing bias Clean the electrodes contact failure contacts between the printer at both sides. body and drum unit dirty? Drum unit Are the drum shaft and drum Clean the shaft and electrode of the printer body the electrode.
- Page 208 CHAPTER 6 TROUBLESHOOTING All black User Check (1) Clean the corona wire of the drum unit. (2) The drum unit may be damaged. Install a new drum unit. Ground Possible cause Step Check Result Remedy contacts Corona failure Is the corona wire dirty? Clean the corona wire with the wire cleaner.
- Page 209 HL-5030/5040/5050/5070N SERVICE MANUAL Dirt on the back of paper Possible cause Step Check Result Remedy Clean the pressure roller Fixing unit dirty Is the pressure roller dirty? referring to the following Is any other area in the printer procedure. dirty? Dirt in the drum Is the transfer roller dirty? Replace the drum unit...
- Page 210 CHAPTER 6 TROUBLESHOOTING Black and blurred vertical streaks User Check (1) Clean the corona wire in the drum unit. (2) Check that the corona wire cleaner is at the home position. (3) Check that the toner cartridge is not empty. (4) The drum unit may be damaged.
- Page 211 HL-5030/5040/5050/5070N SERVICE MANUAL Black and blurred horizontal stripes User Check (1) The drum unit may be damaged. Install a new drum unit. (2) Check the paper used meets the recommended paper specifications. (3) Clean the printer interior and the corona wire in the drum unit. Possible cause Step Check...
- Page 212 CHAPTER 6 TROUBLESHOOTING White vertical streaks User Check (1) Try to wipe the scanner window with a soft cloth. (2) The toner cartridge may be damaged. Install a new toner cartridge. (3) Check the printer’s environment. High temperature and high humidity conditions can cause this problem.
- Page 213 HL-5030/5040/5050/5070N SERVICE MANUAL I-11 Faulty registration Possible cause Step Check Result Remedy Excessive paper Is the paper loaded in the Instruct the user to keep paper load paper cassette more than loads below 27mm in depth. 27mm high? Print paper Is the specified weight of the Recommend to use the recommended paper being...
- Page 214 CHAPTER 6 TROUBLESHOOTING I-13 Image distortion Possible cause Step Check Result Remedy Laser unit Is the laser unit secured to the Secure the unit correctly and installation frame incorrectly? tighten the screws. (Check if there is any play.) Scanner LD Is the laser diode or the Replace the laser unit.
- Page 215 HL-5030/5040/5050/5070N SERVICE MANUAL I-15 White spots User Check (1) If the problem is not solved after printing a few pages, the drum unit may have glue from label stock on the photosensitive drum surface. Refer to Step 1 in the table below and NOTE in the next page.
- Page 216 CHAPTER 6 TROUBLESHOOTING NOTE: Clean the drum unit as follows: (1) Remove the toner cartridge from the drum unit. Place the printing samples in front of the drum unit, and find the exact position of the image defect. Drum unit Position of smudge on the drum 94mm interval...
- Page 217 HL-5030/5040/5050/5070N SERVICE MANUAL I-16 Black spots User Check (1) If the problem is not solved after printing a few pages, the drum unit may have glue from label stock on the photosensitive drum surface. Refer to Step 1 in the table below and NOTE in the previous page.
- Page 218 CHAPTER 6 TROUBLESHOOTING I-17 Black band Ground Possible cause Step Check Result Remedy contacts Corona failure Is the wire cleaner at its home Return the wire position? cleaner to its home position. Corona failure Is the corona wire dirty? 1) Clean the corona wire.
- Page 219 HL-5030/5040/5050/5070N SERVICE MANUAL I-18 Gray background Possible cause Step Check Result Remedy Print paper Does the paper being used Recommend to use the meet the paper specification specified types of paper. (weight, etc.). Recommend to change to freshly unpacked paper. Toner sensing Is the Status LED green even Toner sensor failure.
- Page 220 CHAPTER 6 TROUBLESHOOTING I-19 Hollow print User Check (1) Check the paper used meets the recommended paper specifications. (2) Select the ‘Thick paper mode’ in the printer driver, or use thinner paper than you are currently using. (3) Check the printer’s environment, conditions such as high humidity may cause this situation to occur.
- Page 221 HL-5030/5040/5050/5070N SERVICE MANUAL I-21 Horizontal lines Ground Possible cause Step Check Result Remedy contacts Paper feed roller Are the feed roller shaft and Check the connection the ground contact connected between the shaft and correctly? the ground contact. Also check the ground contact on the back of the feed roller.
- Page 222 CHAPTER 6 TROUBLESHOOTING I-22 Light rain Ground Remedy Possible cause Step Check Result contact Drum unit failure Is the problem solved after Replace the drum replacing the drum unit? unit. Drum Is the contact between the Clean contact connection drum unit and printer body electrode both on the failure connected correctly?
- Page 223 HL-5030/5040/5050/5070N SERVICE MANUAL I-24 Toner specks User Check (1) Check the paper used meets the recommended paper specifications. A rough surfaced paper may cause the problem. (2) The toner cartridge may be damaged. Install a new toner cartridge. (3) The drum unit may be damaged, or may be nearly at the end of life. Install a new drum unit.
-
Page 224: Location Of Grounding Contacts
CHAPTER 6 TROUBLESHOOTING Location of Grounding Contacts 7.4.1 Drum unit (2) Wire cleaner Drum Unit (5) Grid (8) Cleaner (4) Development roller (3) Charge (1) Photosensitive drum (6) Transfer roller Fig. 6-5 7.4.2 Printer body & Paper cassette (1) Photosensitive drum (5) Grid (3) Charge (4) Development roller... -
Page 225: Incorrect Printout
HL-5030/5040/5050/5070N SERVICE MANUAL INCORRECT PRINTOUT When the data is not printed correctly as it is seen on the PC screen, follow the procedures below in the event of a specific error. The printer prints unexpectedly or it prints garbage. User Check (1) Check if the printer cable is not too long. - Page 226 CHAPTER 6 TROUBLESHOOTING Unable to print full pages of a document with the “PRINT OVERRUN” message. User Check (1) Press the Go switch on the control panel to print the data remaining in the printer. (2) If this does not clear the error, reduce the complexity of your document or reduce the printer resolution.
- Page 227 HL-5030/5040/5050/5070N SERVICE MANUAL Headers or footers are not printed out even though they are viewed on PC screen. User Check Most laser printers have a restricted area that cannot be printed on. Usually the first two lines and last two lines of text cannot print (leaving 62 printable lines). Adjust the top and bottom margins in your document to allow for this.
-
Page 228: Network Problem
CHAPTER 6 TROUBLESHOOTING NETWORK PROBLEM If the error related to network occurs, refer to the following sections; Installation Problem If you cannot print over the network, check the following: (1) Make sure that the printer is powered on, is on-line and ready to print. Verify that the printer and the configuration are good by printing the printer settings page. -
Page 229: Intermittent Problem
HL-5030/5040/5050/5070N SERVICE MANUAL (3) If you cannot make any of the connections in step (2), check the following: a) Make sure the printer is turned on and on-line. b) Check the cabling, network connection, and print out a configuration page in the Network STATISTICS information to see if bytes are being transmitted and received. -
Page 230: Tcp/Ip Troubleshooting
CHAPTER 6 TROUBLESHOOTING TCP/IP Troubleshooting If you are using TCP/IP and cannot print to the print server and you have checked the hardware and network as described in the previous steps, then check the following: NOTE: It is always a good idea to try the following in order to eliminate the possibility of setup errors. •... -
Page 231: Windows Nt/Lan Server (Tcp/Ip) Troubleshooting
HL-5030/5040/5050/5070N SERVICE MANUAL (4) If you are using an AT&T-based UNIX, make sure the printer is enabled (enable printer, where printer is the name of the local print queue). (5) Make sure that the lpr/lpd remote line printer service are running on the host computer (refer to your host computer documentation for information on how to do this). -
Page 232: Windows 95/98/Me (Or Later) Peer To Peer (Hp Jetadmin Compatible Method) Troubleshooting
CHAPTER 6 TROUBLESHOOTING Windows 95/98/Me (or later) Peer to Peer (HP JetAdmin Compatible Method) Troubleshooting If you are having trouble printing on a Windows 95/98/Me (or later) Peer to Peer network, check the following (HP JetAdmin compatible method): (1) If the print server does not show up under JetAdmin on a Windows 95/98 Peer to Peer network, try removing all of the Windows 95/98/Me network software from the Network Control panel and then reinstalling them as follows: •... -
Page 233: Windows 95/98/Me/2000/Xp Ipp Troubleshooting
HL-5030/5040/5050/5070N SERVICE MANUAL 9.10 Windows 95/98/Me/2000/XP IPP Troubleshooting Want to use a different Port number other than 631 If you are using Port 631 for IPP printing, you may find that your firewall may not let the print data through. If this is the case, use a different port number (port 80), or configure your Firewall to allow Port 631 data through. -
Page 234: Appletalk Troubleshooting
CHAPTER 6 TROUBLESHOOTING 9.12 AppleTalk Troubleshooting If you cannot print from an AppleTalk for Macintosh computer and you have checked the hardware and network as described in the previous steps, then check the following: (1) Make sure that you are running Phase 2 AppleTalk and that you have selected the correct network interface from the Apple Talk Control Panel on the Macintosh. -
Page 235: Chapter 7 Service Support Software
HL-5030/5040/5050/5070N SERVICE MANUAL CHAPTER 7 SERVICE SUPPORT SOFTWARE CONTROL PANEL Test Print Mode The printer incorporates various test print modes. Select the test mode you want to use following the steps below; (1) Turn off the power switch of the printer and check that the front cover is closed. (2) Turn on the power switch while holding down the Go button. -
Page 236: Service Mode
CHAPTER 7 SOFTWARE SERVICE SUPPORT Service Mode The printer incorporates various service modes. Select the service mode you want to use according to the steps shown below; (1) Turn off the power switch of the printer and check that the front cover is closed. (2) Turn on the power switch while holding down the Job Cancel button. -
Page 237: Inspection Mode
HL-5030/5040/5050/5070N SERVICE MANUAL Inspection Mode The printer incorporates various inspection modes such as the factory inspection mode and the test print mode. The printer supports a factory inspection mode, continuous grid pattern print mode, 3 patterns print mode and NV-RAM value dump mode. Select the inspection mode you want to use following the steps below;... - Page 238 CHAPTER 7 SOFTWARE SERVICE SUPPORT <HL-5040> After checking of all 6 sensors, Toner LED is lit if no unusual states are detected. Front registration sensor Rear registration sensor Paper eject sensor Front cover sensor Fixing unit cover sensor Toner sensor After checking of all 5 sensors, Drum LED is lit if no unusual states are detected.
-
Page 239: How To Know Drum Unit Life
HL-5030/5040/5050/5070N SERVICE MANUAL HOW TO KNOW DRUM UNIT LIFE & PAGE COUNTER If you want to know the drum unit life or the number of printed pages, you should print out the Print Settings. Printing out the Print Settings (1) Press the Set switch three times. (2) Print the Print Settings. - Page 240 CHAPTER 7 SOFTWARE SERVICE SUPPORT <How to calculate drum unit life> **Printing time for 1 page/job in discontinuous printing = 12 seconds (Page counter reduced by the number of drum rotations) = (Time of motor rotation) ÷ (12 sec.) Example: Cold start (Idling for 5 sec.) Hot start Page...
- Page 241 HL-5030/5040/5050/5070N SERVICE MANUAL How to Read the Maintenance Information The maintenance information such as the frequency of consumable parts replacement or paper jam can be found.\ To obtain the maintenance information, you need to obtain and load the Maintenance Information utility which supplied on Service Databank by following the steps below; Get the information;...
-
Page 242: How To Use The Self-Diagnostics Tools
CHAPTER 7 SOFTWARE SERVICE SUPPORT HOW TO USE THE SELF-DIAGNOSTICS TOOLS Three self-diagnostics tools below are automatically installed when the printer driver is installed; 1) Troubleshooting for Printer won’t print 2) Diagnostics 3) Printer Information The following sections describe the details on each tool. Troubleshooting for Printer won’t print This tool instructs you how to clear the problem such as ‘The printer can’t print’... - Page 243 HL-5030/5040/5050/5070N SERVICE MANUAL Diagnostics This tool helps you to report your PC environment to investigate the cause of problem such as ‘Printer won’t print’ or ‘Printer prints garbage or incorrect fonts’. Before using this tool, however, you have to check if you can clear the problem using the ‘Troubleshooting for printer won’t print’...
- Page 244 CHAPTER 7 SOFTWARE SERVICE SUPPORT (3) If you click the OK button in Step 2, the dialog box below appears. Fig. 7-9 (4) Check the result that the printer reported and click the A, B or C button depending on the result.
-
Page 245: Printer Information
HL-5030/5040/5050/5070N SERVICE MANUAL Printer Information The drum unit life or page counter is printed on Print Configuration in some countries as described in 3. ‘HOW TO KNOW DRUM UNIT LIFE & PAGE COUNTER’. This tool also shows the printer information such as printer version or page counter for all models only when the printer is connected to a parallel port or USB. -
Page 246: Nvram Default Value
CHAPTER 7 SOFTWARE SERVICE SUPPORT NVRAM DEFAULT VALUE The default values for the main items to be set in NVRAM are as follows; Items Descriptions Timing of Drum LED ON 18,000 page (Counted from the drum unit life.) Development switching The developing bias is switched from 400V to 300V when timing 5,000 pages are printed. -
Page 247: How To Rewrite Hl-5030/5040/5050/5070N Flash Rom
HL-5030/5040/5050/5070N SERVICE MANUAL HOW TO REWRITE HL-5030/5040/5050/5070N FLASH ROM The ROM composition of each PCB is as follows. MODEL MAIN PCB ROM 0 ROM 1 HL-5030 Production 8 Mbit MASK ROM x 1 Spares 8 Mbit FLASH ROM x 1 HL-5040 Production 32 Mbit MASK ROM x 1... - Page 248 CHAPTER 7 SOFTWARE SERVICE SUPPORT Preparation tool 1) PC (Windows 2000) Create the folder “ZL2” in C drive. 2) 1 HL-5030/5040/5050/5070N printer 3) 1 USB cable 4) FILEDG32.EXE, WAITSEC.EXE and FLW_MAIN.CMD Download ”FILEDG32.EXE”, “WAITSEC.EXE” and “FLW_MAIN.CMD” from Utility DB, then copy them to “ZL2”...
- Page 249 HL-5030/5040/5050/5070N SERVICE MANUAL Controller Firmware (ROM 0) Rewriting procedure (For AVA file) *Before you start the rewriting procedure, uninstall all the printer drivers for HL-5000 series. 1) Choose Start…>Program…>Accessory…>Command prompt Since the DOS window is opened, move the ZL2 folder. Type c:+ ENTER, CD \ZL2 + ENTER.
- Page 250 CHAPTER 7 SOFTWARE SERVICE SUPPORT <PIT3> 6) Move the folder to “PIT3” in DOS window and type “PIT3”, then press ENTER key. PIT3 (software tool) will start. 7) Input model name in PIT3 control window, then press ENTER. “CSXXXX (SCRPTY.YY)” message appears in the model section of PIT3 control window.
- Page 251 HL-5030/5040/5050/5070N SERVICE MANUAL .00113 Denmark .00115 Spain .00116 Italy .00117 Israel .00124 South Africa .00126 Sweden .00136 Chile .00143 GULF .00147 Japan .00151 PAN-NORDIC .00160 France/Belgium/ Netherland .00216 CONSIP NOTE: ”O”; Supported ”X”; Not supported Network Firmware (ROM 1) 1) Choose Start…>Program…>Accessory…>Command prompt Since the DOS window is opened, move the ZL2 folder.
-
Page 252: Main Pcb Circuit Diagram, Hl-5030/5040/5050 (1/3
APPENDIX Appendix 1. Main PCB Circuit Diagram, HL-5030/5040/5050 (1/3) VDD3 ADR[23-1] 6F/7C/7F/3-2E/3-4D/3-4C/8A/8B/3-2D TP731 TP35 TP198 ADR[1] SDRAM DATA[0] RA12 DATA00 ADR01/24 ADR[2] DATA[1] DATA01 ADR02 DATA[2] ADR[3] SDCSN0 VDD1 VDD3 DATA02 ADR03 RASN DATA[3] ADR[4] ADR[17] VDDQ3 DATA03 ADR04 TP36 6F/7A/7C/7F/3-2E/3-4C TP732 CASN... - Page 253 APPENDIX Appendix 2. Main PCB Circuit Diagram, HL-5030/5040/5050 (2/3) Printer Printer CDCC_DIR VDD3 CDCC_HD VDD5 VCC_CABLE VDD5 VCC_CABLE CDCC_D[7-0] D[7-0] CDCC_D[0] PAD00 PRSTN TP536 D[0] CDCC_D[1] PAD01 D[1] CDCC_D[2] PAD02 PCLKOUT TP537 D[2] CDCC_D[3] PAD03 D[3] VDD3 CDCC_D[4] PAD04 GACLKOUT TP538 D[4] PAD05...
- Page 254 APPENDIX Appendix 3. Main PCB Circuit Diagram, HL-5030/5040/5050 (3/3) DQ[31-0] DQ[31-0] 7D/1-8C DIMM DQ[0] VDD3 DQ[1] DATA[15-0] 1-3B/1-7F/1-8F DQ[2] DQ[3] DATA[0] DQ[0] DQ[4] DATA[1] DQ[1] DQ[5] DATA[2] DQ[2] DQ[6] DATA[3] DQ[3] DQ[7] DQ[4] DATA[4] DQ[8] DATA[5] DQ[5] DQ[9] DATA[6] DQ[6] DQ[10] DQ10 DATA[7]...
-
Page 255: Main Pcb Circuit Diagram, Hl-5070N (1/4
APPENDIX Appendix 4. Main PCB Circuit Diagram, HL-5070N (1/4) VDD3 SDRAM ADR[23-1] 5F/6C/7F/3-2E/3-3D/4-6E/3-3C/7A/7B/3-2D TP35 TP198 TP728 DATA[0] ADR[1] RA11 R124 DATA00 ADR01/24 ADR[2] SDCSN0 VDD1 VDD3 DATA[1] DATA01 ADR02 RASN ADR[3] ADR[17] VDDQ3 DATA[2] 5F/6A/6C/7F/3-2E/3-3C/4-6E DATA02 ADR03 CASN ADR[18] VDDQ9 DATA[3] ADR[4] DATA03... - Page 256 APPENDIX Appendix 5. Main PCB Circuit Diagram, HL-5070N (2/4) Printer Printer CDCC_DIR VDD3 CDCC_HD VDD5 VCC_CABLE VDD5 VCC_CABLE CDCC_D[7-0] D[7-0] CDC-.cir/3C CDCC_D[0] D[0] CDCC_D[1] D[1] CDCC_D[2] D[2] VDD5 CDCC_D[3] D[3] CDCC_D[4] D[4] CDCC_D[5] D[5] CDCC_D[6] D[6] CDCC_D[7] D[7] VDD3 INITN CDCCINITN CDCCACKN SEINN...
- Page 257 APPENDIX Appendix 6. Main PCB Circuit Diagram, HL-5070N (3/4) DQ[31-0] 1-8C/7D/4-7E DIMM DATA[15-0] DQ[0] 1-2B/1-6F/1-8F VDD3 DQ[1] DQ[2] DATA[0] DQ[0] DQ[3] DATA[1] DQ[1] DQ[4] DATA[2] DQ[2] DQ[5] DATA[3] DQ[3] DQ[6] DATA[4] DQ[4] DQ[7] DQ[5] DATA[5] DQ[8] DATA[6] DQ[6] DQ[9] DATA[7] DQ[7] DQ[10] DQ10...
- Page 258 APPENDIX Appendix 7. Main PCB Circuit Diagram, HL-5070N (4/4) C104 @C46 C100 C100 @DA1 @C45 RJ-45 C104 @CN2 TP69 TP74 12 FG @R64 IDSEL IF_FG4 11 FG DF5A6.8LF PAD[31-0] 7 LED1_C PAD[0] PAD00 PRSTN RSTN REQN PREQ1 A_VDD 8 LED1_A LINK : YELLOW PAD[1] 1/10W...
-
Page 259: Point To Point Connection Diagram
APPENDIX Appendix 8. Point To Point Connection Diagram CN*d-1 CN101-3 +3.3V +3.3V CDCC I/F NETWORK LIVE except 30 only 70N LVPS HEATON NEUTRAL +24V 30/40/50 P0V(GND24V) CN*a CN10 CN*b CN*c except 30 OPTION : LT CN*d MAIN PCB CN*a-1 SW1-JOB_n LED3-GREEN LED3 T2 PICK UP... -
Page 260: Engine Pcb Circuit Diagram (1/2
APPENDIX Appendix 9. Engine PCB Circuit Diagram (1/2) CODE LJ923001 NAME B512153CIR (1/2) A - 9... - Page 261 APPENDIX Appendix 10. Engine PCB Circuit Diagram (2/2) CODE LJ923001 NAME B512153CIR (2/2) A - 10...
-
Page 262: Low-Voltage Power Supply Pcb Circuit Diagram (120V
APPENDIX Appendix 11. Low-voltage Power Supply PCB Circuit Diagram (120V) Low-voltage PS Circuit(120V) NAME A - 11 A-11... - Page 263 APPENDIX Appendix 12. Low-voltage Power Supply PCB Circuit Diagram (230V) NAME Low-voltage PS Circuit(230V) A - 12...
-
Page 264: High-Voltage Power Supply Pcb Circuit Diagram
APPENDIX Appendix 13. High-voltage Power Supply PCB Circuit Diagram NAME High-voltage PS Circuit A - 13 A-13... - Page 265 APPENDIX APPENDIX 14. HARNESS ROUTING Toner sensor PCB Fan motor 60 unit Fan motor 60 unit LV Laser unit (Polygon motor harness) Toner sensor PCB Fan motor 60 unit Fan motor 60 unit LV Laser unit Engine PCB Engine PCB Engine PCB Engine PCB MP-PE sensor PCB...
Need help?
Do you have a question about the HL 5030 - B/W Laser Printer and is the answer not in the manual?
Questions and answers