Table of Contents
Advertisement
Quick Links
Advertisement
Table of Contents

Related Manuals for Lexicon PCM 90 - REV 1


Summary of Contents for Lexicon PCM 90 - REV 1
- Page 1 PCM 90 Digital Reverberator User Guide...
- Page 2 Le présent appareil numérique n'émet pas de bruits radioélectriques dépassant les limites applicables aux appareils numériques de la class B prescrites dans le Règlement sur le brouillage radioélectrique édicté par le ministère des Communications du Canada. Copyright 1997 All Rights Reserved. Lexicon Part # 070-10399 Rev 1...
- Page 3 PCM 90 Digital Reverberator User Guide...
- Page 4 Dansk Suomi Vigtig information om sikkerhed Tärkeitä turvallisuusohjeita Säilytä nämä ohjeet tulevaa käyttöä varten. Gem denne vejledning til senere brug. Seuraa kaikkia yksikköön merkittyjä ohjeita ja varoituksia. Følg alle anvisninger og advarsler på apparatet. Käytä aina oikeaa verkkojännitettä. Tehovaatimukset selviävät valmistajan Apparatet skal altid tilsluttes den korrekte spænding.
- Page 5 Deutsch Español Wichtige Sicherheitsanweisungen Instrucciones importantes de seguridad Heben Sie sich diese Sicherheitsanweisungen auch für später auf. Guarde esta instrucciones para uso posterior. Befolgen Sie alle auf der Vorrichtung stehenden Anweisungen und Warnungen. Utilice siempre el voltaje correcto. Diríjase a las instrucciones de operación Immer nur mit der richtigen Spannung verwenden! Die Gebrauchsanweisungen del fabricante para obtener las especificaciones de potencia.
-
Page 6: Table Of Contents
Contents Introduction 1. Product Overview Block Diagram ..................1-1 Front Panel Overview ................. 1-2 Rear Panel Overview ................1-3 Installation Notes ................1-4 Mounting ..................1-4 Power Requirements ..............1-4 Audio Connections ............... 1-4 Control Connections ..............1-4 Setting Audio Levels ..............1-5 Headroom Display •... - Page 7 Contents, cont'd. 3. The Algorithms and their Parameters About the Algorithms ................3-1 Random Hall ................3-2 Ambience ..................3-4 Rich Plate ..................3-5 Concert Hall ................. 3-6 Chamber/Room ................3-7 The Parameters .................. 3-8 Compress ..................3-8 Controls ..................3-9 Custom ..................
- Page 8 5. MIDI Operation Contents, cont'd. Selecting a MIDI Channel ..............5-1 Accessing Programs and Registers ............ 5-1 Controlling PCM 90 Tempo Rate with MIDI Clock ......5-2 MIDI Tempo Control ..............5-2 Using the PCM 90 as a MIDI Clock Source ......... 5-2 Slaving two or more PCM 90s ............
-
Page 9: Introduction
Introduction Thank you for your purchase of the PCM 90 Digital Reverberator. The PCM 90 gives you Lexicon's renowned high-end reverb effects with a powerful new interface that provides easy access to superbly crafted presets as well as a wealth of programming capabilities for the sound designer. - Page 10 The PCM 90 gives you a unique set of tempo controls.Tempos can be tapped Tempo Control in with the front panel Tap button (or an assigned controller) or “dialed-in”, in BPM (beats per minute) on the display. The PCM 90 also lets you generate MIDI clock from your tempo, as well as receive MIDI tempo from an external sequencer or drum machine.
-
Page 11: Product Overview
Product Overview Product Overview Block Diagram... -
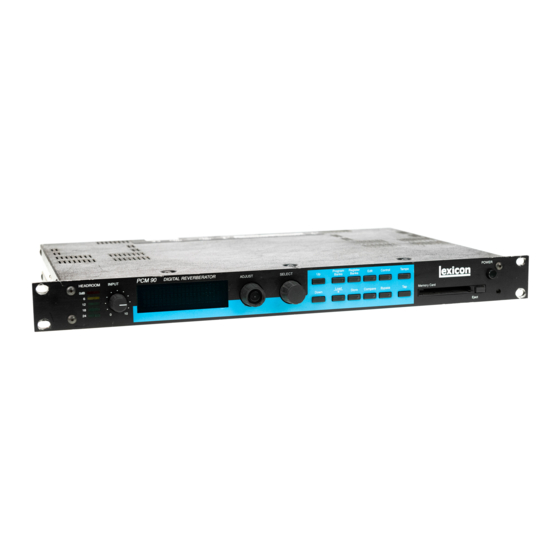
Page 12: Front Panel Overview
PCM 90 User Guide Lexicon Front Panel Overview SELECT Scrolls through pre- sets, registers or pa- rameters. With Pro- gram Bank or Register HEADROOM ADJUST Bank selected, scrolls POWER 5-position indicator for through the 50 pro- In Edit mode, changes On/Off. -
Page 13: Rear Panel Overview
Product Overview Rear Panel Overview Balanced Inputs Input Level Combined 3 pole XLR 2-position (In/Out) and 1/4" jacks, elec- Balanced Outputs switch for matching in- tronically balanced. Output impedance is put gain to the source S/PDIF In/Out 125 , each side, bal- Input impedance is being used. -
Page 14: Installation Notes
PCM 90 User Guide Lexicon Installation Notes Mounting The PCM 90 uses one EIA-standard rack space, and can be mounted on any level surface or in a standard 19 inch (483 mm) rack. If the PCM 90 is mounted in a rack or road case, support the rear of the chassis to prevent possible damage from mechanical shock and vibration. -
Page 15: Setting Audio Levels
Product Overview The PCM 90, with both analog and digital input and output connections, requires Setting Audio Levels some attention to proper setting of signal level. Analog inputs are first gain-conditioned by the rear panel input gain switch, and then by the front panel INPUT knob. Proper setting of both the switch and knob are important for best performance of the A/D converter. -
Page 16: Setting Analog Output Level
PCM 90 User Guide Lexicon Setting Input Levels 1. Press Control. 2. Press Up or Down until the leftmost digit in the lower lefthand corner of the display is 0. 3. Turn SELECT to 0.0 Audio Input Source. 4. Turn ADJUST to select Analog: 48kHz or Analog: 44.1kHz. -
Page 17: Configurations
Product Overview Configurations Connection to a mixing console's effects sends Effects Send (R) Effects Send (L) Channel Input or Effects Return (R) Channel Input or Effects Return (L) If you will be using a PCM 90 as your primary effects unit, and your system includes a console with one or more auxiliary (effects) sends, connect the PCM 90 as shown above. -
Page 18: Memory Cards
PCM 90 User Guide Lexicon Memory Cards You can use Memory cards to store as many as 1000 PCM 90 registers (20 banks of 50 — on a 1 Meg card). Registers stored on a properly formatted card will be recognized whenever the card is inserted, and can be accessed via the front panel Register Banks button, exactly as internal registers. -
Page 19: Basic Operation
Basic Operation Basic Operation The PCM 90 provides a wide range of control over an extraordinary set of reverb effects. All of the controls are easily accessed from the front panel and are described in detail in this section. Modes of Operation The PCM 90 has five basic modes of operation, each of which is selected by pressing a front panel button (Program Banks, Register Banks, Edit, Control and Tempo). -
Page 20: Navigating A Matrix
PCM 90 User Guide Lexicon Navigating a Matrix All of the controls available in a mode are arranged in a matrix of up to 10 columns (numbered 0-9) and 10 rows (each numbered .0-.9). This arrangment allows any one of as many as 100 parameters to be selected simply by using the SELECT knob and the Up and Down buttons to select a position in the matrix. -
Page 21: Info
Basic Operation The PCM 90 offers an extensive set of informative display messages which can Info be activated from the front panel. The front panel switches perform various functions when pressed. Most of these functions are activated on release of the button. If you want to know more about the function of a particular button (without actually executing any action) press and hold the button down. -
Page 22: Control Mode
PCM 90 User Guide Lexicon Control Mode Selections of various system states and conditions are made in Control Mode. Press Control to enter this mode. The Control button LED will light to indicate that the mode is active. Note that Control Mode functions are not available when the Compare function is active. - Page 23 Basic Operation When digital clock is selected, any loss of lock detected in the incoming digital audio, or reception of non-audio data will cause the digital input to be muted. An error message will be displayed if this occurs. The PCM 90 will repeatedly try to establish lock.
- Page 24 PCM 90 User Guide Lexicon CRC: Indicates a Cyclic Redundancy Check error in the incoming data. Parity, Biphase: Indicate that at least one bit (and therefore at least one audio sample) was corrupted. Parity, Biphase, and Confidence errors are most often caused by inappropriate cabling.
- Page 25 Basic Operation Row 1 System 1.0 Edit Mode The PCM 90 has been designed with a "plug and play" feature called Go mode. In this mode, the most useful parameters of each effect are grouped together in a single row which is available whenever you press Edit. Each PCM 90 preset has a set of Go mode parameters which we've selected for you.
- Page 26 PCM 90 User Guide Lexicon Whether Tempo Mode is set to Global or Pgm, you can set a new tempo rate by pressing the front panel Tap button twice. Alternatively, you can choose to have tempo set automatically from incoming MIDI clock. The rate you tap, or the MIDI tempo, will be displayed here.
- Page 27 Basic Operation 1.7 Patch Update When a controller is patched to an effect parameter, this control determines when the controller will take control of the parameter. If Immediate is selected, stored parameter values will jump to the current controller position when the effect is loaded.
- Page 28 PCM 90 User Guide Lexicon Row 2 Card 2.0 Bank Copy This control allows you to copy banks of effects from one location to another. Banks can be copied internally, or to and from PCMCIA Memory Cards. Try, for example, copying Preset Bank 0 into internal Register Bank R0.
- Page 29 Basic Operation 2.2 Format This control allows you to format a Memory Card for PCM 90 use. (Make sure the Write Protect switch on the card is set to Off.) Insert an unformatted card (or one you don't mind erasing), then press Store. The display will ask "Are you sure?"...
- Page 30 PCM 90 User Guide Lexicon Row 3 MIDI 3.0 Reset This control resets all patched parameters to their previously stored values. When this control is activated, a MIDI "Reset All Controllers" message is also transmitted on the current channel by the PCM 90.
- Page 31 Basic Operation Program Change 0-127 can be mapped to any PCM 90 effect in any internal or card bank. Two 128 element maps are stored internally, additional maps may be stored on RAM cards. Once you have selected Map, press Load/ to display: MIDI Pgm Change MapSelect Turn ADJUST to select the desired Program Change Map.
- Page 32 PCM 90 User Guide Lexicon 3.7 SysEx This control is provided for communication with one or more additional PCM 90s or computer editor software. On (the default setting) allows SysEx messages to be received by the PCM 90. Press Load/ to select device ID (0-126 ).
- Page 33 Basic Operation Row 4 Setup 4.0 Store Control mode Audio, System, and MIDI parameter settings, along with two settings from the Tempo matrix, comprise a "Setup." Five setups can be stored and named in the unit, or on a Memory Card, allowing you to transport not only your effects, but complete PCM 90 environments to another PCM 90.
- Page 34 PCM 90 User Guide Lexicon Row 5 Mapx Map 0 and Map 1 When Control mode 3.3 is set to Map, received MIDI Program Change messages will be mapped according to the selections made here. The selec- tions available are: MIDI Program Change # (0-127), Bank # (PCM 90 preset, register, or card bank) and Pgm # (PCM 90 effect number 0-49).
-
Page 35: Program And Register Banks
Basic Operation Program and The PCM 90 has 250 factory-designed programs, organized into five Program Banks of 50 each, and 100 memory locations, called registers, for storing your Register Banks customized effects. Two Register Banks are available in the PCM 90 itself. Additional Register Banks can be stored on PCMCIA cards. - Page 36 PCM 90 User Guide Lexicon In the Program and Register Banks, ADJUST is a Soft Knob. Each of the factory- designed programs has one or more parameters patched to this knob, providing a quick way to make useful changes to the effect.
- Page 37 Basic Operation Bank and Row Labels Each bank and row in the Program and Register Banks has a descriptive name to help you locate different types of effects. For instance, if you want to process dialog to sound as though it's in a shower stall, the Rooms bank is a good place to start.
-
Page 38: Tempo Mode
PCM 90 User Guide Lexicon Tempo Mode The PCM 90 gives you unique control over tempo. In the PCM 90, tempo is not just a matter of setting echo rates. Any delay parameter and any time-based modulator (LFO1, LFO2, Sw 1, Sw 2 and Mod: Delay) can be individually assigned to an absolute time value, or assigned to a tempo value. - Page 39 Basic Operation Press Tempo to access the following tempo parameters: The Tempo Mode Matrix Simultaneously press Up and Down to return to 0.0. An asterisk ( ) accompanying a parameter name indicates that there are subparameters available at that matrix location. The Load / LED will light whenever an asterisk appears in the display.
- Page 40 PCM 90 User Guide Lexicon Row 1 1.0 Tap Duration This control determines how many beats will occur in a tap interval. The default setting (1 beat) is probably adequate for most applications. With the default setting of 1 beat, if the tempo is set to 120 bpm, and the beat value is set to quarter-note, each TAP = 1 quarter-note = 1 beat.
-
Page 41: Editing An Effect
Basic Operation Editing an Effect With 5 algorithms and 250 preset effects, the PCM 90 gives you a lot to play with right out of the box. An enormous range of editing control is provided for each algorithm, with parameters organized into a simple edit matrix. In addition to providing this powerful sound design capability, the PCM 90 is also designed to allow you to customize these controls for your day-to-day editing needs, or to simply use a subset of controls specially designed for each preset. -
Page 42: The Soft Row
PCM 90 User Guide Lexicon Beyond simple ADJUST knob editing, the PCM 90 offers two levels of editing control, called Go mode and Pro mode. Go mode is designed to be a basic "plug and play" mode, with easy access to a specific set of preset parameters. -
Page 43: Compare
Basic Operation Whenever you edit a PCM 90 effect from the front panel, the LED in the Compare Compare button will light. This lets you know that the effect has been altered since the last store operation, and that the edit compare function is active. Whenever this light is on, you can press Compare to hear the original version of the effect. -
Page 44: Store Operations
PCM 90 User Guide Lexicon Store Operations Turning Memory Protection On The PCM 90 is shipped with its Memory Protection option off. To turn Memory Protection on, press Control and use Up and Down and SELECT to display matrix location 1.5. The display should read: System Mem Protect Turn ADJUST to select On. - Page 45 Basic Operation Renaming the Effect Renaming an effect is straightforward. With the asterisk and the cursor posi- tioned as shown, turn ADJUST to select a new character. Press Up or Down to select a new type of character (upper case, lower case, numeric, symbolic, or blank).
-
Page 46: The Full Edit Matrix
PCM 90 User Guide Lexicon The Full Edit Matrix Setting Edit Mode to Pro (Control Mode 1.0) gives you access to the full parameter matrix of the algorithm for any loaded effect whenever you press the front panel Edit button. -
Page 47: Creating A Soft Row
Basic Operation Creating a Soft Row In Pro mode you still have complete access to the Soft Row, which appears above row 0 of the full edit matrix. The parameters assigned here are duplicates of selected parameters in the matrix and can be adjusted from Row S (Soft Row), or from their matrix location. - Page 48 PCM 90 User Guide Lexicon Modifying the Soft Row, or creating a completely new Soft Row for an effect is easy: 1. From the full Edit matrix, press Up until you get to the Soft Row, indicated by an S in the lower left corner of the display.
-
Page 49: Patching
Basic Operation Patching Patching is the ability to assign a control (Source) to any PCM 90 parameter (Destination). This allows you to alter the value of the parameter by manipulating the control Source. For example, you can select the front panel ADJUST knob as a Source and an effect's Mix parameter as a Destination. - Page 50 PCM 90 User Guide Lexicon Assigning a Source Three types of sources are available: Internal, MIDI and MIDI Controller. These types are indicated in the Source list by the labels: Int, MIDI, or a number (001- 119). Turn ADJUST to scroll through the entire list of available sources.
- Page 51 Basic Operation Once you have assigned a parameter as a Destination, the controller you have assigned “owns” that parameter. Adjustments made to this parameter from the Edit matrix, will only affect the initial value of the parameter when the program is loaded.
-
Page 52: Patching Examples
PCM 90 User Guide Lexicon Jump When creating patches, there are situations in which you will want to leave the Patch row to adjust parameters. To make this convenient, a Jump command is available. Jumping is dependent on the current Patch display, and is activated simply by pressing Edit while a certain display is active. - Page 53 Basic Operation Turn SELECT to select Patch 2 (which is set to Off). Patch 2 Turning ADJUST will scroll through the entire list of available patch Sources. Turn ADJUST counterclockwise until LFO1 is displayed in the lower right. Patch 2 LFO1 LFO1 is now assigned as a patch Source.
-
Page 54: Modulation Source Parameters • Changing The Default
PCM 90 User Guide Lexicon Turn ADJUST one click counterclockwise to display the default Destination value (FLAT) assigned to High Cut when LFO1 is at its maximum value (127). Patch 2 Values FLAT That’s all there is to setting up a default patch— select a Source and Destination, and the minimum and maximum patch values are set automatically. - Page 55 Basic Operation Changing the default destination values Let’s modify the patch further by adjusting the Destination values to a more useful range. Press Load/ repeatedly until the Patch 2 Values screen is displayed. Patch 2 Values –360 MONO Notice that the is to the left of the Source value.
- Page 56 PCM 90 User Guide Lexicon Adding an additional pivot point to the patch So far, our example uses only two pairs of patch values. The Destination parameter moves linearly between the value assigned at 000 and the value asssigned at 127.
- Page 57 Basic Operation If the is not at the left of the Source value, press Load/ three times to move it there. (You can take a short cut instead — simultaneously press Down and Load/ to back-step.) Patch 2 Values Patch 2 Values +0 MONO 127 :...
-
Page 58: Mod Row Patches
PCM 90 User Guide Lexicon Multiple Patches with the Same Destination If you create two or more patches with the same Destination, the Destination value will be the sum of all of the patches assigned to it. For example, if Footpedal and ADJUST are both assigned to Mix, the Mix value will be the sum of the patch Destination values for those two patches. -
Page 59: The Custom Row
Basic Operation The Custom Row The Custom row of the full edit matrix allows you to customize an effect by adding defining ranges, as well as adding meaningful names and labels to the ADJUST knob and the Custom Controls. It also provides controls for assigning KeyWords to effects for sorting purposes. - Page 60 PCM 90 User Guide Lexicon LowLabel: The name you assign will appear on the bottom line of the display when the control reaches the value you have set as the Low limit. HighLabel: The name you assign will appear on the bottom line of the display when the control reaches the value you have set as the High Limit.
-
Page 61: The Algorithms And Their Parameters
The Algorithms and Their Parameters The Algorithms and Their Parameters The PCM 90 uses five algorithms to create different types of reverberation effects. Each of these algorithms and its associated parameters are described in detail in this section. When you select any effect, the bank and row label will appear on the upper display line. -
Page 62: Random Hall
PCM 90 User Guide Lexicon Random Hall The Random Hall algorithm gives recorded music a sense of being performed in a real acoustic location. The Size, Spread and Shape controls allow adjust- ment of the buildup and decay of the initial part of the reverberation envelope. - Page 63 The Algorithms and Their Parameters Random Hall incorporates random delay elements which have several effects. First, there is a reduction of long-lived modes in the reverberant decay, which makes the decay less metallic and reduces the apparent reverb time. The random elements also improve the steady-state timbre of the program.
-
Page 64: Ambience
PCM 90 User Guide Lexicon While Random Hall effects are designed to add a cushion of reverberance to Ambience recorded music, while leaving the clarity of the direct sound unaffected, Ambience is intended to become a part of the direct sound — to give it both better blend and a definite position in space. -
Page 65: Rich Plate
The Algorithms and Their Parameters The Rich Plate algorithm mimics the sound of metal plates. It has a dense, Rich Plate smooth, colored sound that makes it a good choice for enhancing any type of percussion. Larger sizes and longer reverb times are particularly effective on vocals and brass, but this algorithm can be optimized for use on virtually any source. -
Page 66: Concert Hall
PCM 90 User Guide Lexicon Concert Hall This algorithm emulates a real concert hall. The reverberation is very clean, and designed to remain behind the direct sound — adding ambience, but leaving the source unchanged. This effect has a relatively low initial echo density which builds up gradually over time. -
Page 67: Chamber/Room
The Algorithms and Their Parameters This algorithm provides two independent reverbs which can be used in mono in/ Chamber/Room stereo out, or stereo in/stereo out configuration. Chamber provides an even, relatively dimensionless reverberation, with little change in color as the sound decays. -
Page 68: The Parameters
PCM 90 User Guide Lexicon The Parameters PCM 90 parameters are organized into labeled rows within each edit matrix. Although there are similarities among all matrixes, such as having a row of Controls first, and Modulation, Patching and Custom Control rows last, some of the parameters within each row, and some entire rows are unique to specific algorithms. -
Page 69: Controls
The Algorithms and Their Parameters Release Release allows adjustment of the release time constant, determining how quickly the compresor responds to decreasing input level. This should normally be set long. Short release times may cause an effect similar to "pumping" in an analog compressor. -
Page 70: Custom
PCM 90 User Guide Lexicon Controls cont'd. The large and duplicated range of the Out Width parameter allows smooth glides from any Left/Right Mix, Phase, Mono/Stereo image point to any other. Of particular interest are: 0 MONO, 45 STEREO, and 90 L–R, R–L (surround channel). - Page 71 The Algorithms and Their Parameters HighLabel: The name you assign will appear on the bottom line of the display when the control reaches the value you have set as the High Limit. MidLabel: The name you assign will appear on the bottom line of the display when the control reaches the value you have set as the MidPoint (not available if you have not assigned a MidPoint within the established range.)
-
Page 72: Delay
PCM 90 User Guide Lexicon Delay In each the Random Hall and Rich Plate algorithms, a Delay row contains parameters for delay, feedback and level settings of each voice. Press Load/ to cycle through selections. Mstr Dly, Dly L, Dly R You can set and display delay val- These controls provide delay voices to the left and right channels. - Page 73 The Algorithms and Their Parameters Attack Attack is provided in the Plate algorithm to set the sharpness of the initial response to an input signal. High settings cause an explosive sound, while low settings cause the sound to build up more slowly with time. Attack only affects the level of sound within the first 50 milliseconds.
-
Page 74: Echo
PCM 90 User Guide Lexicon Design cont'd. Range and Rate Range and Rate controls in the Room algorithm in Chamber/Room can be used to reduce coloration for small room sizes or to reduce the sense of periodicity when the Infinite control is on. These controls allow you to set the range of a moving delay and the speed at which it moves. -
Page 75: Modulation
The Algorithms and Their Parameters The Modulation row, which is the same for every algorithm, contains the Modulation parameters for the PCM 90's internal modulation sources. Use the Patch row to assign these modulators to any PCM 90 effect parameter. Mod: LFO1 and Mod:LFO2 Four parameters are available: Shape, P Width, Depth, and Rate. - Page 76 PCM 90 User Guide Lexicon Modulation cont'd. Mod: AR Env This envelope generator's output, when turned on, will go from 0 to127. How quickly it goes from 0 to 127 is determined by the setting of Attack (0-10 seconds). Once the envelope generator has reached 127, it remains there as long as it is turned on.
- Page 77 The Algorithms and Their Parameters Mod: Latch Modulation cont'd. The latch is a very flexible modulation source. It can be used to do such things as derive a switch from a continuous “return to zero” source (like MIDI After Touch). It can turn a momentary (on/off) footswitch into a latching footswitch (push on/ push off), and it can divide the switching rates of sources in half or thirds.
- Page 78 PCM 90 User Guide Lexicon Mod: Sw 1 and Mod: Sw 2 Modulation cont'd. These are identical time switches. Each has five parameters: Rate, P Width, Mode, T Lvl and T Src. Rate sets the speed (0-10Hz) at which the switch cycles. It can be set in time values (such as 1.5 Hz) or tempo values...
- Page 79 The Algorithms and Their Parameters A special, composite output of these switches, called Sw 1&2 is available as a Modulation cont'd. patch source. The value of Sw 1&2 alternates between the output of Sw 1 and the output of Sw 2. The alternation occurs on the transition from on to off. Note that both Sw 1 and Sw 2 must be active for the alternation to occur.
-
Page 80: Patches
PCM 90 User Guide Lexicon Patches PCM 90 Patch Sources Internal MIDI Controller Numbers Ignored LFO1 Latch Sound Var Mod Wheel Sine1 Sw 1 Timbre Breath Cosine1 Sw 2 Release Ctl 3 Square1 Sw 1 & 2 Attack Foot Ctl... -
Page 81: Reflect
The Algorithms and Their Parameters Mstr Dly, Dly L, Dly R Reflect Dly L and Dly R provide pre-echoes to the left and right channels. Mstr Dly provides a simple grouped control that modifies the left and right values from 0- 200%. -
Page 82: Time
PCM 90 User Guide Lexicon BassBoost A positive value for Gain may reduce low frequencies in program material. Conversely, a negative value for Gain may increase low frequencies. BassBoost allows compensation for this effect by boosting or cutting frequencies below Crossover. - Page 83 The Algorithms and Their Parameters Shelf In Random Hall, Shelf modifies the lowpass characteristic of Rt HC, turning it into a shelving filter. Shelf sets the gain of an output patch which is mixed with the output of Rt HC to form the main reverberant output. Both the pre-echoes and the reverberation are affected.
- Page 84 PCM 90 User Guide Lexicon 3-24...
-
Page 85: The Presets
The Presets The Presets The PCM 90 has 250 factory-designed presets which are organized into five banks of 50 each (labeled P0, P1, P2, P3 and P4). Each bank is organized in a matrix of 5 rows of 10. Press the front panel Program Banks button to display the first bank. -
Page 86: Program Bank 0 Halls
0.8 Concert Hall ADJUST: Decay Keywords: Large, Instrument, Cncrt Hall, Orchestral A large,smooth, dark and lush concert hall. Very dense with reflections added to reinforce the sound. Classic Lexicon! 0.9 Small Church ADJUST: Decay Keywords: Small, Film-ADR, RandomHall, Orchestral A smaller version of Large Church with no reflections and much shorter decay time. -
Page 87: Vocal (1.0-1.9)
The Presets Vocal P0 Halls cont'd. 1.0 Choir Hall ADJUST: Decay Keywords: Large, Short, RandomHall, Vocal A medium sized space with lots of reflections. Fairly dark timbre and a bit of predelay make it more suitable for a group of voices rather than a soloist. 1.1 Vocal Hall ADJUST: Liveness... -
Page 88: Live Sound (2.0-2.9)
PCM 90 User Guide Lexicon P0 Halls cont'd. Live Sound 2.0 Live Arena ADJUST: Seating Keywords: RandomHall, Live PA, Large, Long A very large hall with moderate reverb decay time. ADJUST allows you control the apparent distance from the sound source. Best suited for non-percussive sources. -
Page 89: Instrument (3.0-3.9)
The Presets Instrument P0 Halls cont'd. 3.0 Horns Hall ADJUST: Timbre Keywords: Cncrt Hall, Instrument, Natural, Acoustic A very large space, ideal for horns. ADJUST optimizes the timbre of the horn for a bright, or warm sound. 3.1 Snare Gate ADJUST: Release &... -
Page 90: Custom (4.0-4.9)
PCM 90 User Guide Lexicon P0 Halls cont'd. Custom 4.0 Tidal Hall ADJUST: LFO1 Rate Keywords: Cncrt Hall, Custom, Dynamic, Unnatural A strange hall with an LFO controlling the high cut of the reverb as well as the output width, creating an “in and out”... -
Page 91: Program Bank 1 Rooms
The Presets 4.6 Nonlinear#1 ADJUST: Room Size P0 Halls cont'd. Keywords: Ambience, Custom, Gated, Short, A dense, medium long, nonlinear gated verb. Good for all sorts of program material, especially percussive sounds. Custom 1: Tail Environment Custom 2: High Cut Custom 3: Decay Custom 4: Decay Level 4.7 Tap BrickBPM... -
Page 92: Vocal (1.0-1.9)
PCM 90 User Guide Lexicon P1 Rooms cont'd. 0.5 LargeChamber ADJUST: Decay Keywords: Large, Chamber, RandomHall, Instrument A smooth, large reverberant space using Shape and Spread to add some definition. 0.6 SmallChamber ADJUST: Decay Keywords: Small, Chamber, RandomHall, Instrument Just like its bigger predecessor, but with a tighter Mid Rt and a smaller size. -
Page 93: Live Sound (2.0-2.9)
The Presets P1 Rooms cont'd. 1.7 L Vocal Amb ADJUST: Diffusion Keywords: Large, Vocal, Ambience, Custom A more spacious version of S Vocal Amb. Already set to Studio “A”. Customize your vocals with ADJUST and the three studio settings on Custom 1. Custom 1:Choose the Studio 1.8 AmbientSus ADJUST:... -
Page 94: Drums&Perc (3.0-3.9)
PCM 90 User Guide Lexicon P1 Rooms cont'd. 2.8 Spatial Bass ADJUST: High Cut Keywords: Cncrt Hall, Live PA, Short, Spatial A Spatial EQ bass boost enhances the lower frequencies of your sound source and combines it with a bright reverb on top. -
Page 95: Custom (4.0-4.9)
The Presets 3.9 InverseDrums ADJUST: Spread P1 Rooms cont'd. Keywords: RandomHall, Drums, Special FX, Unnatural A backwards effect. Great as a special effect for one drum, or the whole kit. ADJUST lets you smooth out or tighten up the time it takes to get that perfect backwards sound. Custom 4.0 PCM 60 Room ADJUST:... -
Page 96: Program Bank 2 Plates
PCM 90 User Guide Lexicon P1 Rooms cont'd. 4.5 Spatial Room ADJUST: Spatial Movement Keywords: Ambience, Spatial, Unnatural, Custom Similar to SpinningRoom, but with a different parameters, and more Custom Controls. Custom 1: LFO Shape Custom 2: HighPass Custom 3: Gliding Chorus Custom 4: Verb Proximity 4.6 Hole Room... -
Page 97: Vocal (1.0-1.9)
The Presets 0.4 Rock Plate ADJUST: Out Width P2 Plates cont'd. Keywords: Plate, Instrument, Large A big boomy dark plate with a moderate reverb tail great for high frequency sound sources where you do not want to add more high end. 0.5 Eko Plate ADJUST: Mstr Delay... -
Page 98: Live Sound (2.0-2.9)
PCM 90 User Guide Lexicon 1.6 Bright Vox ADJUST: Darkknob P2 Plates cont'd. Keywords: Plate, Vocal, Bright A large bright plate with a long decay time, great for various vocals. ADJUST controls the high and low frequency response of the plate. -
Page 99: Drums&Perc (3.0-3.9)
The Presets P2 Plates cont'd. 2.8 Great Plate ADJUST: Decay Keywords: Plate, Live PA, Instrument A basic plate that will work well with most any sound source. Not too dark and not too bright! 2.9 PlateDlyBPM ADJUST: Reverb Lvl Keywords: Plate, Live PA, Echo, Tempo This preset can be a plate reverb, a tap tempo delay or both! Drums&Perc. -
Page 100: Custom (4.0-4.9)
PCM 90 User Guide Lexicon P2 Plates cont'd. Custom 4.0 Plate 90 ADJUST: Attitude Keywords: Plate, Dark, Instrument, Custom A general purpose, dark plate. ADJUST gives you attitude which ranges from soft and short to harsh and dry. Custom Controls allow you to control the Reverb Density and delay levels. -
Page 101: Program Bank 3 Post
The Presets 4.8 PanEkoBPM: ADJUST: Panning Speed P2 Plates cont'd. Keywords: Plate, Echo, Tempo, Custom LFOs modulate dry reflections levels to give you a panning effect. Use Tap to tap in the desired delay time. ADJUST controls the panning speed while Custom 1 controls InWidth and OutWidth —... -
Page 102: Indoor Large (1.0-1.9)
PCM 90 User Guide Lexicon P3 Post cont'd. 0.9 Coffin ADJUST: Keywords: Ambience, Indoor, Small. Simulate a tight small space with this ambience preset. ADJUST controls dry delay mix to brighten or deaden the sound for an open or closed casket. -
Page 103: Outdoor (2.0-2.9)
The Presets Outdoor P3 Post cont'd. 2.0 Inside-Out ADJUST: Decay Keywords: Cncrt Hall, Outdoor, Spatial, Special FX A strange hall reverb where the input envelope controls the output width of the reverb. At high levels the signal goes mono. As it decays, the sound fills out the stereo field. 2.1 Outdoor PA ADJUST: Keywords: Ambience, Outdoor, Echo... -
Page 104: Spatial (3.0-3.9)
PCM 90 User Guide Lexicon Spatial P3 Post cont'd. 3.0 Wobble Room ADJUST: Delay Lvl Keywords: RandomHall, Spatial, Room, Custom An LFO drives OutWidth to make the room wobble. A Custom Control allows you to set the LFO rate. Custom 1: Rate 3.1 Spatializer... -
Page 105: Custom (4.0-4.9)
The Presets Custom P3 Post cont'd. 4.0 X Variable ADJUST: Decay Keywords: Cncrt Hall, Indoor, Custom Custom Controls are the solution to this variable equation. Custom 1 links Rt HC, Crossover, and Shape to vary liveness from dull to bright. Custom 2 links Reflect Mstr Dly and Size to setup different reflections;... -
Page 106: Program Bank 4 Splits
PCM 90 User Guide Lexicon P3 Post cont'd. 4.8 Mythology ADJUST: Decay Keywords: RandomHall, Dialog, Unnatural, Custom Size and delay are inversely proportionate to Custom 3; long delay with minimal size at 0, large size with half the delay at 50. Great for supernatural dialog, or Indian film music vocals. -
Page 107: Stereo (1.0-1.9)
The Presets P4 Splits cont'd. 0.6 Two Guitars ADJUST: Gtr1/Gtr2 KeyWords: Splits, Acoustic, Guitar, Mono Designed with a duo in mind, the Acoustic guitar space is fairly small and ambient, while the Electric guitar is in a large wash with a bit of echo. 0.7 Fusion BD/SN ADJUST: Kick/Snare... -
Page 108: Live Sound (2.0-2.9)
PCM 90 User Guide Lexicon 1.8 Warm Dual ADJUST: Chamber/Room P4 Splits cont'd. KeyWords: Dark, Room, Splits, Stereo A Chamber and a Room edited to have very low high frequency content. 1.9 Rvb+DryDelay ADJUST: Stereo Delay Level KeyWords: Splits, Echo, Vocal When the stereo reverb effect decays to silence, a slightly panned dry-signal delay is heard. -
Page 109: Instrument (3.0-3.9)
The Presets 2.9 DualDelayBPM ADJUST: Ganged Delay Hi Cut P4 Splits cont'd. KeyWords: Splits, Echo, Live PA, Tempo Tap Tempo based dual delays. These can be inserted in a console as two independent mono delays. Instrument The Programs in this bank have been created for specific instrument applications. Programs 3.5 - 3.9 are independent mono input machines with a combined stereo output. -
Page 110: Custom (4.0-4.9)
PCM 90 User Guide Lexicon P4 Splits cont'd. Custom 4.0 Thunder&Ice ADJUST: Effects Blend KeyWords: Splits Special FX, Spatial, Custom Two completely opposite reverbs at your disposal. Use ADJUST to blend or separate the short, bright Room and the big and thunderous Chamber. For a backwards effect, go to Custom 1. - Page 111 The Presets P4 Splits cont'd. 4.5 Weird Places ADJUST: Eko Box/Oil Drum KeyWords: Echo, Special FX, Splits, Custom A split program with a short “Box” reverb with repeating echo delays, and a reverb like the inside of an Oil drum. Custom 1: Stereo Delay Custom 2: Oil Drum Timbre Custom 3: Oil Drum Texture...
- Page 112 PCM 90 User Guide Lexicon 4-28...
-
Page 113: Selecting A Midi Channel
MIDI Operation MIDI Operation Selecting a All PCM 90 parameters, programs and registers can be accessed by MIDI. All MIDI applications require the PCM 90 to be connected with one or more MIDI MIDI Channel devices with standard MIDI cables via the rear panel MIDI jacks. MIDI controls, such as Transmit and Receive Channel selection are available in Control mode Row 3 MIDI. -
Page 114: Controlling Pcm 90 Tempo Rate With Midi Clock
PCM 90 User Guide Lexicon Controlling PCM 90 Tempo Rate with MIDI Clock MIDI Tempo Control MIDI Out (MIDI Clock) MIDI In PCM 90 Tempo 0.2 Source set to MIDI Using the PCM 90 as a MIDI Clock Source MIDI In... -
Page 115: Slaving Two Or More Pcm 90S
MIDI Operation The configuration below shows the MIDI connections for controlling the PCM 90 simultaneously with MIDI Clocks from a sequencer, and messages from another MIDI controller. Note that the controller is set to "local control off" and the sequencer is set to "echo input". MIDI In MIDI Thru MIDI Out... -
Page 116: Controller Quirks
PCM 90 User Guide Lexicon Some synthesizers and controllers cannot send the full range of MIDI program Controller quirks change messages (1-128). Others may appear to be able to send only 32, but actually have a bank mode that does let you send all 128 program change messages. -
Page 117: Controlling The Soft Knob With Midi
MIDI Operation Each PCM 90 preset has a unique soft knob patch that allows you to control the Controlling the Soft effect directly from Program or Register Banks mode with the ADJUST knob. Knob with MIDI You can also control the soft knob patch remotely from MIDI, or from the Foot Pedal. -
Page 118: Program Change Messages
PCM 90 User Guide Lexicon Program Change Reception of MIDI Program Change and Bank Select messages can be selectively enabled/disabled from Control Mode parameter 3.3, MIDI Pgm Messages Change. The manner in which the PCM 90 interprets these messages is... -
Page 119: Automation
MIDI Operation SysEx Automation Automation The PCM 90 will transmit SysEx automation messages when Control Mode parameter 3.4, MIDI Automation is set to On. Almost all changes made by front panel operations are transmitted as PCM 90 SysEx messages. This is intended primarily for use in configurations where it is desirable for one or more PCM 90s to be slaved to a single PCM 90 acting as a master. -
Page 120: Bulk Data Dumps
Tempo. MIDI Implementation Details, including System Exclusive documentation, are available to assist experienced programmers in developing software for use with the PCM 90. These can be obtained directly from Lexicon. Request: PCM 90 MIDI Implementation Details. Bulk Data Dumps Control mode 3.8 (MIDI Dump) allows selection of the following types of bulk... -
Page 121: Midi Implementation Chart
MIDI Operation MIDI Implementation Chart Lexicon PCM 90 Digital Reverberator Function Transmitted Recognized Remarks Basic Default Channel Changed 1-16 1-16 Mode Default Mode 1, 3 Messages Altered Note 0-127 Last Note, Low Note, Number High Note used as controllers Velocity... - Page 122 PCM 90 User Guide Lexicon 5-10...
-
Page 123: Troubleshooting
Troubleshooting Troubleshooting This chapter is intended primarily to help you recognize some common error states which can be corrected from the PCM 90 front panel, or by simple means such as cable replacement. Any error states which are not covered here should be referred to your local dealer for service by a qualified technician. -
Page 124: Operational Problems
The PCM 90 performs a series of self tests each time it is powered on, then displays the PCM 90 copyright notice. This should be followed by the display and loading of the last loaded effect. If this sequence does not occur, contact Lexicon Customer Service. -
Page 125: Restoring Factory Default Settings
Troubleshooting You can restore the PCM 90 to its default state without erasing registers by Restoring Factory restoring the factory default setup: Default Settings Press Control. Use the Up and Down buttons to locate Row 4 Setup. Turn SELECT to 4.1 Load. Turn ADJUST counterclockwise to select "Factory Settings". -
Page 126: Reinitialization
PCM 90 User Guide Lexicon Reinitialization Reinitializing will erase all registers and setups The following procedure will return the PCM 90 to the state it was in when shipped from the factory. This includes erasing all registers and setups, as well as restoring all of the default settings: Press Control. -
Page 127: Specifications
Specifications PCM 90 Specifications Audio Input Connectors: Combined 3 pole XLR and 1/4 inch T/R/S phone jacks (2) Impedance: 0 dB/BAL switch position: 100k , balanced -20 dB/UNBAL switch position: 50k , unbalanced Levels: 0 dB/BAL switch position: -2 dBu min for full scale, +20 dBu max -20 dB/UNBAL switch position: -22 dBu min for full scale, 0 dBu max CMRR: 0 dB/BAL switch position: 40 dB minimum, 10 Hz to 20 kHz... - Page 128 Lexicon PCM 90 User Guide Digital Audio Interface Connectors: Coaxial, RCA type Format: conforms to S/PDIF CP-340 Type II and IEC-958 consumer standards Sample Rates: 44.1 kHz, 48 kHz Internal Audio Data Paths Conversion: 18 bits DSP: 18 to 24 bits...
- Page 129 Lexicon Part # 070-10399 Rev 1...
Need help?
Do you have a question about the PCM 90 - REV 1 and is the answer not in the manual?
Questions and answers