Table of Contents
Advertisement
Quick Links
Advertisement
Chapters
Table of Contents

Related Manuals for Hasselblad CF DIGITAL CAMERA BACK RANGE


Summary of Contents for Hasselblad CF DIGITAL CAMERA BACK RANGE
- Page 1 User Manual Hasselblad CF Digital Camera Back Range...
-
Page 2: Table Of Contents
Technical specif ications Inset photo on cover: © Francis Hills/www.figjamstudios.com. Not all the images in this manual were taken with a Hasselblad CF. They are used for illustrative purposes only and are not intended to act as a representation of the image quality produced by a Hasselblad CF. © Jens Karlsson/Hasselblad and David Jeffery. - Page 3 The Hasselblad CF can be upgraded with the 4*Res module at any time. The Hasselblad CFMS comes with the Multi-Shot Module already built in. Today’s photographers demand higher resolution, less noise, and improved composition, all of which the CF digital backs provide.
- Page 4 The information is recorded both in the file and in the file name, providing a quick and easy way to classify and select images, in the field or in the lab. CF backs are fully integrated with the Hasselblad Instant Approval Architecture, bringing automated image classification into your digital workflow from the split second of cap- ture.
-
Page 5: Computer System Requirements
Before you start Leave protective covers on as much as possible. A CF digital back, in line with all Hasselblad products, has a robust construction and is capable of withstanding fairly rough treatment but nevertheless is a precision instrument and will serve you longer if treated with respect from the beginning. - Page 6 Working digitally If you have only worked with film before, you will find that working with a digital back is not so very different in many ways. Several changes in routine are needed and a certain amount of experience with digital products and computers is advantageous to lower the Francis Hills Fashion learning curve at the beginning.
-
Page 7: General Overview
The image file can be temporarily stored either in a CF digital back with a CF card, on a Hasselblad ImageBank-II or the hard disk on a computer. Processing of these images is carried out in conjunction with the included FlexColor software. See the... - Page 8 The Hasselblad CF digital back is designed for use with most professional SLR medi- um format cameras as well as view cameras on the market. Attachment is made by way of an adapter plate that is screwed to the camera. Please see the Ixpress Adapter Kit user manual for full details.
-
Page 9: Parts, Components & Control Panel Buttons
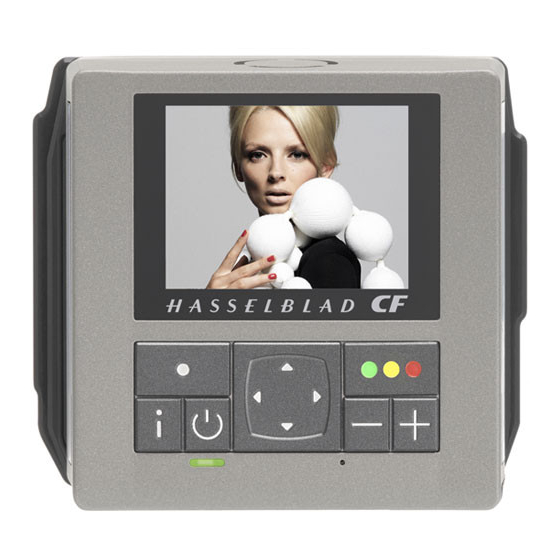
Parts, components & control panel buttons The control panel has an OLED screen that provides a bright, high- The buttons are used for browsing images and navigating the menu contrast view even in bright surroundings and at fairly acute angles. system. - Page 10 Also acts as a confirmation button (OK button) for some types For communicating with a Hasselblad ELD model camera body or of menu operations, such as deleting images; indicated by a label with a modified Hasselblad 202/203/205 model camera body.
-
Page 11: Initial Setup
With a fully charged battery fitted or when tethered to a computer, press the ON/OFF ) button to activate the digital back. An audible signal will be heard and a Hasselblad logo splash screen will appear on the OLED. The back will enter standby mode after the preset time to save the battery. - Page 12 Professional 133x. Other cards will work but offer a reduced capture rate. 2. Semi-tethered / ImageBank-II mode This mode enables you to attach the camera to a portable Hasselblad ImageBank-II via a FireWire cable. The ImageBank-II features massive storage capacity and high-speed data transfer.
- Page 13 (see also “Working with Media and Batches”). Working with a Hasselblad ImageBank-II The ImageBank-II is an optional add-on for your digital camera system. It is essentially an external FireWire hard disk optimized for digital photography, providing extensive storage space and high-speed data transfer.
-
Page 14: Tethered To A Computer
16-bit-per-colour 3F file in the currently selected folder of the computer hard disk. 3F is a proprietary Hasselblad format for storing raw captures. It contains the complete raw image exactly as it was captured by the camera, plus technical details that enable FlexColor to process and display the image correctly. - Page 15 Initial general settings General Using the menu on a CF digital back is very similar to using a menu on a cell phone or similar. When you enter the menu (by pressing the MENU / button) you will be see an initial list: White Bal.
-
Page 16: Over View Of Menu Struc Ture
By using the buttons on the control panel you Overview can navigate down through the various levels in the menu. It provides the source of informa- of menu tion about image files and also provides a way of making custom settings so the digital back suits your way of working. - Page 17 Simple introductory overview of menu access, navigation and settings choice. The menu is structured in a manner similar to cell phones and similar electronic devices. Various branches within the tree system are accessed by pressing the navigation button until you reach the point where a choice has to be made.
-
Page 18: Setting The Menu Language
In this manual you will see the following kind of description regarding settings changes (as opposed to general viewing and browsing etc). The method is the same for all changes, some stages taking a little longer than others and being a little more involved. The initial general setting is language choice. -
Page 19: Navigating Media And Batches
Storage overview – Working with media and batches General With a new CF card (or a newly formatted CF card) inserted or with an ImageBank-II, a new folder (called a batch) is created automatically after the first image has been cap- tured. - Page 20 Medium-type icon (Compact Flash) Medium name The MEDIA list. Number of green, yellow and red shots In this example a CF card and a currently stored on the medium FireWire disk are illustrated and there- fore connected. The blue frame around the CF card symbol tells you that captured images will be saved to the CF card and not the FireWire disk.
-
Page 21: Creating New Batches
• Choose MAIN MENU > Storage to select a medium. This is only relevant when more than one medium is attached (e.g., both a compact flash card and an Imagebank). When you use this function, you will always go to the most recently created batch from the medium you select. -
Page 22: Using Instant Approval Architec Ture
Using Instant Approval Architecture The Instant Approval Architecture system helps you to classify your images as quickly as you take them. It works by supplying immediate audio feedback, which tells you instantly whether each new picture is exposed correctly or likely to be over- or underexposed. Thereafter, the system enables you to assign each image one of three status levels. - Page 23 • Provides audio feedback (if this option has been chosen) by making a warning sound, which immediately alerts you to a possible problem even if you are not looking at the screen. The warning sound is a rapid string of notes going up the musical scale if the image is judged as overexposed or conversely a rapid string of notes going down the musical scale if the image is judged as underexposed.
-
Page 24: Deleting By Approval Status
Browsing by approval status You can set the camera to browse by approval status, which means, for example, that you will see only green-status images as you browse a batch (or both green and yellow, or only red, etc.). The current filter setting is indicated on-screen, as illustrated. Filtered images are still there, but they will not be shown until you change the filter setting. -
Page 25: Basic Image Browsing
Overview of viewing, deleting and transferring images Basic image browsing The large, full-colour OLED display enables you to inspect your shots while you are still on-location. The display offers full-screen previews, high-magnification zoom, two levels of thumbnails and analysis tools including a full histogram and camera settings. When you first turn on the camera, the display opens in standard browse mode, showing the last image taken (if any) for the current medium and batch. -
Page 26: Zooming In For More Detail
Zooming in for more detail The preview display has a much lower resolution than your images. You can therefore zoom very far into the images to inspect small details. To do this: 1. Browse to the image you wish to zoom into with the navigation button. 2. -
Page 27: Preview Modes
You can cycle through all the available preview modes by pressing the View-Mode button. Preview Modes Choosing the Preview mode You can use the view-mode button to cycle through the available preview modes. The preview screen works in several different modes: •... -
Page 28: Histogram
ISO setting The standard preview display is the one shown when you first turn on the camera White balance and is probably the view you will use most Current storage medium often. It features a preview of your most re- cent shot and basic information about the settings and the image itself. -
Page 29: Batter Y Saver Mode
Battery-saver mode In this mode, the digital back is fully responsive, so you can take pictures but the screen is not lit up, thereby saving battery power. You can enter the menu system while shooting in this mode (which activates the screen until you exit the menu system again) but the approval, zoom and navigator buttons have no effect. -
Page 30: Deleting Images
Deleting images − general A CF digital back enables you to delete images using any of the following techniques: Delete shortcut ! • Delete the currently selected image only. • Delete all images from the current batch • Delete all images from the current medium •... -
Page 31: Navigating The Menu System
MENU – • ISO • White balance • Media • Browse Menu system overview The main menu contains those settings that you will need to access most often as you work on an assignment. It also provides sub-menus that give you access to all other settings, most of which you will need less often. - Page 32 Menu structure Items on the main menu...
- Page 33 Language choice As a practical example, a MAIN MENU > SETTINGS > USER INTERFACE > Language item instruction would involve the fol- lowing procedure: 1. Press the menu (MENU) button to open the menu. 2. Use and to select the SETTINGS sub-menu. 3.
- Page 34 White balance / Grey Balance 1 1a There are several ways to make a white/grey balance adjustment. When untethered on location you might prefer to make a quick preset adjustment setting at the same time that you check the ISO and Media settings. Tethered in the studio you might prefer to take the first shot of a grey scale and make the adjustment in FlexColor for that session.
- Page 35 Media The storage setting controls where your digital back will store new images and which stored images will be visible in the browse window. Often, you have just one type of storage media available—the internal compact-flash card. However, if you have several media attached (e.g., a card and one or more external disks), then you may need to switch between them.
-
Page 36: Browse
To set the browse filter using the menus: 1. Select the MAIN MENU > Browse item. The current setting is displayed here. 2. Use the button to step through the filter options (described above) until you have selected the filter you wish to ... - Page 37 MENU – • Storage This section describes file storage, file transference, storage organization, file classification and related subjects. Navigating the STORAGE settings...
-
Page 38: Delete
MAIN MENU > STORAGE The Storage menu provides items for working with storage me- dia. Here, you can format media, copy images from the back to a computer and create new batches on available media. You can also set the initial approval status (green or yellow) assigned to new pictures. -
Page 39: Deleting Several Images From A Batch
Menus for deleting several images from a batch. Deleting several images from a batch To delete several images from a selected batch: 1. Starting at the single-image preview display, Select MAIN MENU > STORAGE > Delete. (See also Navigating the Menu System for details about how to find this setting.) 2. - Page 40 5. You now return to the main menu. Either move on to another setting by using the navigator button or 6. Press the menu (EXIT) button to exit the menu system. Deleting several images from a selected medium To delete several images at once: 1.
- Page 41 Menus for deleting several images from all batches from a selected storage medium. 5. You must now select the approval status that you wish to delete. All images from the selected medium that are also of the status that you select here will be deleted by the opera- tion.
- Page 42 FORMAT The digital back is only able to read and write to media that have been formatted. However, new cards or disks sometimes arrive without any format- ting, or you might want to convert media that are currently using a format that the camera cannot read.
-
Page 43: Format
3. Press the button to reach the confirmation dialogue. To confirm, press the OK button. (To cancel, press the EXIT button.) Confirmation will make a copy of all batches and files and store them on the ImageBank-II in a newly created folder called ‘CARD0001’... - Page 44 DEFAULT APPR. LEVEL The Instant Approval Architecture system helps you to evalu- ate and mark each image based on how well it has come out. By default, the system assigns an initial approval status for each new shot based on an analysis of the distribution of exposure levels. In the factory configuration, the status of each new shot is assigned as follows: •...
- Page 45 Menu: Settings There are a number of settings grouped under the general ‘Settings’ heading which are: • User Interface • Camera • About • Default Navigating the USER INTERFACE settings...
- Page 46 MAIN MENU > SETTINGS > User Interface By altering the User Interface settings, you can control the way the digital back interacts to suit you and your preferred way of working. It also includes date and time settings. Items of the USER INTERFACE Menu The user interface menu includes both items and sub-menus.
-
Page 47: User Inter Face
Setting the options under the User Interface menu Each of the above items can be set by similar menu navigation. Language, Power Down and Mark Overex can be set immediately by the buttons while Sound, Date & Time and Display require another move to sub menu for final choice. - Page 48 The camera choices that appear on the menu are automatically restricted to the adapter you have fitted. So, if the adapter is specifically intended for Hasselblad models, then only Hasselblad models will appear. The following is a description of settings and action needed when working with the various Hasselblad models.
-
Page 49: Camera
(see later section for full description of Capture Sequence settings procedure). Flash sync For use with an ArcBody, a FlexBody or view cameras with a Hasselblad adapter. Please note that although the 903SWC and 905SWC models • Make a Flash sync setting. -
Page 50: Shutter Delay
Shutter Delay There can be differences in the amount of time required in prepara- tion (raising the mirror, opening/closing the shutter etc) for digital capture between various camera models. This corrective feature adjusts the time a little to ensure the image is read out from the sensor. - Page 51 Connectivity diagram Hasselblad camera connectivity diagram H1, H2 Hasselblad H adapter 555 ELD Hasselblad ELD adapter Exposure cable 500 EL/ELM 500/553 ELX Hasselblad EL, ELM, ELX adapter Hasselblad CF Exposure cable 503 CW 503 CW + Winder CW Hasselblad 503 CW...
-
Page 52: Connec Tivit Y
Connectivity diagram Small and medium format camera connectivity diagram Horseman DigiFlex II Hasselblad ELD adapter Flash sync input cable Fuji GX680 Fuji GX680 adapter Mamiya 645 AF Mamiya 645 AFD adapter Mamiya 645 Pro Hasselblad CF Mamiya 645 Pro adapter... - Page 53 View camera connectivity diagram Flash sync input cable Single shot mode only Any shutter Hasselblad CF Hasselblad ELD adapter with X sync Any view camera accepting Hasselblad mount Hasselblad CF-MS Single shot mode Hasselblad ELD adapter Any view camera accepting...
- Page 54 Initial delay: Controls the amount of time required to elapse before the first exposure. Delay: Controls the amount of time required between each ex- posure. Count: Controls the total number of exposures required. Setting EXPOSURE TIME and CAPTURE SEQUENCE Proceed as follows: 1.
- Page 55 button to make an INITIAL DELAY 11. Press either the setting. This setting controls the amount of time that elapses before the first exposure in the sequence. 12. Press to select DELAY. 13. Press either to make a DELAY setting. This setting controls the amount of time between each exposure in the sequence.
- Page 56 (“firmware”) of the digital back. These updates may fix small er- rors and/or add new features. You will probably receive additional assistance from Hasselblad technical support if and when a new update is available. In this case, it may be important to know the serial number and current firmware vision of your digital back.
-
Page 57: Menu Shortcuts
Menu Shortcuts Memorize these quick actions to save time and effort later! To help you work faster, the digital back provides shortcuts to some of the most commonly used menu commands that do not otherwise have a dedicated button on the front panel. These are accessible by pressing and holding one of the front-panel buttons for a second or so. - Page 58 Multishot The Multishot facility is only available with Multishot units. With a Multishot back, there are two extra modes available other than single shot; namely Multi-shot and Micro-step. These virtually eliminate unwanted moire and artefacts in studio type sets ups. Multi-shot The technology behind this mode is high precision piezo controlled movements of the sensor in pixel sized increments.
- Page 59 Portable units All Hasselblad 500 series and SWC series cameras use the regular PC contact on the lens for flash sync. 200 series models, FlexBody ArcBody and view cameras require other configurations (see chart).
- Page 60 CF and Hasselblad 200 series cameras Connection to 200 series cameras depends on whether they are modified or not (contact your local Hasselblad Service Center about modification). TTL is also possible if the flash/strobe unit allows. See the appropriate camera manual for further details.
- Page 61 TCC / 205 FCC with F type type lenses (C-mode setting). lenses and CF type lenses at FlexBody, ArcBody. Any view SWC / SWC/M, 903 SWC, F-mode setting. camera with Hasselblad V 905 SWC system adapter. Flash input sync cable FireWire cable FireWire cable...
- Page 62 5. If you still see spots on your shot after you have cleaned the outside of the infrared filter, then you may have dust on either on the back side of the IR filter or on the CCD itself. This can only be removed at the Hasselblad factory. Contact your Hasselblad dealer for assistance.
- Page 63 Cleaning using the HAMA Cleaning Fluid and tissues Note! Hasselblad recommends HAMA Optic Cleaning Fluid 5902. 1. Carefully spray the fluid onto the IR filter at a distance of 10-15 cm (4-5 inches), so that the fluid is applied onto the filter as a thin, even haze. 1-2 sprays are enough. If you apply too little, the fluid will start to dry up before you start wiping the filter.
- Page 64 • Hasselblad equipment is much sought after and you should take obvious • If you use a spare (standard or rechargeable) battery be particularly careful steps to prevent theft. Never leave it visible in an unattended car, for exam- when storing.
-
Page 65: Technical Specif Ications
0 – 45 ˚C / 32 – 113 ˚F Operating temperature Hasselblad H system and V system, Rollei 600X and AF, Contax 645AF, Mamiya 645 Pro, 645 AFD, Camera support via i-Adapters RB and RZ67, Fuji GX6801/ll/lll. All view cameras via Hasselblad adapter. Horseman DigiFlex ll and PrecisionWide 35 via Hasselblad adapter. - Page 66 Victor Hasselblad AB & Hasselblad A/S. Not all the images in this manual were taken with a Hasselblad CF digital back. They are used for illustrative purposes only and are not intended to represent the image quality produced by a Hasselblad CF digital back.
- Page 67 Hasselblad A/S Hejrevej 30, DK - 2400 Copenhagen, Denmark Victor Hasselblad AB Box 220, SE - 401 23 Göteborg, Sweden CF - English v.3 - item no. 80500483...
- Page 68 Addendum V2 to User Manuals 2007 H1 / H1D / H2 / H2D / H3D / 503CWD / CFV / CF 2007-09-20 / V2...
- Page 69 The changes are effective with regard to the following upgrades: H3D firmware 1.0.2 and later H1/H1D/H2/H2D firmware version 9.2.2 and later Please check your particular model on the following pages to see what changes apply if or when you upgrade. www.hasselblad.com...
-
Page 70: Copy Images
ImageBank-ll again, a new folder is automatically created with the name ‘CARD0002’ (for example) and so on. 4s. The copying dialogue now appears to inform you of progress. Press STOP if you want want to cancel the procedure. www.hasselblad.com... -
Page 71: Standby Mode
So, for example, if you zoom in to check the image you cannot then delete it using this particular feature but must use the regular procedure on the sensor unit. www.hasselblad.com... - Page 72 ‘System Info’ the “System info” section of the menu has an additional information screen that displays the Ultra Focus calibration ID. A matching ID can also be found in the sensor unit menu for optimum performance. www.hasselblad.com...
- Page 73 “Hasselblad partners will provide the minimum of a twelve month warranty to end-users (subject to their normal statutory rights) on new Hasselblad equipment sold, valid from the date that the equip- ment is purchased by the first end-user. For H System camera bodies, film backs and lenses the warranty will be limited to the warranty period provided by the partner or to 100,000 exposures, whichever is reached first.
- Page 74 Software Reference FlexColor 4.0 for Camera Backs by Hasselblad Imacon...
- Page 75 Hasselblad A/S assumes no responsibility or liability for any errors or inaccuracies that may appear in this manual. Hasselblad A/S assumes no responsibility or liability for loss or damage incurred during or as a result of using Hasselblad software or products.
- Page 76 Table of Contents Table of Contents Introduction What's in this Manual Software compatibility FlexColor under Mac OS and Windows System Requirements The 3f File Format FlexColor Menus The FlexColor Menu The File Menu The Edit Menu The Modify Menu The View Menu The Maintenance Menu The Window Menu The Main FlexColor Window...
- Page 77 Table of Contents ...continued General Tab Contrast Tab Texture Tab CC (Color Correction) Tab Auto Tab Dot Tab ColorSync or ICM Tab The Preferences Window Introduction Scanner Tab Camera Tab 3f Tab Output Profiles Tab General FlexColor Settings FlexColor ICC Profiles Generic ICC Output Profiles Editing ColorSync Color Profiles The Thumbnails Window...
- Page 78 Table of Contents The Exposure Window Introduction Using the Exposure window Setting the Exposure Custom White Calibration The Color Info Window Introduction Reading Values in the Color Info Window Setting Fixed Sample Points Active and Reload Buttons Introduction The Gradations Window Introduction Using the Sliders Using the Gradations Color Picker...
- Page 79 Table of Contents The Live Video Window Introduction Live Video Window Tools The Tasks Window Background save from 3f Appendix Keyboard Shortcuts Software Reference - FlexColor 4.0 for Camera Backs...
-
Page 80: Introduction
Introduction What's in this Manual Introduction What's in this Manual This manual provides a menu-by-menu, screen-by-screen listing of controls and settings available with FlexColor. Topics include: • Summaries of all menu commands • Description of the 3f file format • Information about rotating and mirroring images •... -
Page 81: System Requirements
Introduction System Requirements Nearly all of the screen captures shown in this manual were taken from Mac OS X. Windows users will notice the following differences: • In the Setup window, the color management tab is called ICM instead of ColorSync •... - Page 82 Introduction System Requirements OS X Requirements OS X V 10.2.1 or later is required. We recommend updating to the latest release available. Devices can be connected by either SCSI or FireWire. Please note that if you are connecting a SCSI device through a SCSI to FireWire device it will be represented as a FireWire device - that is the bus number in the device window will be 9.
-
Page 83: The 3F File Format
Introduction The 3f File Format The 3f File Format When using the Scan 3f function (for scanners) or capturing an image with a digital camera back, FlexColor stores the image in the unique 3f (flexible file format). The 3f file is an extended TIFF-file containing •... - Page 84 Introduction The 3f File Format Editing 3f Files FlexColor holds all tools required for making standard image correction of the 3f files. If you need to apply pixel-editing to your image, FlexColor has a special plug-in for Photoshop. When installing FlexColor, this plug-in will be installed in the appropriate plug-in folder if Photoshop is already installed.
- Page 85 Introduction Software Reference - FlexColor 4.0 for Camera Backs...
-
Page 86: Flexcolor Menus
FlexColor Menus The FlexColor Menu FlexColor Menus FlexColor commands are available via a standard menu bar. Each of them is described briefly below. Note that most menu entries also list a keyboard shortcut to the right of the entry. Try to remember and use these shortcuts to speed up your work. -
Page 87: The File Menu
FlexColor Menus The File Menu The File Menu The File menu includes entries that initiate image captures and make settings for FlexColor. • Capture: Captures an image using your current settings and saves it as a 3f file (see page 10 for details). A preview of the image will be displayed in main FlexColor window right away, though rendering of the image will continue in the background for several seconds afterwards. - Page 88 FlexColor Menus The File Menu • Devices: Opens the Devices window. The window lists all connected devices allowing you to select which camera or scanner device you want to work with. Click on the one you prefer and click the Select button. If you have only a single scanner or camera connected this device is automatically chosen.
-
Page 89: The Edit Menu
FlexColor Menus The Edit Menu The Edit Menu The Edit menu contains entries that enable you to undo multiple actions that you have made while making settings in FlexColor. It also enables you to cut, copy and paste text in various windows. •... -
Page 90: The Modify Menu
FlexColor Menus The Modify Menu The Modify Menu The Modify menu gives you quick short cuts to functions that are also available from within the modify dialog in the Thumbnails window (see page 61 for details). You have the possibility to select a number of files and choose Process from the Modify menu. -
Page 91: The View Menu
FlexColor Menus The View Menu The View Menu The View menu exposes some of the “secret” short cuts that relate to the control of grid, overlay and crop mask and to zooming and selection of images. The Soft Proof feature combines the ICC color profile of your monitor with the profiles of your camera back and output device to provide a simulation of the output colors on your screen. -
Page 92: The Window Menu
FlexColor Menus The Window Menu The Window Menu The Window menu opens and closes each of the image settings windows available with FlexColor. Each window that is currently open shows a check mark to the left of its name. For more information about each of these windows, see the appropriate section later in this manual: Gradations window . - Page 93 FlexColor Menus Software Reference - FlexColor 4.0 for Camera Backs...
-
Page 94: The Main Flexcolor Window
The Main FlexColor Window Introduction The Main FlexColor Window Introduction The main FlexColor window displays your preview images and provides access to most of the image capturing and editing functions available with FlexColor. Capture and Save Tools Captures an image using your current settings. Capture A preview of the image will be displayed in the main FlexColor window right away. - Page 95 The Main FlexColor Window Capture and Save Tools Saves the image currently shown in the FlexColor window Save as a standard TIFF file. All current crop, mode, color and image-enhancement settings will be applied to the saved image. The save task is added to the list in the Tasks window (see page 111 for details) and the actual save task will take place in the background Previous/Next Image Buttons: Use these buttons to select...
-
Page 96: Color And Exposure Analysis Tools
The Main FlexColor Window Color and Exposure Analysis Tools Color and Exposure Analysis Tools Exposure button Exposure-level indicator Neutralize color picker Soft Proof enabled Red, green and blue pixel values f-stop pixel value Color Info button Use the exposure-level indicator to get a rough idea of how bright your picture is. -
Page 97: Corrections Controls
The Main FlexColor Window Corrections Controls Corrections Controls Gradation Button: Opens/closes the Gradations window. See "The Gradations Window" on page 87 for more information. Histogram Button: Opens/closes the Histogram window. See "The Histogram Window" on page 93 for more information. Color Correction Button: Opens/closes the Color Correction window. - Page 98 The Main FlexColor Window Size Controls The output resolution of the final image. The Width and Height settings will update to reflect the setting you make here. Lock Button: The lock button enables you to lock the output width and height settings. When the lock is closed, then the output width and height will not change when you modify the crop area by dragging one of its corners, and the proportion of height to width will be maintained.
-
Page 99: Zoom Controls
The Main FlexColor Window Zoom Controls Zoom Controls Zoom Out: Click this button to make the preview image smaller. Zoom In: Click this button to make the preview image larger. Fit to Window: Click this button to resize the preview to fit the window. -
Page 100: Other Controls
The Main FlexColor Window Other Controls Other Controls Grab tool: Holding down space activates the grab tool allowing you to drag the contents of the preview window around. Crop mask button: Masks off the area outside the current cropping. Overlay Button: Switches on and off the display of an overlay over the image in the preview window. -
Page 101: Overlay
The Main FlexColor Window Overlay Overlay It is possible to add an overlay to the preview and live video windows to help with aligning your setup. All the standard image file types such as TIFF, JPEG, GIF, and PNG can be used. The Mac version supports PNG-files with alpha channels giving you full control of the image transparency. -
Page 102: The Setup Window
The Setup Window Introduction The Setup Window Introduction The Setup window shows many settings that affect the image and the way in which the other tools in the FlexColor application work. All of the settings displayed in the window can be saved and loaded from your hard disk. -
Page 103: The Flexcolor Setup Philosophy
The Setup Window The FlexColor Setup Philosophy The FlexColor Setup Philosophy In the traditional prepress environment, where photographs are captured on film and then scanned, the professional scanner operator requires extensive education and experience to make all of the settings required to obtain good results. -
Page 104: Advanced Setup Management
The Setup Window Advanced Setup Management To rename the currently loaded setup, click on the Rename button. A window will appear in which you can rename the setup. After you have made changes to the current setup, save them by clicking on the Save button in the Setup window. -
Page 105: General Tab
The Setup Window General Tab General Tab The General tab of the Setup window affects the general behavior of the interface and identifies the setup file currently loaded. Mode Provides a pop-up menu for choosing the color space used when you save an image as a TIFF file. - Page 106 The Setup Window General Tab • Lineart: creates 1-bit images in which each pixel is either 100% black or 100% white. These files are even smaller than grayscale images. Use this mode if your originals are, for example, pen and ink drawings. To adjust the threshold at which the input will jump to either black or white, use the Gradations window.
- Page 107 The Setup Window General Tab Resolution PPI Defines the resolution of the output image. Set this value according to the requirements for your printed output. Most high-quality color work uses 300 ppi. Newspapers typically use less (150 to 200 ppi). On-screen display, such as for the web, requires only 72 ppi.
-
Page 108: Contrast Tab
The Setup Window Contrast Tab Contrast Tab The settings on the Contrast tab sheet are exactly the same as in the Gradations window (available from the Window menu). Changes made here in the Setup window will also change the settings in that window, and vice versa. -
Page 109: Texture Tab
The Setup Window Texture Tab Texture Tab The settings in the Texture tab reflect those made in the Texture window (available from the Window menu). For more information about unsharp masking, see "The Texture Window" on page 101. Color % These three fields (Red, Green, and Blue) control the amount of sharpening effect applied in each color channel. -
Page 110: Cc (Color Correction) Tab
The Setup Window CC (Color Correction) Tab CC (Color Correction) Tab The CC tab contains a color correction chart, which enables you to alter the way input colors are mapped onto the output colors. It can be used to remove or add color cast, or to create stronger colors in your images. The matrix contains the same settings as the Color Correction window (available from the Window menu), and displays all of the settings you have made using that window. - Page 111 The Setup Window CC (Color Correction) Tab To reduce the amount of magenta: R G B C M Y Neutral red More green in all colors Neutral Blue Neutral Cyan -4 -4 -4 -4 -4 -4 Less Magenta in all colors Neutral yellow A full explanation on all of the applications of this tool would be complex and beyond the scope of this manual.
-
Page 112: Auto Tab
The Setup Window Auto Tab Auto Tab The Auto tab sheet has percentage settings for both Shadow and Highlight. When you use the Auto button, the FlexColor application computes what it thinks the highlight and/or shadow values should be based on the histogram of your image. It then modifies the values by the percentages that you set here to find the final setting. -
Page 113: Dot Tab
The Setup Window Dot Tab Dot Tab These settings affect the output of the image brightnesses. Normally, the output will be a maximum (255) at the brightest (highlight) point and minimum (0) at the darkest (shadow) point for each color. However, this can sometimes cause trouble for the printing presses, especially when too much ink is applied for the paper to dry quickly enough. -
Page 114: Colorsync Or Icm Tab
The Setup Window ColorSync or ICM Tab ColorSync or ICM Tab ICC color profiles define the color response of each device in your system. FlexColor uses these profiles to make calibrated, accurate, and high-quality color separations from your images. Under Mac OS, ICC profiles are controlled by Apples ColorSync technology and the setup tab for selecting ICC profiles in FlexColor is called ColorSync Under Windows, ICC technology is referred to as "ICM"... - Page 115 The Setup Window ColorSync or ICM Tab For more information about using ICC profiles, see the online help for your operating system. For information about Apples ColorSync technology, check Apple's web site at: http://www.colorsync.apple.com and/or http://www.apple.com. Software Reference - FlexColor 4.0 for Camera Backs...
- Page 116 The Setup Window ColorSync or ICM Tab Input (Mac) This pop-up menu shows a list of input ICC profiles installed on your system. When selecting an input profile it is possible to choose a "Device Default Profile", enabling you to define a setting that will always use the currently selected device profile for the current device.
- Page 117 The Setup Window ColorSync or ICM Tab Input (PC) Functionality is basically the same as for Mac except that clicking the Change button will open the Scanners and Cameras control panel which shows the list of connected devices. Here you can select properties for your device(s) which will bring up a dialog box from where (e.g.
- Page 118 The Setup Window ColorSync or ICM Tab CMYK This pop-up menu lists all of the output profiles currently installed on your system. Choose the profile specific for your output device, or select the closest of the generic profiles supplied with FlexColor. See "Generic ICC Output Profiles"...
- Page 119 The Setup Window ColorSync or ICM Tab Convert If this checkbox is marked data will be converted according to the current settings of input and output profile. Otherwise the output files will contain data without any ICC corrections applied. Softproof Mark this checkbox to see an on-screen representation of the colors expected from your output device.
-
Page 120: Miscellaneous
The Preferences Window Introduction The Preferences Window Introduction The Preferences window contains several miscellaneous settings that control the general functions of the camera back and the software. The Preferences window settings are universal for the FlexColor application, they are not saved with the other settings in the setup files. To open the window, select Preferences from the FlexColor menu. - Page 121 The Preferences Window Camera Tab Model pop-up menu before you start taking pictures for the first time and each time you change the type of camera body that you are using with the camera back. To set the Model list to show only cameras compatible with your current camera back, mark the Show recommended only check box.
- Page 122 The Preferences Window Camera Tab Flash Delay When you use one of the multi-exposure modes, FlexColor will instruct the camera back to make the captures as quickly as possible, allowing time for the image data to download after each capture. If your flash system requires extra time beyond this to be ready to flash again, then enter the required minimum charge time (in seconds) in the Flash delay field.
-
Page 123: 3F Tab
The Preferences Window 3f Tab 3f Tab When you make a capture, the image is saved as a 3f file in the currently selected folder. The 3f file can contain various information about the file, as described in “The 3f File Format” on page 10 earlier in this manual. Scan Size These settings are only relevant when using FlexColor with a scanner device. -
Page 124: Output Profiles Tab
The Preferences Window Output Profiles Tab Output Profiles Tab Here it is possible to define the default output profiles for RGB, CMYK and Grayscale. In the setup ColorSync tab you can choose to use the default profile instead of specifying a specific output profile. The standard settings will specify the default output profiles for all color spaces. -
Page 125: General Flexcolor Settings
The Preferences Window General FlexColor Settings General FlexColor Settings The bottom of the Preferences window shows the following general FlexColor settings: Opening Saved Images After saving an image as a TIFF file, FlexColor is able to launch the application of your choice and open the saved image in that application. If you would like to use this feature, place a check in the Open in checkbox, then click the Select button. - Page 126 The Preferences Window General FlexColor Settings after moving or resizing a crop area, click on the Auto button in the main FlexColor window. For more information about tonal range and the Auto function, see "The Histogram Window" on page 93 and "Auto Tab" on page 39. For more information about cropping, see "The Main FlexColor Window"...
- Page 127 The Preferences Window Software Reference - FlexColor 4.0 for Camera Backs...
-
Page 128: Flexcolor Icc Profiles
FlexColor ICC Profiles Generic ICC Output Profiles FlexColor ICC Profiles Generic ICC Output Profiles FlexColor includes six generic ICC output profiles for generating various types of color separations. The name of each profile provides a description of the results it creates. See Table 1 for details. Black Black Profile... -
Page 129: Editing Colorsync Color Profiles
FlexColor ICC Profiles Editing ColorSync Color Profiles In some cases, an ICC profile for your (or your service bureaus) specific output device may be available. If so, then use it instead. If your results are not satisfactory, then speak with your printer for advice about how you should modify the profile. - Page 130 FlexColor ICC Profiles Editing ColorSync Color Profiles Run the FlexColor application. Choose Setup from the File menu. Then click on the ColorSync tab. Use the CMYK pop-up menu to select the profile you would like to edit. Note that the profile you select must be as close as possible to the profile you want to make - you are not able to create a completely different profile using the editor.
- Page 131 FlexColor ICC Profiles Editing ColorSync Color Profiles The Create New Profile window appears. Type a name for your edited profile and click on the Create button. Return to the Output Profile window. It shows the output values applied in the final separated file for each color at each of four brightness (neutral-gray) levels (0%, 5%, 50%, and 100%).
- Page 132 FlexColor ICC Profiles Editing ColorSync Color Profiles If you need to make even more detailed adjustments, then click on the triangle next to the Advanced heading. The Advanced section includes value settings for even more gray levels. These settings include the same four levels that you were able to adjust using the standard part of the Output Profile window.
- Page 133 FlexColor ICC Profiles Software Reference - FlexColor 4.0 for Camera Backs...
-
Page 134: The Thumbnails Window
The Thumbnails Window Introduction The Thumbnails Window Introduction The Thumbnails window works like a light table, showing you a small preview image of each of the captures stored in a the currently selected folder. Use the Thumbnails window to review your work, load images into the main FlexColor window and to save images as standard TIFF files. -
Page 135: Selecting A Thumbnails Folder
The Thumbnails Window Selecting a Thumbnails Folder Selecting a Thumbnails Folder Use the folder pop-up menu to select the folder you want to use for your thumbnails. The menu contains both recent and favourite locations. The name of the current folder (ex. My Pictures) appears in the title bar of the Thumbnails window. -
Page 136: Using The Thumbnails Window
The Thumbnails Window Using the Thumbnails Window Using the Thumbnails Window Viewing the Thumbnails Display You have two types of options for controlling how the thumbnails will be displayed in the Thumbnails window: Use this pop-up menu to choose whether the thumbnails Sort by should be sorted by Date (the order in which they were created) or by Name. - Page 137 The Thumbnails Window Using the Thumbnails Window The Thumbnails window displays information about each capture: Progress bar Capture type Image currently previewed Selected thumbnail (highlighted) Crop mask Image name Approval mark The "Capture type" will be shown as one of the following values: •...
-
Page 138: Selecting Images
The Thumbnails Window Using the Thumbnails Window After capturing, a preview image is shown as quickly as possible in the main FlexColor window. However, extra processing is still required before you can view the image in full resolution (See "Processing Workflow"... - Page 139 The Thumbnails Window Using the Thumbnails Window Displays the currently selected image in the main FlexColor Show window, where you can view and work with it (this can also be obtained by double-clicking on an icon). The crop, mode, color and image-enhancement settings selected as default for the selected file will also be loaded into FlexColor.
- Page 140 The Thumbnails Window Using the Thumbnails Window Enables modification of the images in the current thumbnails Modify folder. 5 different operations are possible, all of which can be performed simultaneously. Modify: From this pop-up menu you can select whether you want to modify selected images, approved images, or all images.
- Page 141 The Thumbnails Window Using the Thumbnails Window Image... from the pop-up menu. Name the preset in the appearing window and click on Create and it becomes available in these menus. To use it to neutralize other images simply select those and choose "Your preset name“. from the op-up menu.
-
Page 142: Printing The Thumbnails
The Thumbnails Window Printing the Thumbnails New-Image Controls The name given to each new capture is based on the text you enter in the Name field of the Thumbnails window. This will cause each new capture to be named with the Name you chose plus a unique number, thereby ensuring that each new capture does not overwrite older captures. - Page 143 The Thumbnails Window Software Reference - FlexColor 4.0 for Camera Backs...
-
Page 144: Ixpress Contents Window
Ixpress Contents Window Introduction Ixpress Contents Window Introduction During computer-free operation, the Ixpress Camera Back and the Image Bank work as a single unit. All shots are saved straight to the Image Bank’s hard disk, which has a capacity of more than 1000 shots. To work with these images in FlexColor they will have to be transferred to your current thumbnails folder. - Page 145 Ixpress Contents Window Using the Ixpress Contents Window The Ixpress Contents window displays the following: Transferred mark Image name Selected Image Approval checkmark From the Ixpress Contents window you have the following options: Displays a basic image file information window for each of Get Info the selected shots.
- Page 146 Ixpress Contents Window Using the Ixpress Contents Window Use this pop-up menu to choose whether the thumbnails Sort by should be sorted by Date (the order in which they were created) or by Name. If you wish to reverse the sorting order click the Descending/Ascending button to the right of the pop-up.
-
Page 147: Transferring Images
Ixpress Contents Window Transferring Images Transferring Images To transfer the images from the Image Bank to the currently selected thumbnails folder you have the following options: Drag and drop: Simply select a number of thumbnails in the Ixpress Contents window and drag them to the thumbnails window. Show single image: Select a single image in the Ixpress Contents window and click the Show button. -
Page 148: The Info Window
The Info Window Intoduction The Info Window Introduction The Info window holds various information about the currently selected file and its contents, a complete history of applied settings and the possibility to add unique file data (including IPTC-tags) such as copyright information and keywords to support an image database. - Page 149 The Info Window Using the Info Window The basic file information at the top of the Info window shows the name of the 3f file, the date of creation and the file size and image dimensions. To change the file name simply type a new name in the Name field. The thumbnail image displayed is created using the settings set as default in the History list.
- Page 150 The Info Window Using the Info Window Copyright information. Copyright The contents, if any, from the Copyright field in the Default Info section of the 3f tab in the Preferences window (see page 50) will be added automatically each time an image is captured.
- Page 151 The Info Window Using the Info Window Use button to select the entry with the settings that the Make Default file should be opened with. The check mark to the left indicates which entry is currently selected as default. The settings of the entry selected as default are also applied to the thumbnails displayed in the Info window and in the Thumbnails window.
-
Page 152: The Exposure Window
The Exposure Window Introduction The Exposure Window Introduction The Exposure window enables you to quickly assess your exposure and to make shutter time, aperture, and ISO settings for camera bodies that allow these to be set remotely. Even for camera bodies that do not allow the shutter time to be set remotely, you must select a shutter time setting that matches (or is slightly longer than) that of your camera body to ensure that the CCD does not begin to transmit its readings before the shutter closes. -
Page 153: Setting The Exposure
The Exposure Window Setting the Exposure turns yellow to indicate a probably bad exposure and turns white to indicate a good exposure. Only the part of the image that is inside of your crop area is measured by this tool, which means that the measurement will change when you modify the crop area. -
Page 154: Custom White Calibration
The Exposure Window Custom White Calibration do need a longer exposure time, then remember to change the setting in FlexColor to match the setting on your camera. Note, however, that if you are working with a camera body that allows you to set the shutter speed from FlexColor, then you can just set the exposure time for each capture by using the Shutter time setting. - Page 155 The Exposure Window Software Reference - FlexColor 4.0 for Camera Backs...
-
Page 156: The Color Info Window
The Color Info Window Introduction The Color Info Window Introduction The Color Info window enables you to read pixel values at any point in your image. You can also set up to five fixed Sample points and read the values at all of them simultaneously to monitor the effects of your other settings. -
Page 157: Setting Fixed Sample Points
The Color Info Window Setting Fixed Sample Points Setting Fixed Sample Points You are able to set up to five fixed Sample points so that you can monitor the effects that your settings are having in key areas around your image. Each sample point is indicated with a diamond and a number in the preview image. -
Page 158: Active And Reload Buttons
Active and Reload Buttons Introduction Active and Reload Buttons Introduction The Color Correction, Histogram and Texture windows all have a set of Active and Reload buttons (see below) arranged in a standard fashion, while the Gradations window has two separate sets, one for sliders and one for curves. - Page 159 Active and Reload Buttons Software Reference - FlexColor 4.0 for Camera Backs...
-
Page 160: The Gradations Window
The Gradations Window Introduction The Gradations Window Introduction The functions described in this section will not always be needed during normal operation. They enable you to make fine adjustments to your output images that will affect brightness and contrast and will compensate for printing conditions. -
Page 161: Using The Sliders
The Gradations Window Using the Sliders All of the settings you make using the curves and sliders in the Gradations window are saved with the current setup. The contrast, brightness, gamma and shadow depth settings can also be adjusted using the Contrast tab of the Setup window. -
Page 162: Using The Gradations Color Picker
The Gradations Window Using the Gradations Color Picker Using the Gradations Color Picker The Gradations Color Picker in the lower left corner of the Gradations window enables you to place a gravity point on the curve at the brightness of a point that you select in the preview. - Page 163 The Gradations Window Using the Curve • A neutral (default) gradation curve is a straight, diagonal line from the lower left to the upper right of the graph. • To add brightness to the image (without affecting the highlight value), drag the curve up above neutral.
-
Page 164: Setting The Threshold For Lineart Captures
The Gradations Window Setting the Threshold for Lineart Captures Setting the Threshold for Lineart Captures When you are saving in Lineart mode, FlexColor applies a threshold to create an image in which every pixel is either completely black or completely white. In this case, the gradation curve is simply a vertical line. You can move this line left or right to adjust the input level at which the threshold is applied. - Page 165 The Gradations Window Software Reference - FlexColor 4.0 for Camera Backs...
-
Page 166: The Histogram Window
The Histogram Window Introduction The Histogram Window Introduction The easiest way to set the highlight and shadow points is to use the Auto tonal range button in the main FlexColor window. However, in some cases, the auto function will not provide the desired results. The color pickers and sliders in the Histogram window provide the tools you need to fine tune your highlight and shadow points. -
Page 167: The Histogram Display
The Histogram Window The Histogram Display The Histogram Display To open the Histogram window, type cmd-2 or click on the Histogram button in the Correction area of the main FlexColor window, or select Histogram from the Window menu. The Histogram window contains a graph that indicates the tonal range of your image. - Page 168 The Histogram Window The Histogram Display Sliders Click and drag the sliders to set the highlight and shadow points and to set the minimum- and maximum output values. The min. and max. output values reflect the settings on the Dot tab of the Setup window. See "Dot Tab"...
-
Page 169: The Histogram Color Pickers
The Histogram Window The Histogram Color Pickers Hide/Show Color Channels Click on the triangle in the lower left corner of the window to display separate histograms for each color channel. You are able to adjust highlight and shadow values separately for each. The Histogram Color Pickers The histogram color pickers enable you to point at any pixel in your preview image and assign the highlight, neutralize, or shadow point... - Page 170 The Histogram Window The Histogram Color Pickers To use the color pickers: Click on the appropriate eyedropper button for the type of tonal range setting you would like to make. Your mouse pointer turns into the selected eyedropper. Move the mouse pointer over the preview image; note pixel value readings that appear in the Color area of the main FlexColor window.
-
Page 171: Neutralizing Colors
The Histogram Window Neutralizing Colors • When selecting a shadow point, select an object in the image that you would like to have print black. Check the pixel values at several potential black points to help you pick the best one (usually the darkest one that is not already at the minimum of 0 in any of the colors). -
Page 172: Selective Color Correction
Selective Color Correction Introduction Selective Color Correction Introduction Sometimes you need more control over the image colors than simply removing a color cast. FlexColor features a powerful selective color correction feature, which enables you to adjust the appearance of specific colors throughout your image. - Page 173 Selective Color Correction Using the Color Correction Window The pop-up menu near the top of the window displays the nearest primary color to the one you picked in the preview. Adjusting this color will have the most dramatic effect on the color you chose. However, if you wish to edit a different primary color, then select a different color from the pop-up menu.
-
Page 174: The Texture Window
The Texture Window Introduction The Texture Window Introduction The Texture window holds both the Unsharp Mask filter and the FlexTouch filter. Unsharp Mask Filter The Unsharp Mask filter applies an algorithm that increases contrast along sharply defined edges. Unsharp masking has the potential to both improve and degrade your image - it makes the makes the image look sharper, but can also bring out noise or graininess. -
Page 175: Using The Texture Window
The Texture Window Using the Texture Window Using the Texture Window To open the Texture window, type cmd-4 or click on the Texture button in the Correction area of the main FlexColor window, or select Texture from the Window menu. To access the Unsharp Mask filter settings, click the triangle to the left. - Page 176 The Texture Window Using the Texture Window • Grain limit: Prevents the filter from sharpening low-contrast features in the image, such as film grain, noise, or textures. It works by comparing brightness of each pixel to the brightnesses of its surrounding pixels. If brightnesses differ by less than the Grain limit, then no sharpening is applied to the target pixel.
- Page 177 The Texture Window Software Reference - FlexColor 4.0 for Camera Backs...
-
Page 178: The Detail Window
The Detail Window Introduction The Detail Window Introduction The Detail window can show up to 4 detail views of the preview image (in 100 to 400%). The detail views are especially useful when you want to see the effect of the corrections performed using the various correction tools in different areas of your preview image. -
Page 179: Using The Detail Window
The Detail Window Using the Detail Window Using the Detail Window To open the Detail window, type cmd-5 or click on the Detail button in the Zoom area of the main FlexColor window or select Detail from the Window menu. Delete detail view Add detail view Currently... -
Page 180: The Live Video Window
The Live Video Window Introduction The Live Video Window Introduction The Live Video window gives you rapidly updated overview and detail windows to use for focusing and composition on the set. This allows for focusing solutions for view cameras and other cameras without a ground glass. -
Page 181: Live Video Window Tools
The Live Video Window Live Video Window Tools Live Video Window Tools Live Video Detail Picker: Opens the Live Video Detail Window. Click on the Live Video Detail Picker button, which will turn grey when it is activated. Then click in the overview of the Live Video window. - Page 182 The Live Video Window Live Video Window Tools Black & White button: Shows the Live Video in black and white. In many cases this will make it more comfortable to watch the preview, disabling any distracting colors. When in Black & White mode the Neutralize Picker will be disabled.
- Page 183 The Live Video Window Software Reference - FlexColor 4.0 for Camera Backs...
-
Page 184: The Tasks Window
The Tasks Window Background save from 3f The Tasks Window Background save from 3f When saving final images from a 3f file the actual save process will take place in the background. The Tasks window will pop up. The window shows the progress of all scheduled background operations. After a save task has finished it will remain in the list - you may double click it to open the saved image in the selected helper application. - Page 185 The Tasks Window Software Reference - FlexColor 4.0 for Camera Backs...
-
Page 186: Appendix
Appendix Keyboard Shortcuts Appendix Keyboard Shortcuts Main FlexColor Window F5: Makes a preview capture. F6: Selects Single shot mode. F7: Selects Multi shot mode. F8: Selects Micro step mode. F9: Takes a capture using your current settings. : Opens previous or next image respectively. Space: Press and hold to drag preview around. -
Page 187: File Menu
Appendix Keyboard Shortcuts File Menu Cmd-N: Takes a capture using your current settings. Cmd-S: Saves the image currently shown in the FlexColor window as a standard TIFF file. Cmd-W: Closes the currently selected window if possible. Cmd-U: Opens the Setup window. Cmd-I: Opens an Info window, which contains various information about the currently selected image. - Page 188 Appendix Keyboard Shortcuts Window Menu Cmd-1: Opens/closes the Gradations window. Cmd-2: Opens/closes the Histogram window. Cmd-3: Opens/closes the Color Correction window. Cmd-4: Opens/closes the Texture window. Cmd-5: Opens/closes the Detail window. Cmd-7: Opens/closes the Exposure window. Cmd-8: Opens/closes the Thumbnails window. Cmd-9: Opens/closes the Color Info window.
- Page 189 Appendix Keyboard Shortcuts Software Reference - FlexColor 4.0 for Camera Backs...
- Page 190 FlexColor 4.5 Documentation Addendum...
- Page 191 Table of Contents Part 1: For All FlexColor Users ..............4 How to Use this Document....................4 System Requirements ......................5 Most Important Changes for All Users .................. 5 New Support for Instant Approval Architecture..............5 Gamma Slider Replaced by Midtone Slider..............6 Instant Approval Architecture ....................
- Page 192 File Size Options......................32 Using a Batch Feeder ..................... 32 Reading the 3F Scan Log ....................33 Preventive Maintenance for Scanners ................33 FlexColor 4.5 Documentation Addendum...
-
Page 193: Part 1: For All Flexcolor Users
Part 1: For All FlexColor Users How to Use this Document Part 1: For All FlexColor Users This part describes general information about working with FlexColor with all types of images, regardless of whether you are using a camera or scanner. All users of FlexColor should read this part. -
Page 194: System Requirements
New Support for Instant Approval Architecture FlexColor 4.5 now provides full support for the Instant Approval Architecture (IAA) system introduced with the latest Hasselblad digital cameras and Ixpress digital camera backs. Using this system, you are able to assign one of three approval levels (green, yellow or red) to each image. -
Page 195: Gamma Slider Replaced By Midtone Slider
Part 1: For All FlexColor Users Instant Approval Architecture Gamma Slider Replaced by Midtone Slider In FlexColor 4.0, the window featured a slider labeled , which Gradations Gamma provided a precise gradation adjustment that lightened or darkened the image in a consistent way that is compatible with color management. -
Page 196: Standard Instant Approval Workflow
Part 1: For All FlexColor Users Instant Approval Architecture Green for your best shots Yellow for images that need closer inspection Red for images that should probably not be used. Standard Instant Approval Workflow The standard method of working with the Instant Approval Architecture is as follows: 1. -
Page 197: Approval Settings In The Thumbnails Window
Part 1: For All FlexColor Users Instant Approval Architecture Green : all new shots and scans will initially have a green status. : all new shots and scans will initially have a yellow status. Yellow Auto : Each time you take a new shot or scan, FlexColor will analyze the image to see if it looks good (properly exposed, in focus, correctly framed, etc.). -
Page 198: Approval Settings In The Preview Window
Part 1: For All FlexColor Users Instant Approval Architecture To change the approval status of any image, first select the image by clicking on it once, then click on the appropriate button in the tool panel at the left side of the window. -
Page 199: Modify Thumbnail Setups By Approval Rating
Part 1: For All FlexColor Users Instant Approval Architecture Figure 3: Approval-level display and control in the preview window Modify Thumbnail Setups by Approval Rating Modify function of the thumbnail window enables you to modify the settings for several images at once. You are able to control whether your changes will apply to all images, selected images or to all images of a given approval rating. -
Page 200: Using The Detail Window
Part 1: For All FlexColor Users Using the Detail Window Using the Detail Window In FlexColor 4.5, the Detail window has been improved to support larger images and extended functionality. The description below fully replaces the section from the FlexColor 4.0 User’s Guide. Introduction Detail window can show up to 4 detail views of the preview image (in 100 to... - Page 201 Part 1: For All FlexColor Users Using the Detail Window Figure 4: Using the Detail window Once an image is loaded into the window, you can do the following: Detail To move the image in the Detail window, hold down the space bar, then click and drag in any unlocked pane of the window.
-
Page 202: Using Multiple Panes
Part 1: For All FlexColor Users Using the Detail Window pane shows an image different from the current preview, the file name is shown under the affected pane(s). To unlock a pane, click the closed-clock icon so that it opens again. When you do this, the unlocked pane will immediately update to match the current preview and settings. -
Page 203: Using Zoom
Part 1: For All FlexColor Users Modifying Images in the Thumbnail Window comparing the effects of your changes; for example, load identical images into two panes, then lock one pane and make settings in the window to Gradation compare the effects of your settings at the pixel level. Using Zoom You can use the window at any of three zoom levels: 100%, 200% or 400%. -
Page 204: Setting The Scope Of Affected Images
Part 1: For All FlexColor Users Modifying Images in the Thumbnail Window Setting the Scope of Affected Images Before you open the window, you can start setting the scope of images that Modify you will affect by working in the Thumbnails window (e.g., by using select, search and/or filter), though this is usually not necessary. -
Page 205: Modifying The Current Preview
Part 1: For All FlexColor Users Midtone Slider in the Gradation Window Modifying the Current Preview When you have loaded a 3F file into the main FlexColor preview window, you can modify its history from here, without needing to go back to the Thumbnails window. -
Page 206: Effects On Older 3F Images
Part 1: For All FlexColor Users Keyboard Shortcuts independently for each color channel. The midpoint controls for the independent channels do not implement a strict gamma curve, so the effects are slightly different (though similar). These midpoint values are therefore shown as pixel levels (0 - 255) rather than gamma values. -
Page 207: Part 2: Flexcolor For Cameras
Part 2: FlexColor for Cameras Most Important Changes for Camera Users Part 2: FlexColor for Cameras This part provides information about how FlexColor works when connected to a camera and/or when working with camera images. If you never use FlexColor with a camera or camera images, then you can ignore this part (scanner users should skip ahead to “Part 3: FlexColor for Scanners”... -
Page 208: 3F File Compatibility Issues For Camera Shots
Part 2: FlexColor for Cameras Most Important Changes for Camera Users This issue does not affect 3F files captured using a scanner, which never contained a processed image. With scanner files, you can still zoom in to the pixel level using the preview window. -
Page 209: New White Balance Handling For Camera Captures
Setup window and set the Input profile to “Hasselblad RGB”. This is the profile you should always use when shooting with an Ixpress camera. It is automatically selected in all of the new default camera setups. 3. Click on to save your changes. -
Page 210: Using The Exposure And White-Balance Controls
Part 2: FlexColor for Cameras White Balance Settings for Cameras For scanned images, there are no white-balance controls. This is because the precise qualities of the light in the scanner are known and encoded into the Flextight input color profile, so further control is not needed—images are always scanned to look exactly as they did on film. -
Page 211: Working With White Balance Presets
The following rules apply: When shooting away from your computer, newer cameras (including the Hasselblad H2D camera and Ixpress CF and CFH camera backs) save images locally using the DNG format, which is a raw camera format developed by Adobe. -
Page 212: Using The Import Window
Part 2: FlexColor for Cameras Importing Camera Images When shooting away from your computer, older Ixpress cameras save images using a proprietary raw-file format on the Image Bank. When you shoot connected to your computer, all of your shots are saved only as 3F files on your hard disk. -
Page 213: Import Window Buttons And Controls
Part 2: FlexColor for Cameras Importing Camera Images Click on Load to open the Load window. This window provides more scope controls and enables you to establish the initial setup, name and numbers for the imported image(s). See also “Load Window Buttons and Controls”... -
Page 214: Load Window Buttons And Controls
Part 2: FlexColor for Cameras Importing Camera Images active 3F folder (this is also the folder currently shown in the Thumbnails window). See “Load Window Buttons and Controls”, below, for details. Update : updates the selection of images shown in the Import window. -
Page 215: Using Reproduction Mode
Part 2: FlexColor for Cameras Using Reproduction Mode Scope controls: use the pop-up menu at the top of the window and its accompanying controls to set the scope of the import. At most, you can import all of the images that were shown in the Import window (after filtering) just before you opened the... - Page 216 Part 2: FlexColor for Cameras Using Reproduction Mode During standard operation (when not using reproduction mode), colors are mapped in a way that is most appropriate for everyday photography. An important feature of this processing is its emphasis on reproducing pleasing skin tones for all types of skin. The result still provides extremely accurate color reproduction, but also more attractive skin tones.
- Page 217 Part 2: FlexColor for Cameras Using Reproduction Mode Figure 7: Effects of reproduction mode when shooting flat artwork. Note the shift in the histogram FlexColor 4.5 Documentation Addendum...
-
Page 218: Part 3: Flexcolor For Scanners
Part 3: FlexColor for Scanners Scanning with 3F Part 3: FlexColor for Scanners This part provides information about how FlexColor works when connected to a scanner and/or when working with scanned images. If you never use FlexColor with a scanner or scanned images, then you can ignore this part. Scanning with 3F The procedure for scanning images to 3F files is approximately the same in FlexColor 4.5 as it was in FlexColor 4.0. -
Page 219: File Names And Locations
Part 3: FlexColor for Scanners Scanning with 3F To open the window, click on the button in the tool panel on the left side of the main FlexColor window. File Names and Locations Use the settings at the top of the window to control where your 3F files will Scan 3F be stored and how they will be named. - Page 220 Part 3: FlexColor for Scanners Scanning with 3F scan(s). The setups listed in this pop-up menu will only be those that match the film type you have selected; for example, if you set to “Positive”, Film Type then you will only see positive setups in the Setup pop-up menu.
- Page 221 Part 3: FlexColor for Scanners Scanning with 3F File Size Options Beneath the setup options, the window includes a group of settings that Scan 3F enable you to control the size of your 3F files. Usually, you should use a Scanning of 100%, which ensures that your 3F files will contain the full scan data Resolution...
- Page 222 Part 3: FlexColor for Scanners Preventive Maintenance for Scanners Reading the 3F Scan Log FlexColor keeps a log of each 3F scan that you make using the window. This Scan 3F is mostly useful when you are using a batch feeder because, in this case, you might set up a batch and then leave the scanner for up to an hour.
- Page 223 Part 3: FlexColor for Scanners Preventive Maintenance for Scanners In the Preventive Maintenance window, you can read the following information: Timeline: the indicator and colored bar at the top of the windows show how far along you are until you should send your scanner in for preventive maintenance.
Need help?
Do you have a question about the CF DIGITAL CAMERA BACK RANGE and is the answer not in the manual?
Questions and answers