
Related Manuals for HP 510B - Minitower PC


Summary of Contents for HP 510B - Minitower PC
- Page 1 Maintenance & Service Guide HP 500B and 505B Microtower Business PC Compaq 500B and 505B Microtower Business PC Compaq 510B and 515B Microtower Business PC...
- Page 2 No part of this document may be photocopied, reproduced, or translated to another language without the prior written consent of Hewlett-Packard Company. HP 500B and 505B Microtower Business Compaq 500B and 505B Microtower Business PC Compaq 510B and 515B Microtower Business PC Third Edition (August 2010)
-
Page 3: About This Book
About This Book WARNING! Text set off in this manner indicates that failure to follow directions could result in bodily harm or loss of life. CAUTION: Text set off in this manner indicates that failure to follow directions could result in damage to equipment or loss of information. - Page 4 About This Book...
-
Page 5: Table Of Contents
Table of contents 1 Product Description ............................1 Chassis Designations ........................... 1 HP 500B/505B ........................1 Compaq 500B/505B, Compaq 510B/515B ................2 Product Description ..........................3 2 Removal and Replacement Procedures Microtower (MT) Chassis ............4 Preparation for Disassembly ........................ 4 Access Panel ............................ - Page 6 Type 1 Battery Holder ......................49 Type 2 Battery Holder ......................50 Type 3 Battery Holder ......................50 Appendix A Computer (F10) Setup ........................ 52 Model 500B/510B — Computer Setup (F10) Utilities ................. 52 Using Computer Setup (F10) Utilities ................52 Computer Setup—Main .....................
- Page 7 Solving Memory Problems ......................... 81 Solving CD-ROM and DVD Problems ....................82 Solving Front Panel Component Problems ..................83 Appendix D Connector Pin Assignments ...................... 84 4-Pin Power (for CPU) ........................84 Ethernet BNC ............................. 84 USB ..............................84 Microphone ............................85 Headphone ............................
- Page 8 SMART ATA Drives ..........................99 Hard Drive Capacities ........................99 Appendix G Power Cord Set Requirements ....................100 General Requirements ........................100 Japanese Power Cord Requirements ....................100 Country-Specific Requirements ......................101 Appendix H Specifications ..........................102 Index ................................. 104 viii...
-
Page 9: Product Description
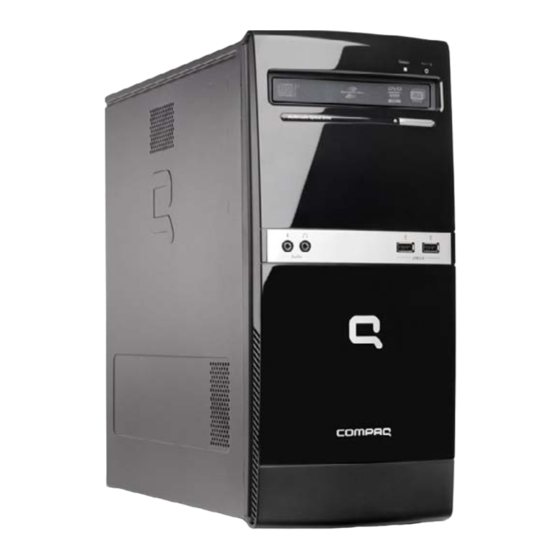
Product Description Chassis Designations The following subsection illustrates the various chassis designs. HP 500B/505B NOTE: Card reader not included on all models. Chassis Designations... -
Page 10: Compaq 500B/505B, Compaq 510B/515B
Compaq 500B/505B, Compaq 510B/515B Chapter 1 Product Description... -
Page 11: Product Description
Product Description HP 500B, Compaq 500B, and Compaq 510B are based on Intel PCA and processor technology, whereas the Compaq 505B MT, Compaq 505B, and Compaq 515B are based on AMD technology. The following list provides notable features of the PCs. -
Page 12: Removal And Replacement Procedures Microtower (Mt) Chassis
Removal and Replacement Procedures Microtower (MT) Chassis Adherence to the procedures and precautions described in this chapter is essential for proper service. After completing all necessary removal and replacement procedures, run the Diagnostics utility to verify that all components operate properly. NOTE: Not all features listed in this guide are available on all computers. -
Page 13: Access Panel
Access Panel NOTE: Access panel appearance may vary. Prepare the computer for disassembly (Preparation for Disassembly on page Remove the side cover by loosening the screw that connects the cover to the computer. Figure 2-1 Removing the Computer Access Panel Grasp the handle on the side cover and pull towards the back of the computer. - Page 14 Remove the side panel by lifting it away from the computer. Figure 2-3 Removing the Computer Access Panel To replace the access panel, reverse the removal steps. Chapter 2 Removal and Replacement Procedures Microtower (MT) Chassis...
-
Page 15: Front Bezel
Front Bezel NOTE: Front bezel appearance may vary. Prepare the computer for disassembly (Preparation for Disassembly on page Remove the access panel (Access Panel on page Pull each of the three side tabs that secure the front bezel to the computer, to release the front bezel. - Page 16 Swing the front bezel out to remove from the computer. Figure 2-5 Removing the Front Bezel NOTE: The appearance of the front bezel may vary. To reinstall the front bezel, reverse the removal procedure. Chapter 2 Removal and Replacement Procedures Microtower (MT) Chassis...
-
Page 17: Memory
Memory The computer comes with double data rate 3 synchronous dynamic random access memory (DDR3-SDRAM) dual inline memory modules (DIMMs). DDR3-SDRAM DIMMs The memory sockets on the system board can be populated with up to two industry-standard DIMMs. These memory sockets are populated with at least one preinstalled DIMM. To achieve the maximum memory support, you can populate the system board with up to 4 GB of memory configured in a high-performing dual channel mode. -
Page 18: Populating Dimm Sockets
Populating DIMM Sockets There are two DIMM sockets on the system board. Figure 2-6 DIMM Socket Locations — 500B/510B Figure 2-7 DIMM Socket Locations — 505B/515B Table 2-1 DIMM Socket Locations Item Description Socket Color DIMM1 socket, Channel A (populate first) Blue DIMM2 socket, Channel A Blue... -
Page 19: Installing Memory Modules
Installing Memory Modules CAUTION: You must disconnect the power cord and wait approximately 30 seconds for the power to drain before adding or removing memory modules. Regardless of the power-on state, voltage is always supplied to the memory modules as long as the computer is plugged into an active AC outlet. Adding or removing memory modules while voltage is present may cause irreparable damage to the memory modules or system board. - Page 20 Open both latches of the memory module socket (1), and insert the memory module into the socket (2). Figure 2-9 Installing a DIMM NOTE: A memory module can be installed in only one way. Match the notch on the module with the tab on the memory socket.
-
Page 21: Expansion Cards
Expansion Cards The computer has one PCI expansion slot, two PCI Express x1 expansion slots, and one PCI Express x16 expansion slot. The expansion slots accommodate full-height or half-height expansion cards. Figure 2-10 Expansion Slot Locations — 500B/510B Figure 2-11 Expansion Slot Locations —... - Page 22 Table 2-2 Expansion Slot Locations (continued) Item Description PCI Express x1 expansion slot PCI Express x1 expansion slot PCI expansion slot NOTE: You can install a PCI Express x1, x4, x8, or x16 expansion card in the PCI Express x16 expansion slot.
- Page 23 On the back of the computer, remove the screw from the bracket cover for the add-in cards. Figure 2-13 Opening the slot cover lock Remove the bracket cover. Figure 2-14 Removing the bracket cover Expansion Cards...
- Page 24 If you are removing a graphics card, press on the latch to release it. Figure 2-15 Press the latch to release the graphics card Remove the graphics card from the card slot. NOTE: If you are removing a PCI Express x16 card, pull the retention arm on the back of the expansion socket away from the card and carefully rock the card back and forth until the connectors pull free from the socket.
- Page 25 For other add-in cards, move the card back and forth gently to free it from the card slot in the computer. Figure 2-17 Rocking the card to Remove Lift the card out of the computer. Figure 2-18 Lifting the card from the computer Expansion Cards...
- Page 26 If present, remove any cables connected to the add-in card. Figure 2-19 Removing cables from the card Store the removed card in anti-static packaging. If you are not installing a new expansion card, install an expansion slot cover to close the open slot.
- Page 27 If you are replacing a graphics card, verify that the latch in the computer snaps back into place. Figure 2-21 Replacing a graphics card Press straight down until the card is fully seated in the card slot. Figure 2-22 Seating the card Expansion Cards...
- Page 28 Replace the bracket cover on the back of the computer. Figure 2-23 Replacing the bracket cover Replace the screw to secure the bracket to the back of the computer. Figure 2-24 Replacing the bracket screw Connect external cables to the installed card, if needed. Connect internal cables to the system board, if needed.
-
Page 29: Cable Management
Cable Management Always follow good cable management practices when working inside the computer. ● Keep cables away from major heat sources like the heatsink. ● Do not jam cables on top of expansion cards or memory modules. Printed circuit cards like these are not designed to take excessive pressure on them. - Page 30 Table 2-3 Cable connections — 500B/510B (continued) Connector Name Connector Color Description PCIE1X1 black PCIe x1 expansion slot PCIE16X black PCIe x16 expansion slot Table 2-4 Cable connections — 505B/515B Connector Name Connector Color Description ATXPOWER white power supply, 24-pin ATXCPU white power supply, 4-pin...
-
Page 31: Drives
Drives The computer supports one optical drive and one hard drive. This section describes the procedure for replacing or upgrading the drives. A Torx T-15 screwdriver is needed to remove and install the guide screws on a drive. Installing Additional Drives When installing additional drives, follow these guidelines: ●... -
Page 32: System Board Drive Connections
System Board Drive Connections Refer to the following illustration and table to identify the system board drive connectors. Figure 2-25 System Board Drive Connections — 500B/510B Figure 2-26 System Board Drive Connections — 505B/515B Table 2-5 System Board Drive Connections System Board Label —... -
Page 33: Removing An Optical Drive
Removing an Optical Drive CAUTION: All removable media should be taken out of a drive before removing the drive from the computer. To remove an optical drive: Prepare the computer for disassembly (Preparation for Disassembly on page Remove the access panel (Access Panel on page Remove the front bezel (Front Bezel on page... - Page 34 Push the drive slightly forward. Figure 2-29 Push the drive forward Pull the disc drive out through the front of the computer. Figure 2-30 Pull the drive from the computer NOTE: To install an optical drive, refer to Replacing an Optical Drive on page Chapter 2 Removal and Replacement Procedures Microtower (MT) Chassis...
-
Page 35: Replacing An Optical Drive
Replacing an Optical Drive To install an optical drive: Prepare the computer for disassembly (Preparation for Disassembly on page Remove the access panel (Access Panel on page Remove the front bezel (Front Bezel on page If the new drive has screws installed on the sides of the drive, remove the screws before inserting the drive into the chassis. -
Page 36: Removing A Hard Drive
Align the disc drive screw holes with the drive bay holes (marked “2”). Figure 2-33 Aligning the holes Replace the drive screws. Figure 2-34 Replacing the screws Replace the front bezel, access panel, and reconnect all cables. Lock any security devices that were disengaged when the access panel was removed. The system automatically recognizes the drive and reconfigures the computer. - Page 37 Locate the external drive bay at the front of the computer, below the optical drive bays. Figure 2-35 Locating the hard drive Disconnect the power (1) and data (2) cables by squeezing the latch on the connector and pulling to remove. Figure 2-36 Disconnecting the hard drive cables Drives...
- Page 38 Remove the two screws that secure the hard disk drive to the computer. Figure 2-37 Removing the hard drive screws Pull the hard drive out of the front of the computer. Figure 2-38 Pulling the hard drive from the computer NOTE: To install a hard drive, refer to Replacing a Hard Drive on page...
-
Page 39: Replacing A Hard Drive
Replacing a Hard Drive Follow the steps in Removing a Hard Drive on page 28 to remove the hard drive. Slide the replacement hard disk drive into the bay. NOTE: If you are replacing an old drive with a new drive, use the four retainer screws from the old drive to install the new drive. - Page 40 Attach the two screws to secure the hard disk drive to the bay. Figure 2-41 Replacing the screws that secure the hard drive Attach the power and data connectors to the back of the drive. Figure 2-42 Attaching the connectors Replace the front bezel, computer access panel, and all cables.
-
Page 41: Front I/O And Usb Panel Housing Assembly
Front I/O and USB Panel Housing Assembly Prepare the computer for disassembly (Preparation for Disassembly on page Remove the access panel (Access Panel on page Lay the computer on its side with the front facing toward you. Remove the front bezel (Front Bezel on page Unplug the four cables that connect the assembly to the system board. -
Page 42: Power Switch/Led Assembly
Power Switch/LED Assembly Prepare the computer for disassembly (Preparation for Disassembly on page Remove the access panel (Access Panel on page Lay the computer on its side with the front facing toward you. Remove the front bezel (Front Bezel on page Remove the optical drive (Removing an Optical Drive on page 25). -
Page 43: System Fan
System Fan Prepare the computer for disassembly (Preparation for Disassembly on page Remove the access panel (Access Panel on page Lay the computer on its side with the rear facing toward you. Disconnect the cable that connects the system fan to the system board. Remove the four Phillips screws that secure the fan to the chassis, rotate the top of the fan forward, and then remove the fan from the chassis. -
Page 44: Heat Sink Assembly (Intel) - Model 500B/510B
Heat sink assembly (Intel) — Model 500B/510B NOTE: Heat sink appearance may vary. Prepare the computer for disassembly (Preparation for Disassembly on page Remove the access panel (Access Panel on page Lay the computer on its side with the rear facing toward you. Disconnect the heat sink fan control cable from the system board (1). -
Page 45: Heat Sink Assembly (Amd) - Model 505B/515B
Heat sink assembly (AMD) — Model 505B/515B Prepare the computer for disassembly (Preparation for Disassembly on page Remove the access panel (Access Panel on page Lay the computer on its side with the rear facing toward you. Disconnect the heat sink fan control cable from the system board. Lift the lever (1) that secures the heat sink latch to the heat sink bracket attached to the system board. -
Page 46: Processor (Intel) - Model 500B/510B
Processor (Intel) — Model 500B/510B Prepare the computer for disassembly (Preparation for Disassembly on page Remove the access panel (Access Panel on page Lay the computer on its side with the rear facing toward you. Disconnect the heatsink control cable from the system board and remove the heatsink Heat sink assembly (Intel) —... - Page 47 Apply the thermal grease provided in the spares kit to the top of the processor and install the heat sink atop the processor. Go to step 7. If using a new heat sink, remove the protective covering from the bottom of the heat sink and place it in position atop the processor.
-
Page 48: Processor (Amd) - Model 505B/515B
Processor (AMD) — Model 505B/515B Prepare the computer for disassembly (Preparation for Disassembly on page Remove the access panel (Access Panel on page Disconnect the heatsink control cable from the system board and remove the heatsink Heat sink assembly (AMD) — Model 505B/515B on page 37). -
Page 49: Power Supply
If using a new heat sink, remove the protective covering from the bottom of the heat sink and place it in position atop the processor. Secure the heat sink to the system board and system board tray with the four captive screws and attach the heat sink control cable to the system board. - Page 50 Locate the power supply at the top of the computer. Figure 2-50 Locating the power supply NOTE: Noting the location, type and orientation of the power connectors is extremely important. Failure to correctly restore all power connectors appropriately will prevent the computer or components from working successfully.
- Page 51 Disconnect the power cable from the optical disc and hard disk drives by squeezing the latch (1) on the connectors and pulling to remove. Figure 2-52 Disconnecting the power cable Power Supply...
- Page 52 The motherboard power connector has a latch that must be pressed to detach the connector from the motherboard. Figure 2-53 Disconnecting the main system board power connector Some connectors may have latches that must be pressed to remove them. Figure 2-54 Connector Latches Chapter 2 Removal and Replacement Procedures Microtower (MT) Chassis...
- Page 53 Disconnect all other power connectors from the motherboard. Figure 2-55 Disconnecting power connectors Remove the four screws that connect the power supply to the computer. The images below illustrate possible power supply screw locations. Figure 2-56 Removing the power supply screws Power Supply...
- Page 54 Use a screwdriver to press the latch at the bottom of the power supply to release it. Figure 2-57 Pressing the power supply latch Pull the power supply back and tilt it out of the computer. Figure 2-58 Removing the power supply from the computer To install the power supply, reverse the removal procedure.
-
Page 55: System Board
Figure 2-59 Power supply securing features System Board When replacing the system board, be sure that the following components are removed from the defective system board and installed on the replacement system board: ● Memory modules ● Processor ● Expansion modules To remove the system board: Prepare the computer for disassembly (Preparation for Disassembly on page... -
Page 56: Battery
Slide the system board toward the front of the chassis, and then lift it up and out of the chassis. NOTE: The system board in the computer may look slightly different from the one shown here. Figure 2-60 Removing the system board — model 500B shown To install the system board, reverse the removal procedure. -
Page 57: Type 1 Battery Holder
Do not expose to temperatures higher than 60°C (140°F) Do not disassemble, crush, puncture, short external contacts, or dispose of in fire or water. Replace the battery only with the HP/Compaq spare designated for this product. CAUTION: Before replacing the battery, it is important to back up the computer CMOS settings. -
Page 58: Type 2 Battery Holder
Plug in the computer and turn on power to the computer. Reset the date and time, your passwords, and any special system setups, using Computer Setup. Refer to the Computer Setup (F10) Utility Guide. Type 2 Battery Holder To release the battery from its holder, squeeze the metal clamp that extends above one edge of the battery. - Page 59 Insert the new battery and position the clip back in place. Replace the computer access panel. Plug in the computer and turn on power to the computer. Reset the date and time, your passwords, and any special system setups, using Computer Setup.
-
Page 60: Appendix A Computer (F10) Setup
Computer (F10) Setup Model 500B/510B — Computer Setup (F10) Utilities Use Computer Setup (F10) Utility to do the following: ● Change factory default settings. ● Set the system date and time. ● Set, view, change, or verify the system configuration, including settings for graphics, audio, storage, communications, and input devices. -
Page 61: Computer Setup-Main
Five menu headings appear on the Computer Setup Utility screen: ● Main ● Advanced ● Power ● Boot ● Exit Use the arrow keys to select the appropriate heading, then press Enter. Use the arrow (up and down) keys to select the option you want, then press Enter. To return to the previous screen, press Esc. -
Page 62: Computer Setup-Advanced
Table A-1 Computer Setup—Main (continued) 1st Drive For each, allows you to: 2nd Drive ● Port Configuration - set the ability to configure ports to: ◦ 3rd Drive Enabled 4th Drive ◦ Disabled ● (view only) ◦ Capacity (Size - HDD only) ◦... -
Page 63: Computer Setup-Power
Table A-2 Computer Setup—Advanced (continued) Primary Video Adapter Allows you to select the boot display device when more than 2 video options are offered by the system: ● ● PCI-Ex16 ● Onboard Video 32 MB Memory Size ● 64 MB ●... - Page 64 Table A-3 Computer Setup—Power (continued) Disables/enables XD (eXecute Disable) bit. NOTE: The XD bit is a technology used in to separate areas of memory for use by either storage of processor instructions or code or for storage of data. Memory designated with the NX attribute may only be used for storing data.
-
Page 65: Computer Setup-Boot
Computer Setup—Boot NOTE: Support for specific Computer Setup options may vary depending on the hardware configuration. Table A-4 Computer Setup—Boot Option Description Boot-time Diagnostic Disables/enables POST diagnostic messages display. Screen ESC: Boot Menu Enables/disables the ability to press the key to access the boot menu during boot. F9: Diagnostics Enables/disables the ability to press the key to access the Diagnostics menu during boo. -
Page 66: Computer Setup-Exit
Computer Setup—Exit NOTE: Support for specific Computer Setup options may vary depending on the hardware configuration. Table A-5 Computer Setup—Exit Option Description Exit Saving Changes Press Enter to exit saving changes. Exit Discarding Press Enter to exit discarding changes. Changes Load Setup Defaults Press Enter... -
Page 67: Using Computer Setup (F10) Utilities
Using Computer Setup (F10) Utilities Computer Setup can be accessed only by turning the computer on or restarting the system. To access the Computer Setup Utilities menu, complete the following steps: Turn on or restart the computer. As soon as the computer is turned on, press when the monitor light turns green to enter Computer Setup. -
Page 68: Computer Setup-Advanced
Table A-6 Computer Setup—Main (continued) 1st Drive For each, allows you to: 2nd Drive ● Port Configuration - set the ability to configure ports to: ◦ 3rd Drive Enabled 4th Drive ◦ Disabled ● (view only) ◦ Capacity (Size - HDD only) ◦... -
Page 69: Computer Setup-Power
Table A-7 Computer Setup—Advanced (continued) Primary Video Adapter Allows you to select the boot display device when more than 2 video options are offered by the system: ● ● PCI-E x1 ● PCI-E x16 ● Onboard Onboard LAN Allows you to disable/enable onboard LAN controller. Onboard LAN Boot Allows you to disable/enable the boot ROM of the onboard LAN chip. - Page 70 Table A-8 Computer Setup—Power (continued) S5 Maximum Power Disables/enables the S5 power setting. Enabling this setting enables the EuP Lot6 power Savings specification of 1 Watt in S5 mode. This setting disable various system board components to reduce power consumption. WOL in S5 Allows you to view whether WOL is disabled or enabled in S5 (view only).
-
Page 71: Computer Setup-Boot
Computer Setup—Boot NOTE: Support for specific Computer Setup options may vary depending on the hardware configuration. Table A-9 Computer Setup—Boot Option Description Boot-time Diagnostic Disables/enables POST diagnostic messages display. Screen Boot Device Priority Allows you to specify which device groups will boot first, second, third, and fourth or to disable any of the four: ●... -
Page 72: Computer Setup-Exit
Computer Setup—Exit NOTE: Support for specific Computer Setup options may vary depending on the hardware configuration. Table A-10 Computer Setup—Exit Option Description Exit Saving Changes Press Enter to exit saving changes. Exit Discarding Press Enter to exit discarding changes. Changes Load Setup Defaults Press Enter... -
Page 73: Appendix B Diagnostics
Diagnostics Interpreting Diagnostic Beep Codes The Power-On Self-Test (POST) is a series of diagnostic tests that runs automatically when the computer is powered on. If the POST detects an error, this causes an audible beep code to sound. The POST beep codes are not necessarily accompanied by an associated, visble error code or text message. -
Page 74: Led Codes
Table B-1 Diagnostic Beep Codes (continued) Beeps Diagnosis Recommended action 3 short beeps, 3 Flashing not ready (missing utility or Upgrade the BIOS to proper version. second pause BIOS image file, etc.) 4 short beeps, 3 Flashing operation has failed Verify the correct ROM. -
Page 75: Accessing Hp Insight Diagnostics
Accessing HP Insight Diagnostics The HP Insight Diagnostics utility can be used to view information about the hardware configuration of the computer. It can also perform hardware diagnostic testing on the computer and its subsystems, which provides information for troubleshooting. HP Insight Diagnostics runs from the recovery discs. -
Page 76: Post Error/Warning Messages
Improperly installed The DIMM is not seated properly or a Open the computer casing and reseat the DIMM. If DIMM socket is bad or unusable. this does not work, try different sockets. Check that no debris or corrosion is in the socket. Defective If the above remedies do not solve the Replace the DIMM. -
Page 77: Power Button/Power Button Led
Display "Default BIOS settings have been loaded... Press for Setup, to Continue”. If the user selects F10, proceed to Setup. However, if the user selects F2, the BIOS should proceed to step 2 below. For all other SKUs, instead of F10 in the above handling. NOTE: If a device fails to respond while the BIOS tries to configure the device during POST, the BIOS must not make the system look as if it locked up by having an infinite loop or waiting for too... -
Page 78: Bios Updates
● Run tests on the hard drive ● Establish a supervisor password that controls access to the Setup Utility BIOS Updates HP periodically releases system BIOS updates, which are available from the HP website. These updates often contain fixes for known issues in the BIOS. To find out whether a PC needs a BIOS update, compare the current BIOS version number against the latest version available for download. - Page 79 Remove the jumper from pins 2-3 pins and put it on pins 1-2 to clear CMOS. Keep the cap on pins 1-2 for 5 to 10 seconds. Replace the jumper on pins 2-3. Reinstall the battery. Replace the access panel, external equipment, and reconnect the power cord. Turn on the computer.
-
Page 80: Appendix C Troubleshooting Without Diagnostics
Troubleshooting Without Diagnostics This chapter provides information on how to identify and correct minor problems, such as hard drive, optical drive, graphics, audio, memory, and software problems. If you encounter problems with the computer, refer to the tables in this chapter for probable causes and recommended solutions. NOTE: For information on specific error messages that may appear on the screen during Power-On Self-Test (POST) at startup, refer to Appendix A,... -
Page 81: Helpful Hints
● Refer to the comprehensive online technical support at http://www.hp.com/support. ● Refer to Helpful Hints on page 73 in this guide. To assist you in resolving problems online, HP Instant Support Professional Edition provides you with self-solve diagnostics. If you need to contact HP support, use HP Instant Support Professional Edition's online chat feature. -
Page 82: Solving General Problems
● Be sure that all the needed device drivers have been installed. For example, if you are using a printer, you need a driver for that model printer. ● Remove all bootable media (DVD or USB device) from the system before turning it on. ●... -
Page 83: Solving Power Problems
Poor performance is experienced. Cause Solution Processor is hot. Make sure airflow to the computer is not blocked. Leave a 10.2-cm (4-inch) clearance on all vented sides of the computer and above the monitor to permit the required airflow. Make sure fans are connected and working properly (some fans only operate when needed). -
Page 84: Solving Hard Drive Problems
The computer will not turn on. Cause Solution Drive data or power supply cables might not be properly Reseat drive data and power supply cables. connected. The unit temperature might have exceeded safe limits, or the The computer is in an exceedingly hot environment. Let it fan might be blocked. -
Page 85: Solving Media Card Reader Problems
Solving Media Card Reader Problems NOTE: It is possible that the driver your memory card uses has become corrupted or is not functioning correctly. From time to time new drivers and firmware are released to address issues. New firmware for your memory card reader might be available that would resolve the particular issue you are having. -
Page 86: Solving Display Problems
Memory card appears in My Computer, but errors occur when writing or reading. Cause Solution You are using an adapter for a type of memory card not Consult the manufacturer of the adapter for help. Be sure supported by the reader. that the memory card is one of the supported types: CompactFlash (1, 2, and Microdrive), Memory Stick, MultiMedia, Secure Digital, or SmartMedia memory cards. -
Page 87: Solving Audio Problems
High pitched noise coming from inside a flat panel monitor. Cause Solution Brightness and/or contrast settings are too high. Lower brightness and/or contrast settings. Solving Audio Problems If the computer has audio features and you encounter audio problems, see the common causes and solutions listed in the following table. -
Page 88: Solving Network Problems
No response from the USB keyboard and mouse during running of application. Cause Solution The application has stopped responding. Restart the computer. Mouse does not respond to movement or is too slow. Cause Solution Mouse connector is not properly plugged into the back of the Shut down the computer if it still does not respond. -
Page 89: Solving Memory Problems
Diagnostics reports a failure. Cause Solution Network controller interrupt is shared with an expansion Under the Computer Setup Advanced menu, change the board. resource settings for the board. Check that they are different from those of the network controller. The network controller is defective. Disable the integrated network controller from the setup utility and install a new network interface card. -
Page 90: Solving Cd-Rom And Dvd Problems
Memory count during POST is wrong. Cause Solution The memory modules may not be installed correctly. Check that the memory modules have been installed correctly and that proper modules are used. One of the memory modules might be faulty. Find out which module is faulty by booting with each module individually. -
Page 91: Solving Front Panel Component Problems
An optical drive cannot read a CD or DVD disc. Cause Solution CD or DVD disc is dirty. Clean the disc. Windows does not detect the DVD-ROM drive. Use Device Manager to remove or uninstall the device. Restart the computer and let Windows detect the device. -
Page 92: Appendix D Connector Pin Assignments
Connector Pin Assignments This appendix contains the pin assignments for many computer and workstation connectors. Some of these connectors may not be used on the product being serviced. 4-Pin Power (for CPU) Connector and Icon Signal +12V CPU -12V CPU Ethernet BNC Connector and Icon Signal... -
Page 93: Microphone
Microphone Connector and Icon (1/8” miniphone) Signal 1 (Tip) Audio_left 1 2 3 2 (Ring) Audio_Right 3 (Shield) Ground Headphone Connector and Icon (1/8” miniphone) Signal 1 (Tip) Audio_left 1 2 3 2 (Ring) Power_Right 3 (Shield) Ground Line-in Audio Connector and Icon (1/8”... -
Page 94: Monitor
Monitor Connector and Icon Signal Signal Red Analog +5V (fused) Green Analog Ground Blue Analog Not used Not used DDC Serial Data Ground Horizontal Sync Ground Vertical Sync Ground DDC Serial Clock Ground 24-Pin Power Connector Front Signal Signal Signal Signal +3.3V +3.3V... -
Page 95: Pci Express
PCI Express x1, x4, x8, and x16 PCI Express Connector Pin A Signal Signal Signal Signal Signal PRSNT1 JTAG3 PERST# PERp0 PERp1 +12V JTAG4 PERn0 PERn1 +12V JTAG5 REFCLK+ +3.3V REFCLK- RSVD JTAG2 +3.3V PERp2 PERn(2) PERn4 RSVD PERp7 RSVD PERp6 PERn7 PERp3... -
Page 96: Pci Express
PERp14 PERn15 PERn14 PERp15 Pin B information is on the next page NOTE: x1 PCI Express uses pins 1-18 x4 PCI Express uses pins 1-32 x8 PCI Express uses pins 1-49 x16 PCI Express uses pins 1-8 PCI Express x1, x4, x8, and x16 PCI Express Connector Pin B Signal Signal... - Page 97 PETn8 PETp12 PETn13 PETp11 PETn12 PETp10 PETn11 PETp9 PETn10 PETp14 PETn9 PETp13 PETn14 PRSNT2# RSVD PETp15 PETn15 Pin B information is on the next page NOTE: x1 PCI Express uses pins 1-18 x4 PCI Express uses pins 1-32 x8 PCI Express uses pins 1-49 x16 PCI Express uses pins 1-8 PCI Express...
-
Page 98: Appendix E Routine Care And Disassembly Preparation
Routine Care and Disassembly Preparation This chapter provides general service information for the computer. Adherence to the procedures and precautions described in this chapter is essential for proper service. CAUTION: When the computer is plugged into an AC power source, voltage is always applied to the system board. -
Page 99: Preventing Electrostatic Damage To Equipment
Removing DIPs* from vinyl tray 2,000 V 4,000 V 11,500 V Removing DIPs* from Styrofoam 3,500 V 5,000 V 14,500 V Removing bubble pack from PCB 7,000 V 20,000 V 26,500 V Packing PCBs in foam-lined box 5,000 V 11,000 V 21,000 V *These are then multi-packaged inside plastic tubes, trays, or Styrofoam. -
Page 100: Grounding The Work Area
Method Voltage Antistatic plastic 1,500 Carbon-loaded plastic 7,500 Metallized laminate 15,000 Grounding the Work Area To prevent static damage at the work area, use the following precautions: ● Cover the work surface with approved static-dissipative material. Provide a wrist strap connected to the work surface and properly grounded tools and equipment. -
Page 101: Operating Guidelines
● Conductive tote boxes ● Opaque shielding bags ● Transparent metallized shielding bags ● Transparent shielding tubes Operating Guidelines To prevent overheating and to help prolong the life of the computer: ● Keep the computer away from excessive moisture, direct sunlight, and extremes of heat and cold. -
Page 102: Routine Care
Routine Care General Cleaning Safety Precautions Never use solvents or flammable solutions to clean the computer. Never immerse any parts in water or cleaning solutions; apply any liquids to a clean cloth and then use the cloth on the component. Always unplug the computer when cleaning with liquids or damp cloths. -
Page 103: Cleaning The Monitor
CAUTION: Use safety glasses equipped with side shields before attempting to clean debris from under the keys. ● Visible debris underneath or between the keys may be removed by vacuuming or shaking. ● Canned, pressurized air may be used to clean debris from under the keys. Caution should be used as too much air pressure can dislodge lubricants applied under the wide keys. -
Page 104: Tools And Software Requirements
Tools and Software Requirements To service the computer, you need the following: ● Torx T-15 screwdriver (HP screwdriver with bits, PN 161946-001) ● Torx T-15 screwdriver with small diameter shank (for certain front bezel removal) ● Flat-bladed screwdriver (may sometimes be used in place of the Torx screwdriver) ●... -
Page 105: Lithium Coin Cell Battery
● If you are inserting or removing a hard drive, turn off the computer. Do not remove a hard drive while the computer is on or in standby mode. ● Before handling a drive, ensure that you are discharged of static electricity. While handling a drive, avoid touching the connector. -
Page 106: Appendix F Serial Ata (Sata) Drive Guidelines And Features
Serial ATA (SATA) Drive Guidelines and Features NOTE: HP only supports the use of SATA hard drives on these models of computer. No Parallel ATA (PATA) drives are supported. SATA Hard Drives Serial ATA Hard Drive Characteristics Number of pins/conductors in data cable Number of pins in power cable Maximum data cable length 39.37 in (100 cm) -
Page 107: Smart Ata Drives
SMART ATA Drives The Self Monitoring Analysis and Recording Technology (SMART) ATA drives for the HP Personal Computers have built-in drive failure prediction that warns the user or network administrator of an impending failure or crash of the hard drive. The SMART drive tracks fault prediction and failure indication parameters such as reallocated sector count, spin retry count, and calibration retry count. -
Page 108: Appendix G Power Cord Set Requirements
Power Cord Set Requirements The power supplies on some computers have external power switches. The voltage select switch feature on the computer permits it to operate from any line voltage between 100-120 or 220-240 volts AC. Power supplies on those computers that do not have external power switches are equipped with internal switches that sense the incoming voltage and automatically switch to the proper voltage. -
Page 109: Country-Specific Requirements
Country-Specific Requirements Additional requirements specific to a country are shown in parentheses and explained below. Country Accrediting Agency Country Accrediting Agency Australia (1) EANSW Italy (1) Austria (1) Japan (3) METI Belgium (1) CEBC Norway (1) NEMKO Canada (2) Sweden (1) SEMKO Denmark (1) DEMKO... -
Page 110: Appendix H Specifications
Specifications Table H-1 Specifications Temperature Range 50° to 95°F 10° to 35°C Operating -22° to 140°F -30° to 60°C Nonoperating Relative Humidity (noncondensing) 10-90% 10-90% Operating 5-95% 5-95% Nonoperating (38.7°C max wet bulb) Maximum Altitude (unpressurized) 10,000 ft 3048 m Operating 30,000 ft 9144 m... - Page 111 Table H-1 Specifications (continued) Acoustic noise LWAd = 43 dB LWAd = 55 dB Desktop average LpAm Desktop average = 32 dBA LpAm = 44 dBA NOTE: Listed are the declared A-weighted sound power levels (LWAd) and declared average desktop seated operator position A-weighted sound pressure levels (LpAm) when the product is operating in a 23°C (73.4°F) ambient environment.
-
Page 112: Index
Index Symbols/Numerics connector pin assignments 84 24-pin power pin assignments 86 country power cord set hard drive 4-pin power pin assignments 84 requirements 101 installing 31 Customer Support 72 proper handling 96 removing 28 access panel SATA characteristics 98 removal and replacement 5 diagnostics 65 hard drive problems 76 audible codes 65... - Page 113 monitor temperature control 93 pin assignments 86 removal and replacement tools, servicing 96 monitor problems 78 access panel 5 Torx T15 screwdriver 96 mouse battery 48 cleaning 95 drives 23 updating BIOS 70 mouse problems 79 fan 35 USB pin assignments 84 front bezel 7 processor removal and front I/O device 33...
Need help?
Do you have a question about the 510B - Minitower PC and is the answer not in the manual?
Questions and answers