
Related Manuals for PowerMax TAC4000


Summary of Contents for PowerMax TAC4000
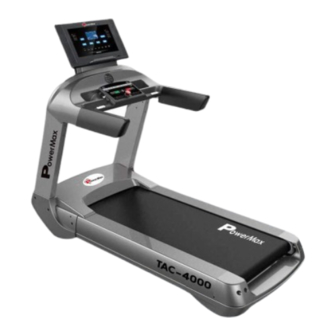
- Page 1 MOTORIZED TREADMILL OWNERS’ MANUAL TAC4000 Read all instruction carefully before use this product. Retain this owner manual for the future reference.
-
Page 2: Safety Instructions
Safety Instructions Warning: Consult with your physician or health professional before starting your workout, especially necessary if your age is up to 35 or once had healthy problem. We take no responsible for any troubles or hurts if you don’t follow our instructions. Treadmill should be carefully assembled and covered with the motor shield before connected to the power Notes: 1、Ensure the safety lock’s clamp were attached to the clothing or belts before using the... - Page 3 12、When the equipment is not used, please cut off the power by pulling off the plug. While cutting off the power, do not pull the power line which may cause broken to the line. Once the power-line is broken, please purchase the power-line from the distributor or contact with our company directly, as the power-line is dedicated to the treadmill.
-
Page 4: Assembly Steps
Assembly Steps Step 1 Open the carton, get out all the above spare parts, and put the Main Frame onto the level ground. Notes: It is better to get out the Main frame with more than 2 persons to avoid hurt. Step 2 A. - Page 5 Step 3 A. Secure the left post bar cover (55L) to the main frame (I) with 5 screws ST4.2*5 (#32). B. Secure the right post bar cover (55R) to the main frame (I) in the same way. Step 4 Secure the display (VI) onto the display rack (VII) with 3 bolts M8*50 (#16).
- Page 6 Step 5 Secure the display rack (VII) to left &right post bar (II) with 10 bolts M10*25(#12) and 10 star washers D10 (#25). IMPORTANT NOTE: Please make sure all screws and bolts are secured tightly before using the treadmill.
-
Page 7: Technical Parameters
Technical Parameters Input As shown Output As shown Speed Range 1.0-25.0km/h Incline 0.0-20.0% Running Space 1750x600mm Display 18.5’’ colorful touch screen Handpulse,time,speed, Readouts Programs 36 auto programs incline,distance,calories N.W. 195.5kgs User Weight 250kgs A:2488*1040*500mm Assembling size 2370*970*1695mm Carton Size B:1040*885*520mm Grounding Methods This product must be grounded. - Page 8 WARM UP STAGE Before exercise, it is better to warm up about 5 ~ 10 minutes to stretch more easily. So follow the below stretching exercises - do five times, each leg takes 10 seconds/time or more time to do it again after the end of the exercise.
- Page 9 Exercise Instructions Warm up stage: If you are over 35 years old, or not very healthy, also it’s your first time exercise, please consult with your doctor or professional person. Before you use the motorized treadmill, please learn how to control the machine, know well how to start, stop, adjust the speed and so on;...
- Page 10 You can control the running intensity through adjusting the velocity and incline of treadmill. We suggest that you don’t set the incline at first; improve the incline is the effective way to strengthen the exercise’s intensity. Consult with your physician or health professional before starting your workout. The professional people can help you make up the suitable exercise time-chart according to your age and health condition;...
- Page 11 Maintance Instruction WARNING: Always unplug the treadmill before cleaning or maintance. General cleaning will greatly prolong the treadmill. Keep treadmill clean by dusting regularly. Be sure to clean the exposed part of the deck on either side of the walking belt and also the side rails. Keep the running shoes clean to avoid foreign material underneath the walking belt.
-
Page 12: Belt Adjustment
Belt Adjustment We suggest that you should cut off the power for 10Mints after keep running 1.5hours to maintain the treadmill. The belt would slip if too loose during using if the belt is too tight, it would affect the performance of motor and increase the abrasion of roller and belt. - Page 13 Explosive Diagram...
-
Page 14: Parts List
Parts list DESCRIPTION DESCRIPTION Motor Up edgings Base frame Side edgings Left & right post bar Each 1 Rear corner protection Left &right side cover for display rack Each 1 corner protection Left &right corner Display screen rack Each 1 protection Keypad board Up computer cover... - Page 15 Star washer D5 Round crash pad Flat washer D10 Power line Spring washer D10 Switch Screw M3*10 Over-current protector Screw ST4.2*25 AC motor Screw ST4.2*15 Incline motor Screw ST3*8 18.5"TFT screen Screw ST4.2*40 Membrane switch Bolt M10*30 Safety key Screw ST4.2*15 Up signal line Audio mesher Middle signal line...
- Page 16 Touch Screen Operation Manual I. Interfaces 1. Home page. There are six modules. “SMART RUN” contains all the running modes. “MULTIMEDIA” can play local music and videos. “USER CENTER” can view your information and running records. “SCENE MODE” contains three high quality scenes. “APPLICATIONS”...
- Page 17 2. SMART RUN-Time mode. You can touch the buttons to change the target time. Then touch the “START” to launch the treadmill. 3. SMART RUN-distance mode. Operations are same as time mode.
- Page 18 4. SMART RUN-calorie mode. Operations are same as time mode. 5. SMART RUN-preset programs mode. There are six modes. Each mode has six strength. Each program has ten steps. You can change the time to run.
- Page 19 6. SMART RUN-custom programs mode. There are five modes. Please click the “SAVE” button after set speed, incline and time. Then click “START” button. 7. MULTIMEDIA You can play the local music and video here.
- Page 20 Video. Audio.
- Page 21 Image. 8. SCENE MODE Touch the icons to select one scene, click “START” to launch treadmill.
- Page 22 9. APPLICATIONS Touch the icon to launch the application. You can delete application by long press. 10.CHOOSE USER There are five users prepared in the treadmill, you can touch the “USER CENTER” on the home page to enter the page, after you finish your exercise, the record will be saved automatically.
-
Page 23: User Center
11. USER CENTER The left is your personal information. Touch “EDIT” to edit your information. The right is the running records. 12. SETTINGS... -
Page 24: Settings-Wi-Fi
13. SETTINGS-Wi-Fi. 14. SETTINGS-Date & Time Settings. - Page 25 15. SETTINGS-brightness setting. Touch the progress bar to change brightness. 16. SETTINGS-language.
- Page 26 17. SETTINGS-tip voice. You can touch the icon to turn on/off the tip voice. 18. SETTINGS-unit setting. ”KPH” is kilometers per hour, “MPH” is miles per hour. 19. SETTINGS-system information. Touch the “RESET” to reset the system to factory state. Touch the “CHECK FOR UPDATES”...
-
Page 27: Speed Control
20. SPEED CONTROL You can touch speed on the bottom data bar to enter this page. 21. INCLINE CONTROL Touch the incline on the bottom data bar to open this page. Attention: Some types of treadmill do not support incline control, if your treadmill does not support this, you cannot open this page. - Page 28 22. RUNNING RESULT II. Main function description Quick Start (manual mode) In standby mode, put the safety key, press the start button and the treadmill starts running with the slowest speed after 3 seconds of countdown. Touch speed +- or press speed shortcut keys to adjust the speed, and touch incline +- or press incline shortcut keys to adjust the incline.
- Page 29 Heart rate detection Hold the heart rate sensor on the right and left handle, the screen will display users’ heart rate after 5-15 seconds. The heart rate value is only a reference for exercise intensity, it cannot be considered as medical data. Emergency stop function: Under any conditions, the treadmill will stop when the emergency switch is off and the screen will display corresponding prompt...
- Page 30 Error Code Meaning Error Code Error description Way to solve 1)To Check if the communication wire is damaged and the terminal is well connected. The newly assembled treadmill shows this code should be checked the communication wire or terminal communication fault between MCB emphatically.
- Page 31 1) To check if the communication 1)the terminal of communication line is damaged or not, and the line is bad connected or damaged The display screen is not bright terminal is well connected or not. after power on 2) the power panel is damaged. 2) Replace the power board.
Need help?
Do you have a question about the TAC4000 and is the answer not in the manual?
Questions and answers