Table of Contents
Advertisement
Quick Links
Advertisement
Table of Contents

Related Manuals for SelectBlinds Wood Woven Shades


Summary of Contents for SelectBlinds Wood Woven Shades
- Page 1 2024.12 INSTALLATION GUIDE Lift Control: MOTORIZED...
- Page 2 CONTENTS INCLUDED IN YOUR PACKAGE SUGGESTED TOOLS (NOT INCLUDED) MOUNTING OPTIONS MOUNTING BRACKETS INSTALLING THE SHADE CARE AND CLEANING WARNING EMERGENCY / FIRST AID Thank you for Choosing our Wood Woven Shade for your Residential or Commercial Property. We are confident that you will find our Wood Woven Shade to be of superior quality and value, compared to other shades available.
-
Page 3: Included In Your Package
INCLUDED IN YOUR PACKAGE WOOD WOVEN SHADE MOTORIZED SCREWS Quantity: 4 per packet CHARGING BRICK / MICRO USB Quantity: 1 (10’ cable provided) per blind BRACKETS Quantity: 2 The wider the shade the more brackets provided - see chart below INSTALLATION BRACKET REQUIREMENT CHART Shade Width Brackets Required... - Page 4 SUGGESTED TOOLS (NOT INCLUDED) DRILL 1/16" drill bit, and 1/4" hex driver LEVEL PENCIL SCREWDRIVER Flat blade, Phillips, or 1/4" hex driver TAPE MEASURE LADDER...
-
Page 5: Mounting Options
MOUNTING OPTIONS Molding Top Sill Jamb OUTSIDE MOUNT(OB) INSIDE MOUNT(IB) Shade mounts outside Shade fits within Bottom Sill window opening window opening Your new shade is custom made to your specifications from the finest fabrics available. The installation should be easy and your shade will look elegant. Mounting NOTES: Mounting screws provided are suitable for most mounting surfaces. -
Page 6: Mounting Brackets
MOUNTING BRACKETS Illustration Installing Brackets: Inside mount: Mount brackets a minimum of 1” - 2” away from the edges of the product depending on the overall width of the shade. • Attach the brackets to the shade, placing the screw bolt through each route. Hold the shade up and mark the bracket or drill hole positions. - Page 7 Outside Mount: Outside edge of the brackets should be positioned at a minimum of 2” from the outside of the headrail cassette, note the sticker on the headrail cassette. Use wall anchors for a secure hold. Mark the position of the bracket as illustrated. •...
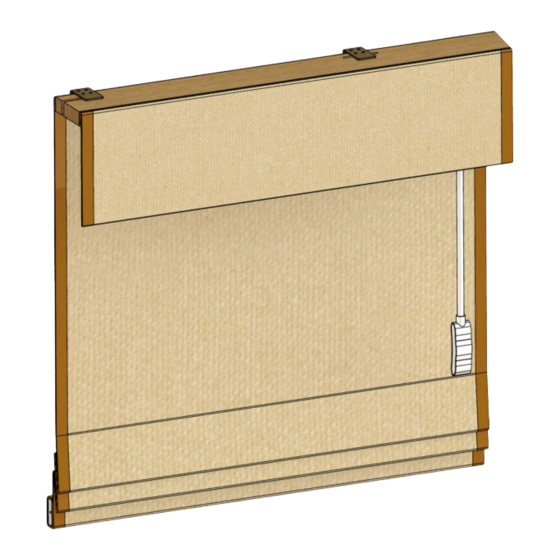
- Page 8 INSTALLING THE SHADE Illustration 2” 2” 1. Lift the head rail into position 6” End Slot End Slot Headrail 2. Slide the headrail into the brackets. 3. Place the wing nut on the post of each bracket and tighten by hand.
-
Page 9: Care And Cleaning
CARE AND CLEANING The soft, delicate feel of woven fabric with the durability of wood materials. It is made from a sturdy, woven fabric and wood slats which can be feather dusted or vacuumed on a low setting. Spots or stains can be lightly rubbed clean with a damp sponge and mild soap. To avoid discoloration of the material, we recommend against the use of chemical cleaners. -
Page 10: Important Safety Warning
WARNING WINDOW BLIND CORD STRANGULATION RISK: A damaged, loose, or missing tension device poses a strangulation risk to children. Remove from the use and repair or replace if tension device is damaged, loose, or missing. IMPORTANT SAFETY WARNING: Window cords can pose a potential strangulation hazard to young children. According to the U.S. Consumer Product Safety Commission, corded window coverings are among the top five hidden hazards in American homes. -
Page 11: Table Of Contents
2024.12 Remote & Safewand Motorized Instructions Remote & Safewand Motorized Instructions CONTENTS PAGE Getting Started: • Product Button/Headrail/Remote Battery Diagram------------2 • Exiting User Mode-------------------------------- -------------------3 • Switching Between Short/Continuous Movement--------------4 • Setting your Top Limit (Motorized Wand & Remote)----------4 • Setting your Bottom Limit (Motorized Wand & Remote)------5 •... -
Page 12: Product Button/Headrail/Remote Battery Diagram
PRODUCT BUTTON DIAGRAM: LCD Display UP Key Stop Key DOWN Key LEFT RIGHT UP Key LED Light Stop Key Setting Button DOWN Key Micro USB Charging Port DD2700H DD2702H Remote Control Multi Chanel Remote Control Motorized Wand HEADRAIL DIAGRAM: Setting key Micro USB Headrail setting key location: inside the side cover on the left or right side of the shade. -
Page 13: Exiting User Mode
EXITING THE USER MODE - WAND: 1. Hold the button for 15 seconds. 3. Use a pin to press the Settings Button once. 2. Solid Green light will be on. Setting Button 4. Green light will quickly blink twice You are now exited User Mode. Please move on to A. Setting the Top Limit or B. Setting the Bottom Limit EXITING THE USER MODE - REMOTE: Use Remote Control Settings (Single Frequency Remote control) 1. -
Page 14: Switching Between Short/Continuous Movement
EXITING THE USER MODE - REMOTE: Use Remote Control Settings (Multi-Channel Remote Control) Button CR2450 2. Press the P2 button once 1. Hold the Button for 15s to see the screen show O. until the screen shows U, then release. SWITCHING BETWEEN SHORT MOVEMENT / CONTINUOUS MOVEMENT MODE USING THE MOTORIZED WAND USING THE REMOTE CONTROL... -
Page 15: Setting Your Bottom Limit (Motorized Wand & Remote)
A. SETTING THE TOP LIMIT - USING THE REMOTE CONTROL Long press Up button so shade will continuously raise to top. Press Stop Button to set height. If need to move up or down, short press the Up or Down Button until desired height is reached. -
Page 16: Entering User Mode
ENTERING THE USER MODE (WAND) 1. Hold button for 15 seconds 3. Use Pin to press Setting Button once 2. Solid Green light will be on Setting Button 4. Green light will slowly blink twice You have now entered User Mode. ENTERING THE USER MODE - REMOTE User Mode: In this mode, the shades key combination debugging function is locked to avoid mis-operation by the user. -
Page 17: Adding Remote Control - Using Motorized Wand
ADDING THE REMOTE CONTROL - USING THE MOTORIZED WAND Press the Up button once. After motor rotation and 3 beeps, remote is paired. Setting Button Use Pin to press Setting Button once for 2 seconds. Listen for motor turning and long beep. Let go after beep. ADDING THE REMOTE CONTROL - USING THE HEADRAIL MOTOR CONTROL Press the Up button once. -
Page 18: Increasing Shade Lifting Speed
SHADE LIFTING SPEED ADJUSTMENT - INCREASE SHADE LIFTING SPEED THERE ARE THREE SHADE SPEEDS: 34R/MIN; 28R/MIN; 20R/MIN Button CR2450 Press the P2 button on the remote Short press the Up button on the Short press the Up button on the remote control. -
Page 19: Deleting Remote Control - Using Shade Motor
DELETING THE REMOTE CONTROL - USING THE SHADE MOTOR Press the shade motor setting button for about 2 seconds. Setting Button After motor rotates, motor will beep for a long time. Short press the Down button on the remote control for one second. The motor will rotate and beep 5 times, indicating that the remote control has successfully deleted the code. -
Page 20: Deleting All Remotes
DELETING ALL REMOTE CONTROLS Button Button CR2450 CR2450 Press the P2 button on the remote 2. Press the Stop button on the Press the P2 button on the remote control once again, the motor will control once, the motor will rotate remote control again, the motor once and will beep once. - Page 21 NOTES...
- Page 22 NOTES...
- Page 23 NOTES...
- Page 24 M O T O R I Z E D W A R R A N T Y We offer a 3-year warrnty on the Motorized E Series motor andcontrols. Specifically, we warrant tht the Fabric E Series rod motor and control are free from defects in material and workmanship under normal use and suitable for a period of 3 years from the date indicated on each product.
Need help?
Do you have a question about the Wood Woven Shades and is the answer not in the manual?
Questions and answers