Genexis FTU-300, FTU-100, FiberTwist Series Manual
- Installation manual (10 pages) ,
- Installation manual (8 pages) ,
- Installation manual (7 pages)
Advertisement
In the box

Installation guide
Choose configuration

 | Ingress 1 |
 | Ingress 2 |
 | Ingress 3 |
 | Patch-out |
- Choose one of the three ingress ports to use for the feeder fiber.
- If using ingress 1, please cut out the oblong on the baseplate. If using ingress 2, the oblong is already cut out by default.
- For a patch-out, cut out the rectangle at the bottom of the baseplate.
- Insert 2 zip ties in the set of holes matching your chosen configuration.
Mount the unit to the wall
De-assemble the FTU, so that the baseplate and FMU are separated.
Use the drilling template to mount the baseplate to the wall.
The baseplate can also be mounted directly on a wall junction box.
The drilling template is available on
https://genexis.eu/product/fibertwist/downloads#ftu


Attach pigtail or patch cable
- Remove the SC/APC coupler from the FMU.
- Take the protective cap off the top end of the coupler and off the fiber connector, and plug the fiber connector into the coupler.
- Put the coupler and fiber back in the FMU.
There is only one correct way to put the connector back in the FMU:
- The slots must be facing upwards.
- The single metal clip on the right hand side must face towards the middle of the FMU.


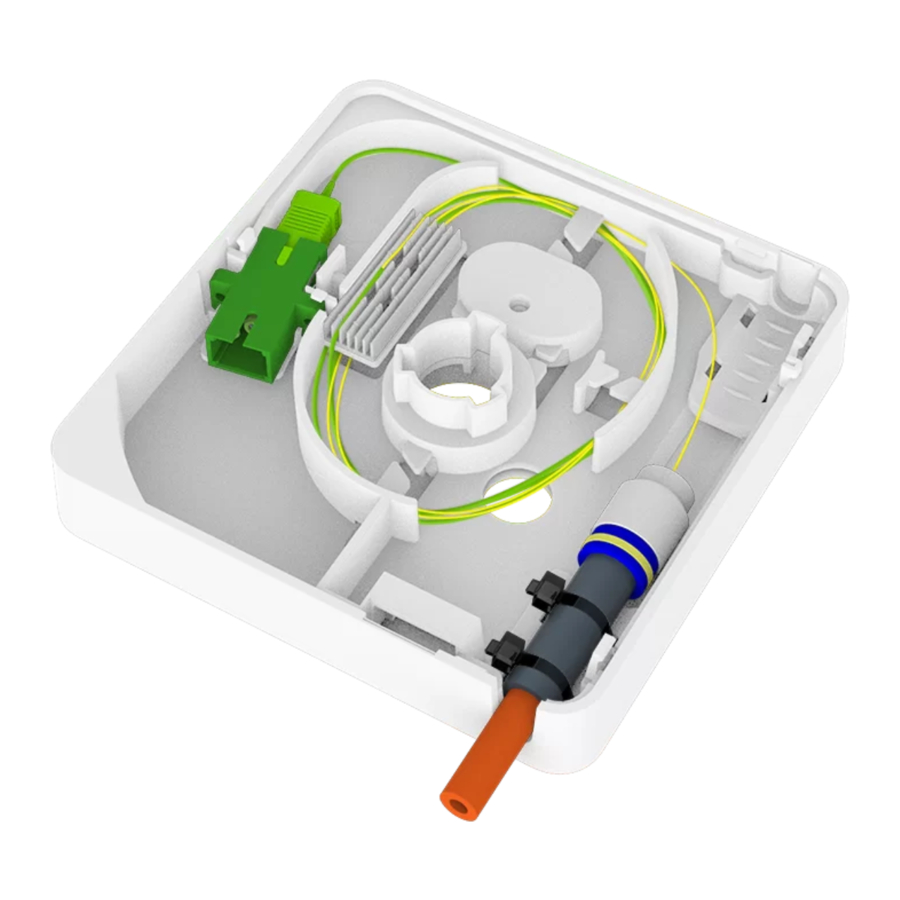
Attach feeder fiber

- If using ingress ports 1 or 2, insert the zip ties through the appropriate set of holes.
- Strip the outer sheath off the feeder fiber.
- If required, install a gasblocker. The gasblocker should rest in the recess.
- Peel the backing off the foam padding before wrapping it around the base of the feeder fiber.
- Position the feeder fiber in the FMU and secure in place using the zip ties. Trim the excess ends off the zip ties.
Splice fiber

- Place the appropriate splice holder.
- Splice the feeder fiber and pigtail together.
- Place the splice in the splice holder.
- Store the overlength fiber in the FMU.
- Perform any tests required to guarantee the quality of the splice.
WDM combiner
(optional)
A WDM combiner is used for terminating a network with CATV services on a separate RF-overlay fiber. Depending on the model it will be provided with a pre-installed WDM combiner. To install:

- Roll out the Data and CATV fibers.
- Splice these two pigtails to the corresponding feeder fibers.
- Place the two splices in the splice holder.
- Store the overlength fibers in the FMU.
- Perform any tests required to guarantee the quality of the splices.
Patch-out
(optional)
The device supports the ability to add patch out fiber cables.
Depending on the model these couplers and/or pigtails are pre-installed in the FMU.

- Connect the pigtail(s) to the patch out coupler.
- Splice the pigtail(s) with the feeder fiber(s).
- Place the splices in the splice holder.
Note: the number and type of patch out options depends on the specific FTU model.
Patch-in
(optional)
The device supports the ability to patch in fiber cables.
These connectors are pre-installed in the FMU.
- Please connect the fiber patch cable from the third-party FTU to the patch-in port of the FiberTwist FTU. Depending on the model, you need to place an SC or LC connector.


Finish installation

- Remove the remaining protective cap from the FiberTwist coupler.
- Place the FMU with the installed fibers on the baseplate.
- Click the transparent cover on the baseplate and FMU.
- Fasten the cover to the baseplate with the screw provided.
- If required, place a seal over the screw.
- Install the active unit or blind cover.
Documents / Resources
References
Download manual
Here you can download full pdf version of manual, it may contain additional safety instructions, warranty information, FCC rules, etc.
Advertisement


Need help?
Do you have a question about the FiberTwist Series and is the answer not in the manual?
Questions and answers