Genexis FiberTwist Series Installation Manual
Hide thumbs
Also See for FiberTwist Series:
- Installation manual ,
- Installation manual (7 pages) ,
- Installation manual (9 pages)
Table of Contents
Advertisement
Quick Links
Advertisement
Table of Contents

Subscribe to Our Youtube Channel
Related Manuals for Genexis FiberTwist Series


Summary of Contents for Genexis FiberTwist Series
- Page 1 FTU-1000 FiberTwist–Series Installation Guide...
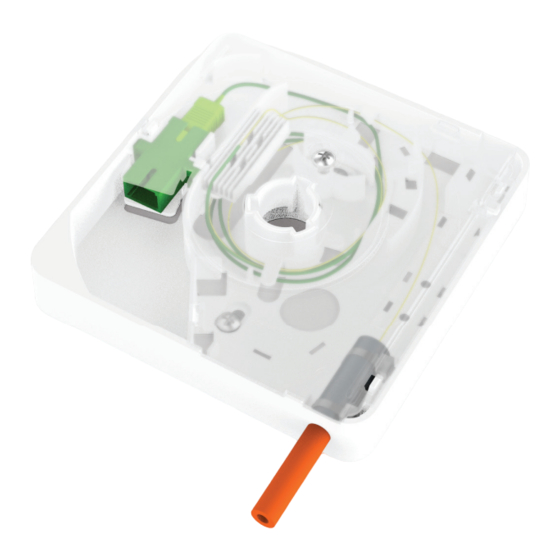
- Page 2 In the box Installation guide Choose con iguration • Choose one of the four ingress ports to use for the feeder fiber. • If using ingress port 1 or 2, cut out the oblong blank of the FTU. • If installing a patch-out, cut out the rectangle blank at the bottom of the FTU. •...
- Page 3 The FTU can also be mounted directly on a wall junction box. • Take the protective cap o� the top end and The drilling template is available on h tps: genexis.eu download-po tal ibe wist plug the fiber into the coupler.
- Page 4 A tach feeder iber Splice iber(s) • Strip the outer sheath o� the feeder fiber. • Place the appropriate splice holder. • If required, install a gasblocker. The • Splice the feeder fiber and pigtail together gasblocker should rest in the recess. •...
- Page 5 Thick cable suppo t (optional) Patch out (optional) The FTU supports the ability to connect to a – potentially pre-connectorized – The device supports the ability to patch out multiple feeder fibers. The patch port thicker cable. If needed, the highlighted pillars can be removed with pliers to create can be used with a duplex SC coupler or with a quad LC coupler.
- Page 6 SC (U)PC to SC APC (optional) Finish installation The device supports using a pre-connectorized fiber with a SC/(U)PC connector. • Remove the remaining protective cap from the FiberTwist coupler. • Insert a SC/(U)PC coupler as shown in the image. • Click the transparent cover on the FTU. •...
- Page 7 Revision 1.0 October 2019, Copyright © 2019 Genexis B. V . All rights reserved. Genexis assumes no responsibility for any inaccuracies in this document. Genexis reserves the right to change, modify, transfer, or otherwise revise this publication without notice.
Need help?
Do you have a question about the FiberTwist Series and is the answer not in the manual?
Questions and answers