Genexis FiberTwist Series Installation Manual
Hide thumbs
Also See for FiberTwist Series:
- Installation manual ,
- Installation manual (7 pages) ,
- Installation manual (7 pages)
Advertisement
Quick Links
Advertisement

Subscribe to Our Youtube Channel
Related Manuals for Genexis FiberTwist Series


Summary of Contents for Genexis FiberTwist Series
- Page 1 Bracket-2 FiberTwist Series Installation Guide...
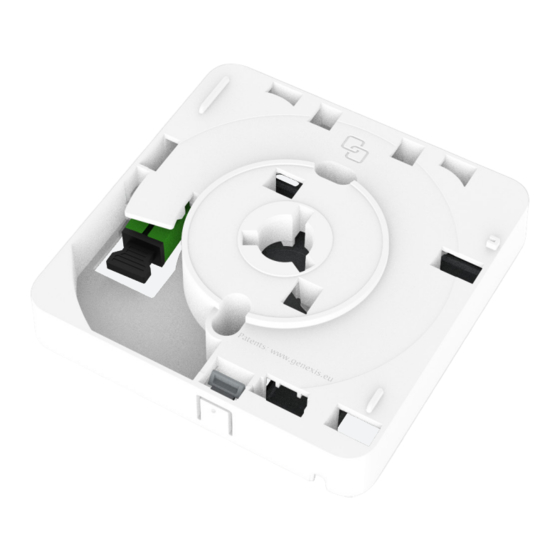
- Page 2 In the box wall plugs & screws Bracket-2 front view Bracket-2 patch-in Bracket-2 rear view rear view...
-
Page 3: Configuration Options
Configuration options Depending on the configuration option the following steps can be done: 1. Bracket-2: walk through all steps of this installation guide. 2. Bracket-2 with patch cable: start at the drill holes section of this installation guide. 3. Bracket-2 with patch-in connector: start at the drill holes section of this installation guide. - Page 4 Installation guide Choose configuration When your Bracket-2 has a pre-installed patch-cable or patch-in coupler, you can skip the steps described below and continue to the drill holes section. If not: • Choose one of the three ingress ports to use for the feeder fiber. •...
- Page 5 Attach patch cable When a patch cable is already pre-installed in the Bracket-2, or when it has a patch-in configuration, you can skip the steps described below and continue with 'Finish installation'. If not: • Remove the SC/APC coupler from the Bracket-2.
- Page 6 Store overlength of fiber Depending on which fiber ingress port was chosen, run the patch cord through the fiber management system in the appropriate fashion. It is important to run the fiber as shown below in order to avoid sharp bends that will cause signal degradation.
- Page 7 Drill two holes in the wall when needed, depending on wall surface. Insert the plugs so that the Bracket-2 can be screwed to the wall. Use the Bracket-2 to mark the location to drill holes, if needed a drilling template is available on https://genexis.eu/product/fibertwist/ downloads#bracket 60 mm...
- Page 8 Finish installation • Make sure all fibers are contained under the lips. • Screw the Bracket-2 to the wall or on the wall junction box. • Connect the loose end of the patch cable to your fiber outlet. • For the patch-in configuration, connect a patch cable between your fiber outlet and the patch-in connector.
- Page 9 Revision 1.1 September 2021, Copyright © 2021 Genexis Netherlands B. V . All rights reserved. Genexis assumes no responsibility for any inaccuracies in this document. Genexis reserves the right to change, modify, transfer, or otherwise revise this publication without notice.
Need help?
Do you have a question about the FiberTwist Series and is the answer not in the manual?
Questions and answers