
Related Manuals for GE phoenix x aminer


Summary of Contents for GE phoenix x aminer
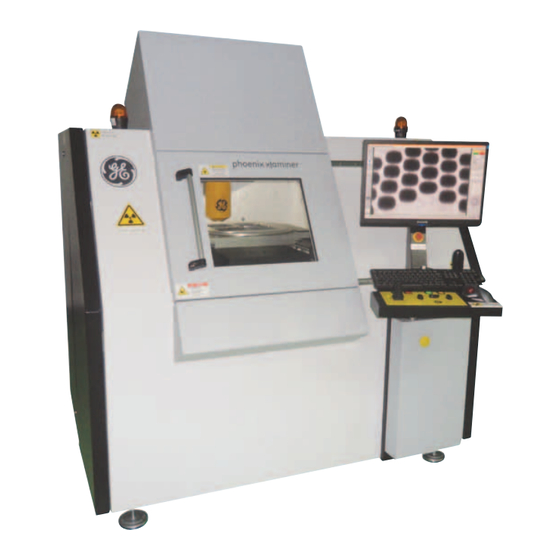
- Page 1 Measurement & Control Solutions Operating Manual X-ray inspection system phoenix x|aminer Original manual Do not commence any work before reading this instruction manual!
- Page 2 5/F, Building 1, No. 1 Huatuo Road, Zhangjiang Hi-Tech park, Pudong, Shanghai , 201203 , China Telephone: +86 (0) 800 915 9966 Fax: +86 21 3877 7488 Website: www.GEinspectiontechnologies.cn www.ge-mcs.com © GE Inspection & Control Technologies (Shanghai) Co. Ltd 2011...
- Page 3 X-ray inspection system phoenix x|aminer Table of Contents Table of Contents General Information about this instruction manual Symbols used in this document Limitation of liability Copyright Warranty Customer service Declaration of conformity Safety Proper use Operator responsibility Personnel requirements 2.3.1 Qualifications 2.3.2 UnAuthorized persons...
- Page 4 X-ray inspection system phoenix x|aminer Table of Contents Technical data Dimensional drawings General information Connection ratings Power ratings Operating conditions Emissions Installation location requirements Operating fluids Rating plate (example) Design and function Overview Brief description Description of the assemblies Equipment supplied 4.4.1 Accessories 4.4.2...
- Page 5 X-ray inspection system phoenix x|aminer Table of Contents System operation Safety instructions for system operation Setting up the operator station Switching the system on and off Setting up the X-ray tube and sample manipulator Opening and closing the sliding door Inserting the sample Positioning the sample Switching X-ray emission on and off...
- Page 6 X-ray inspection system phoenix x|aminer Table of Contents Maintaining the sample manipulator Maintaining and checking the radiation protection cabinet 9.8.1 Housing 9.8.2 Pane of lead glass 9.8.3 Sliding door Measures after maintenance is complete 10 Faults 10.1 Safety instructions for repairing faults 10.2 System messages 10.3...
- Page 7 X-ray inspection system phoenix x|aminer General 1 General Information about this instruction manual This instruction manual provides guidance on the safe and efficient use of the system. The instruction manual is an integral part of the system and must be retained in the immediate vicinity of the system so that it may be accessed at all times by the personnel.
- Page 8 X-ray inspection system phoenix x|aminer General Symbols used in this document Safety instructions Safety instructions in this manual are accompanied by the following danger symbols in addition to a one-word label which advises of the level of danger involved. To prevent accidents, personal injury and material damage, ensure that you follow the safety instructions and exercise caution at all times.
- Page 9 X-ray inspection system phoenix x|aminer General Specific safety symbols The following symbols are used in the safety instructions to draw attention to specific hazards: DANGER! Electricity! Non-observance of safety instructions bearing this symbol may result in death or serious injury. DANGER! Poisonous substances! Non-observance of safety instructions bearing this symbol may result in death or...
- Page 10 X-ray inspection system phoenix x|aminer General Limitation of liability All instructions and specifications contained within this instruction manual have been compiled in accordance with the pertinent standards and reg- ulations, the state of the art and on the basis of our long-standing know- ledge and experience.
- Page 11 X-ray inspection system phoenix x|aminer Safety 2 Safety This section provides an overview of the important safety-related factors that must be observed in order to ensure optimum protection of personnel and safe, trouble-free operation. Non-observance of the instructions and safety instructions provided in this manual may have dangerous consequences.
- Page 12 X-ray inspection system phoenix x|aminer Safety Operator responsibility The operator is considered to be the individual who, for commercial or Operator business purposes, operates the system himself or relinquishes it for use/ application by a third party and who bears legal responsibility for protecting the users, personnel or third parties during operation of the product.
- Page 13 X-ray inspection system phoenix x|aminer Safety Additional operator obligations The operator must appoint a radiation protection adviser in writing. The specific to the use of X-ray radiation radiation protection adviser appointed must possess the necessary spe-cialist expertise to be able to assess and control the X-ray radiation risk. He or she is also responsible for overseeing the precautions taken to counter the risks associated with X-ray radiation.
- Page 14 X-ray inspection system phoenix x|aminer Safety Personnel requirements WARNING! Insufficiently qualified staff presentation injury risk! Any unqualified personnel working on the system or 2.3.1 Qualifications situated within the hazardous area of the system are at risk of causing serious injury or significant material damage.
- Page 15 X-ray inspection system phoenix x|aminer Safety Trained person Trained persons have received training and instruction from the operator on performance of their specific tasks and the potential hazards associated with incorrect behaviour. Personnel may work with the system only if they can be relied upon to perform their work correctly.
- Page 16 X-ray inspection system phoenix x|aminer Safety Protective equipment Personal protective equipment is designed to protect personnel from health and safety hazards at work. Personal protective equipment must be worn for various system-related Personal protective equipment (PPE) activities. Special reference to the equipment required will be made in the individual sections of this manual.
- Page 17 X-ray inspection system phoenix x|aminer Safety Equipment to protect components Equipment to protect components must be worn to protect components or other materials that are to be inspected from becoming damaged or destroyed. Personnel must wear personal protective equipment to protect the com- ponents when performing the various activities with these components.
- Page 18 X-ray inspection system phoenix x|aminer Safety 2.5.1 Electricity-related hazards Electric current DANGER! Danger of death from electric current! Contact with electrically charged components puts you at immediate risk of death from electric shock. Damaged insulation or individual components can be lethal. Work on electrical equipment must be performed by qualified electricians only.
- Page 19 X-ray inspection system phoenix x|aminer Safety 2.5.2 Radiation-related hazards X-ray radiation WARNING! Danger of death from X-ray radiation! Frequent or sustained exposure to X-ray radiation can damage health (e.g. cause cancer) which may prove fatal. • Do not use the system to take X-rays of living animals or humans.
- Page 20 X-ray inspection system phoenix x|aminer Safety 2.5.3 Mechanical system-related hazards Moving parts WARNING! Risk of injury from moving parts! Sample manipulators which rotate and/or move in a linear motion can cause serious injury. • Do not open the sliding door during operation. Sharp edges and pointed corners CAUTION! Risk of injury from sharp edges and pointed corners!
- Page 21 X-ray inspection system phoenix x|aminer Safety 2.5.4 Hazards associated with high temperatures Hot surfaces WARNING! Risk of injury from hot surfaces! During operation, the surfaces of components can become very hot. Touching hot surfaces causes severe skin burns. • For all work in the vicinity of hot surfaces, always wear heat-resistant protective clothing and protective gloves.
- Page 22 X-ray inspection system phoenix x|aminer Safety 2.6.1 Safety device locations The following illustration shows the locations of the individual safety devices. Fig. 1: Safety device locations 1. Left-hand service door safety switches 2. Warning lamp, left 3. Sliding door safety switches 4.
- Page 23 X-ray inspection system phoenix x|aminer Safety 2.6.2 Description of installed safety devices The emergency stop button is located on the screen stand above the Emergency stop button keyboard. Pressing the emergency stop button stops the system by immediately cutting the power supply. This immediately stops the sample manipulator motion and the generation of X-ray beams.
- Page 24 X-ray inspection system phoenix x|aminer Safety Safety switches Two safety switches with two independent safety circuits are installed on the sliding door of the radiation protection cabinet. Opening the door during operation cuts the main power supply to the high- voltage generator, preventing X-ray and laser beam (optional) generation and halting the sample manipulator.
- Page 25 X-ray inspection system phoenix x|aminer Safety Securing against the system being switched back on WARNING! Danger of death if system is switched back on by unauthorized persons or in an uncontrolled manner! If the system is switched back on by an unauthorized person or in an uncontrolled manner it may result in serious injury or even death.
- Page 26 X-ray inspection system phoenix x|aminer Safety Main switch The main switch is located to the right on the front of the system beneath the key-operated switch. The main switch connects the system to the mains supply. 1. Switch off power supply by turning the main switch to the "0" position. 2.
- Page 27 X-ray inspection system phoenix x|aminer Safety Signage The following signs and symbols are used in and around the work area and relate to the immediate location in which they are situated. WARNING! Risk of injury due to illegible symbols! Over time, adhesive labels and signs may become soiled or otherwise damaged rendering them illegible and preventing people from being aware of risks or from following necessary instructions.
- Page 28 X-ray inspection system phoenix x|aminer Technical data 3 Technical data Dimensional drawings Fig. 11: Front view Fig. 12: Side view 2011-08-30...
- Page 29 X-ray inspection system phoenix x|aminer Technical data Fig. 13: Top view 2011-08-30...
- Page 30 X-ray inspection system phoenix x|aminer Technical data 3.2 General information Description Value Unit Weight approx. 2,050 Width 1796 Height 1985 Depth (excluding control console) 1815 Connection ratings Description Value Unit V ~ Voltage 230 +10% ~ -10% Electrical Frequency 50/60 +1% ~ -1% Max.
- Page 31 X-ray inspection system phoenix x|aminer Technical data Sample manipulator Description Value Unit Max. number of axes Max. scanning area 410 × 410 mm² M a x . s c a n n i n g a r e a ( w i t h o u t 510 ×...
- Page 32 X-ray inspection system phoenix x|aminer Technical data Installation location requirements The statics of the installation location must correspond to the weight distribution of the system (Fig. 13). The system must be installed in a sufficiently illuminated area. The system must not be installed in an area that experiences vibrations. The floor must have an even surface and be easy to clean.
- Page 33 X-ray inspection system phoenix x|aminer Design and function Rating plate (example) The rating plate is located at the back of the system, just above the mains connection on the lower left. It provides the following information: • Manufacturer • Manufacturer's address •...
- Page 34 X-ray inspection system phoenix x|aminer Design and function Design and function Overview Fig. 15: Assembly overview and arrangement 1. Radiation protection cabinet 2. Left-hand service doors 3. Warning lamp, left 4. Sliding door with pane of lead glass 5. Sample manipulator 6.
- Page 35 X-ray inspection system phoenix x|aminer Design and function Brief description The X-ray inspection system briefly comprises a radiation protection cabinet, X-ray tube, sample manipulator, image intensifier, vacuum system, high- voltage generator, control console and control panel. The radiation protection cabinet is accessed through a sliding door located on the front.
- Page 36 X-ray inspection system phoenix x|aminer Design and function X-ray tube The transmission X-ray tube is located inside the radiation protection cabinet above the sample manipulator and opposite the detector. The electron beam generator and transmission anode which are required to generate the X-rays are located inside the X-ray tube (fig.
- Page 37 X-ray inspection system phoenix x|aminer Design and function Control console The control console is located on the front of the X-ray inspection system beneath the screen. It comprises the following elements: Keyboard (fig. 21/1) Trackball (fig. 21/2) for operating the system PC and X-ray control software Rocker switches (fig.
- Page 38 X-ray inspection system phoenix x|aminer Design and function Equipment supplied 4.4.1 Accessories The accessories listed below are supplied as standard and come in a portable case. Portable case with accessories Description Quantity Special gloves 1 pair Special cleaning cloths 1 pack Bulb for warning lamp 2 set Fine-wire fuses...
- Page 39 X-ray inspection system phoenix x|aminer Design and function 4.4.2 Laser (optional) Laser as positioning aid As an option, two class 2 lasers (fig. 26/1) may be installed in the radiation protection cabinet . These lasers are used to indicate the position of the central X-ray beam between the X-ray tube (fig.
- Page 40 X-ray inspection system phoenix x|aminer Design and function PCB holder (Optional) This PCB holder is an tool to fixed the PCB board more. 1. Take off the CFK plate from the manipulator. 2. Place the PCB holder on the turntable of manipulator. 3.
- Page 41 Do not remove packaging without authorization. • If you need to move the system to a new location at a later date, please ensure that GE Sensing & Inspection Technologies and local authority is involved. • Transport temperature: -10°C to 45°C.
- Page 42 X-ray inspection system phoenix x|aminer Transportation Packaging Packaging must be disposed of in accordance with the pertinent legal Disposal of packaging materials requirements and local regulations. NOTE! Danger to environment from incorrect disposal! Packaging materials are valuable raw materials and, in many cases, can be reused or simply reprocessed and recycled.
- Page 43 Technologies or persons authorized by the manufacturer. • If you need to move the system to a new location at a later date, please ensure that GE Sensing & Inspection Technologies is involved. • Please inform the local officials 14 days before installation.
- Page 44 X-ray inspection system phoenix x|aminer System operation System operation 7.1 Safety instructions for system operation Improper use WARNING! Risk of injury from improper use! Improper use can cause serious injury and considerable material damage. Perform every step in accordance with the instructions and specifications contained within this manual.
- Page 45 X-ray inspection system phoenix x|aminer System operation 3. Move the control console up or down to the desired position. 4. Tighten the fixing screw. Repositioning of the control console is only possible if the fixing screw is loosened. Fig. 31: Pushbutton Positioning the screen 1.
- Page 46 X-ray inspection system phoenix x|aminer System operation Switching the system on and off Switching on CAUTION! Risk of material damage resulting from collision! If the sample is inserted before the system is switched on, the sample manipulator's reference run may result in a collision with the sample, damaging system components or the sample.
- Page 47 X-ray inspection system phoenix x|aminer System operation Switching off 1. In the "xs|control" dialogue box beneath "X-ray control", click the [OFF] button. 2. Close all programs and exit the operating system. 3. Turn the key-operated switch (fig. 34) to the "Off" position. •...
- Page 48 X-ray inspection system phoenix x|aminer System operation Setting up the X-ray tube and sample manipulator Personnel: Authorized qualified personnel Initializing the X-ray tube Every time the X-ray inspection system is switched on, the X-ray tube must be initialized to ensure a long and reliable service life. After the system is switched on, the X-ray tube is evacuated automatically.
- Page 49 X-ray inspection system phoenix x|aminer System operation Opening and closing the sliding door Personnel: Authorized qualified personnel Opening the sliding door 1. To open the X-ray protection cabinet, take the handle (fig. 35) and slide door to the right (fig. 35/arrow). Fig.
- Page 50 X-ray inspection system phoenix x|aminer System operation Inserting the sample CAUTION! Electrostatic discharge can cause material damage! Electrostatic discharge (ESD) from the human body can damage sensitive electronic components. • Before touching the sample, put on an ESD wrist strap and connect it to the ESD socket on the control console (fig.
- Page 51 X-ray inspection system phoenix x|aminer System operation 1. Move the support strut of the PCB holder to the left or right. 2. To adjust the PCB holder's support strut to the appropriate position. Fig. 39: Adjust the PCB holder , s support strut 3.
- Page 52 X-ray inspection system phoenix x|aminer System operation Rotation/tilt axis (optional) A rotation/tilt axis is supplied with the X-ray inspection system as an op- tion. With this axis, the sample can be tilted +/- 45° in a clockwise or an-ti- clockwise direction ( Section 7.7 "Positioning the sample" ). 1.
- Page 53 X-ray inspection system phoenix x|aminer System operation Positioning the sample CAUTION! Material damage resulting from careless operation of the sample manipulator! Careless operation of the sample manipulator can cause the system components to collide with the X-ray tube or sample, resulting in material damage. •...
- Page 54 X-ray inspection system phoenix x|aminer System operation While the ovhm|module (oblique view at highest magnification) is installed, Moving detector you can change the detector angle to achieve a vertical beam path. This enables the sample to be inspected from an oblique angle at the highest possible magnification.
- Page 55 X-ray inspection system phoenix x|aminer System operation Switching X-ray emission on and off X-ray emission is switched on and off using the xs|control software ( Section 8.3 "Using the software" ). Or, press the button “X-ray ON” (Fig.47/1) on the control console to turn x-ray on, and press the button “X-ray OFF”...
- Page 56 X-ray inspection system phoenix x|aminer Operating the X-ray controls Operating the X-ray controls xs|control The xs|control software is used to monitor and control the X-ray tube using a system PC. The software uses a serial interface to communicate with the X-ray controls.
- Page 57 X-ray inspection system phoenix x|aminer Operating the X-ray controls Item Name Description Switches on X-ray emission or restarts an aborted process (such as warm-up, if it had been aborted by opening the interlock). [ON] The button turns bright green when the system is ready to generate the X-ray beams.
- Page 58 X-ray inspection system phoenix x|aminer Operating the X-ray controls Displays the X-ray radiation. X-ray radiation The indicator flashes when X-rays are indicator being generated. Switches off X-ray emission or aborts a [OFF] running process, such as warm-up or centering. Tube current Regulates tube current between mini- regulator mum and maximum values.
- Page 59 X-ray inspection system phoenix x|aminer Operating the X-ray controls Additional Functions The "Additional Functions" control panel contains various status indicators and a number of additional functions for selection. Item Name Description Restarts system (vacuum, warm up [Restart] and heating current adjustment). Warms the system up to maximum [Warmup] high voltage.
- Page 60 X-ray inspection system phoenix x|aminer Operating the X-ray controls [Target Check] Optional. Starts the automatic target check. Status indicator "Centering": Green: The system is centred. "Centering" Red: The system is not yet centred or centering is not yet completed. Status indicator "Warmup": Green: The system is fully warmed up.
- Page 61 X-ray inspection system phoenix x|aminer Operating the X-ray controls Installing/uninstalling software The xs|control is usually installed on the system as standard. Installing However, if the software is to be installed by the operator, proceed as follows: Switch on the X-ray inspection system and start Microsoft Windows ®...
- Page 62 X-ray inspection system phoenix x|aminer Operating the X-ray controls Optimizing vacuum start Vacuum start can be optimized to avoid any associated problems. 1. Edit the "VacStartHelp" entry in the [GLOBAL] section: Default setting: 0 Optimized vacuum start: 1 Uninstalling To uninstall the xs|control software, proceed as follows: 1.
- Page 63 X-ray inspection system phoenix x|aminer Operating the X-ray controls Using the software Personnel: Authorized qualified personnel 8.3.1 Starting up the X-ray control software Starting xs|control The xs|control software usually starts automatically when the X-ray in- spection system is switched on. However, if you do need to start the software manually, proceed as follows: 1.
- Page 64 X-ray inspection system phoenix x|aminer Operating the X-ray controls Starting warm-up 1. From the "Additional Functions" control panel (fig. 52), click the [Warmup] button (fig. 52/1). Fig. 52: Start warm-up Adjusting the heating current During X-ray tube initialization, the heating current for the filaments in the cathode is adjusted automatically.
- Page 65 X-ray inspection system phoenix x|aminer Operating the X-ray controls 8.3.3 Switching the X-ray beams on and off The X-ray beams are switched on and off using the xs|control software. Switching on 1. From the "xs|control" main control panel beneath "X-ray control", click the [ON] button (fig.
- Page 66 X-ray inspection system phoenix x|aminer Operating the X-ray controls Adjusting the high voltage 1. From the "xs|control" main control panel: Adjust the "kV" regulator (fig. 57/)1 between the minimum and maximum high-voltage value or Enter the high-voltage setpoint value directly (fig. 57/2) or Change the high voltage in increments of 1 kV or 10 kV (fig.
- Page 67 X-ray inspection system phoenix x|aminer Maintenance Maintenance Safety instructions for maintenance Electrical equipment DANGER! Danger of death from electric current! Contact with electrically charged components can be fatal. Switched on electrical components may perform uncontrolled movements and cause serious injury. •...
- Page 68 X-ray inspection system phoenix x|aminer Maintenance X-ray radiation WARNING! Danger of death from X-ray radiation! Frequent or sustained exposure to X-ray radiation can damage health (e.g. cause cancer) which may prove fatal. • Switch off the system before all maintenance work. •...
- Page 69 X-ray inspection system phoenix x|aminer Maintenance Maintenance schedule The following sections describe the maintenance activities that are required to ensure optimum, failure-free system operation in single shift operation. If regular checks indicate accelerated wear and tear, reduce the respective service intervals according to the signs of wear actually observed. If you have any questions about the maintenance work or maintenance intervals required, please contact the manufacturer (see front cover (backside) for contact details).
- Page 70 X-ray inspection system phoenix x|aminer Maintenance Service access points To perform a number of the maintenance activities, you will need to open special service access points (fig. 59). You must never climb onto the roof of the radiation protection cabinet! The following service access points are available: Fig.
- Page 71 X-ray inspection system phoenix x|aminer Maintenance Personnel: Authorized qualified personnel Protctive equipment: Protective gloves Protective clothing Safety shoes Top service access point The service cover and radiation protection cover situated on top of the X-ray inspection system must be removed for the following maintenance activities: •...
- Page 72 X-ray inspection system phoenix x|aminer Maintenance You now have access to the high-voltage cable (fig. 62/1) and turbomolecular pump (fig. 62/2). 4. Perform maintenance activities ( Section 9.5 "Maintaining the high-voltage cable" or Section 9.6 "Maintaining the vacuum system" ). 5.
- Page 73 X-ray inspection system phoenix x|aminer Maintenance 4. Open the radiation protection door out to the left. You now have access to the interior of the radiation protection cabinet and the sample manipulator (fig. 65/1). 5. Perform maintenance activities (Section 9.8 "Maintaining and checking the radiation protection cabinet"...
- Page 74 X-ray inspection system phoenix x|aminer Maintenance Maintaining the X-ray tube If X-ray image quality deteriorates, the X-ray tube requires maintenance. A deterioration in quality may be an indication of any of the following: The filament is worn out: Section 9.4.1 "Replacing the cathode" . The target position currently set is exhausted (penetration damage): Section 9.4.2 "Changing the target position"...
- Page 75 X-ray inspection system phoenix x|aminer Maintenance Personnel: Authorized qualified personnel Protective equipment: Special heat-resistant, lint-free gloves Protective clothing Safety shoes 1. Move the sample manipulator to the lowest position to enable the X-ray tube to be opened. 2. From the "Additional Functions" control panel (fig. 68), click the [Vent System] button to vent the system.
- Page 76 X-ray inspection system phoenix x|aminer Maintenance 11. Insert both pins of the new, clean cathode into the retainer (fig. 72). It is vital that its sensitive surfaces do not become damaged! It is important that the cathode is completely flush. If necessary, turn the cathode 180°...
- Page 77 X-ray inspection system phoenix x|aminer Maintenance 9.4.2 Changing the target position If image quality deteriorates, the target may have suffered penetration damage. When this occurs, the target position must be changed. Within the tube head, the target may be rotated into different positions. There are a total of 40 different positions on the target surface which can be used as the focal spot.
- Page 78 X-ray inspection system phoenix x|aminer Maintenance 7. Using the supplied rotation tool (fig. 75/2), continue turning the target in an anti-clockwise direction to the next marking. 8. Secure the target retaining plate back in place by tightening the three socket cap screws. 9.
- Page 79 X-ray inspection system phoenix x|aminer Maintenance Once all 40 positions of the target ( Section 9.4.2 "Changing the target position" ) have been exhausted, the target must be replaced. Personnel: Authorized qualified personnel Protective equipment: Special heat-resistant, lint-free gloves Protective clothing Safety shoes Removing the target 1.
- Page 80 X-ray inspection system phoenix x|aminer Maintenance 1. Check the backscatter shutter for soiling and, if necessary, clean carefully Cleaning using acetone. The backscatter shutter is the 10 mm wide ring inside the head of the X-ray tube. 2. Check the O-ring and O-ring nut (fig. 80/1) on the X-ray tube head for soiling and clean.
- Page 81 X-ray inspection system phoenix x|aminer Maintenance Maintaining the high-voltage cable The high-voltage generator generates the high voltage required by the X-ray tube. The high-voltage cable carries the high voltage; flanges are used to connect it to the high-voltage generator and X-ray tube. Greasing the high-voltage cable The conical connector plug of the high-voltage cable needs greasing on both sides every 6 months.
- Page 82 X-ray inspection system phoenix x|aminer Maintenance Disconnecting the system from 1. Switch off the system and secure it against being switched back on the mains ( Section2.7 "Securing against the system being switched back on" ). 2. Remove the mains plug to disconnect it completely from the mains. X-ray tube connection 1.
- Page 83 X-ray inspection system phoenix x|aminer Maintenance 8. Carefully insert the high-voltage cable in the X-ray tube connector. Ensure that the contacts from the high-voltage cable do not become contaminated by the grease in the connection point. 9. Check bias voltage. Manually insert the cable cone as far as possible into the X-ray tube connector.
- Page 84 2. Loosen the four socket cap screws (fig. 88/4) on the cable flange (fig. 88/3) of the high-voltage cable. 3. Carefully disconnect the high-voltage cable (fig. 88/1) from the ge-nerator flange. Lead the tip of the cable to the housing to discharge it.
- Page 85 X-ray inspection system phoenix x|aminer Maintenance Maintaining the vacuum system Turbomolecular pump If the turbomolecular pump installed within the system was manufactured by Pfeiffer, the operating fluid reservoir with 9 Porex rods (Pfeiffer PM 143 740 T) must be replaced every 4 years. Replacing the operating CAUTION! fluid reservoir...
- Page 86 X-ray inspection system phoenix x|aminer Maintenance 8. The heat sink (Fig.89/4) is connected to the turbomolecular pump by four screws. Loosen the screws (fig. 89/3), remove the heat sink and store in a safe place (fig. 91). Do not wipe off any cooling paste on the heat sink! Fig.
- Page 87 X-ray inspection system phoenix x|aminer Maintenance Maintaining the sample manipulator Basic lubrication is applied to the sample manipulator at the factory. However, the grooves and spindles of the axes must be cleaned and greased every six months. Personnel: Authorized qualified personnel Protective equipment: Protective gloves Protective goggles...
- Page 88 X-ray inspection system phoenix x|aminer Maintenance 10. Clean the spindle and grooves of the z-axis with a lint-free cloth. 11. Lightly grease the spindle of the z-axis. 12. Using the lubricating nipple, lubricate the spindle nut through the hole in the slide plate (fig.
- Page 89 X-ray inspection system phoenix x|aminer Maintenance Maintaining and checking the radiation protection cabinet If the radiation cabinet becomes noticeably soiled, you should perform the following minor cleaning activities only: Pane of lead glass: Section 9.8.2 "Pane of lead glass" Sliding door: Section 9.8.3 "Sliding door" Before the system is used, the radiation protection cabinet must be in- spected for damage: Housing: Section 9.8.1 "Housing"...
- Page 90 X-ray inspection system phoenix x|aminer Maintenance 9.8.2 Pane of lead glass NOTE! Material damage caused by use of incorrect detergent! The high lead oxide content of the pane of lead glass makes it highly susceptible to scratches, acids and lyes. Using the wrong detergent may cause permanent damage to the pane of lead glass and impair its protective function.
- Page 91 X-ray inspection system phoenix x|aminer Maintenance 9.8.3 Sliding door If the grooves for the sliding door (fig. 98/1) are noticeably soiled, they have to be cleaned to ensure that the sliding door closes securely. Personnel: Trained person Cleaning the sliding door Protective equipment: Protective gloves Protective goggles...
- Page 92 X-ray inspection system phoenix x|aminer Faults 10 Faults The following section describes the possible causes of faults and the action required to remedy them. If you encounter any faults that cannot be remedied with the following actions, contact the manufacturer; for contact details, see front cover (backside) .
- Page 93 X-ray inspection system phoenix x|aminer Faults Improperly performed repairs WARNING! Risk of injury due to repairs performed improperly! Repairs that are performed improperly may cause serious injury and considerable material damage. • Before commencing work, ensure that you have sufficient room to work. •...
- Page 94 X-ray inspection system phoenix x|aminer Faults Fault clearance procedure The following generally applies: 1. If the fault presents an immediate danger to persons or property, perform an emergency stop immediately. 2. Identify the cause of the fault. 3. If work has to be performed in the hazardous area to repair the fault, switch off the system and secure it against being switched back on.
- Page 95 X-ray inspection system phoenix x|aminer Faults Typical system messages Message no. System messages Cause Remedy Time limit for Switch off system and perform a restart. vacuum exceeded Reading errors Vacuum gauge Vent the system and perform a restart. in vacuum system initialization error Use "Adjust Filament"...
- Page 96 X-ray inspection system phoenix x|aminer Faults 10.3 Fault table Description of errors Cause Remedy The external power supply has been Check the external power supply. interrupted. Main switch not switched on. Switch on the main switch. Emergency stop button has been activated. Unlock the emergency stop button. Key switch is not in the "ON"...
- Page 97 X-ray inspection system phoenix x|aminer Faults 10.4 Putting back into operation after fault repair After repairing the fault, the following steps must be completed to put the system back into operation: 1. Reset the emergency stop button by turning it anti-clockwise and pulling up. 2.
- Page 98 When the system has reached the end of its service life, it must be dis- mantled and disposed of in an environmentally sound manner. Please contact the manufacturer GE Sensing & Inspection Technologies before dismantling the X-ray inspection system. 11.1 Safety instructions for dismantling and disposal...
- Page 99 X-ray inspection system phoenix x|aminer Dismantling and disposal 11.2 Dismantling Before commencing the dismantling procedure: Personnel: Qualified electricians Disconnecting the system from the mains 1. Switch off the system and secure it against being switched back on. 2. Physically disconnect the system from the entire power supply and discharge all accumulated electric charge.
- Page 100 X-ray inspection system phoenix x|aminer Dismantling and disposal 11.3 Disposal If no return or disposal agreement has been made, arrange for the dis- mantled components to be recycled: • Arrange for metal to be scrapped. • Recycle plastics. • Sort all other components into their component materials and dispose of accordingly.
- Page 101 X-ray inspection system phoenix x|aminer Spare parts list 12 Spare parts list WARNING! Risk of injury resulting from the use of incorrect spare parts! The use of incorrect or faulty spare parts may put personnel at risk and cause damage, malfunctions or complete system failure.
- Page 102 X-ray inspection system phoenix x|aminer Spare parts list The following maintenance products or spare parts may be purchased directly from the manufacturer: Item Description Target Special gloves Special cleaning cloths Bulb for warning lamp Fine-wire fuses O-ring seals High-voltage silicone grease Manipulator maintenance kit (lubricant), optional Turbomolecular pump maintenance kit (optional) Preconfigured replacement cathodes...
- Page 103 X-ray inspection system phoenix x|aminer Training record 13 Training record The operator must provide regular training for personnel. For tracking purposes, an up-to-date training record must be kept for all employees. Type of training or Date Name Training given by Signature instruction 2011-08-30...
- Page 104 Update EMC Certification Number Declaration Inspection Technologies Conformity Declaration GE Sensing & Inspection (Changzhou) Co. Ltd. Declare in sole responsibility that the equipment to which this declaration applies is in conformity with the following directives and standards: EN 60204-1:2006 +A1:2008 2006/42/EC...
- Page 105 X-ray inspection system phoenix x|aminer Declaration of conformity EC Declaration of Conformity WI-MD02-423-IT Rev. x2 Page 2 of 3 Equipment Product: X-ray Inspection System Model: phoenix xIaminer Conformity Assessment Procedure Environmental and Use Conditions The X-ray inspection system is intended for industrial use and laboratory use. Its purpose is the non- destructive inspection of materials in a Controlled Electromagnetic Environment.
- Page 106 Person(s) Authorized to Compile the Technical File Eberhard Neuser / Niels-Bohr-Strasse 7, Wunstorf, 31515, Niedersachsen, Germany Issue Date Signatory Pandi Jiang Date Quality Leader GE Measurement & Control Solutions Shanghai, China Jeff Fortin Date Technology Leader GE Inspection Technologies Billerica, MA USA 2011-08-30...
- Page 107 X-ray inspection system phoenix x|aminer Appendix 15 Appendix 15.1 Power supply Note: 1. Any other configuration of the power supply may damage the system! 2. Transformer is only for the areas with power supply of 110V. 3. After installation, verification of fault loop impedance shall be performed according to EN 60204-1 Annex A. 4.
- Page 108 X-ray inspection system phoenix x|aminer Appendix 15.2 Circuit diagrams 2011-08-30...
- Page 109 X-ray inspection system phoenix x|aminer Appendix 2011-08-30...
- Page 110 X-ray inspection system phoenix x|aminer Appendix 2011-08-30...
- Page 111 X-ray inspection system phoenix x|aminer Appendix 2011-08-30...
- Page 112 X-ray inspection system phoenix x|aminer Appendix 2011-08-30...
- Page 113 X-ray inspection system phoenix x|aminer Appendix 2011-08-30...
- Page 114 X-ray inspection system phoenix x|aminer Appendix 2011-08-30...
- Page 115 X-ray inspection system phoenix x|aminer Appendix 2011-08-30...
- Page 116 X-ray inspection system phoenix x|aminer Appendix 2011-08-30...
- Page 117 X-ray inspection system phoenix x|aminer Appendix 2011-08-30...
- Page 118 X-ray inspection system phoenix x|aminer Appendix 15.3 Terminal diagrams 2011-08-30...
- Page 119 X-ray inspection system phoenix x|aminer Appendix 2011-08-30...
Need help?
Do you have a question about the phoenix x aminer and is the answer not in the manual?
Questions and answers