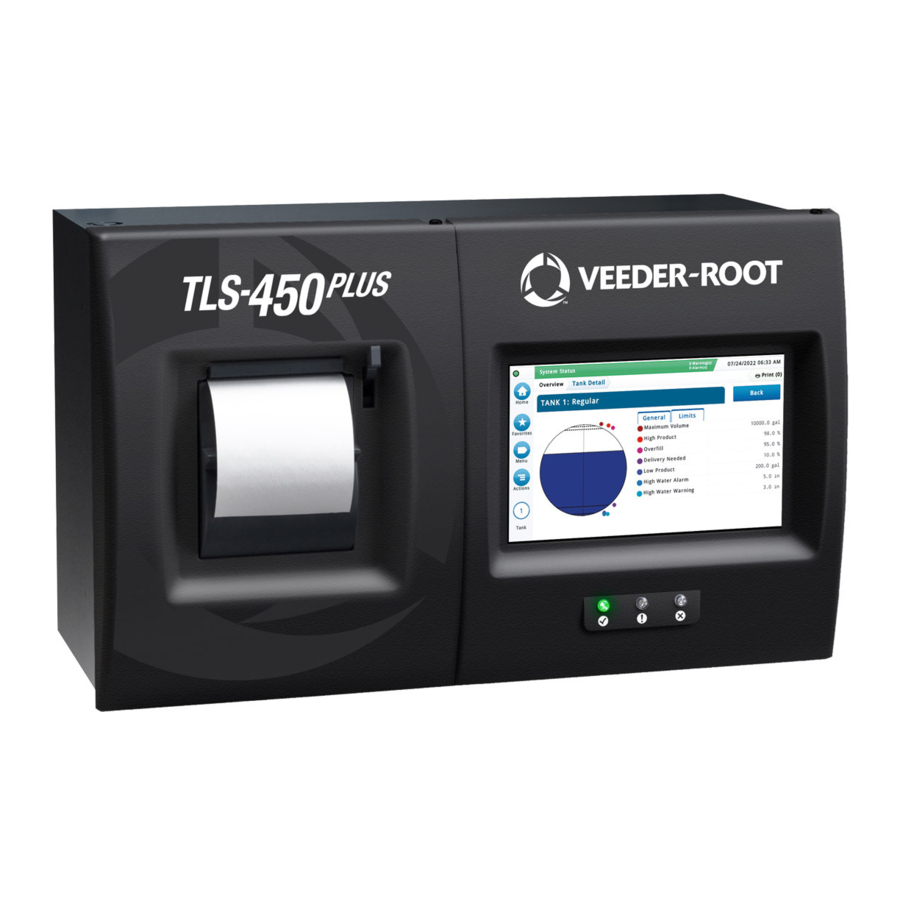
Veeder-Root TLS-350, TLS-450PLUS Manual
- System setup manual (227 pages) ,
- Troubleshooting manual (56 pages) ,
- Installation manual (45 pages)
Advertisement
- 1 Notice
- 2 Introduction
- 3 Removing The Existing Console
- 4 Installing The TLS-450PLUS Console
- 5 Initial Startup Procedure
- 6 Documents / Resources
Notice
Veeder-Root makes no warranty of any kind with regard to this publication, including, but not limited to, the implied warranties of merchantability and fitness for a particular purpose.
Veeder-Root shall not be liable for errors contained herein or for incidental or consequential damages in connection with the furnishing, performance, or use of this publication.
Veeder-Root reserves the right to change system options or features, or the information contained in this publication.
This publication contains proprietary information which is protected by copyright. All rights reserved. No part of this publication may be photocopied, reproduced, or translated to another language without the prior written consent of Veeder-Root.
Contact TLS Systems Technical Support for additional troubleshooting information at 800-323-1799.
DAMAGE CLAIMS / LOST EQUIPMENT
Thoroughly examine all components and units as soon as they are received. If any cartons are damaged or missing, write a complete and detailed description of the damage or shortage on the face of the freight bill. The carrier's agent must verify the inspection and sign the description. Refuse only the damaged product, not the entire shipment.
Veeder-Root must be notified of any damages and/or shortages within 30 days of receipt of the shipment, as stated in our Terms and Conditions.
VEEDER-ROOT'S PREFERRED CARRIER
- Contact Veeder-Root Customer Service at 800-873-3313 with the specific part numbers and quantities that were missing or received damaged.
- Fax signed Bill of Lading (BOL) to Veeder-Root Customer Service at 800-234-5350.
- Veeder-Root will file the claim with the carrier and replace the damaged/missing product at no charge to the customer. Customer Service will work with production facility to have the replacement product shipped as soon as possible.
CUSTOMER'S PREFERRED CARRIER
- It is the customer's responsibility to file a claim with their carrier.
- Customer may submit a replacement purchase order. Customer is responsible for all charges and freight associated with replacement order. Customer Service will work with production facility to have the replacement product shipped as soon as possible.
- If "lost" equipment is delivered at a later date and is not needed, Veeder-Root will allow a Return to Stock without a restocking fee.
- Veeder-Root will NOT be responsible for any compensation when a customer chooses their own carrier.
RETURN SHIPPING
For the parts return procedure, please follow the appropriate instructions in the "General Returned Goods Policy" pages in the "Policies and Literature" section of the Veeder-Root North American Environmental Products price list. Veeder-Root will not accept any return product without a Return Goods Authorization (RGA) number clearly printed on the outside of the package.
Introduction
This manual discusses removal of a TLS-350 console and replacing it with a TLS-450PLUS console. The instructions assume all site monitoring devices have been previously installed and site wiring is complete.
Contractor Certification Requirements
Veeder-Root requires the following minimum training certifications for contractors who will install and setup the equipment discussed in this manual:
Installer Certification (Level 1): Contractors holding valid Installer Certification are approved to perform wiring and conduit routing; equipment mounting; probe, sensor and carbon canister vapor polisher installation; wireless equipment installation; tank and line preparation; and line leak detector installation.
Technician Certification (Level 2/3): Contractors holding valid Technician Certifications are approved to perform installation checkout, startup, programming and operations training, system tests, troubleshooting and servicing for all Veeder-Root Series Tank Monitoring Systems, including Line Leak Detection. In addition,
Contractors with the following sub-certification designations are approved to perform installation checkout, startup, programming, system tests, troubleshooting, service techniques and operations training on the designated system.
- Wireless 2
- Tall Tank
Warranty Registrations may only be submitted by selected Distributors.
Safety Precautions
The following safety symbols may be used throughout this manual to alert you to important safety hazards and precautions
EXPLOSIVE  Fuels and their vapors are extremely explosive if ignited. | FLAMMABLE Fuels and their vapors are extremely flammable. |
ELECTRICITY  High voltage exists in, and is supplied to, the device. A potential shock hazard exists. | TURN POWER OFF  Live power to a device creates a potential shock hazard. Turn Off power to the device and associated accessories when servicing the unit. |
 WARNING indicates a hazardous situation which, if not avoided, could result in death or serious injury. |  NOTICE is used to address practices not related to physical injury. |
USE SAFETY BARRICADES  Unauthorized people in the work area are dangerous. Always use safety cones or safety tape to block access to the work area. | STATIC SENSITIVE COMPONENTS  Wear grounded anti-static wrist strap before handling the printed circuit board and mounted components. |
READ ALL RELATED MANUALS  Knowledge of all related procedures before you begin work is important. Read and understand all manuals thoroughly. If you do not understand a procedure, ask someone who does. |
Safety Warnings
| |
|
FAILURE TO COMPLY WITH THE FOLLOWING WARNINGS AND SAFETY PRECAUTIONS COULD CAUSE DAMAGE TO PROPERTY, ENVIRONMENT, RESULTING IN SERIOUS INJURY OR DEATH.
Connecting power wires to a live circuit can cause electrical shock that may result in serious injury or death. |


Related Documents
DOCUMENTS REQUIRED TO INSTALL EQUIPMENT
This equipment must be installed according to the applicable installation document:
| Equipment | ATEX Descriptive System | IECEx Descriptive System | UL/cUL Control Drawing |
| Document No. | Document No. | Document No. | |
| Associated Apparatus | |||
| TLS-450PLUS | 331940-006 | 331940-106 | 331940-008 |
| Intrinsically Safe Apparatus for Wireless Applications | |||
| Tank Gauge Accessories | 331940-005 | 331940-105 | 331940-012 |
REFERENCE MANUALS
577014-073 TLS-450PLUS Console Site Prep And Installation Manual
Removing The Existing Console
The key to a successful TLS-450PLUS retrofit installation is the careful removal of the old console and wiring. The first concern is safety, so if the console is in a public area of the store, barricade off the work area to prevent injuries.
![]()
- Prior to removing the TLS-350 console, print out the current TLS-350 console's setup configuration that will be used to program the TLS-450PLUS.
- Turn off, tag and lockout the breaker that supplies power to the TLS-350 console.
- Remove the door screws (with a T-15 Torx driver), open the console and unplug the power connector in the power bay. It's always a good idea to use a multimeter to confirm that the circuit is dead before pulling these wires through the console knockout.
- Verify all Intrinsically safe wires are labeled and their polarity (if applicable) noted before removing them. Verify all non-intrinsically wiring connections are labeled before removing them.
- Unplug the high and low voltage connectors from the console. After removing the wires from the connectors, plug them back into the modules.
- Disconnect and label all wires from the communication modules.
- Remove both ground wires, the chassis ground and the barrier ground, from the grounding lugs in the console.
- Loosen the power conduit ring, remove it and pull the wires through the knockout. Once both the high and low voltage wires have been removed, remove the console from the wall. Keep the mounting screws if possible because the mounting holes for the TLS-450PLUS match the mounting holes for the TLS-350.
- Remove the power and ground wires from the wire bundle if they were run in the same conduit with the High Voltage wires. A separate power conduit will need to be run to the TLS-450PLUS.
Installing The TLS-450PLUS Console
Mounting The Console
The TLS-450PLUS has the same mounting bolt pattern and approximate weight as the TLS-350. One major consideration for the placement of the TLS-450PLUS is to put the screen at eye level so it can be seen and touched.
The console is pre-punched for 3/4", 1" and 1-1/4" knockouts for Module Bay slot wiring access. Use a punch, not a drill to remove a knockout. Make sure that the conduit fitting ring is tight (see Figure 1). Never drill holes, expand existing holes or modify the enclosure in any way. Modifying the enclosure may invalidate all certifications and or warranties.

Figure 1. TLS-450PLUS Console Dimensions and Designated Conduit Knockouts
Opening the TLS-450PLUS doors
- Remove the both left and right door screws (with a T-15 Torx screwdriver) and swing open both doors to the left (see Figure 2).


Installing Module Bay Modules
The TLS-450PLUS doesn't have pre-assigned slots for the Module bay modules so use any of the four slots to accommodate intrinsically safe (USM) or non-intrinsically safe (I/O, MDIM, etc.) modules. Since the Module Bay modules can be installed in any of the 4 slots, install them where it makes the most sense for conduit connections.
USM MODULES
USM wiring inputs are intrinsically safe and conduit containing this wiring must enter above or below the slot in which the USM module(s) is installed.
- Figure 3 illustrates acceptable intrinsically-safe USM module positions in the Module Bay of the console. After installing the USM module in the console, loosen the connector input screws, insert the wires and tighten well.
- Make sure to terminate the ground shields to the ground lug on the module. The other end at the probe or sensor isNOT grounded.
- Write in the device name for each wire connection on the connector block in the module's wiring label attached to the inside of the door as you make a connection.
- Make sure to loop the wire neatly under the lip of the module. This will keep wires from interfering with the door when it closes.
- Avoid too much excess wire in the console. Pull unneeded wire back into the wiring trough if necessary.

I/O, MDIM OR LVDIM MODULES
- Figure 3 illustrates acceptable non-intrinsically safe module positions in the Module Bay of the console. After installing the I/O, MDIM or LVDIM module, loosen the connector input screws, insert the wires and tighten well.
- Write in the device name for each wire connection on the connector block in the module's wiring label attached to the inside of the door as you make a connection.
- Make sure to loop the wire neatly under the lip of the module. This will keep wires from interfering with the door when it closes.
- Avoid too much excess wire in the console. Pull unneeded wire back into the wiring trough.
- Close the right door and replace and tighten the top and bottom screws of the door when you have finished with the Module Bay wiring connections.
Installing Comm Modules
PRECAUTIONS AGAINST STATIC ELECTRICITY
Before removing electronic components from their antistatic bags read the following static electricity precautions.
- Before handling any components, discharge your body's static electric charge by touching a grounded surface or using a grounding strap.
- Do not remove parts from their antistatic bags until ready to install them.
- Do not lay parts on the antistatic bags! Only the insides are antistatic.
![]() When handling parts, hold them by their edges and their metal mounting brackets.
When handling parts, hold them by their edges and their metal mounting brackets.- Avoid touching components or edge connectors that plug into slots and wear the antistatic wrist strap (Part No. 576010-908) included in your component replacement kit.
- Never slide parts over any surface.
- Avoid plastic, vinyl, and Styrofoam in the work area
 When handling parts, hold them by their edges and their metal mounting brackets.
COMM MODULES
Table 1 lists Comm Modules for the TLS-450PLUS designed and manufactured by Veeder-Root.
Table 1. Communication Bay Modules
| Part No. | Item |
| 332818-001 | SiteFax/Modem Single Port Module |
| 333460-001 | Ethernet Module (Factory Installed Slot 4 Only) |
| 333477-001 | USB module (Factory installed Slot 5 Only) |
| 332866-001 | RS-232 Single Port Module (also used for EDIM or Satellite S-SAT or Satellite H-JBox Modules apps.) |
| 332868-001 | RS-232 Dual Port Module (also used for EDIM or Satellite S-SAT or Satellite H-JBox Modules apps.) |
| 332867-001 | RS-485 Single Port Module |
| 332869-001 | RS-485 Dual Port Module |
| 333807-000 | Tri-Comm Module |
| 333140-001 | CDIM Module |
| 333651-001 | IFSF LON Module |
COMM MODULE SLOTS
- The Comm Bay is divided into 5 slots numbered from 1 to 5 going from left to right. Only slots 1-3 are available for user-selectable Comm Modules (Figure 4). Slots 4 and 5 are fixed and can not be changed (see Figure 5).

Figure 4. TLS-450PLUS Console - Selectable Comm Modules

Figure 5. TLS-450PLUS Console - Fixed Comm Modules


COMM MODULE PORT CONFIGURATIONS
 To avoid attaching a Comm Module cable to a non-configurable (NC) port, identify the configurable (C) ports of any Comm Module being installed. Also verify the Comm cable port connections to Comm Modules in slots 4 and 5. Record all Comm port connections for use at setup.
User-selectable Comm Port configurations will depend on features ordered. Slots 1-3 (Figure 4) can be used for any combination of Comm Modules found in Table 2 or Table 3 as appropriate.
Table 2. Configurable (C)/Non-Configurable (NC) Ports for Selectable Comm Modules (Comm Bay Slots 1 - 3 Only)
| Comm Module | Comm Type | Slot 1 | Slot 2 | Slot 3 | |||
| Port | Port | Port | |||||
| 1 | 2 | 1 | 2 | 1 | 2 | ||
| RS-232 Single Port (also EDIM, Satellite S-SAT and Satellite H-JBox apps.) | Serial | NC | C | NC | C | NC | C |
| RS-232 Dual Port (also EDIM, Satellite S-SAT and Satellite H-JBox apps.)* | C | C | C | C | |||
| RS-485 Single Port | NC | C | NC | C | NC | C | |
| RS-485 Dual Port* | C | C | C | C | |||
| RS-232/RS-485 Dual Port* | C (RS-232) | C (RS-485) | C (RS-232) | C (RS-485) | |||
| Tri-Comm | C | C | C | C | |||
| SiteFax / Modem | NC | C | NC | C | NC | C | |
| CDIM | DIM | C | NC | C | NC | ||
| IFSF LON | C | NC | C | NC | C | NC | |
| *An unclearable alarm will be posted if this Comm Module is in Slot 3. | |||||||
If using a Tri-Comm Module (slots 1 or 2 only), refer to Figure 6 for Tri-Comm Module locations and Table 3 for TriComm Module port configurations.

Table 3. Tri-Comm Module Port Configuration
| Item | Port 1 | Port 2 | Port 3 | |
| Communication Type | RS-232 or RS-485 (Dependent upon jumper positioning) | RS-485 (Only) | Mini USB/Inquiry Only | |
| Connector Type | RJ-45 | RJ-45 | RJ-45 | Mini USB |
| Cable Pin Outs | RS-232
| RS-485
| Jumper Pins in VST position (default):
Jumper Pins in RS-485 position:
| ---------- |
| Data Bit Parity Stop Bit Data Rate | Configurable | Configurable | Fixed at:
| |
INSTALLING COMM MODULES
- Using a T-15 Torx driver, loosen the screw securing the Comm Module clamp until you can remove the clamp (see Figure 3).
- Remove the blank cover from underneath the desired comm slot by punching it into the console or by using pliers to remove it from the inside of the console. Be careful not to damage any internal components in the process of removing the blank cover.
- Place the new Comm Module in the slot. Align the edge connector on the back of the board in the center of the vertical connector on the Comm Backplane board and push in the module firmly as far as it can go. The sheet metal bracket of the Comm Module slides into the slot and is keyed in the front where the Comm Module clamp holds it down.
- After all Comm Modules are installed, replace the Comm Module clamp and the screw that secures it.
- Close the left door and replace and tighten the top and bottom screws of the door.
CONNECTING A LAPTOP TO THE TLS-450PLUS
Connect your laptop to one of the TLS-450PLUS Comm port using one of the methods shown in the in Figure 7 below.

Figure 7. Connecting Laptop to TLS-450PLUS for Serial Communication
If using a USB to DB9 Serial adapter cable (P/N 576040-170), or equivalent, you will need to follow the instructions shipped with the adapter cable.
Connecting The Power Wires To The Console
This section concludes the TLS-450PLUS retrofit installation by connecting power to the console.
- With the left of the console open, remove the two screws that attach the power connector cover plate (see Figure 3).
- With the cover removed, notice the power connector already attached to the console. This is where the power input wires connect.
- Next, remove the knockouts for console power and install the conduit from the power trough to the console. If local codes require rigid conduit, plan carefully before knocking out these holes. The console is prepunched for ½" conduit. This should be large enough since the only wires going through this conduit will be for L1, neutral, panel ground and earth ground, and possibly 1 relay. Refer to manual 577014-073 for proper wire gauge.
- Next strip the ends of the power wires brought into the console. Referring to Figure 8 and to the locations printed where the power connector attaches to the console, attach the L1, panel ground and neutral wires to the connector block.
- Next, attach the barrier ground (sized as shown in Figure 8) to the grounding clamp.

Figure 8. Wiring AC Power to the TLS-450PLUS Console

POWER WIRING NOTES:
- Barrier ground wire requirements:
- For UL/cUL approved systems, use a 12 AWG barrier ground wire
- For ATEX/IECEx approved systems, use a 4 sq. mm barrier ground wire
- Use an ohmmeter to check the electrical resistance between the console's metal case and the power panel's earthing ground wire connection at the 'known good ground'. It should read less than 1 ohm.
- Connect the power supply wires in the power panel to a separate dedicated circuit.
- Electrical rating of power input - 120 or 240 Vac, 50/60 Hz, 2 A maximum.
- See Figure 1 for locations of power conduit knockouts into the console. Power wiring must enter the console through designated knockouts.
- Plug in the power connector and route the wires so that the cover plate will conceal them when installed.
- Replace the power connector cover plate using both screws and close the bay door.
- Reconnect the communication wires to the appropriate comm cards. Wires which are not used on the TLS450PLUS should be pulled back into the wiring trough. If necessary, seal up the power trough.
- Return to the panel, remove the lock-out/tag-out device and label the breaker with the supplied self-adhesive label. Re-energize the circuit and start up the unit.
Initial Startup Procedure
After installing the TLS-450PLUS console follow the appropriate initial startup procedure below:
FOR SITES WITHOUT WIRELESS 2 DEVICES
- Power up the TLS-450PLUS and wait 5 minutes until the console's 'Discover Mode' is complete.
- Setup the TLS-450PLUS.
FOR SITES WITH WIRELESS 2 DEVICES
- Power up all wireless devices.
- Power up the TLS RF console and wait about 5 minutes, before applying power to the TLS-450PLUS.
- Power up the TLS-450PLUS and wait 5 minutes until the console's 'Discover Mode' is complete.
- Setup the TLS-450PLUS.
Documents / ResourcesDownload manual
Here you can download full pdf version of manual, it may contain additional safety instructions, warranty information, FCC rules, etc.
Advertisement


Need help?
Do you have a question about the TLS-350 and is the answer not in the manual?
Questions and answers