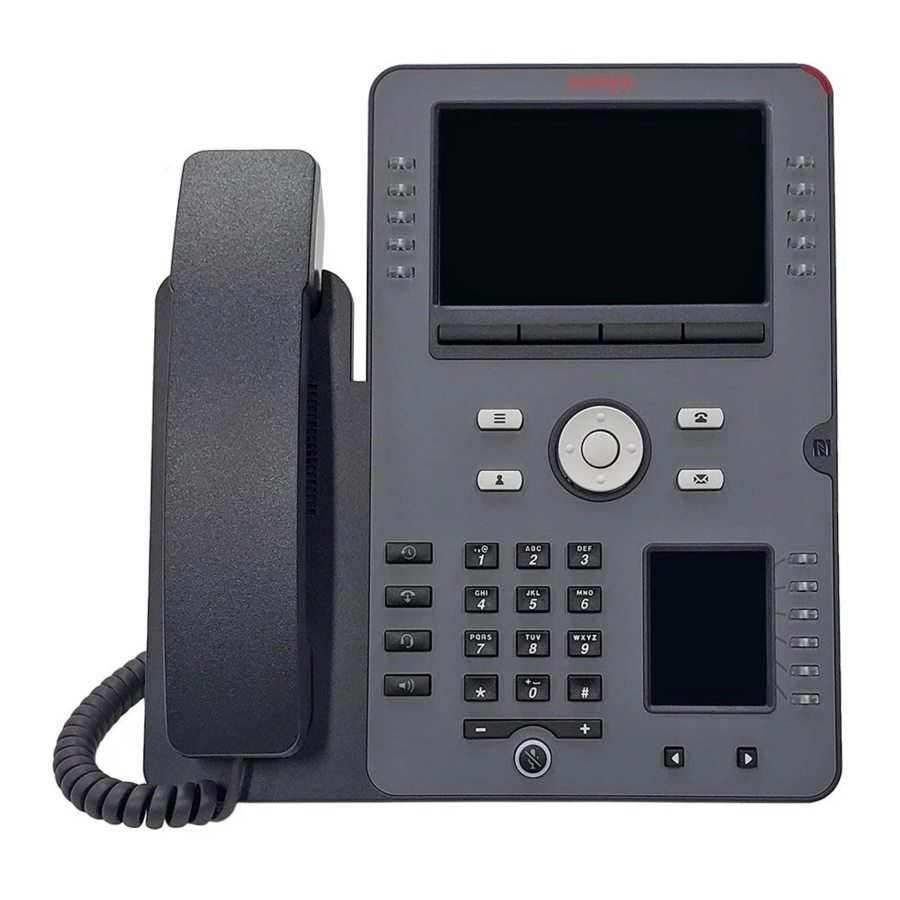
Avaya J189 Manual
- Instructions manual (163 pages) ,
- Using manual (150 pages) ,
- Manual (139 pages)
Advertisement
Main menu
The following table lists the Main menu icons used in Avaya J189 IP Phone:
| Icons | Name | Description |
 | Features | To access the administrated features. |
 | Applications |
|
 | Settings | To change your phone settings, customize button labels, adjust brightness, audio settings, assign speed dial entries, etc. Used to view the connected USB devices such as USB stick and keyboard. |
 | Network information | To check network settings. |
 | Administration | To access administration settings. |
 | About | To view the phone software version. |
General phone icons
The following table lists the icons used in the Avaya J189 IP Phone:
| Icon | Description |
 | Microphone is muted. |
 | Missed call on your phone. You can see the Missed Call icon in the Recents application. |
 | Missed call reason on your phone. You can see the additional context for the missed call. |
 | Incoming call indicates you answered this call. You can see the Incoming Call icon in the Recents application. |
 | Outgoing call indicates you made this call. You can see the Outgoing Call icon in the Recents application. |
 | The Bridged Call icon indicates the line is used for a call on another phone. |
 | Incoming call is alerting. |
 | Outgoing call indicates you made this call. |
 | Call is active. |
 | Call is on hold. |
 | Call is on hold during a conference or transfer call setup. |
 | Conference is active. |
 | Conference is on hold. |
 | Use the Right or Left navigation arrow to see more pages, screens, or options. |
 | Scroll left for more options. |
 | Scroll right for more options. |
 | Team icon indicating the team member is available. |
 | Team icon indicating the team member is busy on a call and unavailable. |
 | Team icon indicating the team member is not on a call, but is forwarding incoming calls. |
 | Team icon indicating the team member is busy on a call and is forwarding incoming calls. |
 | Indicates that the phone is not connected to the call server and operates in Failover mode. Some features might not be available or work incorrectly. If the appearance line displays this icon, it indicates that the phone encountered a failure and preserved the media session until the user hangs up. This icon can also indicate that the phone is connected to the call server but the features are not available. |
 | The EC500 feature is on. |
 | The Do not disturb feature is on. |
 | The Send All Calls feature is on. |
 | The Send NN feature is on. |
 | The Call forward feature is on. |
 | Indicates that the call uses a wideband codec for excellent voice quality. |
 | Indicates a low network performance or local network issues that might result in lower call quality. |
 | The Limit Number of Concurrent Calls (LNCC) feature is on. |
 | Indicates that the SLA Mon™ agent took control of the phone. |
 | Indicates that the call is recorded for SLA Mon™. |
 | Indicates that the audio of this call is secure. |
 | Indicates that the audio alert for incoming calls is off. |
 | Indicates the Bluetooth feature is on. |
 | Indicates that you missed a call. The number in the icon indicates the number of missed calls. In the example icon, the agent missed 9 calls. |
 | Indicates that you missed a call. The plus sign (+) in the icon indicates that the number of missed calls is more than 9. |
 | Autodialing feature. |
 | Toll call. |
 | Toll-free call. |
 | Caller ID validation passed. |
 | Caller ID validation failed |
 | Unknown caller ID validation. |
Wi-Fi icons
The following table lists the Wi-Fi icons used in the Avaya J189 IP Phone:
| Icon | Description |
 | Non-secure Wi-Fi network is detected. |
 | Secure Wi-Fi network is detected. |
 | Wi-Fi network is out of range or offline. |
Getting started
Logging in to your phone with the SSO QR code or URL
You can log in to your phone with your Single sign-on (SSO) credentials using your mobile device or computer. Your phone administrator configures the SSO feature for your extension. After the SSO authentication, the phone automatically logs you in.
Ensure the following:
- Your phone administrator configures the SSO feature.
- Your mobile device can scan a QR code.
- On the Single Sign On screen, pressLogin.
The phone screen displays the QR code and the timer. If the timer runs out and the QR code expires, tap Retry. - Depending on your choice of device, do the following:
- If you are using a mobile device, scan the QR code. When the QR code scan displays a URL on your mobile device, tap the URL.
- If you are using your computer, pressLink. Enter the URL in your computer browser and follow the prompts.
The screen displays the SSO login page of your organization.
- On the SSO login screen, enter your corporate username and password.
The phone screen displays the Successful authentication message. - Follow the screen prompts.
You are logged in to your phone.
Logging in to a phone as a Guest user with SSO login
With the Guest user SSO login feature, you can log in to a phone as a guest user with the SSO authentication for a specified period.
Ensure that your administrator configures the Guest user SSO login feature.
- Press Main Menu.
- Scroll to Applications and press Select.
- Scroll to Guest login and press Select.
- On the Single Sign On Guest login screen, press one of the following to set the duration in hours:
- Right arrow key: To increase the duration value.
- Left arrow key: To decrease the duration value.
- Press Enter.
The phone screen displays the QR code and the timer. If the timer runs out and the QR code expires, tap Retry. - Depending on your choice of device, do the following:
- For a mobile device, scan the QR code. When the QR code scan displays a URL, tap the URL.
- For a computer, press Link. Enter the URL in your computer browser and follow the prompts.
The screen displays the SSO login page of your organization.
- On the SSO login screen, enter your corporate username and password.
The phone screen displays the successful authentication message. - Follow the screen prompts.
You are logged in to your phone.
Logging in to your phone with corporate credentials
You can log in to your phone with the extension and password that your phone administrator provides if the Single sign-on (SSO) feature is not active.
- On the Login screen, in theUsername field, type your extension.
- Press Enter.
- In the Password field, type your password.
- Press Enter.
Logging out of your phone
You can log out of your primary extension when you log in through a Single sign-on (SSO) or SIP login. You can also log out of the SIP login as a guest user.
 Note:
Note:
After a guest user logs out, the phone logs back the primary user.
- Press Main Menu.
- Scroll to Applications and press Select.
- Scroll to Log out and press Select.
- In the confirmation window, pressLog out.
Locking your phone
Lock the phone while you are logged in to prevent unauthorized usage. Locking the phone does not log you out. You can receive all incoming calls and make calls to emergency numbers.
If the Single sign-on (SSO) feature is active on your phone, you cannot lock the phone before setting a PIN.
- PressMain menu.
- SelectApplications > Lock.
Operations
Making a call by using speed dial
Ensure you have speed dial numbers assigned to your contacts.
Press and hold the dial pad key assigned to the number you want to call.
Making an emergency call
Ensure that the Emerg soft key is assigned by your administrator.
Do one of the following:
- On the Phone screen, press theEmerg soft key, and again press Emerg when the phone prompts you for confirmation.
- Dial the emergency number by using the dial pad.
Answering a call when on another call
You can receive a call on a secondary call appearance only if the call appearance is free.
Press one of the following:
- TheAnswer soft key
- OK Button
The phone puts the first call on hold and moves to the second call.
Adding a person to an active call
You can add participants to an active call to set up a conference call.
Start a call.
- During a call, on the Phone screen, press More > Conference.
The phone puts the existing call on hold. - To make a call to a participant, do one of the following:
- Dial the phone extension by using the dial pad.
- Call the person from the Contacts list or the Recents list.
- When the third participant answers the call, press theJoin soft key.
- To add another person, press Add and repeat Steps 2 and 3.
Contacts
Adding a contact from the Recents list
Use this procedure to add a number to your Contacts list from your call history.
- PressRecents.
- Scroll to the required number and press+Contact.
- In theFirst name and Last name fields, type the relevant information.
The phone assigns the extension number to Last name. You can remove the extension number from this field and add other information. - PressSave.
Creating a local Сontacts group
- Press Contacts.
- (Optional) To navigate through Main menu, do the following:
- Scroll to Applications and press Select.
- Scroll to Contacts and press Select.
- Press Groups.
- Press NewGroup.
- In the Enter group name field, type your group name.
- Press Save.
Advanced features
Call forwarding to your cell phone using EC500
Use this procedure to forward calls from your Avaya deskphone to your personal phone.
- Ensure that your administrator enables the feature.
- Ensure that the system administrator sets your personal phone number as your destination number.
- Press the Main menu and scroll to Features.
- Press Select.
- Scroll to EC500 and press Select.
Making a priority call
Use the Priority Calling feature to provide users with a special internal call alert. The called party hears a distinctive ringing when the calling party uses Priority Calling.
The call rings even at an extension with Do not disturb enabled.
Ensure that the administrator enabled the feature invocation target selection.
- Press theMain menu.
- Scroll toFeatures and press Select.
- Scroll down toPriority Call, press OK, or press the corresponding line button.
You can see the Select a destination dialogue box. - Do one of the following to enter the number you want to set as a priority:
- Press the Dial soft key to use the dialpad and manually enter the number.
- Press Contacts, Recents or Phone button to select the number from the list.
- Press the Browser soft key to select the destination number from the browser application.
- Press the Autodial, Busy indicator or Team line key to select the number as destination target.
The Priority feature is activated.
- Press Enter or OK to activate the feature in case of manual dialling.
- (Optional) To cancel the priority call, press the Cancel soft key.
Listening to your voicemail
Use this procedure to listen to your voicemail on your phone.
- Ensure that the system administrator configures the voicemail for your extension.
- Obtain the user ID and password of your voicemail from your system administrator.
- To log in to your voicemail, press the Message button.
- Follow the voice prompts to playback your voice messages.
Making a precedence call by using the Main menu
- Press Main Menu.
- Scroll to Applications and press Select.
- Select Call Priority.
- On the Precedence Selection screen, select the precedence level.
- Dial the extension from one of the following:
- Contacts
- Recents
- The dial pad
Joining a call on a bridged line
On the phone, do one of the following:
- Press the line button with the active call.
- Select an active bridge line number and pressBridge.
Note:
Do not use Headset, Handset or Speaker softkeys to join the call on a bridged line. Pressing Headset, Handset or Speaker opens the Dial screen. To cancel dialing and to press the required line button for joining a call, press the End Call key.
Making a consultative transfer
Transfer a call by connecting a call with the transfer recipient.
Ensure that your administrator enables the feature.
- While on an active call, press Transfer soft key.
The phone displays the Select a destination dialogue box.
The first call is placed on hold. - Do one of the following and then press theCall soft key:
- Dial the number to transfer the call.
- Search for the number in Contacts or Recents.
- Press the Team line key to transfer the call to the configured team button.
You must configure the team button to use as your target selection.
- To initiate a consultative transfer, press Talk.
The call transfer recipient's phone starts ringing. - Do one of the following:
- Press Complete after the recipient answers the call.
The call transfer is complete. This is also called attended transfer. - Press Complete after the recipient's number starts ringing.
The call transfer is complete. This is also called unattended transfer.
- Press Complete after the recipient answers the call.
Making a blind transfer
Use this procedure to transfer an active call without connecting a call with the transfer recipient.
Ensure that your administrator enables the feature.
- While on an active call, press Transfer.
The phone displays the Enter Transfer Destination screen. - Do one of the following and then press the Call soft key:
- Dial the number to which you want to transfer the call.
- Search for the number in the Contacts or Recents list.
- To initiate a blind transfer, press Now.
The call transfer is complete.
Parking a call
Use Call Park to park an active call from your phone extension.
Contact the administrator to activate Call Park on your extension.
- Press Main menu.
- Scroll to Features and press Select.
- Scroll to Call Park and press Select.
Depending on the server configuration, the feature LED can provide one of the following indicators:
- The green LED turns on, indicating that the call parking is complete. The green LED stays on until the call is unparked or returned.
- If the administrator configures the parking lot display timer, the green LED turns on and the Call Park feature button displays the parking lot extension number for a specific duration. After this duration, the Call Park button is available for parking.
Retrieve the call from another extension using Call Unpark. If not unparked within the configured duration, the parking lot returns the call to the parking extension.
Unparking a call
Use Call Unpark to retrieve a parked call.
Contact the administrator to activate Call Unpark on your extension. Obtain the extension number where the call is parked.
- PressMain menu.
- Scroll toFeatures and press Select.
- Scroll toCall Unpark and press Select.
- Enter the extension number and pressSelect.
The call resumes, and the call park LED on the parking extension turns off.
Customization
Changing the phone display mode
You can change the phone display mode to Dark or Light with the Display Mode feature. The font color is black if you set the display mode to Light. The font color is white if you set the display mode to Dark.
Contact your phone administrator if you cannot see the settings to change the display mode.
- Press Main Menu.
- Scroll to Settings and press Select.
- Scroll to Display and press Select.
- Scroll to Display Mode and press Select.
- Press Toggle to switch between Light and Dark.
- Press Save.
Enabling and disabling Bluetooth
You can use Bluetooth enabled devices with your phone.
Ensure the wireless module is installed in your phone.
- Press Main Menu.
- Scroll to Settings and press Select.
- Scroll down to Bluetooth and press Select.
- Scroll to Bluetooth headset and press one of the following:
- Toggle: To enable or disable Bluetooth.
- Right Arrow key: To enable Bluetooth.
- Left Arrow key: To disable Bluetooth.
Note:
For some Bluetooth headsets, volume can be adjusted during the first call after rebooting the phone. Toggle the slider of the pop-up panel to the right to increase the volume, and to the left to decrease it.
Pairing a Bluetooth enabled headset with your phone
You can pair a maximum of six Bluetooth-enabled headsets with the phone, but you can use only one headset at a time. The phone displays the list of available devices and paired devices.
- Ensure the wireless module is installed on your phone.
- Ensure that your administrator enables the feature.
- Ensure your Bluetooth headset is in pairing mode.
- Press Main Menu.
- Scroll to Settings and press Select.
- Scroll down to Bluetooth and press Select.
- Scroll to Devices and press Select.
The phone scans and displays the list of Bluetoothenabled devices. - To pair a device, scroll to the headset and press Pair.
- To disconnect a paired headset, under Paired devices, press Disconnect.
- To unpair a paired headset, under Paired devices, press Forget.
Customizing phone keys
Use this procedure to add, relabel, move, or delete contacts, features, or applications from the Phone screen.
Ensure that the administrator has set Full or Limited customization mode. You cannot customize phone keys in the Blocked mode and can customize labels and Contact and Application favorites in the Limited mode.
- Press Main Menu.
- Scroll to Settings and press Select.
- Scroll to Phone and press Select.
- Scroll to Phone keys customization and press Select.
The customization menu is not available in the Blocked mode. - Press the Customize key.
- Use the Navigation keys to select the line key.
- (Optional) On the phone screen, if the selected line is empty, press Add and do the following:
- To add a contact, press Contact.
- To add a feature, press Feature.
The option is not available in the Limited mode. - To add an application, press App.
You can use the Navigation keys to scroll to the required functionality and press Select.
- To move the selected line key, do the following:
- Press Move.
- Use the Navigation keys to move the selected line key.
- (Optional) If the new location is empty, press Select.
- (Optional) If the new location is already assigned a key, press Swap.
- To set a new label, do the following:
- Press Relabel.
- Type the name of the label.
- If your original language uses extended Latin or non-Latin symbols, press theMore > Symbol soft key to open the Symbols menu and select the necessary symbols. Press Insert > More > Save.
- To delete a key, press Delete and confirm the deletion.
Enabling the Away timer
- Press Main Menu.
- Scroll to Settings and press Select.
- Scroll to Applications and press Select.
- Scroll down to Presence integration and press Select.
- Scroll down to Away timer.
- To turn on the timer, press Toggle to turn on the timer.
- Use the Down Arrow key to go to Away timer value.
- Enter the time in seconds.
You can enter any value from 0 to 999. - Press Save.
Changing the background image
Use this procedure to set the background image for the primary display of the phone.
Also, you can have the same background image as the primary display for the Avaya J100 Expansion Module (JEM24) module, if your administrator makes the required settings. The JEM24 display reflects any changes made to the primary display background. If you select a custom background image for the primary display, the JEM24 displays the default Avaya device image.
- PressMain Menu.
- Scroll toSettings and press Select.
- Scroll toDisplay and press Select.
- Scroll toBackground and press Select.
- Scroll toPrimary display and press Select.
- Scroll down to the new image.
- (Optional) To preview the image, press Preview and then press Back.
- PressSelect.
- PressSave.
Setting a personalized ringtone
Use this procedure to set a ringtone for different uses.
- PressMain Menu.
- Scroll toSettings and press Select.
- Scroll toAudio settings and press Select.
- Scroll toPersonalize ringing, and press Select.
- Scroll to one of the following options:
- Primary
- Team Key
- Bridged CA
- Call Pickup
- PressSelect.
- Scroll to the ringtone, and pressSelect.
- (Optional) To play the ringtone, press Play.
- PressSave.
Setting the network mode
Perform this procedure to set the network mode of your phone to an Ethernet or a specific Wi-Fi network.
Ensure that the network administrator gives you access to perform this task.
- Press Main Menu.
- Scroll to Settings and press Select.
- Scroll to Network and press Select.
- Scroll to Network mode.
- Select the Network mode from the following options:
- Ethernet: To connect the phone to an Ethernet network.
- Wi-Fi: To connect the phone to a Wi-Fi network.
- Press one of the following:
- Toggle
- Right arrow key
- Left arrow key
- PressSave.
- When the phone prompts to restart, pressOK or press Cancel to go back.
Connecting to a Wi-Fi network
Perform this procedure to connect your phone to a specific Wi-Fi network.
- Ensure that the network administrator gives you the access to perform this task.
- Select Wi-Fi as your network mode.
- When you set the network mode, note the SSID, as this is the name of the Wi-Fi network the phone attempts to connect to.
- Ensure that the network administrator enables hidden Wi-Fi features.
- PressMain Menu.
- Scroll toSettings and press Select.
- Scroll toNetwork and press Select.
- To access the list of available Wi-Fi networks, scroll toWi-Fi network and press Select.
The phone displays all available Wi-Fi networks, including the hidden Wi-Fi networks. - Scroll to the requiredWi-Fi network and press Connect to start the connection process.
You can connect to the hidden Wi-Fi network. - To restart the phone, pressOK.
- If the security is WEP or WPA/WPA2 PSK, inPassword, enter the password for the Wi-Fi network.
Depending on the type of security in the Wi-Fi networks, obtain the required credentials. Contact your network administrator for more details. - If the security is 802.1x EAP, enter the following:
- Identity: Your user ID or the shared user ID provided by your administrator.
- Anonymous Identity: Leave blank or use the shared Anonymous Identity provided by your administrator.
- Password: Your password or the shared password provided by your administrator.
When the authentication is successful, the phone automatically restarts to complete the connection.
Viewing USB menu
Use this procedure to view the USB menu for information on connected USB devices.
Connect the USB device to the phone and ensure that USB support is enabled.
- Press Main Menu.
- Scroll to Settings and press Select.
- Scroll to USB and press Select.
You can view the list of USB devices connected to the phone, such as a USB flash drive and keyboard.
Support
Go to www.avaya.com/support for latest support information, including the user guide, administrator guide, installation and maintenance guide, interactive document, and software downloads.
Documents / Resources
References
Download manual
Here you can download full pdf version of manual, it may contain additional safety instructions, warranty information, FCC rules, etc.
Advertisement


Need help?
Do you have a question about the J189 and is the answer not in the manual?
Questions and answers