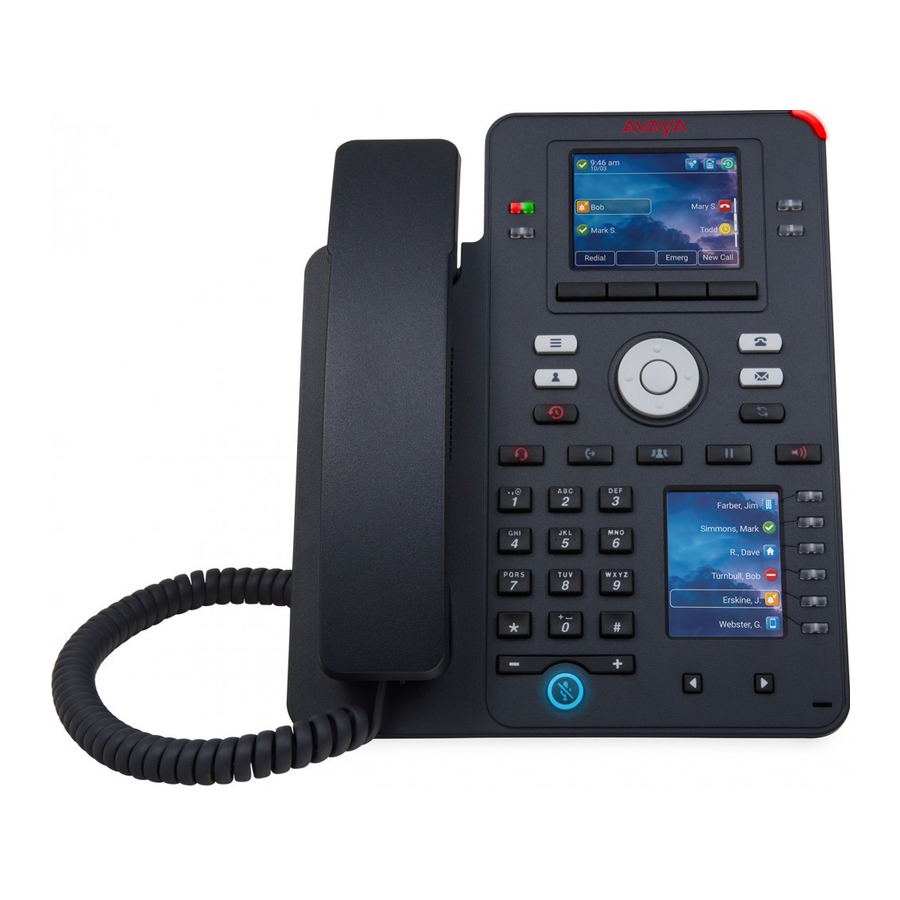
Avaya J159 - IP Phone H.323 Manual
- User manual (149 pages) ,
- Manual (146 pages) ,
- Instructions manual (133 pages)
Advertisement
Logging in to your phone
Use this task to log in to your phone when it prompts you for the extension.
Obtain the extension and password from your administrator.
- Press Login.
- In the Extension field, enter your extension.
- Press Enter.
- In the Password field, enter your password.
- (Optional) If prompted for Login mode, use the right or left navigation arrow to indicate whether you are a visiting user of this phone (Visiting User) or not (Default).
- Press Enter.
Logging in as a guest user
Use this procedure to log in to another phone as a guest and use the features and functionality available on your phone.
 Note:
Note:
The guest user login option is available on your phone only if the administrator has configured this feature. Guest user login does not use the Contacts list available on the phone. The previous Contacts list is cleared, and the phone displays only the contacts of the guest user.
- Press Main menu.
- Select Guest Login.
- Enter your extension number.
- Press Enter.
- Enter your password.
- Press Enter.
- Scroll left or right to select the duration from 1 to 12 hours for using this phone. You can log out at any time despite the duration that you select.
- Press Enter.
Navigation
Main menu
The following table shows the menu options that are available for viewing the current settings and configuring the required parameters on the Avaya J159 IP Phone.
| Name | Description |
| Options & Settings | To change your call settings, personalize button labels, adjust brightness, select your ringing pattern, set up Favorites, assign speed dial entries, etc. |
| Network information | To check the network settings. |
| VPN settings | To view the VPN information. |
| Log Out | To log out from the phone extension to protect your settings or let another user to log in. |
| About Avaya IP Deskphone | To view the phone software version. |
General icons
The following table lists the icons of Avaya J159 IP Phone.
| Icon | Description | |
 | Microphone is muted. | |
 | Missed call on your phone. | |
 | Incoming call; indicates you have answered this call. | |
 | Outgoing call; indicates you have made this call. | |
 | The EC500 feature is activated. | |
 | Incoming call alert. | |
 | Call is active. | |
 | Call is on hold. | |
 | Conference is active. | |
 | Conference is on hold. | |
 | The Right and Left navigation arrows for viewing more pages/ screens/options. | |
 | End of a list; scroll up to see other options. | |
 | The volume is turned off. Pressing on the Volume button continuously causes the volume to turn off. | |
 | Pressing this softkey turns the display backlight off. | |
 | Indicates that your phone is in the Unnamed Registration state caused by not entering an extension or password within 60 seconds after the prompt. Log in with a valid extension and password. | |
 | Indicates that the call is using a wideband codec for excellent voice quality. | |
 | Indicates a low network performance that might result in lower call quality. | |
Call operations
Making a call
- Lift the handset, or press Speaker or Headset (if applicable) or a line button for an available line.
- Dial the number to call.
If you are on a mute call, to select an available call line appearance, you can use Up or Down arrows.
Making an emergency call
If your administrator configured emergency calling for your phone, the Phone screen displays the Emerg softkey to dial a preset emergency services number.
Note:
You can make an emergency call when your phone is logged out only if your administrator configured this feature for you. You can also make an emergency call when you lock your phone.
- On the Phone screen, press Emerg.
- To end the emergency call, press Drop.
Calling a person from the Contacts list
- Press Contacts.
- Select the person or primary number that you want tocall.
- (Optional) To call a non-primary number, select the person, press Details, then select the desired number.
- Press Call.
Calling a person from the call history
- Press Recents.
- Scroll to the left or right to view the list of all calls, orseparate lists of missed, answered or outgoing calls.
- Select the person or number you want to call.
- Press the Call softkey or the OK button or press the corresponding line key.
Making a call using edit dialing
Ensure that the Edit Dialing feature is enabled on your phone.
- On the Phone screen, enter the number you want tocall.
- To edit the number, press Bksp to erase one character at a time.
- To remove the entire number, press Clear
- Press Call.
Answering a call
Answer an incoming call in one of the following ways:
- If you are not on another call, lift the handset orpress the Speaker button to answer the call using the speakerphone.
- If you are on a call, on the Phone screen, scroll tothe line with the incoming call and press Ans Hold to put the first call on hold and answer the incoming call.
- When the phone displays the Phone screen, press the Phone button to quickly move to the top of your call appearance list and answer an incoming call on your primary line.
Managing contacts
Adding a new contact
You can add up to three numbers to a contact. You can add up to six distinct numbers to a contact. For a work extension, selecting Track Presence allows you to track the contact's presence, for example, Available, Busy, Away, Do Not Disturb, Out of Office or Offline. You need to create a new contact to track presence if the work extension of the contact is changed.
- Do one of the following:
- If this is your first Contacts list entry, press Contacts > New.
- If you already have entries in your Contacts list, press Contacts > More > New.
- In the Name field, enter the name using the dial pad.
- In the Number field, enter the extension number.
The contact number can include a-z, A-Z, 0-9, and the following special symbols: comma (,), space, dash (-), dot (.), +, *, #, $, &, !, ~, ?, +, =, |. A comma (,) inserts a pause during dialing.
Press More > Primary if applicable. The primary number is the one that will always display without having to go into contact details.- In the Type field, choose the type of number entered (General, Work, Mobile, Home).
- If you have another number of this contact, scroll down and repeat steps 3 to 4.
You can add up to two additional numbers to one contact entry, but you can designate only one number as primary. - Press Save.
Searching for a contact
- Press Contacts.
- Using the dial pad, start typing the name which youwant to search.
Press Call to call the person or press More > Edit to edit contact information.
Using Voicemail
Receiving your messages
The Message button and the Message Wait indicator at the upper right corner glows red to indicate that you have a message.
Press the Message button to access your voice messages.
Listening to your voicemail
Use this procedure to listen to your voicemail on your phone.
- Ensure that the system administrator configures the voicemail for your extension.
- Obtain the user ID and password of your voicemail from your system administrator.
- To log in to your voicemail, press the Message button.
- Follow the voice prompts to playback your voice messages.
Advanced features
Activating EC500 for simultaneous ringing on multiple phones
With the EC500 feature, you can program calls in the way that your desk phone and your cell phone ring simultaneously when there is an incoming call. Using this feature, you can answer office calls while you are away from your desk. The system administrator has to add your cell phone number and program the desk phone.
- From the Phone screen, go to the Features screen.
- Scroll to EC500, and press Select.
Customization
Setting dialing options
Your phone has the following dialing options:
- You can dial a number by picking up the handset, getting a dial tone, and dialing the required number (off-hook dialing).
- If you set the Edit Dialing feature, you can enter thenumber or a part of it, edit the entered digits if needed, and press the corresponding softkey to dial. When on-hook dialing is enabled, Edit Dialing is not available.
- Press Main Menu.
- Navigate to Options & Settings > Call Settings > Edit dialing.
- Press Change to select On (Enabled) or Off (Disabled).
- Press Save.
Setting Headset Signaling
You can get incoming call alert through your headset and the speaker. This might be convenient if you want to turn the speaker alert off or you have a wireless headset.
Note:
Not all the headsets support audible alerts.
- Press Main menu.
- Navigate to Options and Settings > Call Settings > Headset Signaling.
- Select from the three settings using the corresponding buttons:
- None: No ringing tone is sent to the headset. Headset remains on hook till headset switch-hook button is pressed for an incoming call.
- Switchhook and Alerts: On an incoming call, the phone plays an alert tone in the headset every 5 seconds.
- Switchhook only: The phone does not send the ringing tone to the headset. The headset switchhook button is non functional.
- Press Save.
Adjusting the brightness of a phone screen
Use this procedure to adjust the brightness of a phone screen.
- Press Main menu.
- Scroll to Options & Settings, and press Select.
- Scroll to Screen & Sound Options, and press Select.
- Scroll to Brightness, and press Change.
- On Phone, press one of the following:
- Right arrow key: To increase the brightness.
- Left arrow key: To decrease the brightness.
- Press Save.
Acoustic Protection
Avaya J100 Series IP Phones have the acoustic exposure protection, to protect the user's ears from the acoustic shocks. This feature reduces the loud volume of the conversations on the phone call to permissible acoustic limit. The user can set the permissible acoustic limit to dynamic or predefined static values. In dynamic setting, the feature activates itself and gradually reduces the loud volume of the phone conversations to prevent from reaching the damaging decibel levels.
Acoustic exposure protection feature satisfies OSHA, ETSI and employee health safety requirements.

Only L100 Series Headsets with RJ9 connector supports acoustic exposure protection.
Configuring acoustic exposure protection
Use this procedure to configure the acoustic exposure protection for your headset.
Ensure to use L100 Series Headsets.
- Press Main Menu.
- Scroll to Options & Settings, and press Select.
- Scroll to Advanced Options, and press Select.
- Scroll to Acoustic Protection..., and press Select.
- Choose one of the following and pressSelect:
- Default: Sets the acoustic protection values to one of the following options that your administrator sets:
Dynamic
8 hours
4 hours
Off
This configured value is the default setting for acoustic protection that your administrator sets. - Off: Sets the acoustic protection off.
- Dynamic: Sets the acoustic feature to Dynamic, which activates itself and gradually reduces the loud volume of the phone conversations to prevent from reaching the damaging decibel levels.
- 8 hours : Sets the acoustic protection for 8 hours.
- 4 hours: Sets the acoustic protection for 4 hours.
For more information
Go to www.avaya.com/support for latest support information, including the user guide, administrator guide, installation and maintenance guide, interactive document, and software downloads.
Documents / Resources
References
Download manual
Here you can download full pdf version of manual, it may contain additional safety instructions, warranty information, FCC rules, etc.
Advertisement


Need help?
Do you have a question about the J159 and is the answer not in the manual?
Questions and answers