Advertisement
- 1 Notice
- 2 What's in the box
- 3 Product Overview
- 4 Installation
- 5 Basic Operations
- 6 Product Specifications
- 7 General Troubleshooting
- 8 Support
- 9 Documents / Resources
Notice
- The user menu is to be set up in non-video mode. If the device is in video mode, please proceed only after stopping the video recording.
- Memory Card: Using a new MicroSD card always requires formatting it to your device. Regularly clear the memory card, as continuous video recording for an extended period of time may produce some protected files that are not subject to long-term protection (these files may not be overwritten during loop recording) and some storage fragments, which must be cleared regularly in order to save usable storage space.
- Time-lapse photography should not be enabled while driving. This function captures images more slowly than normal but plays in speed-up mode, which may affect the integrity and continuity of your video.
- On-board Charger: The standard input voltage is configured to 12V. If a voltage greater than 12V, contact your dealer or our customer care via care@rexingusa.com to replace it with a replacement charger.
- The features described in this operation manual are available for all products of the same type. The device you buy may be a model with optional or additional functions. Menu operations may vary. Please refer to your actual product.
- Pay attention to the mounting position, which must not interfere with driving or lead to unsafe driving operation. Make sure it is safely secured.
- A standard 6-meter cable is provided for the rearview camera. It is not recommended to install this type of dash cam if your car is beyond the connection cable range.

The battery (module or pack) must not be expose to an overheat environment such as direct sunlight or flame.
Never remove, strike, or squeeze the battery or put it in fire. Stop using the battery if it is ballooned, warped, leaking, or shows any other visible signs of damage.
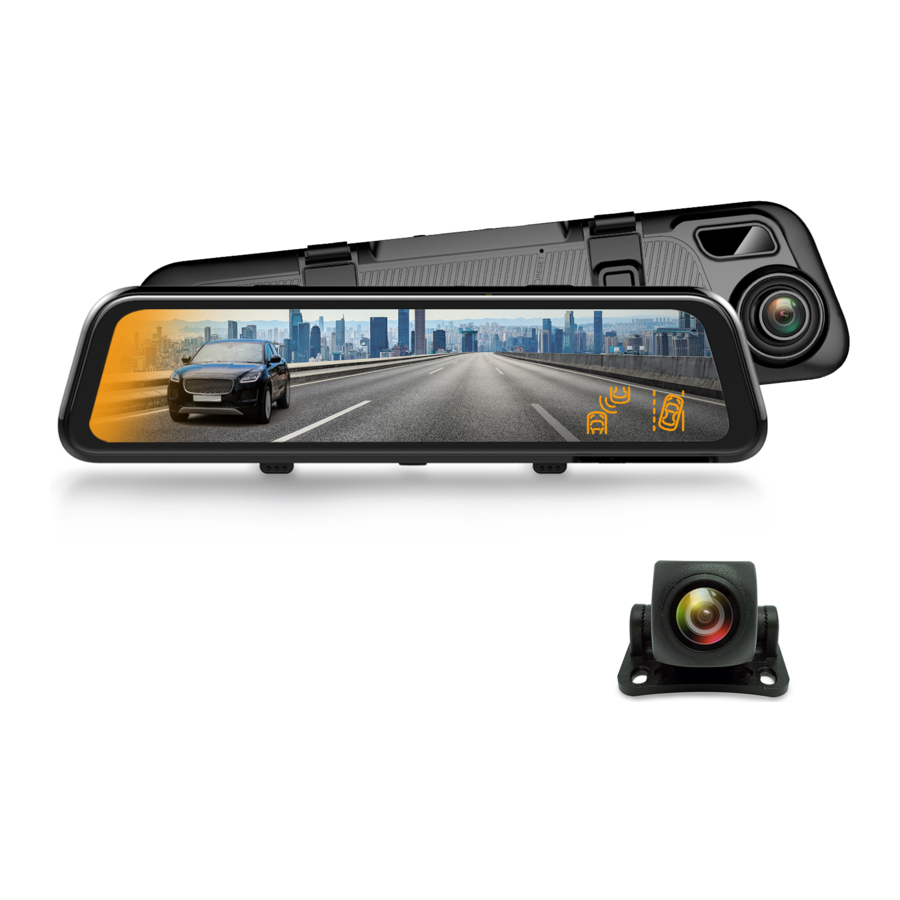
What's in the box

- Rexing M2 Smart Mirror Dash camera
- Rexing rear camera
- GPS Logger
- In-car power cable (12ft)
- Rear camera cable
- Cable Management Tool
- User Manual
Product Overview

| Designation | Description of Functions |
| Power Button | In connection with an external power source, in the power-off state, press or depress this button to start the device. In a power-on state, depress this button to switch off the device. In a power-on state, press this button quickly to turn the screen backlight off. Press it again to turn on the backlight. |
| Display / Touch Screen | Except for power - on/off operation, all the primary functions can be accessed by clicking on the corresponding function button. Some functions are accessed through a screen swiping operation. |
| Reset Key | If the device crashes, quickly press the reset key to resume normal operation. |
| USB Port | Charging port |
| GPS Port | GPS Logger is included in the package. |
| Micro SD Card Slot | A slot for inserting a MicroSD card |
| Front Camera | Front camera faces the same direction as the front of the vehicle and captures videos/images in front of the car. |
| Rear Camera Port | Rear camera plug-in port. |
Installation
Due to excessive mishandling, this device could be damaged during transportation. To avoid high cost of troubleshooting and repairs due to repeated mounting and removal, we recommend that you assemble all components first after delivery and test the device with the on-board charger power supply. Make sure that the device is visibly undamaged prior to installation. Contact our service center in case of any questions.
Install the Device

- Turn off the engine of the car.
- Place the MicroSD card into the slot.
- Secure the dashcam to the original rearview mirror of the car.
- Plug the GPS module into the GPS port and secure the module to a position close to A-pillar of the car. The antenna receiver side (the side without 3M adhesive) faces the outside and the side with 3M adhesive faces down. It should be properly secured.
- Plug the charger into the car's cigarette lighter and connect it to the dash cam's USB port with the included extended USB cable.
Note:
The optional rearview camera is mounted on the rear of the car. Pay attention to its orientation during installation. Plug the rearview camera connector into the corresponding port of the dashcam once the installation is completed. Adjust the position of the lens to ensure that it aligns horizontal with the ground. Start the engine to check the video functionality of the device.
Install the Rearview Camera
(Optional)
- Some rearview cameras are connected through removable coupling connectors. If you receive a product with a separated plug and socketed cable, then connect the plug-in components properly according to the illustrations below. To avoid damage to the pins and connector holes, never use extra force while making connections. The earphone connector of rearview camera cable must be plugged into the corresponding port of the device.

- Rearview Camera Wiring Instruction (as shown below)
The rearview camera has two wire routing options as shown in the above figure. The first part of both options is characterized with concealing the wire routing against the edges of the door(s).


Note:
The device is configured with a streaming media rearview camera that provides clear traffic view behind the car. To obtain clearer and more intuitive images, it is recommended to mount the camera above the license plate (as shown by option B).
- Instructions for Reverse Trigger Wiring
The red wire of the car's reverse gear wiring is connected to the positive end of one of the car's reverse light. Make sure that the car charger is energized during use.
![]()

Turn on the Unit
Connect the dash cam to the car charger after installation. Starting the car engine will start the device. The built-in battery will be charged at the same time.
Note:
Due to unstable voltages caused by starting the car engine, a voltage fluctuation in some vehicles may be especially obvious. If a flashing screen or some other unforeseeable operating problem occurs when you start the engine, it is recommended to unplug the device from the charger before starting the engine, and then reconnect it after the engine is running.
Basic Operations
Video Mode

Key Functions
- Return to the main interface.
- Return to the previous operation menu.
- Start/Stop video recording.
- Take a snapshot.
- Locking/Unlocking (if locked) a file.
- Audio recording On/Off.
- Front/Rear view switching.
- Time, date, and weekday display.
- Status bar: An icon that is illuminated indicates a corresponding enabled function; a function that is disabled is shown in gray.
- Adjustment of screen brightness. Click
![]() to decrease brightness and click
to decrease brightness and click ![]() to increase brightness.
to increase brightness. - Video recording state and duration
Video Recording Operation
With a MicroSD card inserted in the device, it will record automatically in video mode after starting. A red indicator ![]() will flash in the upper left corner of the screen during video recording.
will flash in the upper left corner of the screen during video recording.

Main Interface

The default interface is video recording screen after starting. Press the icon  to access the main interface, which is the entry that can be used to access all functions and setup menus. The interface is shown above.
Smart Driving Mode
Note:
The Advanced Driver Assistance Systems (ADAS) feature depends on the traffic conditions and the driving state information obtained from the front camera and the Blind Spot Detection (BSD) depends on the traffic conditions of blind spots and the driving information obtained from the rear camera. When the display shows the front camera image, ADAS enables. When display shows the rear camera image, BSD enables. They cannot be enabled simultaneously.

Outline
ADAS refers to Advanced Driving Assistant System. This model mainly includes FCWS (Forward Collision Warning System), LDWS (Lane Departure Warning System) and a stop & go function. That is, an alert or warning is generated when a potential collision hazard with the car ahead is detected during driving or it is about to deviate from its lane.
BSD refers to Blind Spot Detection, which monitors in real time any vehicle in the blind spots on both sides during driving. It gives an alert so as to reduce the risk of traffic accidents that are likely to occur when you intend to shift to another lane. It is also called LCA (Lane Change Assist).
ADAS and BSD systems may be interfered with by sunlight, inadequate lane lines, rain, and fog, Certain impacts may be affected by these inaccuracies, and some collisions may not be avoidable. Currently, the ADAS provides a rate of accuracy between 80 to 90 percent during the daytime and 60 to 70 percent at night. BSD provides a rate of accuracy around 90 percent during the daytime and around 80 percent at night.
The following instructions are mainly used for the calibration of the smart driving application of the dashcam. It mainly includes the calibration of ADAS and the blind spot monitoring range.
Before using ADAS, it is necessary to calibrate it according to its mounting position and view angle of the dashcam. Only in this way can it detect vehicles and lanes accurately.
Disclaimer:
The system is a safe driving assistant system and it cannot be used as a proof for the liability of traffic accidents.
ADAS Calibration
- Start
- Enter smart driving interface
- Turn on ADAS
- Enter ADAS setup interface
- Exit ADAS setup interface
- Enter ADAS calibration interface
- Adjust by moving the red, green, and yellow lines
- Save results and exit
- End
Setup Steps:
- Open the smart driving application and turn on ADAS (advanced driving assistant system). The button turns from gray to blue.
- Click
![]() to access the ADAS setup page. Click the option Front Car Warning Time and select the appropriate option (a default value may be used). FCWT refers to the warning time for a potential collision with the car in front.
to access the ADAS setup page. Click the option Front Car Warning Time and select the appropriate option (a default value may be used). FCWT refers to the warning time for a potential collision with the car in front.

- Click the option Lane Change Line-Crossing Warning and select the appropriate option (a default value may be used). LCLCW refers to the sensitivity of line-crossing warning during a lane change. High, moderate, and low indicators correspond to lane change line-crossing time 2s/3s/4s, respectively.

- Click
![]() to access the ADAS calibration page. You will initially see the concept and a brief introduction on the calibration page. Click Next to access the real calibration interface, as shown below. Move the red line up or down align with the horizon (the intersection line between the sky and ground). Move the yellow line up or down to the interface between the engine hood and ground. Move the green line left or right to the focal point where the far end of the road intersects with the horizon.
to access the ADAS calibration page. You will initially see the concept and a brief introduction on the calibration page. Click Next to access the real calibration interface, as shown below. Move the red line up or down align with the horizon (the intersection line between the sky and ground). Move the yellow line up or down to the interface between the engine hood and ground. Move the green line left or right to the focal point where the far end of the road intersects with the horizon.
Note:
The range of calibration line adjustment is limited. If the extreme adjustment has reached the its limits and the result is unsatisfactory, it may be necessary to adjust the mounting position of the dashcam or perform fine adjustments of the lens so as to align it properly within all angles.

- When the adjustment is accurate as shown above, save and exit.
 to access the ADAS setup page. Click the option Front Car Warning Time and select the appropriate option (a default value may be used). FCWT refers to the warning time for a potential collision with the car in front.


Calibration For Monitoring Blind Spots
- Start
- Enter Smart Driving Interface
- Turn on BSD
- Enter BSD setup interface
- Exit BSD setup interface
- Enter BSD calibration interface
- Move the box left or right to adjust blind spot warning range
- Save the result and exit
- End
Setup Steps:
- Open the smart driving application and turn on BSD (Blind Spot Detection). The button turns from gray to blue.
- Click
![]() to enter BSD setup interface. Click the option Warning Speed and select the appropriate option (a default value can be used). The Warning Speed means that when any vehicle is detected within the set warning range, an alarm is activated if the driving speed of the car is greater than the set value.
to enter BSD setup interface. Click the option Warning Speed and select the appropriate option (a default value can be used). The Warning Speed means that when any vehicle is detected within the set warning range, an alarm is activated if the driving speed of the car is greater than the set value.

- Click the option Warning Sensitivity and select an appropriate option (a default value can be used). Warning Sensitivity means that when any vehicle is detected within the set warning range, an alarm is activated if the driving speed of the following vehicle is greater than that of the car. High: An alarm is activated regardless of car speed. Moderate: An alarm is activated if the following vehicle has a speed 10km/h greater than the car. Low: An alarm is activated if the following vehicle has a speed 20kg/h greater than the car.

- Click
![]() to access the BSD calibration interface. You will initially see the concept and a brief introduction on the calibration page. Click Next to access the real calibration interface, as shown below:
to access the BSD calibration interface. You will initially see the concept and a brief introduction on the calibration page. Click Next to access the real calibration interface, as shown below:

- Move the red line up or down to the horizon (the intersection line between sky and Earth). Move the yellow line up or down to the interface between the car's tail and ground. Move the green line left or right to the focal point where the far end road intersects with the horizon. After proper adjustment, click Next to access calibration of the warning range.
Note:
The range of calibration of the line adjustment is limited. If extreme adjustment is still unsatisfactory, it will be necessary to adjust the mounting position of the camera or perform fine adjustments of the lens so as to align it in the rearward direction.

- Warning Range Setup:
Click![]() to switch among the four corners of both the left and right square zones. The corner indicated by the red spot means the zone is currently adjustable. Click
to switch among the four corners of both the left and right square zones. The corner indicated by the red spot means the zone is currently adjustable. Click ![]() to adjust the warning range. By touching one of the four arrows you may move it up, down, left, or right. Click Save after making the appropriate adjustments. Only in this way can the calibration data be saved.
to adjust the warning range. By touching one of the four arrows you may move it up, down, left, or right. Click Save after making the appropriate adjustments. Only in this way can the calibration data be saved.

- Testing:
Testing: When testing is on, as shown above, the image from the rearview camera shows two warning zones marked in cyan. It is not shown when the button is off. This function is mainly used for demonstration of the warning ranges. To avoid interference with the image display, it is off as a default after starting the device each time. It is to be manually turned on if such a display is desired.
 to enter BSD setup interface. Click the option Warning Speed and select the appropriate option (a default value can be used). The Warning Speed means that when any vehicle is detected within the set warning range, an alarm is activated if the driving speed of the car is greater than the set value.

 to access the BSD calibration interface. You will initially see the concept and a brief introduction on the calibration page. Click Next to access the real calibration interface, as shown below:

 to switch among the four corners of both the left and right square zones. The corner indicated by the red spot means the zone is currently adjustable. Click
  to adjust the warning range. By touching one of the four arrows you may move it up, down, left, or right. Click Save after making the appropriate adjustments. Only in this way can the calibration data be saved.
Playback Mode and File Management

Key Functions
- Return to the main interface.
- Icon to return to previous operation
- Time, date, and weekday display
- Image files
- Video files
- Front camera video file
- Front camera locked video file
- Rear camera video file
- Rear camera locked video file
Enter the file list interface and touch the ![]() icon to lock a video file. For a locked video file, touch the icon
icon to lock a video file. For a locked video file, touch the icon  to unlock the file. For unwanted video and picture files, touch the icon
  to delete the file. To play a video file, touch the file name. During playback, touch the
  icon to pause it. Touch
 ![]() to scroll up the files and touch the icon
to scroll up the files and touch the icon ![]() to scroll down the files.
to scroll down the files.
For an image file, touch the file name to enter the full screen view. Touch ![]() to scroll up the files and touch the
to scroll up the files and touch the ![]() icon to scroll down the file. On the file list page touch to delete a file.
icon to scroll down the file. On the file list page touch to delete a file.
Note:
Locked files will not be overwritten by loop recording. When there are too many locked files or the Locked files full message is prompted, please backup the files and delete them from the device.
Driving Setup

- Loop Recording: 1, 2, 3 minutes. Video record is saved in segments. When the storage card is full, the earliest recorded video will be overwritten in order to maintain loop recording status. The time length in menu is the duration of each recording.
- Video Resolution: 2K Front + 1080P Rear
- Frequency: 50HZ, 60HZ
- Gravity Sensor Sensitivity: High, Moderate, Low, Off
Note:
The gravity sensor receives impacts when the car shakes violently or receives an impact and the system will automatically save the currently recorded video as a protected file. This feature performs the same function as the manually activated emergency lock after the device has been started. If the emergency mode is not activated automatically, touch the  icon during recording and apply the manual lock to protect the current video file.
- Rear Camera Mirroring (On, Off):
This feature displays a reverse image on-screen display for rear camera view. On enables mirroring display and off displays the original image. - Mute Video Recording (On, Off):
When mute is on, video is recorded with no audio. This function can be directly switched on by clicking the![]() icon on the video recording interface.
icon on the video recording interface. - Time Stamp:
Off, On - Parking Monitoring (On, Off):
This feature is on when you see the illuminated![]() icon in the status bar on the video recording interface, and it is off when you see the grayed-out
icon in the status bar on the video recording interface, and it is off when you see the grayed-out ![]() icon. When the parking monitor is activated, its standby state will be activated after the engine is turned off. When the car is shocked by an external force and the sensor detects the impact, the system will begin video recording.
icon. When the parking monitor is activated, its standby state will be activated after the engine is turned off. When the car is shocked by an external force and the sensor detects the impact, the system will begin video recording.
 icon in the status bar on the video recording interface, and it is off when you see the grayed-out
  icon. When the parking monitor is activated, its standby state will be activated after the engine is turned off. When the car is shocked by an external force and the sensor detects the impact, the system will begin video recording.
The characteristics and precautions of the parking monitor are as the follows:
- When the engine is turned off, the monitor uses power from its built-in battery. No external power source is required. This mode requires the battery to be charged with enough power to start the parking monitoring function.
- With the use of the smart hardwire kit (sold separately). After the car engine is turned off, the smart hardwire kit detects the power loss and sends a command to the host device. The system enters a standby state. The mini USB plug must always be kept connected to the USB port of the device so as to ensure a constant power supply to the smart hardwire kit.
- In the above two modes, a video that is locked for about 15 seconds will be recorded after the dash cam is turned on. When a recording is started, the screen does not light up and there is no booting sound.
- When the engine is restarted and the parking monitor has been activated, a prompt will be immediately indicated as shown below:
![]()
- Monitoring files are saved in the folders VIDEO_F_LOCK and VIDEO_R_LOCK.

- Time-lapse Recording:
Off, On This feature is on when you see this illuminated![]() icon in the status bar on the video recording interface, and it is off when you see this
icon in the status bar on the video recording interface, and it is off when you see this ![]() grayed out icon. This function is generally used during parking. It should not be turned on while driving. One frame of image is captured for each second of real time when this function is enabled. However, it is played back 30 times faster.
grayed out icon. This function is generally used during parking. It should not be turned on while driving. One frame of image is captured for each second of real time when this function is enabled. However, it is played back 30 times faster.
 icon in the status bar on the video recording interface, and it is off when you see this
  grayed out icon. This function is generally used during parking. It should not be turned on while driving. One frame of image is captured for each second of real time when this function is enabled. However, it is played back 30 times faster.
Note:
When selecting the parking monitoring function, please disable the time-lapse function, or the parking monitor function will not start.
System Setup

- Stream Media:
When this feature is switched on, the full screen rearview camera image is displayed after starting the device. - Speed Setup:
60 to 160 km/h adjustable - Speed Setup:
60 to 160 km/h adjustable.
An alarm sounds when driving speed exceeds the set value. - Speed Error Correction:
-6 to +6 - Satellite Information:
Check GPS information status and GPS signal condition. - Brightness Setup:
1, 2, 3, 4, 5 Sets the brightness of the screen. - Volume Setup:
0, 1, 2, 3, 4 Sets the audio volume of the system. - Sleep Mode:
10S, 30S, 60S, off Sets the time to activate the screen's sleep mode. The display remains on without powering-off when sleep mode is deactivated. - Key Tone:
Off, On - Language Setup:
Simplified Chinese, Traditional Chinese, and other languages. - Time Setup:
System time setup. - System Formatting:
Confirm, Cancel.
Note:
Formatting removes all files (including protected files) from the storage card. Files cannot be restored after formatting. Please, back up important files before formatting.
- Version:
System version - Restore Factory Settings (Confirm, Cancel):
Select Confirm to restore system default values. Settings made by the user will be altered.
Track Playback
Video Track Playback
Please download GPS logger player through the link gpsb.rexingusa.com OR Scan the QR Code below.

The video track player enables display of traveling track information when playing a video.
Operating Steps:
- Connect the MicroSD card to the computer via a card reader.
- For the initial operation, please copy the link contained in GPS Player Download.txt to the browser and open it in the browser. Depending to your computer system (32 or 64 bit), select an appropriate player program and download it to your computer for installation.
- After installation, click the shortcut
![]() icon to run the player. The following picture shows the player playing a video with front and rear tracks of road.
icon to run the player. The following picture shows the player playing a video with front and rear tracks of road.
 icon to run the player. The following picture shows the player playing a video with front and rear tracks of road.
Primary features of the player are shown below:
- Video Play Window.
If the video files of front and rear road tracks are recorded synchronously and loaded into the playing list at the same time, they can be played separately in split left and right screens. - Play Control Panel
- Open a Video File
Press the button and select storage path. When you find the desired video file, click on the video and load it into the play list to play it. When you need to select several files, hold down the left mouse button and drag the desired files to the box to load them into the play list. - Play List
- Speed And Driving State Indication
- Map and Track Display
- Setup of primary functions such as language, map selection, and speed
GPS Satellite Connection Exception
Even when GPS is successfully connected with the satellite network, your location and environmental factors may directly affect its accuracy. The following factors have a direct impact on satellite signal reception and may cause a failure of the speed detection features and camera reporting.

Check Recorded Files with a Computer
- Unplug the used MicroSD card and place it into a card reader
- Connect the card reader to the USB port of the computer. Open the removable disc and you will see the following file folders
- PICTURE: Pictures saved
- VIDEO_F/VIDEO_R: Video records of front and rear road tracks
- VIDEO_F_LOCK/VIDEO_R_LOCK: locked video records of front and rear road tracks
Note:
Be careful when deleting any locked video. Important videos, if any, should be backed up.
- To play videos or browse pictures, your computer must have the necessary software available.
- Backup Files
If you intend to keep important and memorable videos and pictures for a long time, we suggest that you make a copy of each file from the card to your computer. Do not save them in a new folder created in the same storage card; doing so will reduce the available space of the card.
Product Specifications
| Display | TFT display |
| MicroSD card | Class 10 and above (supports a card capacity up to 128GB) |
| Speaker | Built-in |
| MIC | Built-in |
| Video format | MOV |
| Picture format | JPG |
| Video resolution | 2560 X 1440 |
| Available languages | Simplified Chinese, Traditional Chinese, and other languages |
| G-SENSOR | Yes |
| Loop recording | 1, 2, 3 minutes |
| Input current | DC5V 2000mA |
Note:
Be careful when deleting any locked video. Important videos, if any, should be backed up.
General Troubleshooting
| Trouble | Possible Causes | Solution |
Device fails to power on | Defective connection with the charger or burned out fuse | Check the plug to the cigarette lighter or check the charger fuse for continuity |
Device fails to record video or take a picture |
| Plug in the card. If the card is not recognized, unplug it and plug it in again, or clean up any contamination from the card contacts, or format the card by connecting it to a computer. |
| Format MicroSD storage card | |
| Delete some files or unlock to release storage space, or format MicroSD card. | |
Video does not play smoothly | Slow reading speed of the card reader or insufficient system ROM of the computer | Change card reader or copy the video file to your computer, and then play it again. If this does not solve the problem, try another computer. |
All buttons fail to function | Program error or wrong operation | Press Reset Key to restart the device. |
Support
If you have any questions regarding your product, please do not hesitate to contact us at care@rexingusa.com, or call us at (877) 740-8004. Queries are typically answered within 12-24 hours.
Your opinion matters
Rexing is firmly committed to always improving our products, services, and user experience. If you have any thoughts on how we can do even better, we welcome your constructive feedback and suggestions.
Connect with us today at care@rexingusa.com
Check us out here.
- https://www.facebook.com/rexingusa/
- https://www.instagram.com/rexingdashcam/
- https://www.rexingusa.com/support/registration/
 Facebook

 Instagram

Site

Product Support

If you register your product on our official site (https://www.rexingusa.com/support/registration), you can extend the warranty to 18 months.
Documents / Resources
References
https://www.facebook.com/rexingusa/
![www.instagram.com]() Instagram
Instagram![www.rexingusa.com]() Rexing Product Reg II
Rexing Product Reg II![www.rexingusa.com]() Rexing Product Reg II
Rexing Product Reg II![www.rexingusa.com]() HomePage
HomePage![gpsb.rexingusa.com]() Rexing Apps
Rexing Apps
Download manual
Here you can download full pdf version of manual, it may contain additional safety instructions, warranty information, FCC rules, etc.
Advertisement


Need help?
Do you have a question about the M2 and is the answer not in the manual?
Questions and answers