Rexing V1 User Manual
Hide thumbs
Also See for V1:
- User manual (52 pages) ,
- Quick start manual (45 pages) ,
- User manual (3 pages)

Related Manuals for Rexing V1


Summary of Contents for Rexing V1
- Page 1 User Manual The information in this manual is subject to change without notice. www.rexingusa.com 01/2018Rev10 © 2018 REXING All Rights Reserved...
-
Page 2: Safety Information
Failure to comply with safety warnings and regulations can result in serious injury or death. Rexing Dash Cam is not intended to be touched, modified, or calibrated while operating a vehicle. Rexing is not responsible for any damages resulting from the user's misuse of the camera. - Page 3 • Rexing cannot be responsible for the user’s safety when using accessories or supplies that are not approved by Rexing. Do not drop the charger or device, or subject them to impact. Handle and dispose of the charger and device with care.
- Page 4 If you notice strange smells or sounds coming from your device, or if you see smoke or liquid leaking from the device, stop using the device immediately and take it to a Rexing Service Center. Failure to do so may result in fire or explosion.
- Page 5 Do not attempt to disassemble, repair, or modify your device. • Any changes or modifications to your device can void your manufacturer’s warranty. © 2018 REXING All Rights Reserved...
- Page 6 Household users should contact either the retailer where they purchased this product, or their local government office, for information on where and how they can take these items for environmentally safe recycling. © 2018 REXING All Rights Reserved...
- Page 7 ANY CONTENT OR SERVICE MADE AVAILABLE THROUGH THIS DEVICE AND UNDER NO CIRCUMSTANCES, INCLUDING NEGLIGENCE, SHALL REXING BE LIABLE, WHETHER IN CONTRACT OR TORT, FOR ANY DIRECT, INDIRECT, INCIDENTAL, SPECIAL OR CONSEQUENTIAL DAMAGES, ATTORNEY FEES, EXPENSES, OR ANY OTHER DAMAGES...
- Page 8 SERVICE BY YOU OR ANY THIRD PARTY, EVEN IF ADVISED OF THE POSSIBILITY OF SUCH DAMAGES.” Third party services may be terminated or interrupted at any time, and Rexing makes no representation or warranty that any content or service will remain available for any period of time.
-
Page 9: About This Manual
Content may differ from the final product or from software provided by service providers, and is subject to change without prior notice. • For the latest version of this manual, refer to the Rexing website at www.rexingusa.com. • Available features and additional services may vary by device and software. -
Page 10: Table Of Contents
Powering the Device Manually ..............24 Basic Operation .................... 25 Video Settings ....................26 Resolution ....................26 Loop Recording .................... 26 Time-lapse Record ..................27 WDR (Wide Dynamic Range) ............... 27 Exposure ...................... 27 © 2018 REXING All Rights Reserved... - Page 11 Delayed Shutdown ..................31 Daylight Saving .................... 31 GPS ......................31 Update Time of GPS ..................31 Default Setting ....................31 Version ......................31 Photo Settings ....................32 Capture Mode ....................32 Resolution ....................32 © 2018 REXING All Rights Reserved...
- Page 12 Quick Review ....................34 Date Stamp ....................34 Playback ......................35 Camera Playback Mode ................35 Computer Playback ..................36 GPS Playback ....................37 Troubleshooting ....................39 Updating Firmware ..................39 Common Solutions ..................40 © 2018 REXING All Rights Reserved...
-
Page 13: Product Specifications
3 min / 5 min / 10 min / Off Screen Saver 15 sec / 1 min / 3 min / Off Auto Shutdown 3 min / 5 min / 10 min / Off Audio Recording On / Off © 2018 REXING All Rights Reserved... -
Page 14: Package Contents
All supplied items are designed for use only with this device and may not be compatible with other devices. Malfunctions resulting from the use of unapproved accessories are not covered by the warranty service. For more information about available accessories, refer to www.rexingusa.com. © 2018 REXING All Rights Reserved... -
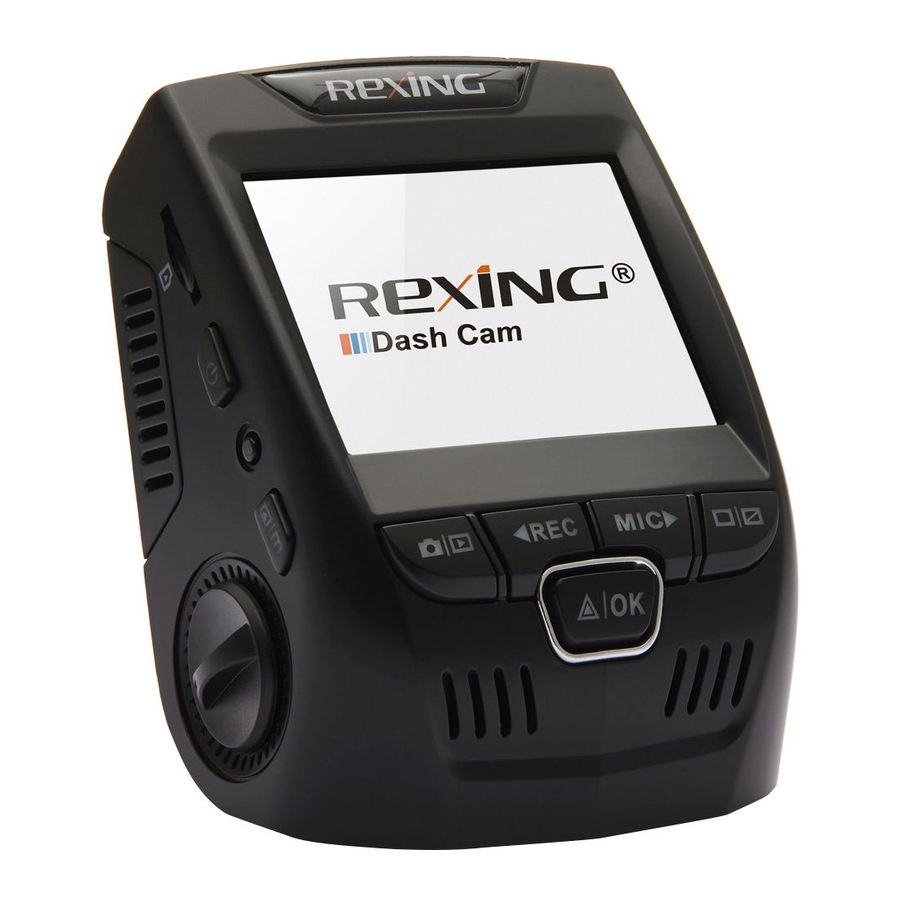
Page 15: Camera Overview
3. OK (Emergency Lock) 10. Lens Angle Adjustment 4. MIC 11. Mini-USB Port 5. SCREEN 12. GPS Logger Port 6. Micro SD Card Slot 13. Rear Camera Port (Not 7. Power supported by V1) © 2018 REXING All Rights Reserved... -
Page 16: Buttons
Toggle between Video / Photo / Playback modes Playback Mode: Stop playback Toggle display on/off RESET Hold for 4 seconds to reset the device Solid Blue – Power, Charging Indicator Flashing Red – Recording © 2018 REXING All Rights Reserved... -
Page 17: Status Icons
Video Resolution Blinking – Recording Wide Dynamic Range enabled Connected to power source Battery level (not connected to power source) Audio recording disabled Audio recording enabled Video Recording Mode Playback Mode Photo Mode Loop Recording © 2018 REXING All Rights Reserved... - Page 18 Camera Overview Memory card detected G-sensor sensitivity White Balance GPS signal (Green = Ready, Blue = Acquiring signal) License plate number Current recording is locked © 2018 REXING All Rights Reserved...
-
Page 19: Getting Started
The Rexing V1 supports Micro SD cards up to 128GB in size. For reliable operation, we recommend using a Class 10 High Endurance Micro SD card with a capacity of at least 8GB (See: Page 22). -
Page 20: Charging The Battery
3. Connect the car charger to the car's 12V DC outlet Run the cable down from your camera to the 12V cigarette lighter port of your vehicle, as shown in the diagram. Be sure to connect only Rexing-approved chargers designed and supplied specifically for use with your device. Using an incompatible charger can cause serious personal injury or damage to your device. - Page 21 • If the device is not charging properly, take the device and the charger to an authorized Rexing Service Center or contact Customer Care. Connecting the charger improperly may cause serious damage to the device. Any damage caused by misuse is not covered by the warranty.
-
Page 22: Inserting The Memory Card
Inserting the Memory Card Recommended Card Type: “High-endurance” Micro SD Card The V1 accepts Micro SD memory cards (class 10 or higher) with a maximum capacity of 128GB. Depending on the memory card manufacturer and type, some cards may not be compatible with your device. Using an incompatible card may damage the device or the memory card, or corrupt the data stored on it. -
Page 23: Removing The Memory Card
Do not remove the memory card while the device is transferring or accessing information. Doing so can result in data loss or corruption, or damage to the memory card or device. Rexing is not responsible for losses that result from the use of damaged memory cards, including the loss of data. -
Page 24: Powering The Device Manually
To turn off the device, again press and hold the Power button for a few seconds. The above image will again be displayed briefly upon shutdown. © 2018 REXING All Rights Reserved... -
Page 25: Basic Operation
Basic Operation Automatic recording The V1 will automatically power on and start recording once it begins receiving a charge, such as when you start your car. There will be a red dot blinking on the top left of the screen to indicate that it’s currently recording. -
Page 26: Video Settings
Loop Recording. Note: Turning Loop Recording off would require you to manually clear recordings from your memory card whenever storage is full, thus we highly recommend keeping Loop Recording enabled. © 2018 REXING All Rights Reserved... -
Page 27: Time-Lapse Record
Positive values brighten recordings, while negative values darken them. Record Audio Default setting: On Allows you to enable or disable audio recording with your videos. Note: This feature can also be toggled with the MIC button. © 2018 REXING All Rights Reserved... -
Page 28: Date Stamp
Locked videos can be found on the memory card under “\CARDV\MOVIE\RO”. Note: Locked video files will not be erased by Loop Recording, they will remain on the memory card until they are manually deleted, or when the card is formatted. © 2018 REXING All Rights Reserved... -
Page 29: System Settings
Default setting: 5 Minutes When enabled, this feature allows the device to shut down after a period of time in which the camera isn’t recording. Beep Sound Default setting: On Enable or disable the device’s sound effects. © 2018 REXING All Rights Reserved... -
Page 30: Language
Specifies the duration for which the display will stay on after the device is powered on. Having this setting disabled (default) will keep the display on constantly, though you may manually toggle it with the SCREEN button (See: Page 15). © 2018 REXING All Rights Reserved... -
Page 31: Delayed Shutdown
Default setting: Off Updates the time automatically with your time zone (requires GPS Logger). Default Setting Performing this operation will reset all settings to their default values. Version Displays the current device firmware information. © 2018 REXING All Rights Reserved... -
Page 32: Photo Settings
Quality Default setting: Normal Set the quality level of captured images. Lower quality images will take up less space on the memory card, but are more visually compressed than higher quality images. © 2018 REXING All Rights Reserved... -
Page 33: Sharpness
Adjust the camera's sensitivity to light when taking photos. The higher the ISO, the better the camera operates in low light, although images are produced with more noise (grainy-looking). Exposure Default setting: +0.0 Adjust the camera exposure value to manually brighten or darken your images. © 2018 REXING All Rights Reserved... -
Page 34: Anti-Shaking
Upon capturing an image, the image will be previewed on the display for a few seconds before returning to Photo Mode. Date Stamp Default setting: Date/Time Apply a date and/or time stamp to captured images (works similarly to the Date Stamp function in the Video Menu). © 2018 REXING All Rights Reserved... -
Page 35: Playback
Press OK once to view options to "Delete Current" recording or "Delete All" recordings. With “Delete Current” selected, press OK. When prompted with “Erase This?” press the MIC button to scroll down to "OK" and press OK to delete the selected recording. © 2018 REXING All Rights Reserved... -
Page 36: Computer Playback
Connect your camera to your computer using the provided USB cable and select “Mass Storage” to access your card storage. Your videos will be stored under “\CARDV\MOVIE”. Finding locked files Locked videos can be found on the memory card under “\CARDV\MOVIE\RO”. © 2018 REXING All Rights Reserved... -
Page 37: Gps Playback
Playback GPS Playback If you purchased a Rexing GPS Logger with your camera, you may play back your recordings in a specialized application which allows you to view speed and location information alongside your footage. Minimum System Requirements Operating System: Windows 7, 8, or 10... - Page 38 In the settings menu, you may change your language from English to Chinese, Japanese, or Vietnamese. You may also change your unit of speed measurement from MPH to KM/H. Additionally, you have the option to change the map application used from Google Maps to Baidu Maps. © 2018 REXING All Rights Reserved...
-
Page 39: Troubleshooting
11. After formatting, use the Power button to reboot the camera. Do not disconnect the camera from the power source. 12. Upon reboot, you may disconnect your camera from power. © 2018 REXING All Rights Reserved... -
Page 40: Common Solutions
Press REC to stop MENU button isn’t Camera is recording recording before accessing responding the menu Charge the battery for 3 Device will not turn Battery is depleted hours. Make sure device is off while charging © 2018 REXING All Rights Reserved... - Page 41 Memory card is too thin Use a new memory card Memory card isn’t Format the memory card. If Memory card needs recognized (cluster issue persists, replace the to be formatted error) memory card © 2018 REXING All Rights Reserved...
- Page 42 Camera isn’t getting continuous power Use a new memory card Update the latest firmware Memory card is Format the memory card. If Screen is frozen defective or corrupted issue persists, replace the memory card © 2018 REXING All Rights Reserved...
- Page 43 G-sensor sensitivity is Make sure Gravity Sensing Loop Recording too high is on low sensitivity isn’t functioning Memory card is full Format the memory card © 2018 REXING All Rights Reserved...
- Page 44 Memory card is issue persists, replace the trying to play back corrupted memory card pictures or video Carefully clean dust or Hazy images Lens is dirty fingerprints from the lens with a microfiber cloth © 2018 REXING All Rights Reserved...
- Page 45 Disable “Update Time of date GPS” setting GPS Logger is too Update firmware GPS Logger isn’t close to the device, Place GPS Logger at least connecting causing interference 5” from device with the signal © 2018 REXING All Rights Reserved...
Need help?
Do you have a question about the V1 and is the answer not in the manual?
Questions and answers