
Subscribe to Our Youtube Channel
Related Manuals for Rexing M2 Max


Summary of Contents for Rexing M2 Max
- Page 1 M2 Max User Manual The information in this manual is subject to change without notice. www.rexingusa.com...
- Page 2 Notice The user menu is to be set up in non-video mode. If the device is in video mode, please proceed only after stopping the video recording. Memory Card: Using a new MicroSD card always requires formatting it to your device.
- Page 3 Warning The battery (module or pack) must not be exposed to overheat environments such as direct sunlight or flame. Never remove, strike, or squeeze the battery or put it in fire. Stop using the battery if it is ballooned, warped, leaking, or shows any other visible signs of damage.
- Page 4 We hope you love your new products as much as we do. If you need assistance, or have any suggestions to improve it, please contact us. care@rexingusa.com (877) 740-8004 Our support team will respond to you as soon as possible. Always a surprise with Rexing Check us out here. • https://www.facebook.com/rexingusa/ • https://www.instagram.com/rexingdashcam/ • https://www.rexingusa.com/support/registration/...
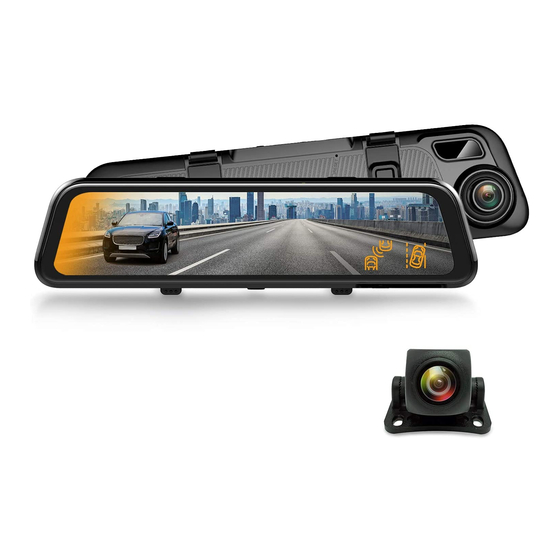
- Page 5 What’s in the box? M2 Max User Manual The information in this manual is subject to change without notice. www.rexingusa.com In-car power cable (12ft) Rexing M2 Max Smart Mirror Dash camera Cable Management Tool Rexing rear camera User Manual GPS Logger...
-
Page 6: Table Of Contents
Table of Contents Camera Overview Installation Basic Operations Product Specifications General Troubleshooting Warranty & Support... -
Page 7: Camera Overview
Camera Overview Type-C Port Rearview Camera Port MicroSD Card Slot GPS Port Display/Touch Screen Front Camera Reset Key Pinhole Speaker MIC Pinhole Power Key... - Page 8 Designation Description of Functions Power Button In connection with an external power source, in the power-off state, press and hold the power button on the bottom for three seconds to start the device. In a power-on state, press and hold the power button for three seconds to switch off the device.
-
Page 9: Installation
Installation Due to excessive mishandling, this device could be damaged during transportation. To avoid the high cost of troubleshooting and repairs due to repeated mounting and removal, we recommend that you assemble all components first after delivery and test the device with the on-board charger power supply. - Page 10 Location of GPS Module Power Supply Wiring Location Optimum Instalation Location II. Install the Rearview Camera Some rearview cameras are connected through removable coupling connectors. If you receive a product with a separated plug and socketed cable, then connect the plug-in components properly according to the illustrations below. To avoid damage to the pins and connector holes, never use extra force while making connections.
- Page 11 Align the male portion and the female portion of the rearview camera cable between the arrows before pressing the connectors together. Rearview Camera Wiring Instruction (as shown below) Connected to rearview camera Connected to reverse light The rearview camera has two wire routing options as shown in the above figure. For both options, it is suggested that you conceal the wiring against the edges of the car's door.
- Page 12 Note: The device is configured with a media streaming rearview camera that provides clear traffic view behind the car. To obtain clearer and more intuitive images, it is recommended to mount the camera above the license plate (as shown by option B). Instructions for Reverse Trigger Wiring (optional) The red wire connects to the positive end of one of the car’s reverse light.
-
Page 13: Basic Operations
Basic Operations I. Video Mode 11-25-2022 17:06:16 00:21 2.5K Key Functions Home On/Off Audio Recording Take Snapshot Video Duration Start/Stop Recording Date & Time Recorded File Locked Status Bar... - Page 14 Video Recording Operation With a MicroSD card inserted in the device, it will record automatically in video mode after starting. A red indicator will flash in the upper left corner of the screen during video recording. Press the icon to stop recording Press the icon to start recording when no recording is active.
- Page 15 II. Home Interface Choosing the home button brings you to the home screen where you can find smart drive, file explorer, camera settings, and system settings 17:07 11-25-2022 Friday Dashcam Smart drive File explorer Camera setting Sys setting 000 km/h III.
- Page 16 Outline RCW refers to Rear-End Collision Warning. This warning system will trigger an alert when an object or vehicle is detected by the rear camera. BSD refers to Blind Spot Detection, which monitors in real time any vehicle in the blind spots on both sides during driving.
- Page 17 BSD Calibration Smart Drive Turn on BSD Choose Calibrate under BSD Read Calibration Directions and choose Next Use the arrows on screen to set the view correctly. Once set correctly so that the yellow box lines up with the red area, choose save, Success Save results and exit...
- Page 18 Setup Steps: Open the smart driving application and turn on BSD (blind spot detection). The button turns from gray to blue. Click to access the BSD setup page. Click the option Monitoring sensitivity and select the appropriate option (a default value may be used). Monitoring sensitivity refers to the relative speed of the detected object and the vehicle.
- Page 19 Note: The range of calibration line adjustment is limited. If the extreme adjustment has reached the its limits and the result is unsatisfactory, it may be necessary to adjust the mounting position of the dashcam or perform fine adjustments of the lens so as to align it properly within all angles.
- Page 20 RCW Calibration Smart Drive Turn on RCW Calibrate RCW Read Calibration directions and choose next Use arrows to establish the correct view Once correct view is established choose save Move the box left or right to adjust blind spot warning range Save the result and exit...
- Page 21 Setup Steps: Open the smart driving application and turn on RCW (Rear Collision Warning). The button turns from gray to blue. Choose settings under RCW (Rear Collision Warning). to complete the setup. The Warning Speed means that when any vehicle is detected within the set warning range, an alarm is activated if the driving speed of the car is greater than the set value.
- Page 22 Click to access the RCW calibration interface. You will initially see the concept and a brief introduction on the calibration page. Click Next to access the real calibration interface, as shown below: RCW CALIBRATE The yellow box is the alarm area to prevent rear-end collision and reversing areas (close distance).
- Page 23 Note: The range of calibration of the line adjustment is limited. If extreme adjustment is still unsatisfactory, it will be necessary to adjust the mounting position of the camera or perform fine adjustments of the lens so as to align it in the rearward direction. Warning Range Setup: Click to switch among the four corners of both the left and right square...
- Page 24 V. Playback Mode (File Explorer) VIDEO-F VIDEO-B VIDEO-LOCK IMAGE 2022112513560123_f.mov 2022112513560123_f.mov 2022112513550823_f.mov 2022112513544623_f.mov 2022112513455223_f.mov Key Functions Front camera video file Locked video file Return to home Rear camera video file Image files Enter the file list interface and touch the icon to lock a video file.
- Page 25 VI. Camera Settings Camera setting Video reolution 3840x2160(4K) Loop Recording 1 Minute 60 Hz Light source frequency G-sensor sensitivity Mute audio recording • Video Resolution: 4K Front + 1080P Rear • Loop Recording: 1, 2 minutes. Video record is saved in segments. When the storage card is full, the earliest recorded video will be overwritten in order to maintain loop recording status.
- Page 26 • Mute Video Recording (On, Off): When mute is on, video is recorded with no audio. This function can be directly switched on by clicking the icon on the video recording interface. • Rear Camera Mirroring (On, Off): This feature displays a reverse image on-screen display for rear camera view. On enables mirroring display and off displays the original image.
- Page 27 When the engine is restarted and the parking monitor has been activated, a prompt will be immediately indicated as shown below: Notice Crash happened during parking. Please check the video. Monitoring files are saved in the folders VIDEO_F_LOCK and VIDEO_R_LOCK.
- Page 28 VII. System Setup System setting Stream media switch Brightness setting Volume setting Keytone Screen sleep Closed • Wi-Fi: On, Of. • Stream Media: When this feature is switched on, the full screen rearview camera image is displayed after starting the device. •...
- Page 29 • Key Tone: Off, On • Daylight Savings Time: Off, On • Language Setup: English, Chinese, Japanese, and other languages. • Time Zone Select: Select your timezone. • Time Setup: System time setup. • Satellite Information: Check GPS information status and GPS signal condition. •...
- Page 30 Track Playback I. Video Track Playback: Please download GPS logger player through the link https://www.rexingusa.com/support/rexing-apps/ OR Scan the QR Code below. The video track player enables display of traveling track information when playing a video. Operating Steps: Connect the MicroSD card to the computer via a card reader.
- Page 31 GPS Player 1.9 20200801172441_f.mov 01/08/2020 18:44:18 062km/h N22.531100,E114.015800 00:18/01:00 62 km/h 1.0x 2560 X 1440 130 MB 20200801172441_r.mov 00:00:59 2020/08/01 17:24:40 20200801184358_f.mov 00:01:00 2020/08/01 18:43:28 130 MB 2560 X 1440 2560 X 1440 2020/08/01 17:24:40 130 MB 20200801172440_f.mov 00:01:00 Primary features of the player are shown below: Video Play Window.
- Page 32 Play List Speed And Driving State Indication Map and Track Display Setup of primary functions such as language, map selection, and speed II. GPS Satellite Connection Exception Even when GPS is successfully connected with the satellite network, your location and environmental factors may directly affect its accuracy. The following factors have a direct impact on satellite signal reception and may cause a failure of the speed detection features and camera reporting.
- Page 33 Check Recorded Files with a Computer Unplug the used MicroSD card and place it into a card reader Connect the card reader to the USB port of the computer. Open the removable disc and you will see the following file folders •...
- Page 34 Wi-Fi Connect Step 1 To enable the Wi-Fi feature, go to system settings, find Wi-Fi, and choose On. Step 2 On your mobile device, navigate to your Wi-Fi settings. Connect to your dash cam's Wi-Fi by tapping its name when it appears. Enter your dash cam's Wi-Fi password if you are prompted to do so.
- Page 35 Step 3 Once you're connected to the dash cam, open the Rexing Connect app on your mobile device. Please select "Keep Trying Wi-Fi" if you see the notification on the right. Step 4 In the app, hit the "Connect" button to connect to your dash cam, allowing you to access live view and view/download your recordings.
- Page 36 Easily download the app by scanning the QR code below or search via the App Store or Google Play. Wi-Fi Connect Troubleshooting If you bring up the Rexing connect app and cannot connect your phone to the dash cam please go to https://www.rexingusa.com/wifi-connect/...
-
Page 37: Product Specifications
Product Specifications Display IPS Touch Screen MicroSD card Class 10 and above (supports a card capacity up to 256GB) Speaker Built-in Built-in Video format Picture format Video resolution 3840 X 2160(4K) Available English, Chinese, Japanese, and other languages. languages G-SENSOR Loop recording 1, 2, minutes Input current... -
Page 38: General Troubleshooting
General Troubleshooting Trouble Possible Causes Solution Device Defective connection Check the plug to the cigarette fails to with the charger or lighter or check the charger fuse for power on burned out fuse continuity • Device fails MicroSD card is not Plug in the card. -
Page 39: Warranty & Support
Warranty & Support Warranty The Rexing M2 Max Dash Cam comes with a full 12-month warranty. If you register your product on our official site (https://www.rexingusa.com/support/registration), you can extend the warranty to 18 months. Support If you have any questions regarding your product, please do not hesitate to contact us at care@rexingusa.com, or call us at... - Page 40 FCCID: This device complies with part 15 of the FCC Rules. Operation is subject to the following two conditions: (1) This device may not cause harmful interference, and (2) this device must accept any interference received, including interference that may cause undesired operation. Changes or modifications not expressly approved by the party responsible for compliance could void the user's authority to operate this equipment.
Need help?
Do you have a question about the M2 Max and is the answer not in the manual?
Questions and answers
What is the correct daylight savings time zone for the west on the Rexing M2 Max camera?
The Rexing M2 Max camera allows users to enable or disable Daylight Savings Time (DST) in its settings. Users can select their appropriate time zone and adjust the DST option accordingly.
This answer is automatically generated