
Subscribe to Our Youtube Channel
Related Manuals for Rexing M3


Summary of Contents for Rexing M3
- Page 1 User Manual The information in this manual is subject to change without notice. www.rexingusa.com...
-
Page 2: Table Of Contents
Table of Contents Overview Backup Camera Lines Package Contents Screen Saver Camera Overview Date Stamp Screen Icons Volume Memory Card Installation Language Date and Time Insert a Memory Card Time Format Formatting a Memory Card Installation Date Format Light Frequency Dash Cam Installation Audio Recording Install a GPS Logger... -
Page 3: Overview
(877) 740-8004 Our Support Team will respond to you as soon as possible. Always a surprise in Rexing. Check us out here. • https://www.facebook.com/rexingusa/ • https://www.instagram.com/rexingdashcam/ • https://www.rexingusa.com/support/registration/... -
Page 4: Package Contents
Package Contents User Manual The information in this manual is subject to change without notice. www.rexingusa.com Rear camera cable Rexing M3 smart mirror dash cam Cable management tool Rear camera USB cable In-car power cable with User manual GPS logger(12ft) -
Page 5: Camera Overview
Front Camera Microphone Note • The M3 dash cam is powered by a supercapacitor, please always connect to the power cord to turn on the dash cam • Press the Power Button to turn On or Off the screen •... -
Page 6: Screen Icons
Screen Icons 08:39 00:29 02/09 Video Recording Take a Photo Lock/Unlock a Video Audio Recording Screen View Switch Button Screen Brightness Adjustment Playback Settings Note • If the screen is off, tap the screen to turn it back on. • If the icons on the screen are hidden, tap the screen to display the icons. -
Page 7: Memory Card Installation
You will need to insert a memory card before beginning recording. Push the memory card into the slot until it locks in place. The M3 dash cam accepts memory cards with a maximum capacity of 256GB. Depending on the memory card’s manufacturer and type, some cards may not be compatible with the dash cam. -
Page 8: Formatting A Memory Card
Do not remove the memory card while the device is transferring or accessing information. Doing so can result in data loss, corruption, or damage to the memory card or device. Rexing is not responsible for losses that result from the use of damaged memory cards, including the loss of data. -
Page 9: Installation
Installation Dash Cam Installation Strap the dash cam to the rearview mirror of your vehicle with the rubber mounting strap. Adjust the angle of the cameras to ensure that it captures your desired view. Mount the rear camera as shown below and then connect the rear camera to the main unit. - Page 10 When connecting the charger to the vehicle’s 12V DC outlet, be sure to use only a Rexing-approved charger. The charger should be at least a 2.5A charger which is designed and supplied specifically for use with your device. Using an incompatible...
-
Page 11: Install A Gps Logger
Install a GPS Logger Plug the power cable into the cigarette light socket and secure the module that on the power cable to a position close to the A-Pillar of the car. The antenna receiver side (the side without 3M adhesive) faces the outside and the side with 3M adhesive faces down. -
Page 12: Video Playback
Video Playback To playback a video on the device, press the icon on the home screen and select a desired file to play. Front Cabin Rear 20210204_080856 20210204_075332 20210204_075249 20210204_154611 20210204_144658 To playback a video on the computer, either use an SD card adapter or connect the device to the computer directly using the included USB cable. -
Page 13: Basic Operations
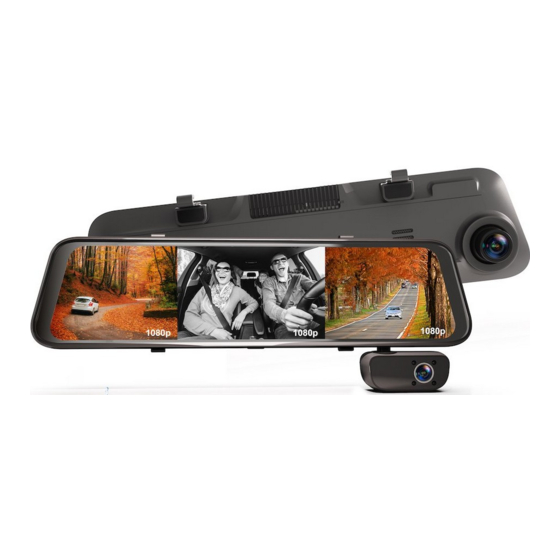
Basic Operations Resolution The dash cam can record videos in two or three channels. The video resolution taken by each camera is FHD 1920x1080P. Loop Recording With Loop Recording Mode enabled, the device will continuously erase the older video as it records a new video, keeping only the footage captured over a user-selected time range. -
Page 14: G-Sensor
G-sensor If a change in gravitational forces is detected, such as in the event of a vehicular accident, the g-sensor will signal to the camera, and an automatic locked file will be placed on the current video, preserving your most crucial footage. Locked videos can be found on the memory card under “\event”. -
Page 15: Parking Mode (Parking Monitor)
Tap the icon to stop recording Tap the icon to access settings Toggle to Time Lapse Recording and select a time length Tap the icon to exit Time lapse Recording 2 Hours 8 Hours 12 Hours 24 Hours Parking Mode (Parking Monitor) Parking mode provides surveillance on your parked vehicle. - Page 16 Tap the icon to stop recording Tap the icon to access settings Toggle to Parking Mode and make a selection (It is recommended to choose the Time-lapse option) Tap the icon to exit There are 2 options under parking mode: We recommend using the Time-lapse Recording option.
-
Page 17: Backup Camera Lines
Backup Camera Lines Use this option to adjust the parking assist lines, you need to connect the red wire of the rear camera to the power supply of the reverse lights. Tap the icon to stop recording Tap the icon to access settings Toggle to Backup Camera Lines and make a selection. -
Page 18: Date Stamp
Date Stamp You have the option to display the date and time in your videos. Note that the date and time stamp cannot be removed from videos if this feature was enabled at the time of recording. Date Stamp Volume Use this option to adjust the volume of the device's sound. -
Page 19: Date And Time
Date and Time Use the following procedure to change the device’s time and date. Tap the icon to stop recording Tap the icon to access settings Adjust Year, Month, Day, Hour, Minute, Second by using Tap the to save and to exit Tap the icon to exit... -
Page 20: Light Frequency
Light Frequency This option should be set according to the power supply specification used in your country or geographical region (U.S. users should select the "60Hz" option). Audio Recording You may choose to record audio with video, or turn off the microphone so that all recorded videos will be muted. -
Page 21: Rear Cam Flip Horizontal
Rear Cam Flip Horizontal (rear cam must be connected) Use the following procedure to flip the image of the rear camera horizontally. Tap the icon to stop recording Tap the icon to access settings Toggle to Rearcam Flip Horizontal and select On/Off Tap the icon to exit Rear Cam Flip Vertical (rear cam must be connected) -
Page 22: Reset
Reset Performing this operation will reset all of your device's settings to their original values. Note Any user-customized settings will be lost. Confirm restore default settings? Cancel FW Version View the current device firmware information. -
Page 23: Warranty And Support
Warranty & Support Warranty The Rexing M3 dash cam comes with a full 12-month warranty. If you register your product on our official site https://www.rexingusa.com/support/registration, you can extend the warranty to 18 months. Support If you have any questions regarding your product, please do not hesitate to contact us at care@rexingusa.com, or call us at... - Page 24 This device complies with part 15 of the FCC Rules. Operation is subject to the following two conditions: (1) This device may not cause harmful interference, and (2) this device must accept any interference received, including interference that may cause undesired operation. Changes or modifications not expressly approved by the party responsible for compliance could void the user's authority to operate this equipment.
Need help?
Do you have a question about the M3 and is the answer not in the manual?
Questions and answers