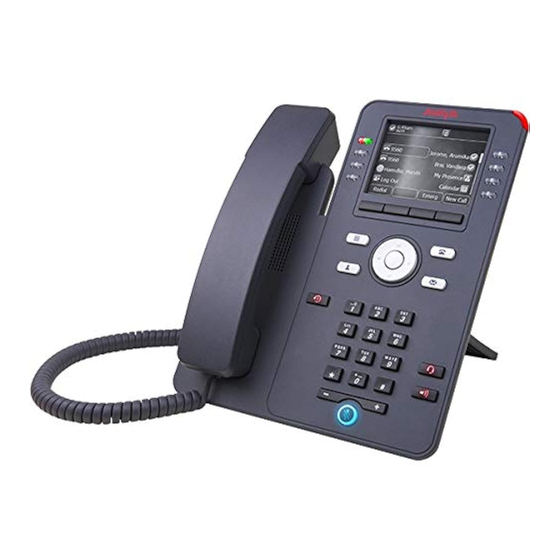
Avaya J169 Quick Reference
In an open sip environment
Hide thumbs
Also See for J169:
- User manual ,
- Installing and administering (203 pages) ,
- Instructions manual (179 pages)
Advertisement
Avaya J169/179 IP Phone in an
Open SIP environment Quick
Reference
General phone icons
The following table lists the icons used in Avaya J169/
J179 IP Phones:
Note:
The icons of Avaya J169/J179 IP Phones look similar
but the Avaya J169 IP Phone has grayscaled icons
and the Avaya J179 IP Phone has colored icons.
Icon
Description
Microphone is muted.
Missed call on your phone.
Incoming call; indicates you have
answered this call.
Outgoing call; indicates you have
made this call.
Incoming call is alerting.
Call is active.
Call is on hold.
Call redirection
Icon
Release 4.0.5
Issue 1
April 2020
©
2020, Avaya Inc.
All Rights Reserved.
Getting started
Entering the file server address
Enter the file server address if the phone prompts, for
example, when you connect to the network for the first
time.
Obtain the file server address from the system
administrator.
1. When you boot the phone for the first time, the Auto
Provisioning screen displays Do you want to
Table continues...
Description
Conference is active.
Conference is on hold.
Use the Right or Left navigation
arrow to see more pages, screens
or options.
Scroll left for other options.
Scroll right for other options.
If the appearance line displays the
icon, the icon indicates that the
phone has encountered a failure
and has preserved the media
session until the user hangs up.
Icon also indicates non-AST mode.
Indicates that the call is using a
wideband codec for excellent voice
quality.
Indicates a low network
performance or presence of local
network issues that might result in
lower call quality.
™
Indicates that the SLA Mon
agent
has taken control of the phone.
Indicates that the call is being
™
recorded for SLA Mon
.
Indicates that the ringtone is off.
activate Auto Provisioning now? , press one
of the following:
• Yes: To connect to the Device Enrollment Services
(DES) server to obtain the file server address and
ignore the file server address from the DHCP.
• No: To obtain the file server address from the
DHCP server.
In case of a time out, and the DHCP does not provide
the file server address, the phone selects Yes.
If the connection to DES is successful, and the phone
receives the file server address, the phone continues
to boot and not prompt you for the file server address.
If the connection to DES is successful, and the phone
does not receive the file server address, the phone
prompts you for an Enrollment code. Contact your
administrator for an Enrollment code. When you enter
the valid Enrollment code, the phone continues to
boot and not prompt you for the file server address.
If you do not have an Enrollment code, press Cancel.
The phone continues to boot using the DHCP.
If the connection is successful, the phone displays the
Starting message. If the phone does not receive
the file server address from the DES or the DHCP
server, the phone displays the Enter the file server
address screen.
2. On Enter the file server address screen, press one of
the following:
• Config: To enter the file server address.
• Never: To never prompt for the file server address.
• Cancel: To cancel the prompt and display the Login
screen.
3. After you have pressed Config, enter the file server
address in the Address field.
The address can be in the form of a numerical IP
address or an alphanumeric Fully Qualified Domain
Name (FQDN) like http://myfileserver.com/j100/.
Tip:
To enter the dot symbol (.) in the field, press the
alphanumeric soft key to toggle to the
alphanumeric mode.
To enter the forward slash symbol (/) in the field,
press the / soft key.
4. Press Save.
The phone continues to boot and connect to the file
server address for provisioning configuration.
1
Advertisement
Table of Contents

Subscribe to Our Youtube Channel
Related Manuals for Avaya J169


Summary of Contents for Avaya J169
- Page 1 Enrollment code, the phone continues to and has preserved the media The following table lists the icons used in Avaya J169/ session until the user hangs up. boot and not prompt you for the file server address.
-
Page 2: Locking Your Phone
Logging in to your phone Making an emergency call Searching LDAP contacts Your extension and password are provided by your Ensure that the Emerg soft key is assigned by your You can search LDAP directory using Contacts administrator. administrator. application on your phone or directly. You can use multiple search attributes and display up to 20 matches for each 1. -
Page 3: Broadworks Anywhere
• Navigate to an empty line, and press Custom. A call parked by the monitored user is indicated with the • On the Avaya J100 Expansion Module, press the With the Busy Lamp Field (BLF) feature, you can monitor the call status of other phones connected to the same button corresponding to an empty line. - Page 4 Use this procedure to configure the mobile device you The red LED light turns on, indicating that the 7. Change the following: want to use in conjunction with your office phone. feature is available, but inactive. • Description: To change the description, press 4.
-
Page 5: Shared Call Appearance
The call is unparked from the shared room, and you Parking feature configured on the phone. Contact your SCA is available only in Avaya J139 IP Phone, Avaya system administrator for more details. can talk to the caller. The Shared Parking line displays J169/J179 IP Phone and Avaya J159 IP Phone. -
Page 6: Pairing A Bluetooth Enabled Headset With Your Phone
2. Scroll to Settings, and press Select. Note: L100 Series Headsets. 3. Scroll to Display, and press Select. Avaya J169 IP Phone does not support the Bluetooth 1. Press Main menu. 4. Use the Down Arrow key to go to the Time format feature.
Need help?
Do you have a question about the J169 and is the answer not in the manual?
Questions and answers