Advertisement
WHAT'S INCLUDED

 NOTICE

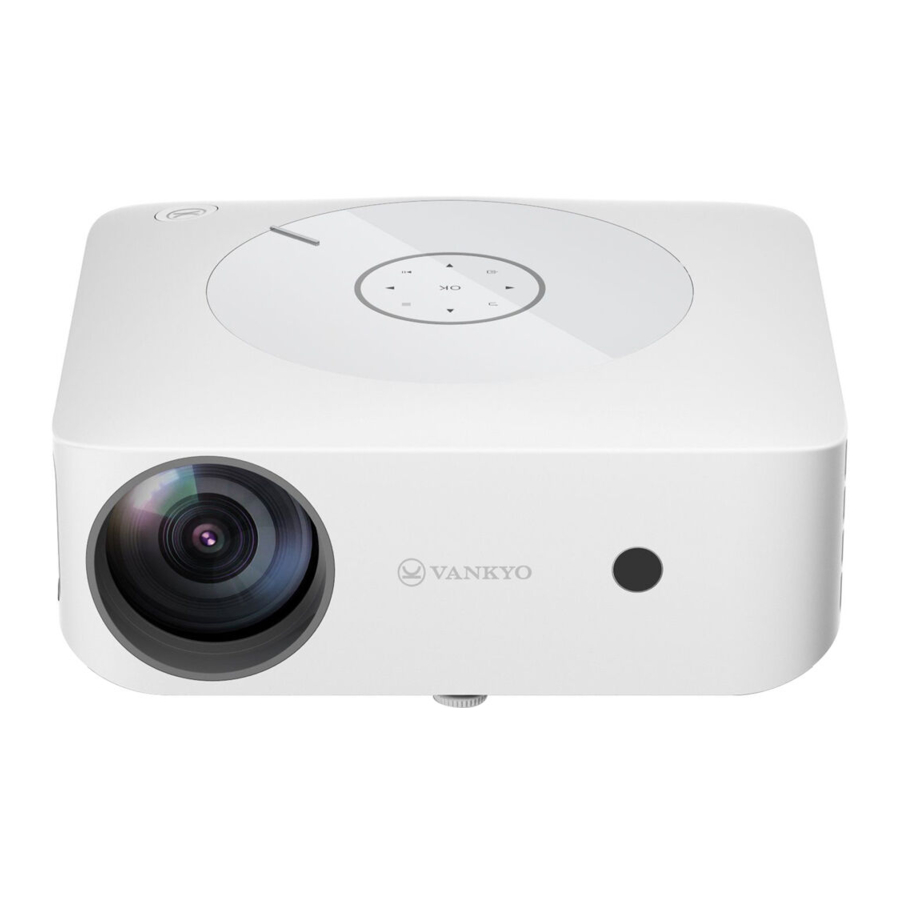
PRODUCT OVERVIEW

QUICK START
Plug the power cord into an outlet.

Take off the lens cover.

Connect your device to the projector correctly.

Press the Power Button to turn on the projector.

Select the correct input source to project your device.

Adjust the kickstand accordingly.

Adjustthe focus ring on the projector and correct keystone distortion in Projection Image Settings to get the best image performance.

Press the Power Button twice to turn off the projector.

HOMEPAGE

KEYSTONE CORRECTION
Step 1:
Select  on the Homepage to enter the interface of Settings, then select Projection Images Setting to enter the interface of Projection. Or, press
  on the remote to directly enter the interface of Projection.

Step 2:
*Select Front in the option of Keystone Advanced and the Manual Keystone option will be displayed. You can correct the Vertical keystone distortion manually until the shape is evenly rectangular.

* Select Side in the option of Keystone Advanced and the 4-Point Keystone option will be displayed. You can correct the image shape by four corners.

MULTIMEDIA CONNECTION
USB Disk/Memory Card Connection
Step 1: Turn on the projector and insert your USB disk/memory card into the USB port/memory card slot.

Step 2: Go to Homepage and select the file category you would like to display among Movie, Music, Photo and Office Suite, then enter the inserted USB disk/memory card to check all files stored.
* Video files
- Select Movie to correspondingly read video files stored.
- Tap OK on the projector/Press OK on the remote for a certain video file to enter full-screen display.
- Tap OK/
![]() on the projector or press OK/
on the projector or press OK/![]() on the remote w hen playing a video to bring up the toolbar to control the video playing.
on the remote w hen playing a video to bring up the toolbar to control the video playing.
 on the projector or press OK/
Video Format Supported: AVI/MP4/MKV/FLV/MOV/RMVB/3G2/MPG/VOB/SWF/MPG/H.264/TS/WMV
* Audio files
- Select Music to correspondingly read audiofiles stored.
- Tap OK on the projector/Press OK on the remote for a certain audio file to enter full-screen display, then press
![]() on the remote to start/pause playing.
on the remote to start/pause playing.
 on the remote to start/pause playing.
Audio Format Supported: AAC/MP3/FLAC/OGG/APE/AMR/WAV/MP2
* Photo files
- Select Photo to correspondingly read photo files stored.
- Tap OK on the projector/Press OK on the remote for a certain photo file to enter full-screen display.
Image Format Supported: JPEG/BMP/PNG
* Document files
- Select Office Suite to correspondingly read document files stored.
- Tap OK on the projector/Press OK on the remote to view contents of a certain file.
- Tap
![]() on the projector or press
on the projector or press ![]() on the remote to jump the cursor to the toolbar at the top.
on the remote to jump the cursor to the toolbar at the top.
Text Format Supported: DOC/DOCX/XLS/XLSX/PPT/PPTX/TXT
Step 3:Tap on the projector or press on the remote to go back to Homepage.
HD Connection
Step 1:Turn on the projector and connect your device to the HD 1/HD 2 Port of the projector with the provided HD cable.

Step 2: Select HD 1/HD 2 on the left side of the Homepage as the input source, then the contents of your device will be projected to the screen/wall.

 Tip:
Tip:
For Windows 7 or higher system, press the "Windows Logo + P" key combination to access four display modes.
- PC screen only option displays contents on computer screen only.
- Duplicate option displays the same contents on both computer screen and projected screen.
- Extend option splits the display between the computer screen and the projected screen.
- Second screen only option displays contents only on the projected screen.
AV Connection
Step 1: Turn on the projector and connect your device to the AV Port of the projector with an AV cable.

Step 2: Select AV on the left side of the Homepage as the input source, then the contents of your device will be projected to the screen/wall
SCREEN MIRRORING
For iOS System
Step 1: Select  on the upper right corner of the Homepage, then enter Settings interface and select Wifi Setting.
Step 2: Turn on the WiFi switch of the projector and connect the projector to your router's WiFi.

Step 3: Enter WiFi settings of your iOS device and connect it to the same router's WiFi.
Step 4: Go to Homepage > iOS Cast to enter the following interface.

Step 5: ActivateScreen Mirroring/AirPlay Mirroring on your iOS device and search for the projector.
Step 6: Select Leisure XXXX from the searching list to connect.

Step 7: The contents on your iOS device will be mirrored to the wall/screen.
For Android System
To activate this function, please make sure your Android device supports Multi-screen/Wireless display. Names may differ from one Android device to another.
Step 1: Turn ON the WiFi switch in your Android device.
Note: Successful WiFi connection is not a must, but please make sure the WiFi switch in your Android device is ON.
Step 2: Go to Homepage> Miracast to enter the following interface.

Step 3: Activate Multi-Screen function on your Android device and search for the projector.
Step 4: Select Leisure XXXX from the searching list to connect.
Step 5: The contents on your Android device will be mirrored to the wall/screen.
Note:
- The fluency of screen mirroring will be affected by the network environment. A bandwidth of 100Mbit or more is recommended when using screen mirroring.
- Make sure your mobile device is close to the projector when using wireless connection. A distance within 3ft is recommended.
- Some mobile devices may not support screen mirroring due to the compatibility.
SETTINGS
Select on the upper right corner of the Homepage to enter Settings interface.

| Wifi Setting | Connect the projector to your router's WiFi |
| Projection Image Setting |
|
| Language Setting | Select a language for the projector. |
| System Update |
|
| Other Setting |
|
| About | Check the System Version and MAC Address of the projector. |
 to turn the projector on when you plug its power cord into an electrical outlet for the next use.
PROJECTION DISTANCE & SIZE

* The recommended projection distance varies with different projection contents. Please adjust the distance between the wall/screen and the projector properly as needed.
* Ambient darkness will improve the clarity of the projected images.
SPECIFICATION
| Display Technology | LCD | Light Source | LED |
| Resolution | Native 1920 x 1080 | Input Signal | 576i, 720P, 1080i, 1080P |
| Installation Type | Front/Rear/Ceiling | Aspect Ratio | 4:3/16:9/Auto |
| Focus | Manual | Electronic Keystone | ± 50o |
| Speaker | 3W/4 ohm | Power Supply | AC 100-240V,50/60Hz |
| Unit Dimension | 240 x 210 x 90mm | Unit Net Weight | 1.8kg |
| Photo Format Supported | JPGE/BMP/PNG | Audio Format Supported | AAC/MP3/FLAC/OGG/APE/AMR/ WAV/MP2 |
| Mounting Screws | Metric | Number of Screw | 4 |
| Video Format Supported | AVI/MP4/MKV/FLV/MOV/RMVB/3G2/MPG/VOB/SWF/MPG/H.264/TS/WMV | ||
| Ports | HD In x 2/ USBx1 / Audio Out x 1/ AVIn x 1/ Memory Card Slot x 1 | ||
| Text Format Supported | DOC/DOCX/XLS/XLSX/PPT/PPTX/TXT | ||
TROUBLESHOOTING GUIDE
- The content from Hulu, Netflix, and similar services can not be mirrored or cast.
* Due to the copyright restriction from Hulu, Netflix, and similar services, the contents MAY NOT be mirrored or cast. - What should I do if I want to watch the content from Hulu, Netflix, and similar services via the projector?
* Please prepare a FireTVstick, Rokustick or ChromecastTM ( not included), then connect it to the projector to watch the content. - Blurry Image
* Adjust focus ring/keystone.
* Projector and screen/wall must be in effective distance. - Remote Unresponsive
* Make sure remote points at IR receiver directly.
* Do not cover IR receiver.
* Try a new pair of AAA batteries. - Upside Down Images
* Go to Homepage >![]() > Projection Image Setting > Projection Mode to flip the projection image.
> Projection Image Setting > Projection Mode to flip the projection image. - Factory Reset
* Go to Homepage >![]() > System Update > Restore Factory to reset the projector to default settings.
> System Update > Restore Factory to reset the projector to default settings.
 > Projection Image Setting > Projection Mode to flip the projection image.
VANKYO SUPPORT
North America support@ivankyo.com
United Kingdom support.uk@ivankyo.com


Documents / Resources
References
Download manual
Here you can download full pdf version of manual, it may contain additional safety instructions, warranty information, FCC rules, etc.
Advertisement


Need help?
Do you have a question about the Leisure E30T and is the answer not in the manual?
Questions and answers