
Related Manuals for Vankyo Leisure 3


Summary of Contents for Vankyo Leisure 3
- Page 1 2018-2019 VanTop, Inc. All rights reserved. Leisure 3 User Manual V1.04 1 / 32...
-
Page 2: Table Of Contents
www.ivankyo.com 2018-2019 VanTop, Inc. All rights reserved. Contents Notice ..................................................................... 3 Introduction to your projector ..........................................................3 Product Packing List ............................................................3 Projector Overview ............................................................4 Projector Specification ............................................................5 Setting up Your Projector ............................................................6 Projector Installation Options ......................................................... 6 Projection Distance and Size .......................................................... -
Page 3: Notice
If the projector is mounted on a ceiling or wall, it should be installed using mounting hardware that supports it securely and safely If the projector is damaged, do not attempt to service this product yourself, and contact the VANKYO Team... -
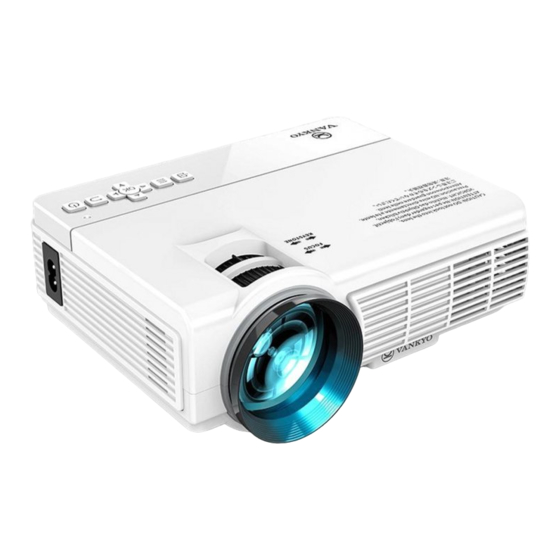
Page 4: Projector Overview
2018-2019 VanTop, Inc. All rights reserved. AV cable HDMI cable VGA cable Power cable If there is any part missing, contact the VANKYO Support Team. Projector Overview 4 / 32... -
Page 5: Projector Specification
2018-2019 VanTop, Inc. All rights reserved. Important: When using the remote, make sure it is pointed to the IR sensor on the rear of the Leisure 3. Projector Specification Display Light Source Technology Resolution Native 800 x 480 Input Signal 576i、576P、720i、720P、1080i、1080P... -
Page 6: Setting Up Your Projector
www.ivankyo.com 2018-2019 VanTop, Inc. All rights reserved. Setting up Your Projector Projector Installation Options Depending on how you positioned the projector, you may need to change the projected image orientation so the image can be viewed correctly by the audience. If you project from the ceiling or the rear, please go to Menu >... -
Page 7: Projection Distance And Size
www.ivankyo.com 2018-2019 VanTop, Inc. All rights reserved. Rear Ceiling. In this mode, the projector is placed behind the screen with the lens upside down. This mode allows you to flip the image over. A compatible screen which supports rear projection will be required. Front Ceiling, which flips the image over top-to-bottom to project upside-down from a ceiling or wall mount. -
Page 8: Projector Connections
www.ivankyo.com 2018-2019 VanTop, Inc. All rights reserved. Note: The image will be poor if the projector is too far or too close to the screen, or if the focus ring and Keystone adjustment are incorrect. Projector Connections When you connect any device to the projector, please follow the steps below at your first use of the projector. Step 1: Connect the power cord into the projector's power inlet, then plug the power cord into an electrical outlet;... -
Page 9: Playing Videos
www.ivankyo.com 2018-2019 VanTop, Inc. All rights reserved. Step 1: After connecting a different external device, press the button on the projector or remote to bring up the Input Source menu. Step 2: Press the Up/Down on the projector or remote to select the correct input source, then press the OK button of the projector/remote to confirm. For USB/Hard Disk or microSD (TF) card, please select input source USB or TF. - Page 10 www.ivankyo.com 2018-2019 VanTop, Inc. All rights reserved. enter the following interface. Step 2: Select the disk C:, then press the OK button to view the folders and files on that device. Step 3: Select the video file or click the folder to enter the next directory till you find the video you would like to play in the directory. Step 4: Press the button on the projector or the Play/Pause button on the remote to play the selected video in full-screen mode.
- Page 11 www.ivankyo.com 2018-2019 VanTop, Inc. All rights reserved. Press the OK button when playing videos, it will show a bottom bar with different settings. Press Down or Back button to hide it. Press the right arrow button to show more options in 2 pictures below.
-
Page 12: Playing Music
www.ivankyo.com 2018-2019 VanTop, Inc. All rights reserved. Tips: Your projector can play videos with formats of AVI/MP4/MKV/FLV/MOV/ RMVB/3GP/MPEG1/ MPEG2/H.264/XVID. All the folders will be shown in the USB disk or microSD card, but you can only play the video files after you select MOVIE in the main interface. Playing Music After selecting USB or TF in the interface of Input Source, you will enter the main interface that shows the options of MOVIE, MUSIC, PHOTO, and TEXT. - Page 13 www.ivankyo.com 2018-2019 VanTop, Inc. All rights reserved. Step 4: Press the button on the projector or the Play/Pause button on the remote to play the selected music. A depiction of the music being played will be displayed on the screen. Tips: Select the Return icon and press the OK button to return to the root directory shown in Step 1 no matter in which directory, while select the Up Folder icon and press the OK button to return to the parent directory.
-
Page 14: Displaying Photos
www.ivankyo.com 2018-2019 VanTop, Inc. All rights reserved. Play/Pause: plays or pauses the current music. FB: Fast Backward, rewinds the music quickly while playing it. The rewinding speed ranges from 2X to 16X. FF: Fast Forward, advances the music forward quickly while playing it. The forward speed ranges from 2X to 16X. Prev.: Previous, goes back to the beginning of the prior track that played. - Page 15 www.ivankyo.com 2018-2019 VanTop, Inc. All rights reserved. Step 1: Select PHOTO in the main interface by pressing the UP/Down/Left/Right buttons and the font of the selected frame will be highlighted to be red. Then press the OK button to enter the following interface. Step 2: Select the C: disk, then press the OK button to view the folders and files on that device.
- Page 16 www.ivankyo.com 2018-2019 VanTop, Inc. All rights reserved. Step 4: Press the button on the projector or the Play/Pause button on the remote to play the selected photo in full-screen mode. Tips: Select the Return icon and press the OK button to return to the root directory shown in Step 1 no matter in which directory, while select the Up Folder icon and press the OK button to return to the parent directory.
-
Page 17: Displaying Texts
www.ivankyo.com 2018-2019 VanTop, Inc. All rights reserved. Playlist: a list of photo files that can be played from the folder. If you did not tick the favorite photos by pressing the OK button in the Sub-menu, it would show all the photos in this folder that can be played;... - Page 18 www.ivankyo.com 2018-2019 VanTop, Inc. All rights reserved. Step 1: Select TEXT in the main interface by pressing the UP/Down/Left/Right buttons and the font of the selected frame will be highlighted to be red. Then press the OK button to enter the following interface. Step 2: Select the C: disk, then press the OK button to view the folders and files on that device.
- Page 19 www.ivankyo.com 2018-2019 VanTop, Inc. All rights reserved. Prev P: Previous Page, goes back to the previous page of the current text. Next P: Next Page, goes to the next page of the current text. Prev.: Previous, goes back to the previous text. Next: goes to the next text.
-
Page 20: Connecting To A Computer
www.ivankyo.com 2018-2019 VanTop, Inc. All rights reserved. Connecting to a Computer When you're in a conference room and need to project slides, videos, music and so on, please connect your computer to the projector. Option 1: Connect the projector to your computer by using the HDMI cable in the package. An HDMI connection is recommended for projecting movies, videos, and other files which need to be HDMI. - Page 21 www.ivankyo.com 2018-2019 VanTop, Inc. All rights reserved. Step 5: Select VGA to project any file on your computer by pressing the Up/Down or the button. Notes: To connect a Mac/Surface that includes only a Mini DisplayPort, Thunderbolt port, or Mini-DVI port, you need to obtain an adapter that allows you to connect to the projector's HDMI or VGA port.
- Page 22 www.ivankyo.com 2018-2019 VanTop, Inc. All rights reserved. You need to select a display option when connecting your computer to the projector for the first time. You can change the display mode anytime after that on the computer. For Windows7 and higher system, pressing the Windows logo key + P key at the same time invokes a display-switch toolbar with various display options shown below: ...
-
Page 23: Connecting To A Mobile Device
www.ivankyo.com 2018-2019 VanTop, Inc. All rights reserved. the content to the projection screen. For more information, please refer to https://support.apple.com/en-us/HT202351; Connecting to a Mobile Device If you would like to project the files on your mobile devices like a smartphone or tablet, you can connect the projector to them. Step 1: Turn on your mobile device and the projector. -
Page 24: Connecting To A Dvd Player
www.ivankyo.com 2018-2019 VanTop, Inc. All rights reserved. Tips: Select Trust when there may be a pop-up window on your mobile device, then you can project any files on the mobile device. When it shows the screen with some QR codes, butterfly icon and so on after selecting, please do not scan any QR code and wait for a moment. Never directly insert your Lightning cable, Micro USB cable or the Type-c cable to the USB port on the projector. - Page 25 www.ivankyo.com 2018-2019 VanTop, Inc. All rights reserved. Step 3: Connect the yellow jack plug to the AV port on the projector. Step 4: Press the to bring up the Input Source menu. Step 5: Select the correct input source AV to project the DVD in your DVD player by pressing the button.
-
Page 26: Using The Basic Projector Features
www.ivankyo.com 2018-2019 VanTop, Inc. All rights reserved. Using the Basic Projector Features You can use the projector's Menu system to adjust the settings to control how your projector works. Picture Settings Press the Menu button, and it will display the PICTURE settings shown below. Picture Mode: switches among the image modes of Standard, Soft, User, and Vivid for different projected contents. -
Page 27: Sound Settings
www.ivankyo.com 2018-2019 VanTop, Inc. All rights reserved. Press the Up and Down button to select the option you would like to change, then press the OK button to enter the submenu to set up. When you finish changing settings on a menu, press the Back button to exit. Sound Settings Press the Left and Right buttons to enter the Sound Settings: Sound Mode: To filter the noise with different frequencies for projected contents by setting up the different sound pattern which includes Standard, MUSIC, MOVIE, Sports, and User... -
Page 28: Option Settings
www.ivankyo.com 2018-2019 VanTop, Inc. All rights reserved. Option Settings Press the Left and Right buttons to enter the Option Settings: OSD Language: to set up the language displayed in the operation interface. Restore Factory Default: to reset the projector. Projection Mode: Front Table, Rear Table, Front Ceiling and Rear Ceiling. OSD Duration: adjusts the duration that a Menu appears on the screen after the last button press on the projector or Remote. -
Page 29: After Using Your Projector
www.ivankyo.com 2018-2019 VanTop, Inc. All rights reserved. After Using Your Projector Please turn off the projector after using it. Press the On/Off button once, and the projector displays a shutdown confirmation screen. Turn off the projector by another press. (To leave it on, press any other button.) Unplug the power cord of the projector. - Page 30 www.ivankyo.com 2018-2019 VanTop, Inc. All rights reserved. *Try another HDMI cable if you select the HDMI input source. 3. Why does the projection screen show No Signal? *Make sure all cables are plugged correctly and firmly. *Make sure you select the right input source. For example, if you insert a USB drive, please select USB in the interface of Input Source. *USB 2.0 disk is supported on this projector.
- Page 31 10. What should I do if there is Expanding Dark spot on the projected image, or smoke is coming from the projector? *Check if the fan noise increases or the fan stops working. Unplug the projector and contact the VANKYO Team for assistance.
- Page 32 www.ivankyo.com 2018-2019 VanTop, Inc. All rights reserved. 16. How can I connect my smartphone to the projector? *HDMI adapter is needed to delivery display from smartphones. Adapters vary depending on smartphones. 18. What kind of cable do I need when connecting TV BOX, TV, Firestick and DVD Player to the projector? *HDMI cable for all devices mentioned above.
Need help?
Do you have a question about the Leisure 3 and is the answer not in the manual?
Questions and answers