
Related Manuals for Vankyo Leisure 410


Summary of Contents for Vankyo Leisure 410
- Page 1 2018-2019 VanTop, Inc. All rights reserved. Leisure 410 User Manual V1.01 1 / 39...
-
Page 2: Table Of Contents
www.ivankyo.com 2018-2019 VanTop, Inc. All rights reserved. Contents Notice ..........................................................................................3 Introduction to your projector ................................................................................3 Product Packing List ..................................................................................3 Projector Overview................................................................................... 4 Projector Specification ................................................................................... 5 Setting up Your Projector ..................................................................................6 Projector Installation Options ..............................................................................6 Projection Distance and Size ............................................................................... -
Page 3: Notice
If the projector is mounted on a ceiling or wall, it should be installed by the safe mounting hardware; If the projector is damaged, do not attempt to service this product yourself and contact Vankyo Support Team; Introduction to your projector Product Packing List Please keep all the packaging material in case shipment is needed in the future. -
Page 4: Projector Overview
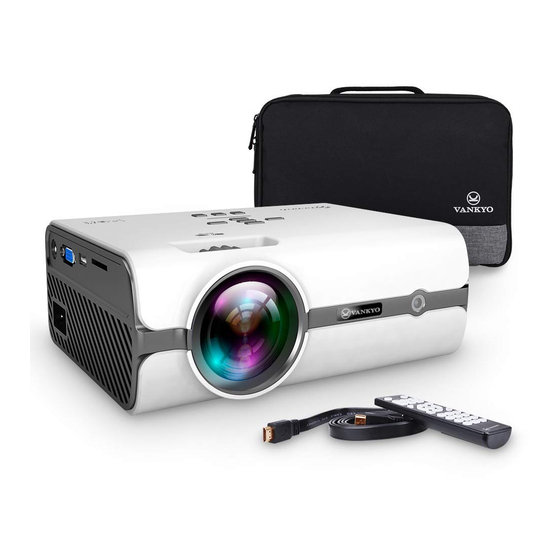
2018-2019 VanTop, Inc. All rights reserved. AV cable HDMI cable Power cable VGA cable If there is any part missing,please contact Vankyo Support Team. Projector Overview 4 / 39... -
Page 5: Projector Specification
www.ivankyo.com 2018-2019 VanTop, Inc. All rights reserved. Projector Specification 5 / 39... -
Page 6: Setting Up Your Projector
www.ivankyo.com 2018-2019 VanTop, Inc. All rights reserved. Setting up Your Projector Projector Installation Options Depending on how you positioned the projector, you may need to change the projection direction to project your images correctly. If you project from the ceiling or from the rear, please go to Menu—Picture—Projection Direction to set up the projection modes. -
Page 7: Projection Distance And Size
www.ivankyo.com 2018-2019 VanTop, Inc. All rights reserved. Front On Ceiling, which flips the image over top-to-bottom to project upside-down from a ceiling or wall mount. Rear On Ceiling, in this mode, the projector is placed behind the screen with the lens upside down. This mode allows you to flip the image over. A compatible screen which supports rear projector will be required. -
Page 8: Projector Connections
www.ivankyo.com 2018-2019 VanTop, Inc. All rights reserved. Locate the projector at an appropriate position, then adjust the focus ring and Keystone (on the back side of the projector) manually to get the best image performance. Note: Being too far or too close between the projector and the wall/screen, or the incorrect adjustment of the focus ring and Keystone may result in the poor image. Projector Connections When you connect any device to the projector, please follow the steps below at your first use of the projector. -
Page 9: Connecting To The External Storage Device
www.ivankyo.com 2018-2019 VanTop, Inc. All rights reserved. Step 8: Adjust the focus ring and keystone (on the back side of the projector) to get the best image performance. Tips: After you plug the power cord into the inlet, turn on the projector until the LED indicator on the projector shows solid Red. If the projector is turned on and working properly, the LED indicator shows solid Blue. -
Page 10: Playing The Video
www.ivankyo.com 2018-2019 VanTop, Inc. All rights reserved. Playing the Video After selecting USB/SD in the interface of Input Source, you will enter the main interface which shows the options of Movie, Music, Photo, Text and Support. Step 1: Select Movie in the main interface by pressing the Left/Right buttons, the selected frame will show a picture, then press the OK/ Enter button on the projector/remote to enter the following interface;... - Page 11 www.ivankyo.com 2018-2019 VanTop, Inc. All rights reserved. Step 2: Select the disk C, then press the OK/Enter button on the projector/remote to enter the disk; Step 3: Select the video file or click the folder to enter the next directory till you find the video you would like to play in the directory; Step 4: Press the button on the projector or the Play/Pause button on the remote to play the video into full-screen mode.
- Page 12 www.ivankyo.com 2018-2019 VanTop, Inc. All rights reserved. Tips: Select the Return icon and press the OK/Enter button to return to the root directory shown in Step 1 no matter in which directory, while select the Up Folder icon and press the OK button to return to the parent directory;...
-
Page 13: Playing The Music
www.ivankyo.com 2018-2019 VanTop, Inc. All rights reserved. then exits from the current video; One loops to play the current video all the time; Set A/Set B/None: selects Set A by pressing the OK/Enter button to set a time point and select Set B by pressing OK/Enter button to set another time point when playing the video, then it will loop to play the video fragment between these points. - Page 14 www.ivankyo.com 2018-2019 VanTop, Inc. All rights reserved. Step 1: Select Music in the main interface by pressing the Left/Right buttons, the selected frame will show a picture, the press the OK/ Enter button on the projector/remote to enter the following interface; Step 2: Select the disk C, then press the OK/Enter button on the projector/remote to enter the disk;...
- Page 15 www.ivankyo.com 2018-2019 VanTop, Inc. All rights reserved. Step 4: Press the button on the projector or the Play/Pause button on the remote to play the music. Tips: Select the Return icon and press the OK/Enter to return to the root directory shown in Step 1 no matter in which directory, while select the Up Folder icon and press the OK button to return to the parent directory;...
- Page 16 www.ivankyo.com 2018-2019 VanTop, Inc. All rights reserved. Play/Pause: plays or pauses the current music by pressing the OK/Enter button; FB: Fast Backward, rewinds the music back quickly while playing it. The rewinding speed ranges from 2 X to 16X; FF: Fast Forward, pushes the music to move forward quickly while playing it. The forward speed ranges from 2 X to 16X; Prev.: Previous, goes back to the previous music;...
-
Page 17: Playing The Photo
www.ivankyo.com 2018-2019 VanTop, Inc. All rights reserved. Tips: Your projector can play the audio files with formats of MP3/WMA/M4A/AAC/WAV. All the folders will be shown in the USB disk or SD card, but you can only play the music files after you select Music in the main interface. Playing the Photo After selecting USB/SD in the interface of Input Source, you will enter the main interface which shows the options of Movie, Music, Photo, Text and Support. - Page 18 www.ivankyo.com 2018-2019 VanTop, Inc. All rights reserved. Step 2: Select the disk C, then press the OK/Enter button on the projector/remote to enter the disk; Step 3: Select the music file or click the folder to enter the next directory till you find the music you would like to play in the directory; Step 4: Press the button on the projector or the Play/Pause button on the remote to play the photo.
- Page 19 www.ivankyo.com 2018-2019 VanTop, Inc. All rights reserved. Tips: Select the Return icon and press the OK/Enter button to return to the root directory shown in Step 1 no matter in which directory, while select the Up Folder icon and press the OK button to return to the parent directory;...
-
Page 20: Playing The Text
www.ivankyo.com 2018-2019 VanTop, Inc. All rights reserved. : rotates the photo by 90 degrees clockwise; : rotates the photo by 90 degrees counterclockwise; :zooms in the photo size from 1X to 8X; : zooms out the photo size to 1/2 and 1/4; Move: after zooming in the photo, press the OK/Enter button when selecting the Move icon. - Page 21 www.ivankyo.com 2018-2019 VanTop, Inc. All rights reserved. Step 2: Select the disk C, then press the OK/Enter button on the projector/remote to enter the disk; Step 3: Select the music file or click the folder to enter the next directory till you find the music you would like to play in the directory; Step 4: Press the button on the projector or the Play/Pause button on the remote to play the photo.
- Page 22 www.ivankyo.com 2018-2019 VanTop, Inc. All rights reserved. Press the Up/Enter button on the remote when playing the text, it will show a bottom bar with different settings. Press the Down button or the Menu button on the projector, the Down Button or the Exit button on the remote to hide the bottom bar and into a full-screen mode. Prev P: Previous Page, goes back to the previous page of the current text;...
-
Page 23: Connecting To The Computer
www.ivankyo.com 2018-2019 VanTop, Inc. All rights reserved. OK button to return to the parent directory; All the folders will be shown in the USB disk or SD card, but you can only play the text after you select TEXT in the main interface. Your projector can play the text files with a format of TXT. - Page 24 www.ivankyo.com 2018-2019 VanTop, Inc. All rights reserved. Option 2: You can also connect the projector to your computer by using a VGA computer cable in the package. Step 1: Turn on your computer and the projector; Step 2: Connect the VGA cable to your computer's VGA port; Step 3: Connect the other end to the VGA port on your projector;...
- Page 25 www.ivankyo.com 2018-2019 VanTop, Inc. All rights reserved. You need to select the project option when connecting your computer to the projector at the first use no matter you connected by HDMI or VGA option. For Windows7 and higher system, pressing the Windows logo key + P key at the same time invokes a display-switch toolbar with various display options shown below: ⚫...
-
Page 26: Connecting To The Mobile Device
www.ivankyo.com 2018-2019 VanTop, Inc. All rights reserved. Extend - This option splits the image between the computer and projector. This way you can display one thing on your computer screen and something else on the projector screen. This is great when using PowerPoint so the presentation is displayed on the projector while your presentation notes are displayed on your computer screen in front of you. Projector Only (Second Screen Only) - As its name implies, this option will display the content of your presentation on the projector, but show a blank screen on your computer. - Page 27 www.ivankyo.com 2018-2019 VanTop, Inc. All rights reserved. Step 5: Press the button on the projector or the Source button on the remote to enter the interface of Input Source; Step 6: Select HDMI to project any file on your mobile device by pressing the Up/Down or the Source button on the projector or the remote, then press the OK/Enter button. Tip: Select Trust when there may be a pop-up window on your mobile device, then you can project any files on the mobile device;...
-
Page 28: Connecting To The Dvd Player
www.ivankyo.com 2018-2019 VanTop, Inc. All rights reserved. Here are some pictures of the proper cable below as reference: For iPhone For Android device with Micro USB For Android device with Type-C Connecting to the DVD Player If you would like to watch movies by using the projector and a DVD player, you can use the AV cable in the package. Step 1: Turn on your DVD player and the projector;... -
Page 29: Using The Basic Projector Features
www.ivankyo.com 2018-2019 VanTop, Inc. All rights reserved. Using the Basic Projector Features You can use the projector's Menu system to adjust the settings to control how your projector works by pressing the Menu button. TV Settings 1. Insert the coaxial cable in to the TV port on the projector; 2. -
Page 30: Picture Settings
www.ivankyo.com 2018-2019 VanTop, Inc. All rights reserved. Auto Tuning: the projector will search the TV channels automatically. ATV Manual Tuning: you can also manually adjust the channels by the Upward/Downward buttons. Press the Up and Down button to select the option you would like to change, then press the OK/Enter button to enter the submenu to set up. When you finish changing settings on a menu, press the Menu button on the projector or the Exit button on the remote to exit. - Page 31 www.ivankyo.com 2018-2019 VanTop, Inc. All rights reserved. Picture Mode: switches among the image modes of Standard, Soft, User and Vivid for different projected contents. You can set up the Contrast, Brightness, Color, Sharpness and Tint for the image after you select the User mode; Color Temperature: switches among the color temperature modes of Medium, Warm, User and Cool for different color preferences of the image.
-
Page 32: Sound Settings
www.ivankyo.com 2018-2019 VanTop, Inc. All rights reserved. Projection Direction: you can set the projection modes Front, Rear On Desk, Front On Ceiling and Rear On Ceiling. Press the Up and Down button to select the option you would like to change, then press the OK/Enter button to enter the submenu to set up. When you finish changing settings on a menu, press the Menu button on the projector or the Exit button on the remote to exit. -
Page 33: Sleep Timer Settings
www.ivankyo.com 2018-2019 VanTop, Inc. All rights reserved. Sound Mode: to set up sound patterns of Standard, MUSIC, MOVIE, Sports and User for different projected contents; Balance: to balance the sound of the left and right channel of the speaker; Auto Volume: to intelligently adjust volume; Surround Sound: you can choose different sound modef from Off, SRS TruSurround XT and Surround options. -
Page 34: Option Settings
www.ivankyo.com 2018-2019 VanTop, Inc. All rights reserved. Sleep Timer: can shut off the projector after a set amount of time. Press the Up and Down button to select the option you would like to change, then press the OK/Enter button to enter the submenu to set up. When you finish changing settings on a menu, press the Menu button on the projector or the Exit button on the remote to exit. -
Page 35: After Using Your Projector
www.ivankyo.com 2018-2019 VanTop, Inc. All rights reserved. OSD Language: to set up the language displayed in the operation interface. Restore Factory Default: to reset the projector; Blending: to adjust the background transparency of Menu interface. You can choose from Low, Middle, High and Off; OSD Duration: to adjust the duration of keeping the Menu interface. -
Page 36: Troubleshooting
*Encryption applied to the videos or media player which holds the video *If the lamp of the projector is off with only audio playing, the lamp is defective. Please contact Vankyo for a replacement *Try another HDMI cable if you select the HD input source 3. - Page 37 www.ivankyo.com 2018-2019 VanTop, Inc. All rights reserved. *Make sure all cables are plugged correctly and firmly *Make sure you select the right input source. For example, if you insert a USB drive, please select USB in the interface of Input Source *USB 2.0 disk is supported on this projector.
- Page 38 *Make sure the power plug is working and firmly fitted into the outlet. *If the LED indicator on the projector is light up, but the fan doesn't work, please contact Vankyo Team for assistance. *Overheat on the projector will activate built-in power-off protection panel. Restart the projector when it gets cooler.
- Page 39 www.ivankyo.com 2018-2019 VanTop, Inc. All rights reserved. 17. What kind of Screws do I need for mounting this Projector? * British Standard Pipe Thread of 1/4 inch 18. What Kind of Cable do I Need when Connecting TV BOX, TV, Firestick and DVD Player to the Projector? *HDMI cable for all devices mentioned above.
Need help?
Do you have a question about the Leisure 410 and is the answer not in the manual?
Questions and answers