Table of Contents
Advertisement
Available languages
Available languages
Quick Links
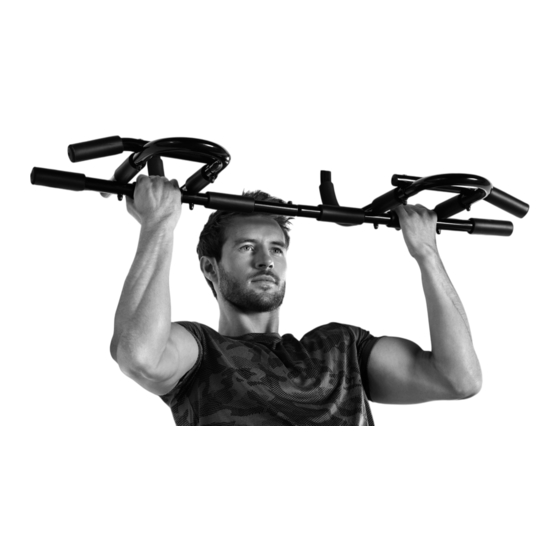
MULTI-FUNCTION PULL UP BAR
MULTI-FUNCTION PULL UP BAR
Assembly, operating and safety instructions
MULTIFUNCTIONEEL DEURREK
Montage-, bedienings- en veiligheidsinstructies
IAN 309759_1904
BARRE DE TRACTION MULTIFONCTION
Instructions de montage, d'utilisation et
consignes de sécurité
MULTIFUNKTIONS-TÜRRECK
Montage-, Bedienungs- und Sicherheitshinweise
Advertisement
Table of Contents

Related Manuals for Crivit HG05678


Summary of Contents for Crivit HG05678
- Page 1 MULTI-FUNCTION PULL UP BAR MULTI-FUNCTION PULL UP BAR BARRE DE TRACTION MULTIFONCTION Assembly, operating and safety instructions Instructions de montage, d‘utilisation et consignes de sécurité MULTIFUNCTIONEEL DEURREK MULTIFUNKTIONS-TÜRRECK Montage-, bedienings- en veiligheidsinstructies Montage-, Bedienungs- und Sicherheitshinweise IAN 309759_1904...
- Page 2 GB / IE / NI Assembly, operating and safety instructions Page FR / BE Instructions de montage, d‘utilisation et consignes de sécurité Page NL / BE Montage-, bedienings- en veiligheidsinstructies Pagina 14 DE / AT / CH Montage-, Bedienungs- und Sicherheitshinweise Seite...
- Page 3 You need · Il vous faut · U hebt nodig · Sie benötigen: Max. 110 kg...
-
Page 5: Delivery Contents
Multi-function pull up bar M6 screw (15 mm) Straight bar (left) U-bar (left) M6 screw (55 mm) Washer M6 screw (50 mm) Introduction Locking nut Metal crossbar We congratulate you on the purchase of Technical data your new product. You have chosen a high quality product. -
Page 6: Safety Information
Do not perform any exercises that require you Safety information to hang with your head towards the ground. Do not swing on the product! PLEASE READ THE OPERATING INSTRUCTIONS The product may only be used by one person PRIOR TO USE! PLEASE KEEP THE OPERATING at a time. -
Page 7: Cleaning, Maintenance And Storage
Affix the product to the door frame as shown in Then push your body upwards until your arms Figures D and E. are nearly straight. Pull-up (see Fig. H) and wide pull-up Training instructions (see Fig. J) Affix the product to the door frame as shown in General training tips Figures D and E. -
Page 8: Warranty Claim Procedure
Disposal You will find the item number on the type plate, an engraving on the front page of the instructions (bot- The packaging is made entirely of recyclable mate- tom left), or as a sticker on the rear or bottom of the rials, which you may dispose of at local recycling appliance. -
Page 9: Caractéristiques Techniques
Barre de traction multifonction Descriptif des pièces Barre coudée Écrou de blocage Introduction Barre de maniement Barre droite Barre droite (droite) (gauche) Nous vous félicitons pour l‘achat de votre Barre en U (droite) Vis M6 (55 mm) nouveau produit. Vous avez opté pour Vis M6 (15 mm) Vis M6 (50 mm) un produit de grande qualité. -
Page 10: Consignes De Sécurité
Avant chaque utilisation, vérifiez la position du Consignes de sécurité produit dans l‘encadrement de la porte, ainsi que la stabilité du support de sécurité. VEUILLEZ LIRE LE MODE D‘EMPLOI AVANT La charge maximale de ce produit UTILISATION ! LE MODE D‘EMPLOI EST À est de 110 kg. - Page 11 Montage (voir ill. A–E) Exercices Emboîtez l‘une dans l‘autre la barre droite Pompes (voir ill. F) et pompes prise large (gauche) et la barre droite (droite) , et les (voir ill. K) visser avec la vis M6 (15 mm) et la rondelle. Placez le produit sur une surface plate.
-
Page 12: Nettoyage, Entretien Et Stockage
Sit-up (voir ill. I) retourner ce produit au vendeur. La présente garantie Vous pouvez vous ne constitue pas une restriction de vos droits légaux. blesser à la colonne vertébrale, lorsque cet exercice est effectué de façon in- Ce produit bénéficie d‘une garantie de 3 ans à correcte. -
Page 13: Service Après-Vente
de caisse) et d’une description écrite du défaut avec mention de sa date d’apparition. Service après-vente Service après-vente France Tél. : 0800 919270 E-Mail : owim@lidl.fr Service après-vente Belgique Tél. : 070 270 171 (0,15 EUR / Min.) E-Mail : owim@lidl.be FR/BE... -
Page 14: Beschrijving Van De Onderdelen
Multifunctioneel deurrek Beschrijving van de onderdelen Inleiding Gebogen stang Tussenring Stang met handgreep Borgmoer Hartelijk gefeliciteerd met de aankoop Rechte stang (rechts) Rechte stang (links) van uw nieuwe product. U hebt voor een U-stang (rechts) M6-bout (55 mm) hoogwaardig product gekozen. Maak M6-bout (15 mm) M6-bout (50 mm) u voor de eerste ingebruikname vertrouwd met het... - Page 15 Controleer het product voor elk gebruik op sta- Veiligheidsinstructies biliteit door eraan te trekken en te schudden. Dit product is niet geschikt voor de bevestiging LEES VOOR HET GEBRUIK A.U.B. DE GEBRUIKS- van beweeglijke onderdelen, bijv. schommels. AANWIJZING! BEWAAR DE GEBRUIKSAAN- Voer geen oefeningen uit waarbij u met uw WIJZING ZORGVULDIG! OVERHANDIG TEVENS hoofd naar beneden hangt.
- Page 16 Opmerking: als de diepte van de deur tussen Houd uw hele lichaam de hele oefening lang 11 cm en 15 cm ligt, bevestigt u de bout onder spanning zodat uw hoofd zich in één lijn zoals op afbeelding B1. Bij een diepte tussen met de wervelkolom bevindt.
-
Page 17: Reiniging, Onderhoud En Opslag
Reiniging, onderhoud en opslag aan breekbare onderdelen, zoals bijv. schakelaars, accu’s of dergelijke onderdelen, die gemaakt zijn Reinig het product nooit met schurende reinigings- van glas. middelen en veeg het alleen met een droge rei- nigingsdoek schoon. Afwikkeling in geval van Bewaar het product altijd op een schone, garantie droge plaats op kamertemperatuur. -
Page 18: Bestimmungsgemäße Verwendung
Multifunktions-Türreck Teilebeschreibung gebogene Stange Sicherungsmutter Einleitung Griffstange gerade Stange gerade Stange (links) Wir beglückwünschen Sie zum Kauf Ihres (rechts) M6-Schraube neuen Produkts. Sie haben sich damit für U-Stange (rechs) (55 mm) ein hochwertiges Produkt entschieden. M6-Schraube M6-Schraube Machen Sie sich vor der ersten Inbetriebnahme mit (15 mm) (50 mm) dem Produkt vertraut. - Page 19 Überprüfen Sie das Produkt vor jeder Verwendung Sicherheitshinweise auf Stabilität, indem Sie daran ziehen und rütteln. Dieses Produkt ist nicht für die Befestigung VOR GEBRAUCH BITTE DIE BEDIENUNGSAN- beweglicher Teile, z. B. Schaukeln, geeignet. LEITUNG LESEN! BEDIENUNGSANLEITUNG Führen Sie keine Übungen durch, bei denen Sie SORGFÄLTIG AUFBEWAHREN! HÄNDIGEN mit dem Kopf nach unten hängen.
-
Page 20: Allgemeine Trainingshinweise
Sicherungsmutter . Montieren Sie dann die Senken Sie dann Ihren Oberkörper in die ursprüng- Stangen der anderen Seite. liche Position. Hinweis: Wenn die Tiefe der Tür zwischen 11 cm Halten Sie Ihren ganzen Körper während dieser und 15 cm liegt, befestigen Sie die Schraube gesamten Übung unter Spannung, so dass Ihr wie in Abbildung B1. -
Page 21: Abwicklung Im Garantiefall
Die Garantieleistung gilt für Material- oder Fabrika- Ziehen Sie Ihren Oberkörper jetzt mithilfe der Bauchmuskeln langsam nach oben. Behalten tionsfehler. Diese Garantie erstreckt sich nicht auf Sie diese Position ein paar Sekunden lang bei, Produktteile, die normaler Abnutzung ausgesetzt bevor Sie Ihren Oberkörper langsam senken. sind (z. - Page 23 OWIM GmbH & Co. KG Stiftsbergstraße 1 74167 Neckarsulm GERMANY Model no.: HG05678 Version: 10 / 2019 Last Information Update · Version des informations · Stand van de informatie · Stand der Informationen: 08 / 2019 · Ident.-No.: HG05678082019-GB / IE / NI / BE...
Need help?
Do you have a question about the HG05678 and is the answer not in the manual?
Questions and answers