Table of Contents
Advertisement
Available languages
Available languages
Quick Links
PUSH-UP-BOARD
PUSH-UP BOARD
PLANCHE À POMPES
PUSH-UP-BOARD
Gebrauchsanweisung
PLANCHE À POMPES
Notice d'utilisation
DESKA DO POMPEK
Instrukcja użytkowania
DOSKA NA CVIČENIE
Návod na použivanie
PUSH-UP BOARD
Brugervejledning
PUSH-UP-DESZKA
Használati útmutató
IAN 439938_2304
PUSH-UP BOARD
Instructions for use
PUSH-UP BOARD
Gebruiksaanwijzing
DESKA PUSH-UP
Návod k použití
TABLA DE FLEXIONES
Instrucciones de uso
TAVOLA PER PUSH-UP
Istruzioni d'uso
Advertisement
Table of Contents

Related Manuals for Crivit 100369455


Summary of Contents for Crivit 100369455
- Page 1 PUSH-UP-BOARD PUSH-UP BOARD PLANCHE À POMPES PUSH-UP-BOARD PUSH-UP BOARD Gebrauchsanweisung Instructions for use PLANCHE À POMPES PUSH-UP BOARD Notice d’utilisation Gebruiksaanwijzing DESKA DO POMPEK DESKA PUSH-UP Instrukcja użytkowania Návod k použití DOSKA NA CVIČENIE TABLA DE FLEXIONES Návod na použivanie Instrucciones de uso PUSH-UP BOARD TAVOLA PER PUSH-UP...
-
Page 6: Table Of Contents
Inhaltsverzeichnis/Contents/Table des matieres/Inhoudsopgave Lieferumfang ............9 Package contents ..........14 Technische Daten ..........9 Technical data ........... 14 Bestimmungsgemäße Verwendung ....9 Intended use ............14 Sicherheitshinweise ..........9 Safety information ..........14 Besondere Vorsicht – Extra caution – risk of injury to children! ..14 Verletzungsgefahr für Kinder! ...... - Page 7 Spis treści/Obsah/Obsah/Indice Zakres dostawy ..........29 Obsah balení ............ 34 Dane techniczne ..........29 Technické údaje ..........34 Użytkowanie zgodne z przeznaczeniem ..29 Použití dle určení ..........34 Wskazówki bezpieczeństwa ......29 Bezpečnostní pokyny ........34 Zachować szczególną ostrożność – Důrazné...
- Page 8 Indholdsfortegnelse/Indice/Tartalomjegyzék Leveringsomfang ..........47 Contenuto della fornitura ......... 51 Tekniske data ............ 47 Dati tecnici ............51 Bestemmelsesmæssig brug ......47 Uso conforme alla destinazione ..... 51 Sikkerhedsanvisninger ........47 Indicazioni di sicurezza ........51 Vær særligt forsigtig – Prestare particolare attenzione – fare for kvæstelser for børn! ......47 pericolo di lesioni per i bambini! ....
-
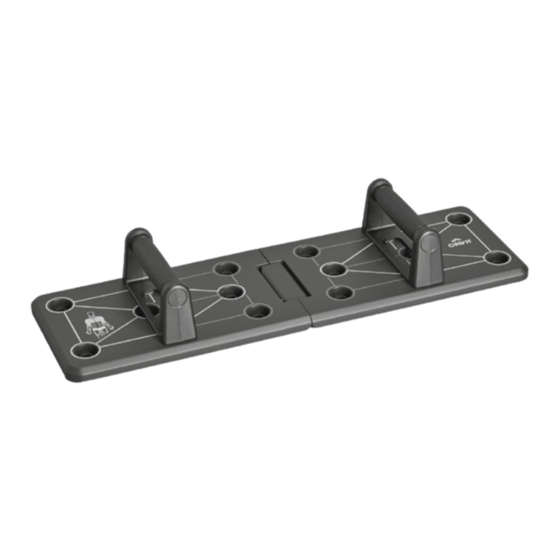
Page 9: Lieferumfang
Herzlichen Glückwunsch! Sicherheitshinweise Mit Ihrem Kauf haben Sie sich für einen hoch- • Der Artikel darf nur unter Aufsicht Erwachse- wertigen Artikel entschieden. Machen Sie sich ner und nicht als Spielzeug verwendet werden. vor der ersten Verwendung mit dem Artikel •... -
Page 10: Montage Und Demontage
Die Sicherheit des Artikels kann nur gewähr- • Jeder Übungssatz kann 3 Mal wiederholt leistet werden, wenn er regelmäßig auf werden. Beschädigungen und Verschleiß geprüft wird. • Zwischen den Übungssätzen sollten Sie je- Bei Beschädigungen dürfen Sie ihn nicht mehr weils eine Pause von 30 Sekunden einhalten. - Page 11 Enge Liegestütz (Abb. C) 7. Führen Sie die Übung in drei Durchgängen so oft wie möglich für ca. 45 - 60 Sekunden Ausgangsposition durch. 1. Gehen Sie in die Liegestützposition und plat- Wichtig: Achten Sie besonders darauf, zieren Sie den Artikel auf Brusthöhe unter sich. die Körperspannung die ganze Zeit zu 2.
-
Page 12: Dehnen
6. Drücken Sie den Körper wieder nach oben 6. Wiederholen Sie die Übung 10 bis 25 Mal in und kehren Sie in die Ausgangsposition zurück, drei Übungsdurchgängen. ohne die Arme komplett durchzustrecken. Wichtig: Achten Sie besonders darauf, die Körperspannung die ganze Zeit zu 7. -
Page 13: Hinweise Zur Garantie Und Serviceabwicklung
Der Recycling-Code dient der Kennzeich- Bitte wenden Sie sich bei Beanstandungen nung verschiedener Materialien zur zunächst an die untenstehende Service-Hotline Rückführung in den Wiederverwertungs- oder setzen Sie sich per E-Mail mit uns in Verbin- kreislauf (Recycling). Der Code besteht aus dung. -
Page 14: Package Contents
Congratulations! • Consult your doctor before you start training. You have chosen to purchase a high-quality Make sure you are healthy enough to train. product. Familiarise yourself with the product • Always remember to warm up before training before using it for the first time. and train according to your current perfor- Read the following instructions mance ability. -
Page 15: General Training Instructions
General training instructions 2. Rotate both your shoulders forwards at the same time and then change direction after Training procedure one minute. • Wear comfortable sports clothing and athletic 3. Pull your shoulders up to your ears and then shoes. let them drop again. - Page 16 End position 6. Push your body upwards again and return to 4. In a jumping movement, bend the straight leg the starting position without straightening your arms completely. and pull your knee as far as possible towards 7. Repeat the exercise 10 to 25 times in 3 sets. your chest.
-
Page 17: Stretching
Stretching Notes on the guarantee and service handling Take sufficient time to stretch after each training session. Some simple exercises to do this are The product was produced with great care and shown below. You should perform each exercise under continuous quality control. DELTA-SPORT 3 times per side for 15–30 seconds. -
Page 18: Étendue De La Livraison
Félicitations ! Vous venez d’acquérir un article • Consultez votre médecin avant de commencer de grande qualité. Avant la première utilisation, l’entraînement. Assurez-vous que votre état de familiarisez-vous avec l’article. santé vous permet de vous entraîner. Pour cela, veuillez lire attentive- •... -
Page 19: Conseils D'entraînement Généraux
2. Tirez les poignées avant de ranger l’article. Muscles du cou 3. Pour éviter que la planche ne glisse, collez les 1. Tournez lentement votre tête vers la gauche protections de sol (3) sur la planche sous les et vers la droite. Répétez ce mouvement côtés longs. - Page 20 6. Poussez le corps à nouveau vers le haut et Important : soyez particulièrement revenez à la position de départ sans étirer attentif à maintenir en permanence la complètement les bras. tension corporelle. 7. Répétez l’exercice 10 à 25 fois sur trois séries. Pompes à...
-
Page 21: Étirements
Stockage, nettoyage Pompes avec changement de position (fig. H) Lorsque vous n’utilisez pas l’article, rangez-le Position de départ toujours dans un endroit sec et propre à une 1. Placez les poignées à une distance approxi- température ambiante. mative de la largeur des épaules. Nettoyez uniquement avec de l’eau puis essuyez 2. - Page 22 Les réclamations au titre de cette garantie Article L217-4 du Code de la sont exclues si l‘article a été utilisé de manière consommation abusive ou inappropriée, hors du cadre de son Le vendeur livre un bien conforme au contrat et usage ou du champ d‘application prévu ou si les répond des défauts de conformité...
- Page 23 Les pièces détachées indispensables à l’utili- sation du produit sont disponibles pendant la durée de la garantie du produit. IAN : 439938_2304 Service France Tel. : 0800 919 270 E-Mail : deltasport@lidl.fr Service Belgique Tel. : 0800 12089 E-Mail : deltasport@lidl.be *n’est valable que pour la France FR/BE...
-
Page 24: Leveringsomvang
Gefeliciteerd! • Raadpleeg uw arts voordat u met de training Met uw aankoop hebt u voor een hoogwaardig begint. Zorg ervoor dat uw gezondheid deze artikel gekozen. Zorg ervoor dat u voor het training toelaat. • Denk eraan dat u altijd een warming-up doet eerste gebruik met het artikel vertrouwd raakt. -
Page 25: Montage En Demontage
Montage en demontage (afb. A) Nekspieren 1. Draai uw hoofd langzaam naar links en naar 1. Steek de handgrepen (2) in het bord (1) tot rechts. Herhaal deze beweging 4 tot 5 keer. ze hoorbaar vastklikken. 2. Draai uw hoofd over uw borst eerst de ene 2. - Page 26 Belangrijk: let er speciaal op dat u de li- Push-ups op de knieën (afb. F) chaamsspanning te allen tijde vasthoudt. Uitgangspositie Knie optillen (afb. D) 1. Plaats de handgrepen ongeveer op schouder- breedte uit elkaar. Uitgangspositie 2. Steun met beide handen op de handgrepen. 1.
-
Page 27: Rekken
Afvalverwerking 2. Steun met beide handen op de handgrepen. Het lichaam wordt uitgestrekt en vormt één lijn. Voer het artikel en de verpakkingsmateri- 3. Plaats uw benen dicht bij elkaar en span uw alen af in overeenstemming met de buikspieren aan. Uw voeten raken de vloer actuele lokale voorschriften. - Page 28 Uit de garantie voortvloeiende claims kunnen alleen tijdens de garantieperiode op vertoon van de originele kassabon ingediend wor- den. Gelieve daarom de originele kassabon te bewaren. De garantieperiode wordt door eventuele reparaties op grond van de garantie, wettelijke waarborg of coulance niet verlengd. Dit geldt ook voor vervangen en gerepareerde onderdelen.
-
Page 29: Zakres Dostawy
Gratulujemy! Wskazówki Decydując się na ten produkt, otrzymują Pań- bezpieczeństwa stwo towar wysokiej jakości. Należy zapoznać • Produkt może być używany wyłącznie się z produktem przed jego pierwszym użyciem. Należy uważnie przeczytać pod nadzorem dorosłych, ale nie jako zabawka. następującą instrukcję użytkowa- nia. -
Page 30: Zagrożenia Spowodowane Zużyciem
Ogólne planowanie treningu Zagrożenia spowodowane Stworzyć plan treningowy dostosowany do swo- zużyciem ich potrzeb z seriami ćwiczeń składającymi się • Produkt może być używany wyłącznie, z 6–8 ćwiczeń. jeśli jest w idealnym stanie. Przed każdym Należy przestrzegać następujących zasad: użyciem należy sprawdzić produkt pod kątem •... -
Page 31: Propozycje Ćwiczeń
Propozycje ćwiczeń (rys. B) 6. Po zmianie pozycji stóp rozpocząć kolejny skok. Można trenować różne grupy mięśni całego 7. Wykonywać ćwiczenie w trzech seriach tak ciała. Te grupy mięśni są oznaczone kolorem często, jak to możliwe, przez oko 45–60 se- w środkowej części produktu. -
Page 32: Rozciąganie
6. Popchnąć ciało z powrotem do góry i wrócić Wskazówka: zachować szczególną uwagę, aby cały czas utrzymywać na- do pozycji wyjściowej bez całkowitego roz- pięcie ciała i uniknąć wygięcia lędźwio- ciągnięcia ramion. wego. 7. Powtórzyć ćwiczenie 10 do 25 razy w trzech seriach. -
Page 33: Wskazówki Dotyczące Gwarancji I Obsługi Serwisowej
Niniejsza gwarancja nie ogranicza Państwa Kod recyklingu służy do oznaczenia ustawowych praw, w szczególności roszczeń różnych materiałów nadających się do gwarancyjnych wobec danego sprzedawcy. ponownego przetworzenia (recyklingu). W przypadku wymiany części lub całego arty- Kod taki składa się z symbolu recyklingu kułu okres gwarancji przedłuża się... -
Page 34: Obsah Balení
Srdečně blahopřejeme! • Nezapomeňte se před cvičením vždy zahřát Svým nákupem jste se rozhodli pro kvalitní výro- a cvičte podle své aktuální výkonnosti. V pří- bek. Před prvním použitím se prosím seznamte padě nadměrné námahy a přetížení hrozí váž- s tímto výrobkem. ná... -
Page 35: Obecné Pokyny Pro Cvičení
Obecné pokyny pro cvičení 3. Vytáhněte ramena směrem k uším a nechte je opět klesnout. Průběh cvičení 4. Střídavě levou a pravou rukou dělejte • Noste pohodlné sportovní oblečení a tenisky. krouživé pohyby dopředu a po jedné minutě • Před každým cvičením se zahřejte a trénink dozadu. -
Page 36: Závěrečné Protahování
5. Druhou nohu současně natáhněte dozadu 2. Oběma rukama se opřete o opěrky. Nohy a dopadněte na špičky prstů. jsou natažené dopředu. 6. Poté, co nohy vystřídaly polohu, podnikněte Konečná poloha další skokový pohyb. 3. Napněte břišní svaly a na propnutých pažích 7. -
Page 37: Uskladnění, Čištění
3. Levou rukou uchopte pravý loket a zatlačte Nároky z této záruky jsou vyloučeny, pokud vý- dozadu. robek byl používán neodborně nebo nedovole- 4. Vyměňte strany a opakujte cvičení. ným způsobem nebo nikoli v rámci stanoveného účelu určení nebo předpokládaného rozsahu Uskladnění, čištění... -
Page 38: Rozsah Dodávky
Blahoželáme! • Nezabudnite sa pred cvičením vždy zahriať Svojím nákupom ste sa rozhodli pre kvalitný a cvičte adekvátne svojej aktuálnej športovej výrobok. Pred prvým použitím sa s výrobkom výkonnosti. Pri príliš veľkom zaťažení a pretré- dôkladne oboznámte. novaní hrozia vážne poranenia. Pri ťažkos- Pozorne si prečítajte tento návod tiach, pocite slabosti alebo únavy tréning na použivanie. -
Page 39: Všeobecné Pokyny Na Cvičenie
Všeobecné pokyny na cvičenie 2. Krúžte oboma ramenami súčasne dopredu a zmeňte smer po jednej minúte. Priebeh tréningu 3. Plecia ťahajte k ušiam a opäť ich spustite. • Noste pohodlné športové oblečenie a športo- 4. Striedavo krúžte raz ľavou a raz pravou rukou vú... -
Page 40: Strečing
5. Súčasne vystrite druhú nohu dozadu a skočte Zdvíhanie tela (obr. G) vždy na pokrčenú nohu. Východisková poloha 6. Po tom, ako si nohy vymenia polohu, začnite 1. Umiestnite rukoväte od seba asi v šírke ramien ďalší skokový pohyb. a posaďte sa medzi rukoväte. 7. -
Page 41: Skladovanie, Čistenie
Ruky a plecia Nároky z tejto záruky zanikajú, keď sa výrobok používal neodborne alebo nesprávne, mimo 1. Stojte vzpriamene, kolená sú mierne zohnuté. určenia na používanie alebo určeného rozsahu 2. Pravé rameno dajte za hlavu až kým pravá používania alebo neboli dodržané pokyny ruka nie je medzi lopatkami. -
Page 42: Alcance De Suministro
¡Enhorabuena! • Consulte con su médico antes de comenzar Con su compra se ha decidido por un artículo con el entrenamiento. Asegúrese de que su es- de gran calidad. Familiarícese con el artículo tado de salud es apto para el entrenamiento. •... -
Page 43: Indicaciones Generales De Entrenamiento
3. Para evitar que la tabla se deslice, pegue los 2. Después, haga un movimiento circular lento protectores de suelo (3) debajo de los lados con la cabeza primero en una dirección y longitudinales de la misma. después en la otra. Brazos y hombros Indicaciones generales de 1. - Page 44 Importante: Asegúrese de mantener la Plancha sobre las rodillas (Fig. F) tensión corporal todo el tiempo. Posición inicial Elevación de rodilla (Fig. D) 1. Coloque las empuñaduras con una separa- ción equivalente a la anchura de los hombros. Posición inicial 2.
-
Page 45: Estiramiento
Almacenamiento, limpieza Plancha con cambio de posición (Fig. H) Si no va a utilizarlo, almacene siempre el artícu- Posición inicial lo seco y limpio y a temperatura ambiente. 1. Coloque las empuñaduras con una separa- Limpie solo con agua y después seque con un paño de limpieza. - Page 46 Se excluyen derechos derivados de esta garantía, si se ha realizado un uso incorrecto o abusivo del artículo o que no se encuentre dentro del marco del uso o ámbito de uso previs- tos o si no se ha observado lo recogido en el manual de instrucciones, a no ser que el cliente final demuestre que existen fallos del material o fabricación no derivados de una de las circuns-...
-
Page 47: Leveringsomfang
Hjertelig tillykke! Du har valgt at købe et kvali- • Husk altid at varme op inden træningen, og tetsprodukt. Lær produktet at kende, inden du træn i overensstemmelse med din nuværende bruger det første gang. træningstilstand. Ved for kraftig anstrengelse Det gør du ved at læse nedenstå- og overtræning kan du komme alvorligt til ende brugervejledning omhygge-... -
Page 48: Generelle Træningsanvisninger
Generelle træningsanvisninger 4. Sving skiftevis venstre og højre arm fremad i en cirkel, og efter et minut baglæns. Træningsforløb Vigtigt: Glem ikke at trække vejret • Bær bekvemt sportstøj og sportssko. roligt! • Varm godt op inden hver træning, og sænk in- Forslag til øvelser (fig. -
Page 49: Udstrækning
7. Udfør øvelsen i tre øvelsessæt med så mange 2. Støt med begge hænder på håndtagene. gentagelser som muligt i ca. 45-60 sekunder. Benene ligger strakt fremad. Vigtigt: Vær opmærksom på hele tiden Slutstilling at holde kropsspændingen. 3. Spænd mavemusklerne, og pres dig opad med strakte arme. -
Page 50: Opbevaring, Rengøring
Arme og skuldre Garantien kan ikke gøres gældende, hvis varen er blevet anvendt ukorrekt eller uagtsomt eller 1. Stil dig med ret ryg og knæene let bøjet. til andre formål end det tilsigtede eller i det 2. Før højre arm om bag hovedet, indtil højre tilsigtede omfang. -
Page 51: Contenuto Della Fornitura
Congratulazioni! • Prima dell’allenamento riscaldarsi sempre e Avete acquistato un articolo di alta qualità. Con- allenarsi in base alle proprie attuali capacità. sigliamo di familiarizzare con l’articolo prima di In caso di sforzo elevato e di sovrallena- cominciare ad utilizzarlo. mento, si rischiano lesioni. - Page 52 2. Se si desidera riporre l’articolo, staccare le Muscolatura del collo maniglie. 1. Ruotare la testa lentamente a sinistra e a de- 3. Per evitare che la tavola scivoli, incollare le stra. Ripetere questo movimento 4 o 5 volte. protezioni per il pavimento (3) sui lati longitu- 2.
- Page 53 Importante: prestare la massima attenzio- Push-up sulle ginocchia (fig. F) ne e mantenere sempre il corpo disteso. Posizione di partenza Sollevamento del ginocchio (fig. D) 1. Posizionare le maniglie sulla larghezza delle spalle. Posizione di partenza 2. Sostenersi con entrambe le mani sulle mani- 1.
- Page 54 Smaltimento 2. Sostenersi con entrambe le mani sulle mani- glie. Il corpo rimane disteso e forma una linea Smaltire l’articolo e i materiali della retta. confezione nel rispetto delle attuali 3. Unire strette le gambe e tendere i muscoli normative locali. Conservare i materiali addominali.
- Page 55 Dalla presente garanzia sono escluse le richieste legate a casi di utilizzo non conforme oppure di abuso dell’articolo, oppure di utilizzo avvenuto non nell’ambito delle condizioni previste oppure del campo di impiego previsto, oppure in caso di non osservanza delle direttive riportate nelle istruzioni d’uso, a meno che il cliente non dimostri che sussista un vizio di materiale o di lavorazione che non sia riconducibile ad una...
-
Page 56: Csomag Tartalma
Szívből gratulálunk! • Mielőtt az edzést elkezdené, egyeztessen Vásárlásával kiváló minőségű terméket válasz- orvosával. Bizonyosodjon meg róla, hogy tott. Használatba vétele előtt ismerkedjen meg a egészségi állapota lehetővé teszi-e az edzést. termékkel. • Soha ne felejtsen el bemelegíteni az edzés Figyelmesen olvassa el az alábbi előtt, és jelenlegi teljesítőképességének használati útmutatót. -
Page 57: A Markolatok Fel- És Leszerelése
A markolatok fel- és Bemelegítés leszerelése (A ábra) Minden edzés előtt fordítson elég időt a beme- legítésre. A következőkben ehhez ismertetünk 1. Helyezze be a markolatokat (2) a deszkába néhány egyszerű gyakorlatot. (1) úgy, hogy azok jól hallhatóan a helyükre Az adott gyakorlatot mindig 2–3-szor ismételje kattanjanak. - Page 58 Véghelyzet 3. Csak a lábujjhegy érintkezzen a talajjal. 5. Hajlítsa be a karját és eressze le a felsőtestét 4. Ne ejtse bele a csípőjét, és feszítse meg a hasizmait. kontrollált mozgással addig, amíg a felkar a Véghelyzet felsőtesttel párhuzamos nem lesz. Ügyeljen 5.
-
Page 59: Nyújtás
4. A lábak maradjanak kinyújtva, és a felsőtest- Karok és vállak hez képest 90 fokos szöget zárjanak be. 1. Álljon fel egyenesen, térd kissé hajlítva. 5. Tartsa meg egy ideig ezt a pozíciót. 2. Helyezze a jobb karját a feje mögé, hogy a 6. - Page 60 A garancia nem terjed ki a szokásos elhasználó- dásnak kitett, ezért kopó alkatrésznek tekintendő alkatrészekre (pl. elemek), valamint a törékeny alkatrészekre sem, például a kapcsolókra, az akkumulátorokra vagy az üvegből készült alkatrészekre. Kizárásra kerül a garanciaigény, ha a terméket szakszerűtlenül vagy helytelenül, nem rendel- tetésszerűen vagy nem az előirányzott felhasz- nálási körben használták, vagy figyelmen kívül hagyták a kezelési útmutató...
- Page 64 DELTA-SPORT HANDELSKONTOR GMBH Wragekamp 6 • 22397 Hamburg GERMANY 08/2023 Delta-Sport-Nr.: FP-13494 IAN 439938_2304...
Need help?
Do you have a question about the 100369455 and is the answer not in the manual?
Questions and answers