Table of Contents
Advertisement
Quick Links
Advertisement
Table of Contents

Related Manuals for Philco POP 7880 TBX


Summary of Contents for Philco POP 7880 TBX
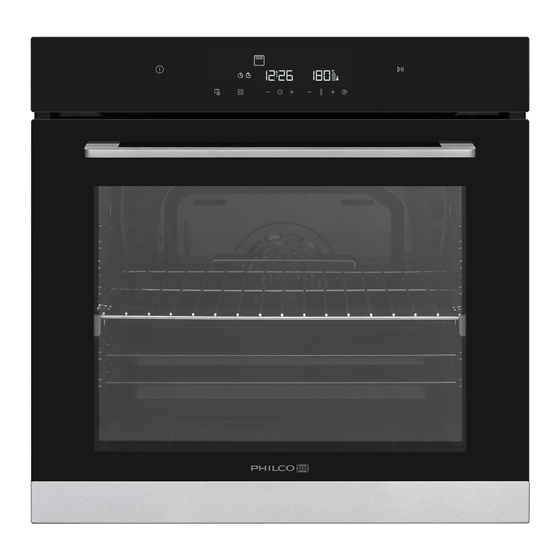
- Page 1 Built-in Oven OWNER’S MANUAL POP 7880 TBX...
- Page 2 IMPORTANT / NOTE Operating the system correctly Dear customer, Thank you for buying a PHILCO brand product. So that your appliance serves you well, please read all the instructions in this user’s manual. Copyright © 2024, Fast ČR, a. s.
-
Page 3: Table Of Contents
CONTENTS 1. SAFETY INSTRUCTIONS ..........................2 1.1 General Safety Warnings................................2 1.2 Installation Warnings ................................. 4 1.3 During Use ..................................... 5 1.4 During Cleaning and Maintenance ............................6 2. INSTALLATION AND PREPARATION FOR USE ...................8 2.1 Instructions for the Installer ..............................8 2.2 Installation of the Oven ................................ -
Page 4: Safety Instructions
1. SAFETY INSTRUCTIONS keep them in a convenient place for reference when necessary. therefore your appliance may not have some of the features described within. For this reason, it is important to pay particular attention to any figures whilst reading the operating manual. 1.1 General Safety Warnings above and by persons with reduced physical, sensory or mental capabilities or lack of experience and knowledge if they have... - Page 5 door glass and other surface. They can scratch the surfaces which may result in shattering of the door glass or damage to surfaces. WARNING: To avoid the possibility of electric shock, make sure that the appliance is switched off before replacing the lamp. CAUTION: Accessible parts may be hot when cooking or grilling.
-
Page 6: Installation Warnings
Since the glass may break, care should be taken while cleaning to avoid scratching. Avoid hitting or knocking the glass with accessories. installation. If the supply cord is damaged, it must be replaced by the manufacturer, its service agent or similarly qualified persons in order to prevent a hazard. -
Page 7: During Use
minimum temperature of 100°C. order to avoid overheating. 1.3 During Use perfectly normal and is caused by the insulation materials on the heater elements. We suggest that, before using your oven for the first time, you leave it empty and set it at maximum temperature for 45 minutes. Make sure that the environment in which the product is installed is well ventilated. -
Page 8: During Cleaning And Maintenance
main control switch off. 0” (stop) position when it is not in use. hot food while removing it from the ovens. could unbalance the oven or damage the door. its handles. 1.4 During Cleaning and Maintenance carrying out any cleaning or maintenance operations. recommend you always use original spare parts and to call our authorised service agents in case of need. - Page 9 CE Declaration of conformity We declare that our products meet the applicable European Directives, Decisions and Regulations and the requirements listed in the standards referenced. This appliance has been designed to be used only for home cooking. Any other use (such as heating a room) is improper and dangerous.
-
Page 10: Installation And Preparation For Use
2. INSTALLATION AND PREPARATION FOR USE WARNING: This appliance must be installed by an authorised service person or qualified technician, according to the instructions in this guide and in compliance with the current local regulations. and the warranty will not be valid. adjustments of the appliance are compatible. - Page 11 Installation under a worktop Installation in a wall unit EN - 9 Copyright © 2024, Fast ČR, a. s. Revision 05/2024...
-
Page 12: Electrical Connection And Safety
After making the electrical connections, insert the oven into the cabinet by pushing it forward. Open the oven door and insert 2 screws in the holes located on the oven frame. While the product frame touches the wooden surface of the cabinet, tighten the screws. 2.3 Electrical Connection and Safety WARNING: The electrical connection of this appliance should be carried out by an authorised service person or qualified electrician, according to the instructions in this guide and in compliance with the... -
Page 13: Product Features
3. PRODUCT FEATURES Important: Specifications for the product vary and the appearance of your appliance may differ from that shown in the figures below. List of Components 3. Oven Door Control Panel 4. Timer EN - 11 Copyright © 2024, Fast ČR, a. s. Revision 05/2024... -
Page 14: Use Of Product
4. USE OF PRODUCT 4.1 Oven Functions * The functions of your oven may differ depending on the product model. Defrost Function: The oven’s warning lights will switch on and the fan will start to operate. To use the defrost function, place your frozen food in the oven on a shelf in the third slot from the bottom. - Page 15 Pizza Function: The oven’s thermostat and warning lights will switch on, and the ring, lower heating elements and fan will start operating. This function is ideal for baking food, such as pizza, evenly in a short time. While the fan evenly disperses the heat of the oven, the lower heating element ensures baking of the food.
- Page 16 Pyrolytic Cleaning Function: This function allows you to clean the inside of the oven thoroughly. Warning: that the oven is empty. Do not leave anything inside the oven cavity in order to prevent damage. available) and ensure the oven door is closed. could cause overheating and damage to both appliances.
-
Page 17: Cooking Table
4.2 Cooking Table Dishes 2 - 3 - 4 170-190 35-45 Cake 2 - 3 - 4 170-190 30-40 Cookie 2 - 3 - 4 170-190 30-40 Stew 175-200 40-50 Chicken 2 - 3 - 4 45-60 2 - 3 - 4 170-190 25-35 Cake... -
Page 18: Use Of The Full Touch Control Timer
4.3 Use of the Full Touch Control Timer Function Description Faster On/Off Grilling Auto Cooking Stop Function Double Temperature Defrost Function Turbo 3D Function Thermostat Cooking Time Function Cleaning Cooking End Minus Function Function Time Static Temperature Minute Minder Function Display Time Display Key Lock... - Page 19 Oven Function Selection Touch the ON/OFF WAIT” mode. Defrost WAIT” mode. PLAY/PAUSE sensor is pressed, the function will not start. During this mode, you will be able to select the desired cooking functions, adjust the temperature, activate BOOST” function, as well as adjust the cooking time, end time, Minute Minder timer and the time of day. WAIT”...
- Page 20 Adjusting the Cooking Duration Time Then select the desired cooking function and the temperature. Touch the MODE( ) sensor button until you see the Duration Time symbol on the Time display. Set the required cooking period using the PLUS and MINUS sensors while the timer is in this position.
-
Page 21: Accessories
Door Lock When the DOOR LOCK ( ) button is pressed for 3 seconds, the door lock will be activated. DOOR LOCK ( ) button again for 3 seconds to unlock the door . “Lock” appears on the screen for 5 seconds while the pyrolytic door lock is activated. - Page 22 The Deep Tray The deep tray is best used for cooking stews. The Rotisserie 1. Loosen the screws on the skewer clamps (b slide the clamps back on, and stick them into the chicken. Tighten the screws. 2. Fit the skewer grid (c) into the appropriate rack. 3.
- Page 23 Important: Make sure the oven is not in operation while performing these steps. The Shallow Tray The shallow tray is best used for baking pastries. The Wire Rack with Easyfix Half Telescopic Rail The half telescopic rail extends half-way out, to allow easy access to your food. EN - 21 Copyright ©...
- Page 24 Telescopic rails Clean the accessories thoroughly with warm water, detergent and a soft clean cloth on first use. Fastening tab Fastener bottom fasteners until you clearly hear the fasteners clip into the side rack level fixing wire. The Wire Grid The wire grid is best used for grilling or for processing food in oven-friendly containers.
- Page 25 Soft-Close Oven Door The oven door closes slowly by itself when it is released just before the closed position. The Water Collector In some cases of cooking, condensation may appear on the inner glass of the oven door. This is not a product malfunction.
-
Page 26: Cleaning And Maintenance
5. CLEANING AND MAINTENANCE 5.1 Cleaning WARNING: Switch off the appliance and allow it to cool before cleaning is to be carried out. General Instructions on your appliance. abrasive cleaning powders, rough wire wool or hard tools as they may damage the cooker surfaces. Do not use cleaners that contain particles as they may scratch the glass, enamelled and/or painted parts of your appliance. - Page 27 within the oven. This is normal. Oven cleaning fumes could be fatal to birds, children and pets so all should be kept away until the operation is complete. function, and any doors leading into the area should be closed to avoid passing the smell and fumes throughout.
- Page 28 Removal of the Inner Glass B and release from the location bracket (x direction of A. To replace the inner glass: y), in the direction of B. x) in the direction of C. If the oven door is a triple glass oven door, the third glass layer can be removed the same way as the second glass layer.
- Page 29 Removal of the Oven Door 1. Open the oven door. 2. Open the locking catch (a) (with the aid of a screwdriver) up to the end position. 3. Close the door until it is almost in the fully closed position, and remove the door by pulling it towards you. EN - 27 Copyright ©...
-
Page 30: Maintenance
Removal of the Wire Shelf To remove the wire rack, pull the wire rack as shown in the figure. After releasing it from the clips (a), lift it up. 5.2 Maintenance WARNING: The maintenance of this appliance should be carried out by an authorised service person or qualified technician only. -
Page 31: Troubleshooting & Transport
6. TROUBLESHOOTING & TRANSPORT 6.1 Troubleshooting If you still have a problem with your appliance after checking these basic troubleshooting steps, please contact an authorised service person or qualified technician. Problem Possible Cause Solution Check whether there is power supplied. Also check Oven does not switch on. -
Page 32: Product Information Sheet
Minimum duration of the guarantee offered by the supplier: 24 months Additional information: Weblink to the supplier’s website, where the information in point 6 of Annex II to Commission Regulation (EU) 2019/2022 is found: www.philco.cz https://eprel.ec.europa.eu/qr/2018883 Energy Saving Tips Oven - Cook the meals together, if possible. -
Page 33: Technical Information
When contacting our authorized service, have the model designation, serial number and defect description available. To download documents, visit www.philco.cz. To report a defect and obtain additional service information, visit https://philco.cz/podpora-a-servis. Subject to change without notice. EN - 31 Copyright © 2024, Fast ČR, a. s. -
Page 34: Instructions And Information Regarding The Disposal Of Used Packaging Materials
INSTRUCTIONS AND INFORMATION REGARDING THE DISPOSAL OF USED PACKAGING MATERIALS Dispose of packaging material at a public waste disposal site. DISPOSAL OF USED ELECTRICAL AND ELECTRONIC APPLIANCES The meaning of the symbol on the product, its accessory or packaging indicates that this product point for the recycling of electrical &... - Page 35 NOTES/POZNÁMKY...
- Page 36 Výrobce/Manufacturer: Fast ČR, a.s. U Sanitasu 1621 Říčany 251 01, CZECH REPUBLIC Distributor: FAST PLUS, a.s. Vlčie hrdlo 324/90 821 07 Bratislava, SLOVAKIA is pending or registered trademark of Electrolux Home EN - 1 Products, Inc. and used under a license from Electrolux Home Products, Inc Copyright ©...
Need help?
Do you have a question about the POP 7880 TBX and is the answer not in the manual?
Questions and answers