Table of Contents
Advertisement
Quick Links
Advertisement
Table of Contents

Related Manuals for Philco POB93


Summary of Contents for Philco POB93
- Page 1 User manual Oven POB93...
-
Page 2: Table Of Contents
CONTENTS Safety information Additional functions Safety instructions Helpful hints and tips Product description Care and cleaning Before first use What to do if… Daily use Installation Clock functions Environment concerns Subject to change without notice. SAFETY INFORMATION Before the installation and use of the appliance, carefully read the supplied instructions. -
Page 3: Safety Instructions
• Do not use a steam cleaner to clean the appliance. • Before maintenance cut the power supply. • Do not use harsh abrasive cleaners or sharp metal scrapers to clean the glass door since they can scratch the surface, which may result in shattering of the glass. - Page 4 contact opening width of minimum 3 • Use a deep pan for moist cakes. Fruit jui- ces cause stains that can be permanent. Care and Cleaning Warning! Risk of injury, burns or Warning! Risk of injury, fire or damage electric shock or explosion. to the appliance.
-
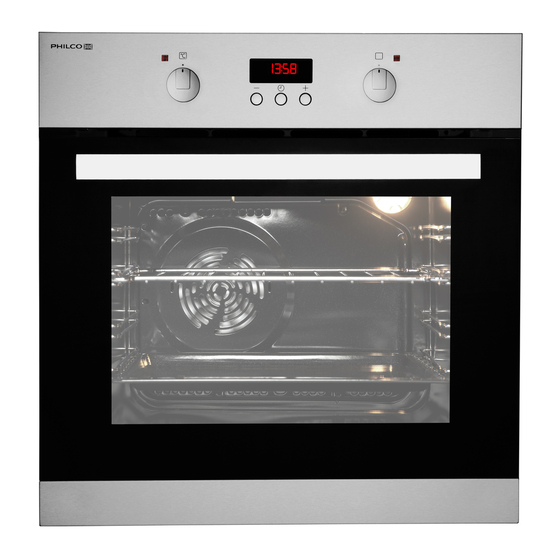
Page 5: Product Description
PRODUCT DESCRIPTION Temperature control knob Electronic programmer Oven function control knob Power indicator Air vents for the cooling fan Grill Oven lamp Rating plate Oven accessories • Wire shelf For cookware, cake tins, roasts. • Grill- / Roasting pan To bake and roast or as pan to collect fat. -
Page 6: Daily Use
DAILY USE Warning! Refer to the Safety chapters. The temperature indicator comes on while the temperature in the appliance increases. Activating and deactivating the 3. To deactivate the appliance, turn the appliance knob for the oven functions and the 1. Turn the knob for the oven functions to knob for the temperature to the Off po- an oven function. -
Page 7: Clock Functions
CLOCK FUNCTIONS Electronic programmer Function indicators Time display Button + Selection button Button - Clock function Application Time of day To set, change or check the time of day. Minute Minder To set a countdown time. This function has no effect on the opera- tion of the oven. -
Page 8: Additional Functions
ADDITIONAL FUNCTIONS Cooling fan overheating. To prevent this, the oven has a safety thermostat which interrupts the pow- When the appliance operates, the cooling er supply. The oven activates again auto- fan activates automatically to keep the sur- matically when the temperature drops. faces of the appliance cool. - Page 9 Conventional True Fan Cook- cooking Cooking TYPE OF DISH Notes time [min] Temp Temp Level Level [°C] [°C] Shortbread 2 (1 24 - 34 In a cake mould dough and 3) Butter-milk 60 - 80 In a 26 cm cake mould cheese cake Apple cake (Ap- 2 (1...
- Page 10 Conventional True Fan Cook- cooking Cooking TYPE OF DISH Notes time [min] Temp Temp Level Level [°C] [°C] Pasta flan 40 - 50 In a mould Vegetable flan 45 - 60 In a mould Quiches 40 - 50 In a mould Lasagne 25 - 40 In a mould...
- Page 11 Conventional True Fan Cook- cooking Cooking TYPE OF DISH Notes time [min] Temp Temp Level Level [°C] [°C] Trout / Sea 2 (1 40 - 55 3 - 4 fishes bream and 3) Tuna fish / Sal- 2 (1 35 - 60 4 - 6 fillets and 3) Grilling...
-
Page 12: Care And Cleaning
Drying - True Fan Cooking Cover the oven shelves with baking parch- ment. VEGETABLES Shelf position Temperature TYPE OF DISH Time [hr] [°C] 1 level 2 levels Beans 60 - 70 6 - 8 Peppers 60 - 70 5 - 6 Vegetables for 60 - 70 5 - 6... - Page 13 Removing the shelf supports 1. Pull the front of the shelf support away from the side wall. 2. Pull the rear end of the shelf support away from the side wall and remove it. 1. Turn the glass cover counterclockwise Installing the shelf supports to remove it.
- Page 14 Removing the oven door and the glass panel 1. Open the door fully and hold the two door hinges. 2. Lift and turn the levers on the two hing- 3. Close the oven door to the first open- ing position (halfway). Then pull forward and remove the door from its seat.
- Page 15 4. Put the door on a soft cloth on a stable surface. 5. Release the locking system to remove the internal glass panel. 6. Turn the two fasteners by 90° and re- move them from their seats. 90° 7. Carefully lift (step 1) and remove (step 2) the glass panel.
-
Page 16: What To Do If
Installing the door and the glass panel When the cleaning is completed, install the glass panel and the oven door. Do the above steps in the opposite sequence. The screen-printing zone must face the in- ner side of the door. Make sure that after the installation the surface of the glass pan- el frame on the screen-printing zones is not rough when you touch it. -
Page 17: Environment Concerns
Building In Electrical installation Warning! Only a qualified person must do the electrical installation. The manufacturer is not responsible if you do not follow the safety precau- tions from the chapter "Safety Informa- tion". This appliance is supplied with a main plug and a main cable. - Page 18 Packaging material breviations such as PE, PS, etc. Dis- The packaging material is environmen- pose of the packaging material in the tally-friendly and recyclable. Plastic containers provided for this purpose at parts are marked with international ab- your local waste management facility.
- Page 20 892954539-A-242013...
Need help?
Do you have a question about the POB93 and is the answer not in the manual?
Questions and answers