Table of Contents
Advertisement
Quick Links
Advertisement
Table of Contents

Related Manuals for Philco POB68


Summary of Contents for Philco POB68
- Page 1 User manual Oven POB68...
-
Page 2: Table Of Contents
CONTENTS Safety information Using the accessories Safety instructions Additional functions Product description Helpful hints and tips Before first use Care and cleaning Control panel What to do if… Daily use Installation Clock functions Environment concerns Automatic programmes Subject to change without notice. SAFETY INFORMATION Before the installation and use of the appliance, carefully read the supplied instructions. -
Page 3: Safety Instructions
• Before maintenance cut the power supply. • Do not use harsh abrasive cleaners or sharp metal scrapers to clean the glass door since they can scratch the surface, which may result in shattering of the glass. • To remove the shelf supports first pull the front of the shelf support and then the rear end away from the side walls. -
Page 4: Internal Light
• Be careful, when you open the appliance • Make sure the appliance is cold. There is door while the appliance is in operation. the risk that the glass panels can break. Hot air can release. • Replace immediately the door glass pan- •... -
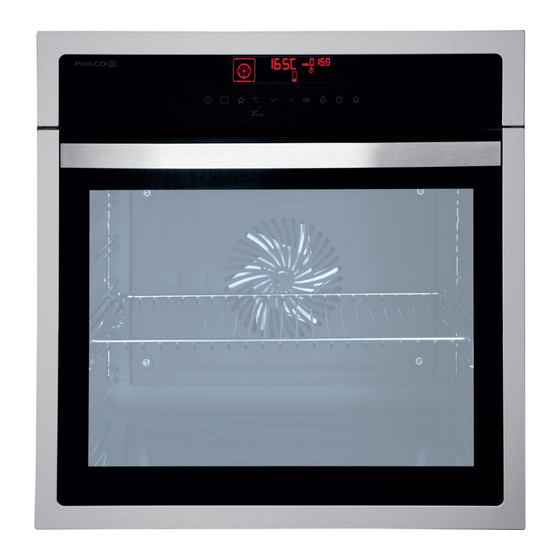
Page 5: Product Description
PRODUCT DESCRIPTION Control panel Electronic programmer Heating element Lamp Rear wall heating element Bottom heat Shelf support, removable Shelf positions Accessories Wire shelf For cookware, cake tins, roasts. Grill- / Roasting pan To bake and roast or as a pan to collect fat. -
Page 6: Before First Use
Telescopic runners For shelves and trays. BEFORE FIRST USE Warning! Refer to the Safety chapters. Setting the time of day: 1. Touch to set the hours. Initial Cleaning 2. Touch 3. Touch to set the minutes. • Remove all parts from the appliance. 4. -
Page 7: Other Indicators In The Display
Sensor Field Function Description OPTIONS To set an oven function, an automatic programme or a cleaning function (selected models only). Straight access to an oven function when the ap- pliance is off. MY FAVOURITE PRO- To store your favourite programme. Use it to have GRAMME access to your favourite programme directly or when the appliance is deactivated. -
Page 8: Daily Use
Symbols Name Description Temperature You can see or change the temperature. Oven light The light is off. Minute minder The minute minder function operates. Heat up indicator When the appliance is at the set tempera- ture, the bars go off the display. If you activate an oven function, the bars come on in the display. - Page 9 Oven function Application ECO Roasting ECO functions let you optimize the energy consumption dur- ing cooking. Thus, it is necessary to set the cooking time first. To get more information about the recommended set- tings, refer to the cooking tables for an oven function that is almost the same.
-
Page 10: Clock Functions
CLOCK FUNCTIONS SYMBOL FUNCTION DESCRIPTION TIME OF DAY To examine the time of day. For changing the time of day refer to 'Setting and changing the time'. DURATION To set how long the appliance operates. To set when the appliance deactivates. You can use the Duration and End functions at the same time (Time delay), if the appliance is to be activated and deactivated auto- matically later. -
Page 11: Automatic Programmes
5. Touch a sensor field (apart from ON / 5. Touch a sensor field or open the oven OFF) to start the SET+GO function. door to stop the acoustic signal. Setting the Time delay function You can use the SET+GO function only when the DURATION is set. -
Page 12: Using The Accessories
7. Touch a sensor field or open the door default weight value with to stop the acoustic signal. Touch 6. When the set time ends, an acoustic signal sounds for two minutes. flashes. The appliance deactivates. USING THE ACCESSORIES Warning! Refer to the Safety chapters. Inserting the oven accessories The deep pan and the wire shelf have side edges. - Page 13 Put the wire shelf on the telescopic runners so that the feet point downwards. The high rim around the wire shelf is a special device to prevent the cookware from slipping. Inserting the wire shelf and the deep pan together Put the wire shelf on the deep pan.
-
Page 14: Additional Functions
ADDITIONAL FUNCTIONS My Favourite Programme SAFE comes on or goes out in the display. function Function Lock Use this function to save your favourite You can activate the function only when the temperature and time settings for an oven appliance operates. The Function Lock pre- function or programme. -
Page 15: Helpful Hints And Tips
2. Touch and hold Automatic switch-off for three seconds. The display shows "SET1" and "1" For safety reasons the appliance deacti- flashes. vates automatically after some time: 3. Touch to select the setting. • if an oven function operates. 4. Touch •... -
Page 16: Tips On Baking
Tips on baking Baking results Possible cause Remedy The bottom of the cake is not The shelf position is incorrect. Put the cake on a lower shelf. browned sufficiently. The cake sinks and becomes The oven temperature is too The next time you bake, set a soggy, lumpy or streaky. - Page 17 Type of baking Oven function Shelf position Temperature Time (min) (°C) Apple pie / Apple Conventional 70 - 90 pie (2 tins Ø20 Cooking cm, diagonally off set) Cheesecake Conventional 170 - 190 60 - 90 Cooking 1) Preheat the oven. Cakes / pastries / breads on baking trays Temperature Type of baking...
- Page 18 Biscuits Temperature Type of baking Oven function Shelf position Time (min) (°C) Short pastry bis- True Fan Cooking 150 - 160 10 - 20 cuits Short bread / Short bread / True Fan Cooking 20 - 35 Pastry stripes Short bread / Conventional Short bread / 20 - 30...
-
Page 19: Multileveled Baking
Multileveled Baking Cakes / pastries / breads on baking trays True Fan Cooking Temperature Type of baking Shelf position Time (min) (°C) 2 shelf positions 3 shelf positions Cream puffs / 1 / 4 25 - 45 160 - 180 Eclairs Dry streusel cake 1 / 4... -
Page 20: Roasting With Turbo Grilling
Type of baking Shelf position Temperature °C Time (min.) Vegetable pie 160 - 180 50 - 60 Unleavened bread 10 - 20 230 - 250 Puff pastry flan 45 - 55 160 - 180 Flammekuchen (Pizza- 12 - 20 230 - 250 like dish from Alsace) Piroggen (Russian ver- 15 - 25... - Page 21 Type of meat Quantity Oven func- Shelf posi- Temperature Time (min.) tion tion °C Roast veal 1 kg Turbo Grilling 160 - 180 90 - 120 Knuckle of 1.5 - 2 kg Turbo Grilling 160 - 180 120 - 150 veal Lamb Type of meat...
-
Page 22: Convenience Food
Caution! Always grill with the oven door closed. Grilling Time (min.) Food to be gril- Shelf position Temperature 1st side 2nd side Roast beef 210 - 230 30 - 40 30 - 40 Filet of beef 20 - 30 20 - 30 Back of pork 210 - 230 30 - 40... - Page 23 Food to be Temperature Oven functions Shelf position Time (min.) cooked (°C) as per manufac- as per manufac- Conventional Frozen pizza turer’s instruc- turer’s instruc- Cooking tions tions Conventional as per manufac- French fries (300 Cooking or Turbo 200 - 220 turer’s instruc- - 600 g) Grilling...
- Page 24 Cooking time until Continue to cook at Preserve Temperature in °C simmering (min.) 100°C (min.) Strawberries / Blueber- ries / Raspberries / 160 - 170 35 - 45 Ripe gooseberries Stone fruit Cooking time until Continue to cook at Preserve Temperature in °C simmering (min.) 100°C (min.)
-
Page 25: Care And Cleaning
CARE AND CLEANING Warning! Refer to the Safety chapters. 2. Touch again and again until the dis- play shows “Cata" and the duration of Notes on cleaning: the cleaning procedure (1 hour). You • Clean the front of the appliance with a cannot set the duration, but you can soft cloth with warm water and a cleaning use the End function to delay the start... -
Page 26: Installing The Shelf Supports
2. Pull the rear end of the shelf support away from the side wall and remove it. 4. Install the glass cover. Installing the shelf supports Install the shelf supports in the opposite se- Replacing the lamp on the left side of quence. -
Page 27: Cleaning The Oven Door
Cleaning the oven door Removing the door and the glass panels You can remove the oven door and the in- ternal glass panels to clean it. The number of glass panels is different for different models. Warning! Be careful when you remove the door from the appliance. -
Page 28: Installation
Problem Possible cause Remedy The appliance does not heat The appliance is deactivated. Activate the appliance. The appliance does not heat The clock is not set. Set the clock. Refer to “Setting and changing the time”. The appliance does not heat The necessary settings are not Make sure that the settings are set. - Page 29 min. 50 mm 560 min. 20 min. ! 530 min.
- Page 30 560 min. 530 min. 590 min. alternativ 100 max. R1200 mm H05VV-F H05RR-F min. 1600 mm 90 º...
-
Page 31: Environment Concerns
2x3,5x25 ENVIRONMENT CONCERNS about recycling of this product, please The symbol on the product or on its contact your local council, your household packaging indicates that this product may waste disposal service or the shop where not be treated as household waste. Instead you purchased the product. - Page 32 892956693-A-362012...
Need help?
Do you have a question about the POB68 and is the answer not in the manual?
Questions and answers