Table of Contents
Advertisement
Available languages
Available languages
Quick Links
TRAININGSBANK
WORKOUT BENCH
BANC DE MUSCULATION
TRAININGSBANK
Kurzanleitung
BANC DE MUSCULATION
Guide de démarrage
ŁAWKA TRENINGOWA
Skrócona instrukcja
TRÉNINGOVÁ LAVIČKA
Krátky návod
TRÆNINGSBÆNK
Kort vejledning
IAN 388200_2104
KURZANLEITUNG
QUICK GUIDE
GUIDE DE DÉMARRAGE
WORKOUT BENCH
Quick Guide
TRAININGSBANK
Korte handleiding
TRÉNINKOVÁ LAVICE
Stručný návod
BANCO DE MUSCULACIÓN
Guía rápida
Advertisement
Table of Contents

Related Manuals for Crivit 100341101


Summary of Contents for Crivit 100341101
- Page 1 KURZANLEITUNG QUICK GUIDE GUIDE DE DÉMARRAGE TRAININGSBANK WORKOUT BENCH BANC DE MUSCULATION TRAININGSBANK WORKOUT BENCH Kurzanleitung Quick Guide BANC DE MUSCULATION TRAININGSBANK Guide de démarrage Korte handleiding ŁAWKA TRENINGOWA TRÉNINKOVÁ LAVICE Skrócona instrukcja Stručný návod TRÉNINGOVÁ LAVIČKA BANCO DE MUSCULACIÓN Krátky návod Guía rápida TRÆNINGSBÆNK...
- Page 2 M10 x 55mm M8 x 50mm M10 x 20mm M8 x 16mm...
- Page 8 0,6m 0,6m 0,6m 0,6m...
-
Page 10: Technische Daten
• Trainieren Sie nur auf einem fla- Bei diesem Dokument handelt es sich um eine Sicherheitshinweise verkürzte Druckausgabe der vollständigen chen, waagerechten und rutschfes- Verletzungsgefahr! Gebrauchsanweisung. Durch das Scannen des ten Untergrund. QR-Code gelangen Sie direkt auf die Lidl- • Dieses Gerät kann von Kindern ab •... -
Page 11: Montage
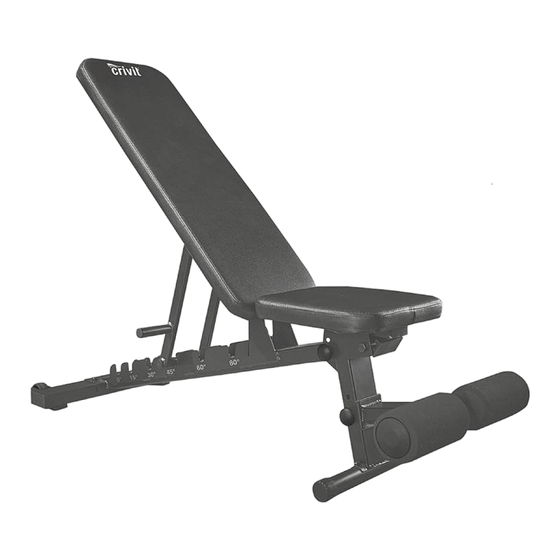
• Weisen Sie Kinder insbesondere Rückenlehne einstellen (Abb. F) Wichtig: Vergessen Sie dabei nicht, ruhig weiter zu atmen! Die Rückenlehne (6) ist siebenfach, von einem darauf hin, dass der Artikel kein Neigungswinkel von -15º, 0º, 15º, 30º, 45º, Spielzeug ist. Übungsvorschläge 60º... - Page 12 Dehnen Flaches Bankdrücken mit Kurzhan- Endposition 6. Spannen Sie die Brust- und Armmuskulatur an. tel (Abb. I) Nehmen Sie sich nach jedem Training ausrei- 7. Beugen Sie die Ellenbogen gleichzeitig mit Ausgangsposition chend Zeit zum Dehnen. Im Folgenden beschrei- der Ausatmung bis zum Anschlag. 1.
-
Page 13: Intended Use
supervised or have been instruct- • To avoid injury, never transport the This document is an abridged print version of the full instructions for use. By scanning ed in the safe use of the item and item over stairs or other obstacles the QR code you gain direct access to the understand the dangers it can by yourself. -
Page 14: Suggested Exercises
Disassembly Arms and shoulders sets. Important: Pay attention to your body 1. Interlock your hands behind your back and To disassemble the item, follow the steps above tension during the exercise. gently pull them upwards . The best way to in the reverse order. -
Page 15: Storage, Cleaning
Important: During the exercise, pay 4. Switch sides and repeat the exercise. attention to your body tension and push Leg muscles your shoulder blades towards your 1. Stand up straight and lift one foot off the floor. buttocks. 2. Slowly move your foot in a circle, first in one direction and then in the other. -
Page 16: Caractéristiques Techniques
ou mentales ou encore qui n’ont • L’article doit être monté unique- Ce document est une version imprimée abrégée de la notice d’utilisation complète. En scannant pas l’expérience ni les connais- ment par un adulte afin d’éviter les le code QR, vous serez directement redirigé(e) sances nécessaires que sous blessures dues à... -
Page 17: Consignes Générales Pour L'entraînement
• Utilisez uniquement des pièces de • Si vous êtes débutant, ne travaillez jamais Relever le tronc (ill. G) avec une charge trop élevée. Augmentez Position de départ rechange d’origine. lentement l’intensité de l’entraînement. 1. Réglez le dossier en position inclinée à -15º et •... - Page 18 Stockage, nettoyage 7. Revenez lentement en position de départ et Position finale répétez l’exercice 7 fois sur 4 séries. Entre 6. Contractez les pectoraux et les muscles des Si vous n’utilisez pas l’article, rangez-le à tem- chaque série, faites une pause d’env. 120 se- bras.
-
Page 19: Beoogd Gebruik
dit plaatsvindt onder toezicht dan • Gebruik het artikel pas als het vol- Bij dit document gaat het om een verkorte gedrukte editie van de volledige gebruiksaan- wel na voorlichting met betrekking ledig gemonteerd is. wijzing. Door de QR-code te scannen, geraakt u tot veilig gebruik van het toestel •... - Page 20 • Bescherm het artikel tegen extreme • Let op een gelijkmatige ademhaling. Adem uit 5. De nek blijft in het verlengde van de wervel- bij inspanning en in bij ontspanning. kolom en de schouders blijven laag. Houd de temperaturen, zon en vocht. Ver- •...
- Page 21 5. Laat de rechterschouder daarbij iets zakken, 3. Houd de halter met de rechterhand vast, terwijl de linkerschouder stabiele ondersteu- zodanig dat de handrug zijwaarts wijst. De ning biedt doordat het schouderblad iets naar elleboog is gestrekt. rechtsonder te bewegen. 4.
-
Page 22: Użytkowanie Zgodne Z Przeznaczeniem
od 14 lat oraz przez osoby ze • Użytkownik powinien natychmiast Niniejszy dokument jest skróconą wersją drukowaną pełnej instrukcji użytkowania. Po zmniejszonymi możliwościami zakończyć trening, gdy poczuje zeskanowaniu kodu QR trafią Państwo bezpo- fizycznymi, sensorycznymi albo zawroty głowy, przyspieszone średnio na stronę obsługi klienta Lidl (www. mentalnymi lub też... - Page 23 Propozycje ćwiczeń 2. Podnieść drążek blokujący (1a) i włożyć go Zagrożenia wynikające ze w wycięcie (1b), aby zablokować żądany kąt zużycia Na przyrządzie można trenować nie tyl- pochylenia. ko mięśnie nóg i pośladków, lecz także • Produkt sprawdzać pod wzglę- 3.
- Page 24 Przechowywanie, czyszcze- 4. Łokcie leżą poniżej płaszczyzny położenia, 4. Chwycić hantle, kierując grzbiety dłoni są odchylone od ciała pod kątem 45º i do tyłu. Łokcie leżą poniżej płaszczyzny zgięte. Hantle znajdują się na wysokości położenia, są odchylone od ciała pod kątem Nieużywany przyrząd przechowywać...
-
Page 25: Technické Údaje
pokud byly seznámeny s bezpeč- • Nepoužívejte výrobek jako pomoc U tohoto dokumentu se jedná o zkrácené tiskové vydání úplného návodu k použití. Naskenová- ným používáním zařízení a s rizi- pro lezení nebo jako náhradu ním QR-kódu se dostanete přímo na servisní ky, která... - Page 26 Montáž Zahřátí 8. Pomalu se vraťte do výchozí polohy a cvik opakujte 7krát ve 4 cyklech. Mezi jednot- Tento výrobek by měly montovat dvě Před každým tréninkem se dostatečně zahřejte. livými cykly udělejte cca 120sekundovou osoby. Zde je popis několika jednoduchých cviků. přestávku.
- Page 27 Skladování, čistění 80º bench press s krátkou činkou (obr. L) Když lavici nepoužíváte, skladujte ji na suchém Výchozí poloha a čistém místě při pokojové teplotě. 1. Nastavte opěrku na 80º. Otírejte ji pouze vlhkým hadříkem a následně ji 2. Posaďte se na lavici a opřete se zády o opěr- utřete dosucha.
- Page 28 používaní zariadenia a rozumejú • Nepoužívajte výrobok ako po- Pri tomto dokumente sa jedná o skrátený výtla- čok úplného návodu na používanie. Naskeno- prípadným nebezpečenstvám. Deti môcku na vystupovanie alebo ako vaním QR kódu sa dostanete priamo na stránku sa so zariadením nesmú hrať. náhradu rebríka.
- Page 29 Montáž Zahriatie Koncová poloha 6. Napnite svalstvo hrude, brucha a ramien. Výrobok musia montovať dve osoby. Pred každým tréningom venujte dostatok času 7. Zároveň s výdychom zdvihnite činky vodo- Pozor pri citlivých podlahách! V prípa- zahriatiu. Nižšie je opísaných niekoľko jednodu- rovne nahor v jednej línii s hrudníkom.
- Page 30 9. Cvičenie opakujte 7-krát v 4 sériách. Medzi Svalstvo nôh sériami spravte cca 90 sekundovú prestávku. 1. Postavte sa vzpriamene a zdvihnite jednu Dôležité: Pri cvičení dbajte na napnutie nohu zo zeme. tela a lopatky posuňte smerom k seda- 2. Pomaly krúžte nohou najskôr do jednej potom cej časti.
- Page 31 de experiencia y conocimientos, si • Preste atención a que el artículo Este documento es una copia impresa abreviada de las instrucciones de uso completas. Esca- han recibido supervisión o instruc- se use solo cuando esté completa- neando el código QR accederá directamente a ción sobre el uso del aparato de mente montado.
-
Page 32: Montaje
El almacenamiento y el uso inco- • Respire uniformemente. Espire con el esfuerzo Posición final e inspire al relajar. 4. Tense los abdominales y levante el torso lo rrectos del artículo pueden provo- • Mantenga una postura correcta mientras reali- máximo que pueda, mientras espira. - Page 33 Almacenamiento, limpieza Remo con un brazo en el banco 8. Permanezca brevemente en esa posición y vuelva despacio a la posición de partida. (fig. J) Cuando no lo utilice, guarde el artículo en un 9. Repita el ejercicio 7 veces en 4 tandas. Haga Posición de partida lugar seco y limpio, a temperatura ambiente.
- Page 34 som kan være forbundet med det. • Undgå at træne, hvis du er træt og Ved dette dokument drejer det sig om en forkor- tet, trykt udgivelse af den komplette brugervej- Børn må ikke lege med produktet. ukoncentreret. Træn ikke lige efter ledning.
- Page 35 Anvendelse 3. Træk skuldrene op til ørerne, og lad dem falde 4. Albuerne holdes 45º ud fra kroppen under ned igen. bænken og er bøjede. Håndvægtene er på Vi anbefaler at lægge et håndklæde på artiklen 4. Sving skiftevist den venstre og højre arm frem højde med brystet.
- Page 36 Opbevaring, rengøring Slutstilling 6. Spænd bryst- og armmuskulaturen. Opbevar altid artiklen tørt og rent ved rumtem- 7. Stræk armene, og løft håndvægtene over peratur, når den ikke bruges. hovedet parallelt med skinnebenene. Rengør den kun med en fugtig klud, og tør den 8.
- Page 40 DELTA-SPORT HANDELSKONTOR GMBH Wragekamp 6 • DE-22397 Hamburg GERMANY 09/2021 Delta-Sport-Nr.: HB-10037 IAN 388200_2104...
Need help?
Do you have a question about the 100341101 and is the answer not in the manual?
Questions and answers