
Related Manuals for Ruijie Reyee RG-RAP72Pro


Summary of Contents for Ruijie Reyee RG-RAP72Pro
- Page 1 Ruijie Reyee RG-RAP72Pro Access Point Installation Guide Document Version: V1.0 Date: July 31, 2024 Copyright © 2024 Ruijie Networks...
- Page 2 Ruijie Networks reserves the right to modify the content of the document without any notice or prompt. This manual is designed merely as a user guide. Ruijie Networks has tried its best to ensure the accuracy and reliability of the content when compiling this manual, but it does not guarantee that the content of the manual is completely free of errors or omissions, and all the information in this manual does not constitute any explicit or implicit warranties.
-
Page 3: Preface
Preface Audience This document is intended for: Network engineers Technical support and servicing engineers Network administrators Technical Support Official Website of Ruijie Reyee: https://reyee.ruijie.com Technical Support Website: https://reyee.ruijie.com/en-global/support Case Portal: https://www.ruijienetworks.com/support/caseportal Community: https://community.ruijienetworks.com ... - Page 4 Note An alert that contains additional or supplementary information that if not understood or followed will not lead to serious consequences. Specification An alert that contains a description of product or version support. Note This manual provides installation steps, troubleshooting, technical specifications, and usage guidelines for cables and connectors.
-
Page 5: Table Of Contents
Contents Preface ..............................I 1 Overview ............................1 1.1 About the RG-RAP72Pro ......................1 1.2 Package Contents........................1 1.3 Product Appearance ........................2 1.3.2 Front Panel ........................2 1.3.3 Rear Panel ........................3 1.4 Technical Specifications ......................4 1.5 Power Supply Technical Specifications ..................7 1.6 Cooling ............................ - Page 6 2.3 Tools ............................10 3 Installing the AP..........................12 3.1 Before You Begin ........................12 3.2 Safety Precautions During Installation ..................12 3.3 Installing the AP ........................13 3.4 Removing the AP ........................15 3.5 Bundling Cables ........................16 3.6 Checklist After Installation ....................... 16 4 Debugging ............................
- Page 7 7.1 Connectors and Media ......................21 7.1.1 100/1000/2.5GBASE-T Ports ..................21 7.2 Cabling Recommendations...................... 23 7.2.1 Requirements for Cable Bend Radius ................. 23 7.2.2 Precautions for Bundling up Cables ................23...
-
Page 8: Overview
RG-RAP72Pro Installation Guide Overview Overview About the RG-RAP72Pro The RG-RAP72Pro access point (AP) is a powerful Wi-Fi 7 5040 Mbps dual-band ceiling AP designed for indoor scenarios such as offices, hotels, and schools. Featuring multiple advanced technologies, this AP can deliver high-speed, stable, and secure Wi-Fi connectivity to meet the diverse needs of users. -
Page 9: Product Appearance
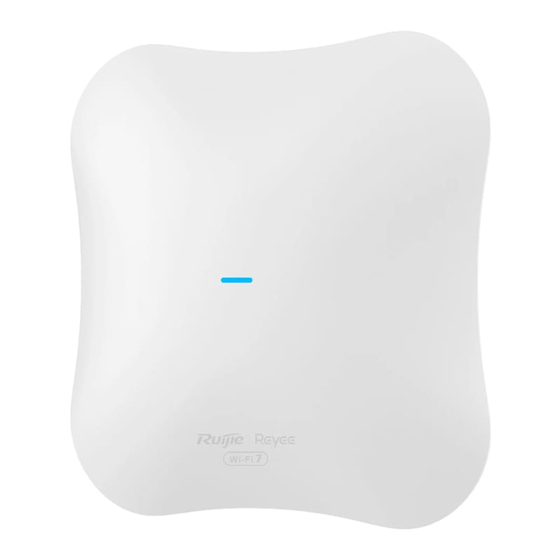
RG-RAP72Pro Installation Guide Overview Product Appearance Figure 1-1 Appearance 1.3.2 Front Panel Figure 1-2 Front Panel Table 1-2 LEDs Status Description Solid blue The device is working properly. The device is not receiving power. -
Page 10: Rear Panel
RG-RAP72Pro Installation Guide Overview Status Description Fast blinking blue The device is starting up. Blinking blue (one blink per 2 The device is not connected to the Internet. seconds) Possible cases: The device is resetting. Blinking blue The device is recovering. twice Caution Do not power off the device when the LED is in this state. -
Page 11: Technical Specifications
RG-RAP72Pro Installation Guide Overview Table 1-3 Components on the Rear Panel Component Description DC power connector Supplies power to the AP, with a power supply specification of DC 12 V Reset button Press and hold for less than 2 seconds: Restart the device. Press and hold for more than 5 seconds: Restore the device to factory settings. - Page 12 RG-RAP72Pro Installation Guide Overview 11a/g: –82 dBm (6 Mbps), –74 dBm (24 Mbps), –70 dBm (36 Mbps), –65 dBm (54 Mbps) 11n: 20MHz: –82 dBm (MCS0), –64 dBm (MCS7) 11n: 40MHz: –79 dBm (MCS0), –61 dBm (MCS7) 11ac: 20MHz: –82 dBm (MCS0), –59 dBm (MCS8) 11ac: 40MHz: –79 dBm (MCS0), –54 dBm (MCS8) 11ac: 80MHz: –76 dBm (MCS0), –51 dBm (MCS9) 11ac: 160MHz: –73 dBm (MCS0), –48 dBm (MCS9)
- Page 13 RG-RAP72Pro Installation Guide Overview 5150 to 5350 MHz, EIRP ≤ 23 dBm ○ 5470 to 5725 MHz, EIRP ≤ 30 dBm ○ 5725 to 5825 MHz, EIRP ≤ 30 dBm ○ Indonesia: 2400 to 2483.5 MHz, EIRP ≤ 27 dBm ○...
-
Page 14: Power Supply Technical Specifications
RG-RAP72Pro Installation Guide Overview Power Supply Technical Specifications The RG-RAP72Pro can be powered by the DC power supply or PoE. When a DC power adapter is used for power supply, the power adapter should have a voltage of 12 V and a current of 2.5 A or higher. -
Page 15: Preparing For Installation
RG-RAP72Pro Installation Guide Preparing for Installation Preparing for Installation Safety Guidelines Note To avoid personal injury and device damage, review the safety guidelines in this chapter before you begin the installation. The following safety precautions may not include all the potentially hazardous situations. 2.1.1 Safety Precautions ... -
Page 16: Installation Site Requirements
RG-RAP72Pro Installation Guide Preparing for Installation Make sure that the AP is powered off when you cut off the power supply. Do not place the AP in a wet position, and keep it away from liquid. Keep the AP far away from grounding or lightning protection devices for power equipment. ... -
Page 17: Emi
RG-RAP72Pro Installation Guide Preparing for Installation ≥ 3 μm ≤2.4 x 10 Particles/m ≥ 5 μm ≤1.3 x 10 Particles/m Apart from dust, the salt, acid, and sulfide in the air of the equipment room must meet strict requirement. These harmful substances will accelerate metal corrosion and component aging. - Page 18 RG-RAP72Pro Installation Guide Preparing for Installation Note This device is delivered without a toolkit. Prepare the preceding tools by yourself.
-
Page 19: Installing The Ap
RG-RAP72Pro Installation Guide Installing the AP Installing the AP The RG-RAP72Pro must be installed indoors, and used in a fixed place. Caution Before installing the AP, make sure that you have carefully read the requirements described in Chapter 2. Before You Begin Before installing the RG-RAP72Pro, carefully plan and arrange the installation location, networking mode, power supply, and cabling. -
Page 20: Installing The Ap
RG-RAP72Pro Installation Guide Installing the AP Installing the AP Note In an indoor environment, a ceiling-mounted AP offer broader antenna radiation coverage compared to a wall-mounted one. Hence, ceiling mounting is the preferred option. The schematic diagram provided is for reference purposes only. The actual product should be installed based on its physical specifications and design. - Page 21 RG-RAP72Pro Installation Guide Installing the AP Caution The plane deviation of the wall in a specific area should be within 2 mm (0.08 in.), and the recommended torque for installation is 4 kgf.cm. In case of uneven installation site, please mount the AP on a protruding wall. (3) Connect cables according to the actual networking.
-
Page 22: Removing The Ap
RG-RAP72Pro Installation Guide Installing the AP Caution Before securing the AP to the mounting plate, connect the cables first. The slots on the back of the AP must be aligned with and slid into the square feet on the mounting plate. Do not press the slots into the square feet by force. -
Page 23: Bundling Cables
RG-RAP72Pro Installation Guide Installing the AP (2) Slide down the AP as indicated by the arrow. Bundling Cables Caution Bundle the cable in a visually pleasing way. Make sure that the fibers at the connectors have natural bends or bends of large radius. ... -
Page 24: Debugging
Verify the LED status. After the AP is powered on, check whether the SSID (@Ruijie-mXXXX for multiple devices or @Ruijie-sXXXX for a single device) can be searched by a mobile phone or other wireless devices. Logging In to the Web GUI (1) Power on the PC and configure the local connection attribute on the PC. -
Page 25: Monitoring And Maintenance
RG-RAP72Pro Installation Guide Monitoring and Maintenance Monitoring and Maintenance Monitoring When the RG-RAP72Pro is operating, you can monitor the device running status by observing the LED. Maintenance If the hardware is faulty, please contact the local distributor. -
Page 26: Troubleshooting
Check whether the LED is normal. Check whether cables are properly connected with ports. Contact Ruijie technical support to check whether hardware faults exist. Common Faults 6.2.1 The Status LED Is Off After the AP Is Powered On ... - Page 27 RG-RAP72Pro Installation Guide Troubleshooting (3) Verify that the AP is correctly configured. (4) Move the client device closer to the AP.
-
Page 28: Appendix
RG-RAP72Pro Installation Guide Appendix Appendix Connectors and Media 7.1.1 100/1000/2.5GBASE-T Ports The 2.5GBASE-T/1000BASE-T/100BASE-TX port is 2.5 Gbps/1000 Mbps/100 Mbps port that supports auto MDI/MDIX Crossover. Compliant with the IEEE 802.3bz standard, 2500BASE-T requires a Category 6 (Cat 6) or Category 5e (Cat 5e) 100-ohm UTP or STP (recommended) cable with a maximum distance of 100 meters (328 feet). - Page 29 RG-RAP72Pro Installation Guide Appendix Figure 7-2 show feasible connections of the straight-through and crossover twisted pairs for a 100BASE-TX port. Figure 7-2 100BASE-TX Twisted Pair Connection...
-
Page 30: Cabling Recommendations
RG-RAP72Pro Installation Guide Appendix Cabling Recommendations During installation, route cable bundles upward or downward along the sides of the rack depending on the actual situation in the equipment room. All cable connectors used for transit should be placed at the bottom of the cabinet rather than be exposed outside of the cabinet. - Page 31 RG-RAP72Pro Installation Guide Appendix without sharp corners. The metal hole traversed by cables should have a smooth and fully rounding surface or an insulated lining. Use cable ties to bundle up cables properly. Do not connect two or more cable ties to bundle up cables. ...
- Page 32 RG-RAP72Pro Installation Guide Appendix The power cords connecting moving parts such as grounding cables should be reserved with some access after being assembled to avoid suffering tension or stress. After the moving part is installed, the remaining cable part should not touch heat sources, sharp corners, or sharp edges. If heat sources cannot be avoided, high-temperature cables should be used.
Need help?
Do you have a question about the Reyee RG-RAP72Pro and is the answer not in the manual?
Questions and answers