Table of Contents
Advertisement
Quick Links
Advertisement
Table of Contents

Subscribe to Our Youtube Channel
Related Manuals for Elite Fitness Pershing


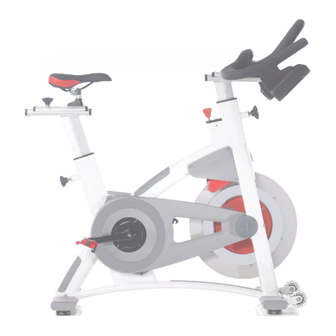
Summary of Contents for Elite Fitness Pershing
- Page 1 ASSEMBLY MANUAL Record serial number Elite Pershing Spin bike...
-
Page 2: Table Of Contents
Please read through this manual to familiarise yourself with the operation of your new Elite Pershing Spin bike. Doing so will help to insure that you get the most out of your machine, enjoying safe and effective workouts ahead. -
Page 3: Important Safety Instructions
IMPORTANT SAFETY INSTRUCTIONS The following definition applied to the word “WARNING” when used in this manual: Used to call attention to POTENTIAL hazards that could result in personal injury or loss of life. READ ALL INSTRUCTIONS BEFORE USING THE MACHINE This product has been designed for home use only. -
Page 4: Product Specifications
— Only carry out training work on the equipment when it is in perfect working order. Only use original spare parts in the event of a repair. — Do not use strong solvents for cleaning, and only use the tools supplied, or suitable ones of your own, for any repairs that may be required. -
Page 5: Assembly Instructions
ASSEMBLY INSTRUCTIONS STEP 1 Attach the Rear Stabiliser (24) to the frame using two Carriage bolts (51), two Flange Nuts (54) and two Washers (52). Secure firmly using the Multi Wrench (14). STEP 2 Attach the Front Stabiliser (56) to the frame using two Carriage bolts (51), two Flange Nuts (54) and two Washers (52). - Page 6 STEP 3 Thread the right pedal (42R) that has “R” on the spindle to the right side arm of the bike using the Multi-Wrench (14). Please note that the R pedal is right hand threaded which needs to be turned clockwise to tighten. Thread the left pedal (42L) that has “L”...
- Page 7 STEP 5 Align the Handlebar as shown in the diagram. Locate the Adjustable Pop Pin on the front of the Frame. Loosen the knob and pull it outward. Then, insert the Handlebar (25) into the frame. Move the Handlebar (25) upward or downward to place at the desired position, and then tighten the knob.
- Page 8 CONGRATULATIONS Assembly of your Elite Pershing Spin bike is now complete! Be sure to fully inspect your machine before using it for the first time. Failure to visually check and test and tech the assembly before use can cause damage to the Elite Pershing Spin bike and serious injury to users and bystanders and can also compromise the effectiveness of your exercise program.
-
Page 9: Setting Your Spin Bike Up
SETTING YOUR SPIN BIKE UP Saddle Height Adjustment Adjusting the Seat Fore-and-Aft Position Adjusting the Seat Fore-and-Aft Position Having your bike seat adjusted to the right height is essential for a comfortable ride, Once you’ve adjusted seat height, it’s time efficient pedalling and avoiding injury. - Page 10 Handle Bar Adjustment Holding this position, have your helper place the end of the plumb line (line of string with The positioning of the handlebars can be nut/washer) on the front of your leg, at a point dependent on the bike design and adjustability just below the bony protrusion that’s beneath available.
-
Page 11: Care And Maintence
DO NOT over-tighten, only enough to stop any slipping of the belt drive system. If you require further assistance or advice contact the Elite Fitness Service Department or your nearest Elite Fitness Store. -
Page 12: Maintenance Log
MAINTENANCE LOG Prolong the life of your spin bike by performing periodic maintenance checks. Not only does this ensure your machine is in full working order, but it will save you service costs in the long run. Every time you perform maintenance, record the date and if you can, the distance and hours operated. -
Page 13: Limited Warranty
B) Used with an extension cord any longer than 1.5m. Repair and Maintenance Service Please contact our Elite Fitness Service Department at eliteservice@elitefitness.co.nz or visit www.elitefitness.co.nz for any service related issues or advice on preventative maintenance servicing procedures. -
Page 14: Warm-Up Exercise
WARM-UP EXERCISE Warm up exercise is important in preparing the muscles for activity whilst minimising the risk of injury. You may choose to warm up with a light/brisk walking pace for 5-10 minutes before stopping and performing some simple stretches. (As shown in the pictures below) —... -
Page 15: Training Stages
TRAINING STAGES Cardiovascular training plays an important part in maintaining a healthy heart and lung function, so it’s no surprise we should be paying attention to how quickly our heart beats during exercise. The chart above outlines a range of heart rate training zones determined by the individual’s age and workout goals to ensure you train safely and effectively. -
Page 16: Parts
PARTS We recommend 2 people assist in assembling this unit. Place all parts of the spin bike in a cleared area and remove the packing materials. Do not dispose of the packing materials until assembly is completed. Before you start installation, inspect and prepare all parts and screws featured in this manual. -
Page 17: Parts List
PARTS LIST Part Description Quantity Part Description Quantity Main Frame 32-1 Washer 32-2 Flange Nut Sleeve (handlebar, seat post) Adjustable Pop Pin Clamp Allen Bolt Magnet Allen Nut Flywheel Tension Control Water Bottle Holder Square Washer Outer Chain Guard Helical Compression Spring Belt Square Nut Big Pulley... -
Page 18: Exploded Drawing
EXPLODED DRAWING... - Page 19 For more information about our Elite exercise equipment or other brands that we stock for your home, visit www.elitefitness.co.nz Copyright © 2017 Elite Fitness Elite Fitness, 11 George Bourke Drive, Mt Wellington, Auckland, New Zealand, 0800 243 834, www.elitefitness.co.nz Keep up to date with the latest products, competitions and equipment, follow us on our social media sites.
Need help?
Do you have a question about the Pershing and is the answer not in the manual?
Questions and answers