Table of Contents
Advertisement
Quick Links
Advertisement
Table of Contents

Related Manuals for Elite Fitness RAZOR R9+


Summary of Contents for Elite Fitness RAZOR R9+
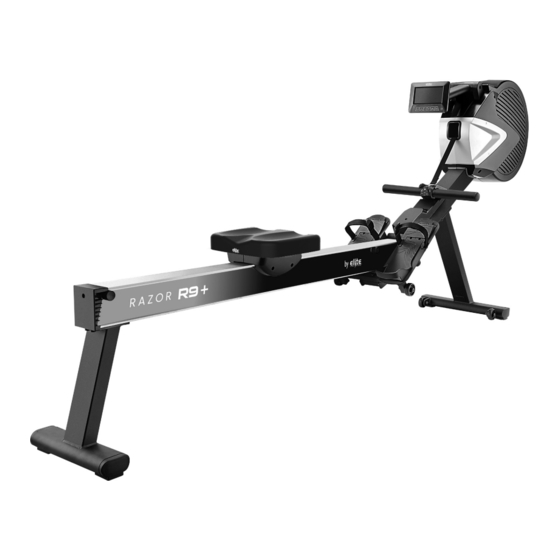
- Page 1 ASSEMBLY MANUAL RAZOR Record serial number Elite R9+ Razor Rowing Machine...
-
Page 2: Table Of Contents
Thank you for purchasing the Elite R9+ Razor Rower machine. For over 20 years, Elite Fitness™ has been New Zealand’s largest supplier of fitness equipment. Our aim and vision is to provide you Elite™ branded products, tested to the highest standard for quality and biomechanics at the best possible price. -
Page 3: Important Safety Instructions
IMPORTANT SAFETY INSTRUCTIONS The following definition applied to the word “WARNING” when used in this manual: Used to call attention to POTENTIAL hazards that could result in personal injury or loss of life. READ ALL INSTRUCTIONS BEFORE USING THE MACHINE This product has been designed for home use only. -
Page 4: Product Specifications
WARNING: Before beginning any exercise program, consult your physician. This is especially important for persons with pre-existing health problems. The seller assumes no responsibility for personal injury or property damage sustained by or through the use of this product. SERVICE HINTS: The high quality standard of this product only will be kept if you on a regular basis check all screw-connections and moving parts on proper fitting. -
Page 5: Assembly Instructions
ASSEMBLY INSTRUCTIONS STEP 1 Clear a 2 x Metre by 2.5 Metre working space before unpacking your R9+ Razor Rower Machine. STEP 2 Open the carton as shown in the diagram below. NOTE: To protect the Rower while assembling we suggest that you do not remove the Protective Packing Material until it is absolutely necessary. - Page 6 STEP 3 a) Remove the partly assembled rower from the carton lid and place it the correct way up as shown in the diagram below. b) Remove the safety strap holder and discard. Place the handle bar in it’s holder. c) Remove 2 x bolt [84] from main frame [2] and 2 x bolt [76] with the tool provided.
- Page 7 STEP 4 a) Turn over the Main frame [2] in the Carton Lid as shown in the diagram below. b) Remove 4 x bolt [84] from main frame [2] with the tool provided. c) Connect AC Adaptor cable [113] to AC cable [116]. d) Assemble the front stabiliser [4] with the same 4 x bolt [84] and tighten firmly.
- Page 8 STEP 5 a) Remove the ALUMINIUM BEAM [1] from the carton and place ii on top of the carton lid as shown in the diagram below. b) Remove 4 x BOLT [84] from ALUMINIUM BEAM [1] with the TOOL provided. c) Assemble REAR STABILISER [6] with the same 4 x BOLT [84] and tighten firmly.
- Page 9 STEP 6 a) Remove 6 x bolt [74] from pivot bracket [3] with the tool provided. b) Assemble the Aluminium beam [1] with the same 6 x bolt [74] and tighten firmly. ELITE ROWING MACHINE ASSEMBLY MANUAL...
- Page 10 STEP 7 a) Remove 4 x bolt [74] from seat [34] with the tool provided. b) Assemble seat [34] with the same 4 x bolt [74] and tighten firmly.
- Page 11 STEP 8 a) Remove 4 x bolt [72] from carriage with the tool provided. b) Assemble 2 x seat carriage cover [14] with the same 4 x bolt[72] and tighten firmly. NOTE: Ensure that the 2 x [14] seat carriage cover engage correctly into each other as shown in the diagram below.
- Page 12 STEP 9 a) Connect the AC adaptor [115] into the main power socket.
- Page 13 CONGRATULATIONS Assembly of your Elite R9+ Rowing Machine is now complete! Be sure to fully inspect your machine before using it for the first time. Failure to visually check and test and tech the assembly before use can cause damage to the Elite R9+ Rowing machine and serious injury to users and bystanders and can also compromise the effectiveness of your exercise program.
-
Page 14: Storage & Transportation
ADJUSTMENT GUIDE & STORAGE INSTRUCTIONS MOVING THE MACHINE 1) With the rower in a flat position, use your right hand to grip the FOLD HANDLE and with your left hand release the LOCKING BAR by pushing it down (See Fig 1) 2) Now lift the ALUMINIUM BEAM (1) to the upright position, making sure you hear the locking mechanism engage. - Page 15 UNFOLDING 1) Position yourself on the left side of the rower and with your right hand take a firm grip of the ALUMINIUM BEAM (1) as shown in Fig 3. 2) Use your left foot to release the locking mechanism by pushing down on the LOCKING BAR as shown in Fig 3, and then carefully lower the ALUMINIUM BEAM (1) to the floor.
-
Page 16: Care & Maintenance
Contact the Elite Fitness Service Department for further information on servicing your rowing machine. Prolong the life of your rowing machine by performing periodic maintenance checks. Not only does this ensure your machine is in full working order to ensure they continue to run smoothly and reliably, but it will save you service costs in the long run. - Page 17 MAINTENANCE LOG Prolong the life of your rowing machine by performing periodic maintenance checks. Not only does this ensure your machine is in full working order, but it will save you service costs in the long run. Every time you perform maintenance, record the date and if you can, the distance and hours operated.
-
Page 18: Limited Warranty
Repair and Maintenance Service Please contact our Elite Fitness Service Department at eliteservice@elitefitness.co.nz or visit www.elitefitness.co.nz for any service related issues or advice on preventative maintenance servicing procedures. -
Page 19: Console
CONSOLE DISPLAY FUNCTIONS FUNCTION DESCRIPTION SPECS TIME The time of each workout ,when starting exercise. 0M:00S ~ 99M:59s TIME/500m The time of each 500 metre at the current stroke velocity. 0M:00S ~ 99M:59s DISTANCE The distances of each workout ,when starting exercise. 0.0 ~ 9999 KM PULSE Heart rate during each workout. - Page 20 KEY FUNCTIONS FUNCTION DESCRIPTION RECOVERY Measure your heart rate immediately after your workout. MENU Shortcut key to the Main Menu. Up key to choose workout or increase the resistance level. DOWN Down key to choose workout or increase the resistance level. ENTER/ Confirm setting or selection DISPLAY...
- Page 21 PACER PROGRAM The PACER PROGRAM allows you to row beside a pace boat on the console to help you pace your workout. There are two ways to program the Pace Boat Time. • Set the TIME/500M • Set the TIME and METRES. 1.
- Page 22 RACE PROGRAM The RACE PROGRAM allows you to row against any USERS AVERAGE TIME/500M. 1. From the Main Menu, press the select keys to scroll and select the “RACE” Program. Press the ENTER Key to confirm your selection. NOTE: To return to the Main Menu press the MENU Key.
- Page 23 INTERVAL PROGRAMS These two INTERVAL PROGRAMS are designed for Interval Training. NOTE: We suggest that you do not exceed 100% Heart Rate. • INTERVAL DISTANCE PROGRAM = A target “DISTANCE” combined with timed rest periods • INTERVAL TIME PROGRAM = A target “TIME” combined with timed rest periods 1.
- Page 24 HEART RATE CONTROL PROGRAMS The HEART RATE PROGRAMS are designed to keep your heart rate/pulse at the constant level you have selected. Every 30 x seconds the computer will check your heart rate/pulse against what you have selected and will automatically adjust the Resistance LEVELS accordingly. NOTE: All Heart Rate Programs require a heart rate signal via a compatible Chest Strap.
- Page 25 TARGET HEART RATE PROGRAM The Target Heart Rate Program is similar to the three other heart rate control programs. You can adjust your Target Heart Rate value by pressing the SELECT Keys. NOTE: All Heart Rate Programs require a heart rate signal via a compatible Chest Strap. 1.
- Page 26 WATTS PROGRAM The WATTS PROGRAM is designed to keep your watt output at a constant level you have selected. Every 10 x seconds the computer will check your Watts output against what you have selected and will automatically adjust the Resistance LEVELS accordingly. During your workout you can adjust the Watts Value by pressing the SELECT Keys.
- Page 27 CALCULATING TARGET HEART RATE Refer to the target heart rate chart below to calculate your THR at 60%, 75% and 90%, that is our suggested training zone. We also suggest that you start your workouts at the 60% THR and increase your THR % as your fitness improves.
- Page 28 PROFILE PROGRAMS The console with adjust the resistance LEVEL according to the PROFILE PROGRAM you select. 1. From the Main Menu, press the select keys to scroll and select the “PROFILES” Program. Press the ENTER Key to confirm your selection. NOTE: To return to the Main Menu press the MENU Key.
- Page 29 FITNESS TEST A five minute Fitness Test based on your heart rate recovery. You must provide the computer with a heart rate signal via a compatible Chest Strap. Row as fast as you can for five minutes to get your heart rate to maximum.
- Page 30 USER PROFILE Each user can design their own Custom Profile Program. All profiles use the Bar Graph Display being 8x Rows High = 16 Resistance Levels and 16x Columns Long = 16x Time Intervals. During your workout the computer will automatically adjust the Resistance LEVELS according to the PROFILE you design and you can also adjust the Resistance LEVELS with the SELECT Keys.
- Page 31 RECOVERY PROGRAM The RECOVERY PROGRAM is an excellent cardiovascular fitness level indicator. The RECOVERY PROGRAM will evaluate your cardiovascular fitness level by measuring how quickly your heart rate recovers over a period of one minute immediately at the end of your workout. For the entire 60 countdown it is essential that you provide the computer with a heart rate signal via a compatible Chest Strap.
-
Page 32: Warm Up Exercise + Technique
WARM-UP EXERCISE Warm up exercise is important in preparing the muscles for activity whilst minimising the risk of injury. You may choose to warm up with a light/brisk walking pace for 5-10 minutes before stopping and performing some simple stretches. (As shown in the pictures below) —... - Page 33 ROWING TECHNIQUES The Rowing Action uses 84% of your muscle mass; from the tips of the fingers holding the handle, to the balls of the feet connected to the footboard, all the muscles between these 2 points contribute to the Rowing Action. The Rowing Action is comprised of both fast (drive phase) and slow (recovery phase) movements.
-
Page 34: Training Stages
TRAINING STAGES Cardiovascular training plays an important part in maintaining a healthy heart and lung function, so it’s no surprise we should be paying attention to how quickly our heart beats during exercise. The chart above outlines a range of heart rate training zones determined by the individual’s age and workout goals to ensure you train safely and effectively. -
Page 35: Parts List
PARTS LIST PART PART DESCRIPTION Q’TY DESCRIPTION Q’TY Aluminium Beam Strap Drum Main Frame Return Spring - Drum Pivot Bracket Return Spring - Cover Front Stabiliser Return - Holder Rear Stabiliser Flywheel Fan Rear Bracket Special Seat Roller Ali Handle Bar Heel Rest Seat Carriage Plug... - Page 36 PARTS LIST PART DESCRIPTION Q’TY Bolt - M6x20mm Bolt - M8x16mm Bolt - M8x60mm Bolt - M10x12mm U-Bolt Bolt - M5x8mm Washer - M8x012x1T Washer - M8x012x2T Washer - M8x016x2T Washer - M8x023x2T Washer - M8x018x2T Washer - M10x017x2.3T Screw - M3x10mm Screw - M4x12mm Screw - M4x20mm Screw - M2x10mm...
-
Page 37: Exploded Drawing
EXPLODED DRAWING ELITE ROWING MACHINE ASSEMBLY MANUAL... - Page 38 For more information about our Elite Fitness equipment or other brands that we stock for your home, visit www.elitefitness.co.nz Copyright © 2021 Elite Fitness Elite Fitness, 28 Morrin Road, St Johns, Auckland, New Zealand. 0800 243 834, www.elitefitness.co.nz Keep up to date with the latest products, competitions and equipment, follow us on our social media sites.
Need help?
Do you have a question about the RAZOR R9+ and is the answer not in the manual?
Questions and answers
How to reduce the tension
To reduce the tension on the Elite Fitness RAZOR R9+, press the DOWN key to decrease the resistance level.
This answer is automatically generated