Table of Contents
Advertisement
Quick Links
Advertisement
Table of Contents

Related Manuals for Elite Fitness SOLARIS


Summary of Contents for Elite Fitness SOLARIS
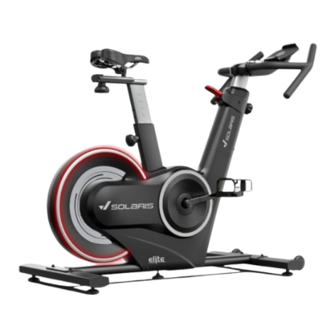
- Page 1 ASSEMBLY MANUAL Record serial number Elite Solaris Spin Bike...
- Page 2 Elite Solaris Spin Bike. Elite Solaris Spin Bike. SERVICE & WARRANTY Elite Fitness HQ CONTENTS Parts List Assembly Complete...
-
Page 3: Important Safety Instructions
IMPORTANT SAFETY INSTRUCTIONS READ ALL INSTRUCTIONS BEFORE USING THE MACHINE CONSULT A PHYSICIAN IMMEDIATELY. ELITE SOLARIS SPIN BIKE ASSEMBLY MANUAL... -
Page 4: Product Specifications
120 KGS. PRODUCT SPECIFICATIONS 120 KG 52 KG 45 KG... -
Page 5: Parts List
Cable compression spring Screw ST2.9*9.5 Brake group retractor spring Bolt M5*25 IPAD tension spring Flat washer IP group spring Bolt M8*45 Left chain cover Bolt M8*75 Right chain cover Lock nut Left brake cover Bolt M6*15 ELITE SOLARIS SPIN BIKE ASSEMBLY MANUAL... - Page 6 PARTS LIST Right brake cover Bolt M5*10 Front tube rubber ring Screw ST3.5*15 Rear tube rubber ring Smart knob Front decoration ring Adapter Back decoration ring Pull wire motor IP bracket Main panel wire IP shelf cover Main line bottom line IP base support Power cable IP cushion...
- Page 7 • Use the 5# inner hexagon spanner (109) to loosen the bolt. Remove the packaging from the bottom tube (b). (Note: Components a and b serve as protective packaging only. After disassembly, please dispose of them properly along with the packing materials.) ELITE SOLARIS SPIN BIKE ASSEMBLY MANUAL...
- Page 8 ASSEMBLY INSTRUCTIONS STEP 2 • Using the 5# inner hexagon spanner (109) and bolt (70), along with the standard spring washer (77) and flat washer Class C (72), attach the front foot tube assembly (2) securely to the exercise spin bike frame assembly (1). Repeat the same process to install the rear foot tube assembly (3).
- Page 9 • Thread the adjustment assembly through the seat cushion (7) and seat cushion adjustment assembly (5), securing them with bolt (90), flat washer (73), and tightening nut (21) to fasten the bolt (90) in place. ELITE SOLARIS SPIN BIKE ASSEMBLY MANUAL...
- Page 10 ASSEMBLY INSTRUCTIONS STEP 4 • Connect the main panel wire (99) to the main line bottom line (100). Connect the light to the panel wire (105) and the light strip bottom line (106), then insert both wires into the tube. •...
- Page 11 Right pedal (58) marked 'R' should be installed with clockwise rotation. Do not install them in reverse, as this may cause the crank to slip and render it unusable. ELITE SOLARIS SPIN BIKE ASSEMBLY MANUAL...
- Page 12 ASSEMBLY INSTRUCTIONS STEP 6 • Insert the adapter (97) into the machine, and then connect the other end to the power outlet. • Op�onal feature: Atmosphere light. The light features three colors: green, blue, and red. When the step frequency is below 50RPM, the green light illuminates; between 50 and 80RPM, the blue light illuminates;...
- Page 13 ASSEMBLY COMPLETE CONGRATULATIONS Assembly of your Elite Solaris Spin Bike Failure to visually check and test the assembly of your exercycle before use can cause damage to the spin bike, serious injury to users and bystanders and can also compromise the effec�veness of you exercise program.
-
Page 14: Display Functions
1st gear normally. To verify, immediately adjust to the middle gear after power-on to see if the error reoccurs. 4. Components of the shuffler may be damaged, contact Elite Fitness. 5. The cable motor may be damaged from the factory, contact Elite Fitness. -
Page 15: Operation Functions
READY state (as shown in Figure After powering on, the resistance will automatically reset to the "1" gear. Figure 1 Figure 2 ELITE SOLARIS SPIN BIKE ASSEMBLY MANUAL... - Page 16 INSTRUCTIONS If there is no operation for 1 minute, the device will automatically reset, clearing the data. If there is no operation for 3 minutes, the display will completely turn off, entering standby mode (as shown in Figure 2). • In the READY state, press the knob or start pedaling to enter the exercise mode.
- Page 17 32 corresponds to approximately 44.6 kcal per kilometer. Bluetooth: • Display: Bluetooth connected. • Not displayed: Bluetooth not connected. NOTE: This machine is electrical equipment. Please ensure correct usage of power. When not in use, disconnect the power plug. ELITE SOLARIS SPIN BIKE ASSEMBLY MANUAL...
-
Page 18: Exploded Diagram
EXPLODED DIAGRAM... - Page 19 SETTING YOUR SPIN BIKE UP Saddle Height Adjustment Adjusting the Seat Fore-and-Aft Position Adjusting the Seat Fore-and-Aft Position Saddle Height Adjustment ELITE SOLARIS SPIN BIKE ASSEMBLY MANUAL...
- Page 20 SETTING YOUR SPIN BIKE UP Handle Bar Adjustment Please note: The spin bikes shown in the ‘setting up your spin bike’ section are for demonstration purposes only and your spin bike my vary in aesthetics and features.
-
Page 21: Care And Maintenance
CARE AND MAINTENANCE Friction Brake Pad System MAY CAUSE DAMAGE TO THE SHAFT THREAD. Magnetic Braking System Chain Driven Belt Driven ELITE SOLARIS SPIN BIKE ASSEMBLY MANUAL... -
Page 22: Maintenance Log
MAINTENANCE LOG MECHANICAL FRAME MAINTENANCE SERVICE DATE HOURS DISTANCE COMMENTS Chain / Seat / Brake Cleaned Belt Pedals 01/06 16.5km none... -
Page 23: Limited Warranty
LIMITED WARRANTY Warranty Range Warranty Time HOME USE The following conditions are not under warranty range: The Spin bike should not be: Repair and Maintenance Service ELITE SOLARIS SPIN BIKE ASSEMBLY MANUAL... -
Page 24: Warm-Up Exercise
WARM-UP EXERCISE... -
Page 25: Training Stages
TRAINING STAGES ELITE SOLARIS SPIN BIKE ASSEMBLY MANUAL... - Page 26 @EliteFitnessTV @EliteFitnessNZ...
Need help?
Do you have a question about the SOLARIS and is the answer not in the manual?
Questions and answers