Table of Contents
Advertisement
Quick Links
Advertisement
Table of Contents

Subscribe to Our Youtube Channel
Related Manuals for Elite Fitness STELLAR SL BGB118


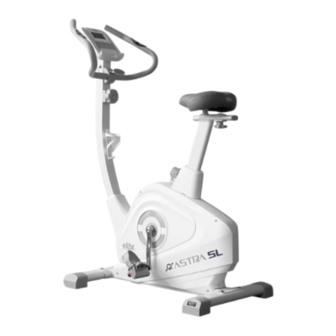
Summary of Contents for Elite Fitness STELLAR SL BGB118
- Page 1 ASSEMBLY MANUAL Record serial number Elite STELLAR SL Exercycle...
-
Page 2: Table Of Contents
Thank you for purchasing the Elite Stellar SL Exercycle. Elite Stellar SL. SERVICE & WARRANTY For service and warranty assistance please visit: (09) 258 9067 Elite Fitness HQ 28 Morrin Road St Johns Auckland, New Zealand 0800 2 438 348... -
Page 3: Important Safety Instructions
IMPORTANT SAFETY INSTRUCTIONS READ ALL INSTRUCTIONS BEFORE USING THE MACHINE This product has been designed for home use only. not be applicable to products being subjected to professional use or products being used in a — — — — — —... -
Page 4: Product Specifications
PRODUCT SPECIFICATIONS User Weight Capacity: 120 kg 29.2 kg Shipping Weight: 26.7 kg Net Weight:... -
Page 5: Hardware Package
HARDWARE PACKAGE ELITE STELLAR SL EXERCYCLE ASSEMBLY MANUAL... -
Page 6: Parts List
PARTS LIST NAME/SPECIFICATION NAME/SPECIFICATION Main Frame Axle of Rotation Rear Stabilizer Circlip Front Stabilizer Screw Saddle Support Post Axis of Flywheel Saddle Bearing Block Saddle Post Decorative Cover Bearing 6001 Front Post Bearing End Cap Handle Bar T-Shape Knob Console Decorative part Adjusting Knob Screw... - Page 7 ASSEMBLY INSTRUCTIONS STEP 1 Connect the front stabiliser (3) and the rear stabiliser (2) to the main frame (1) using Screw (54) and flat washer (55). The front stabiliser (3) comes with a transport wheel, making it easier for you to move this equipment.
- Page 8 ASSEMBLY INSTRUCTIONS STEP 2 Fix the saddle (5) onto the saddle sliding (56) using a flat washer (64) and nylon nut (60), then securely �ghten the saddle (5). Insert the saddle and bracket into the ver�cal saddle support post (4) and posi�on them at your preferred height.
- Page 9 ASSEMBLY INSTRUCTIONS STEP 3 Insert the front post (7) into the front post cover (28) ini�ally. Join together the console wire (14) and speed sensor wire (16). Ensure that all the pins are straight when connec�ng 14 & 16. Failure to do so may lead to console malfunc�on. Secure the front post (7) to the main frame (1) using screw (63), flat washer (55), and curved washer (66).
- Page 10 ASSEMBLY INSTRUCTIONS STEP 4 Fit the console (9) onto the front post (7) using the screws (68). Remove the protec�ve plug (67), insert the pulse sensor wires (19) from the handlebar (8) into the hole on the front post (7), and then pull them out.
- Page 11 ASSEMBLY INSTRUCTIONS CONGRATULATIONS Assembly of your Elite Stellar Sl Exercycle Failure to visually check and test the assembly of your exercycle before use can cause damage to the exercycle, serious injury to users and bystanders and can also compromise the effec�veness of you exercise program. ELITE STELLAR SL EXERCYCLE ASSEMBLY MANUAL...
- Page 12 ASSEMBLY INSTRUCTIONS HANDLING...
-
Page 13: Exploded Drawing
EXPLODED DRAWING ELITE STELLAR SL EXERCYCLE ASSEMBLY MANUAL... -
Page 14: Seat Adjustment
SEAT ADJUSTMENT Adjusting the Seat Fore-and-Aft Position Having your bike seat adjusted to the right This also minimises stress to the knee by being and a plumb line (a length of string with a nut Saddle Height Adjustment — Place your heels on the bike pedals and crank arm around and have your helper stop the crank when the pedal is at three o’clock hips rock from side to side while pedalling... -
Page 15: Display Console
DISPLAY CONSOLE Functional Buttons: MODE: Press down to select func�ons. Press down for 2 seconds to reset �me, distance, and calories. SET: Used to set the values of �me, distance, and calories when not in scan mode. RESET: Press down to reset �me, distance, and calories. Functions and Operations: SCAN: Press the "MODE"... -
Page 16: Specifications
DISPLAY CONSOLE DISTANCE Target Training Mode: Press the "MODE" bu�on to switch to the "DIST" func�on, then press the "SET" bu�on to set the target distance. When the required distance is reached, stop the bu�on. Start using the machine, and the display will start coun�ng down. When the countdown reaches zero, the distance func�on flashes to indicate the comple�on of the training target. -
Page 17: Care And Maintenance
CARE AND MAINTENANCE IMPORTANT INFORMATION Cleaning and prevent unnecessary corrosion stains and damage to the structural components from sweat Please ensure all sweat residue is wiped from any contact points or framework with a damp cloth using a suitable PH neutral detergent in water to avoid salt and corrosion deposits on your Frame and Pedals ELITE STELLAR SL EXERCYCLE ASSEMBLY MANUAL... -
Page 18: Maintenance Log
MAINTENANCE LOG SERVICE DATE HOURS DISTANCE COMMENTS 01/06 16.5km none... -
Page 19: Limited Warranty
Warranty Time — — The following conditions are not under warranty range: The damage due to incorrect adjustment of the machine; Repair and Maintenance Service Please contact our Elite Fitness Service Department at or visit ELITE STELLAR SL EXERCYCLE ASSEMBLY MANUAL... -
Page 20: Warm-Up Exercise
WARM-UP EXERCISE — Keep your knees slightly bent and slowly lean forward, back and shoulders relaxed, reaching — — Keeping your legs straight and the heel on the ground, lean — —... -
Page 21: Training Stages
TRAINING STAGES Note: Contact heart rate may provide inaccurate readings and is designed only as a guide ELITE STELLAR SL EXERCYCLE ASSEMBLY MANUAL... -
Page 22: Notes
NOTES... - Page 23 @EliteFitnessNZ @EliteFitnessTV...
Need help?
Do you have a question about the STELLAR SL BGB118 and is the answer not in the manual?
Questions and answers