Table of Contents
Advertisement
Quick Links
Advertisement
Table of Contents

Related Manuals for Elite Fitness PHOENIX


Summary of Contents for Elite Fitness PHOENIX
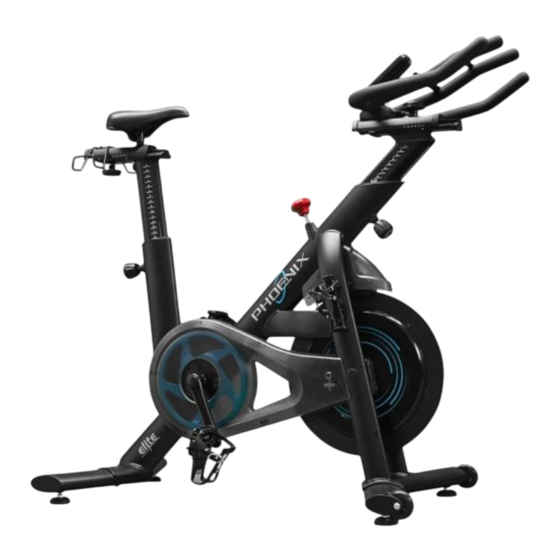
- Page 1 ASSEMBLY MANUAL Record serial number Elite Phoenix Spin Bike...
- Page 2 Elite Phoenix Spin Bike. Elite Phoenix Spin Bike. SERVICE & WARRANTY Elite Fitness HQ CONTENTS Parts List Assembly Complete Notes...
-
Page 3: Important Safety Instructions
IMPORTANT SAFETY INSTRUCTIONS READ ALL INSTRUCTIONS BEFORE USING THE MACHINE CONSULT A PHYSICIAN IMMEDIATELY. ELITE PHOENIX SPIN BIKE ASSEMBLY MANUAL... -
Page 4: Product Specifications
120 KGS. PRODUCT SPECIFICATIONS 120 KG 53.5 KG 48.5 KG... -
Page 5: Parts List
PARTS LIST ELITE PHOENIX SPIN BIKE ASSEMBLY MANUAL... - Page 6 PARTS LIST...
- Page 7 PARTS LIST ELITE PHOENIX SPIN BIKE ASSEMBLY MANUAL...
- Page 8 PARTS LIST Main frame x 1 Front stabilizer x 1 Rear stabilizer x 1 Front handlebar x 1 Computer x 1 6L/R Pedal x 1 Water bottle x 2 Bolt x 2 Allen wrench S5 x 1 Spring washer x 2 Allen wrench S4 x 1 Curved washer x 2 Screw x 2...
- Page 9 Rear Stabilizer (3) onto the Main Frame (1). Align the holes and insert bolts (19), securing them with curved washers (21) and spring washers (20). Use an Allen wrench (107) to �ghten them securely. A�en�on: The Front Stabilizer (2) has transporta�on wheels on the front. ELITE PHOENIX SPIN BIKE ASSEMBLY MANUAL...
- Page 10 ASSEMBLY INSTRUCTIONS STEP 2 Unscrew screws (41) located on both sides of the front tube of the main frame (1). A�ach Water Bo�le Cages (7), securely screw and �ghten onto the main frame, ensuring proper alignment, u�lising the Allen wrench (108).
- Page 11 Securely a�ach the Le� Pedal (6L) to the le� Crank (63L) by turning it �ghtly in an an�clockwise direc�on. A�ach the Right Pedal (6R) to the right Crank (63R) by turning it �ghtly in a clockwise direc�on. Use a mul�-func�on spanner (106). ELITE PHOENIX SPIN BIKE ASSEMBLY MANUAL...
- Page 12 ASSEMBLY INSTRUCTIONS STEP 4 To adjust the saddle height, loosen the Seat Adjustor Knob (16) by unscrewing it one rota�on. Then, pull out the spring-loaded sec�on (16). Adjust the saddle support post (10) to the desired height and ensure it aligns with the appropriate hole. Then, �ghten it clockwise to secure. A�en�on: Ensure that the saddle height does not exceed the STOP indicator on the post to prevent damage or instability.
- Page 13 (8) to the desired height, ensuring it aligns with the appropriate hole. Then, �ghten the knob (16). Be careful not to exceed the STOP indicator on the post when adjus�ng the height. ELITE PHOENIX SPIN BIKE ASSEMBLY MANUAL...
- Page 14 ASSEMBLY INSTRUCTIONS STEP 6 Properly connect the Computer Middle Wire (102) from the bike frame with the wire from the computer (5). Ensure a secure connec�on. Insert the Computer (5) onto the plate of the Handlebar (4) according to the provided instruc�ons. Note: The handlebar (4) can also be adjusted forward or backward by loosening the knob (39) and then �ghtening it once the desired posi�on is achieved.
- Page 15 Note: Ensure the equipment is stable and secure before use. If the computer doesn't work or the screen flashes, you may need to charge the ba�ery. Use the Type-C data cable to charge the ba�ery as necessary. ELITE PHOENIX SPIN BIKE ASSEMBLY MANUAL...
- Page 16 ASSEMBLY INSTRUCTIONS...
- Page 17 ASSEMBLY COMPLETE CONGRATULATIONS Assembly of your Elite Phoenix Spin Bike Failure to visually check and test the assembly of your exercycle before use can cause damage to the spin bike, serious injury to users and bystanders and can also compromise the effec�veness of you exercise program.
- Page 18 INSTRUCTIONS Functional Button: • MODE: Press this bu�on to select �me, speed, distance, calories, WATT, and RPM func�ons. Push down to reset �me, distance, and calories for 2 seconds. • SET: To set the values of �me, distance, and calories (set when stopping exercise). •...
- Page 19 • Once the computer successfully connects to the device and app, it will automa�cally power off and begin displaying data on the app. • If you wish to reuse the computer a�er connec�ng to the app, you must first exit the app and disable the Bluetooth on your device. ELITE PHOENIX SPIN BIKE ASSEMBLY MANUAL...
- Page 20 INSTRUCTIONS APP Operanting Instructions: • NOTE: Both the "Kinomap" and "Zwi�" apps will update in real �me. The opera�on process outlined here serves as a reference guide only. Kinomap: 1- Download the app from your device's app store. 2- Once the download is complete, open the app and register. Ensure that the Bluetooth on your device is turned on to ac�vate the computer and ensure it is awake.
- Page 21 2- Once the download is complete, open the app and register. Ensure that the Bluetooth on your device is turned on to ac�vate the computer and ensure it is awake. 3- Follow these steps to add sports equipment: 4- Once equipment is added, you're all set to begin your workout! ELITE PHOENIX SPIN BIKE ASSEMBLY MANUAL...
-
Page 22: Exploded Diagram
EXPLODED DIAGRAM... - Page 23 SETTING YOUR SPIN BIKE UP Saddle Height Adjustment Adjusting the Seat Fore-and-Aft Position Adjusting the Seat Fore-and-Aft Position Saddle Height Adjustment ELITE PHOENIX SPIN BIKE ASSEMBLY MANUAL...
- Page 24 SETTING YOUR SPIN BIKE UP Handle Bar Adjustment Please note: The spin bikes shown in the ‘setting up your spin bike’ section are for demonstration purposes only and your spin bike my vary in aesthetics and features.
-
Page 25: Care And Maintenance
CARE AND MAINTENANCE Friction Brake Pad System MAY CAUSE DAMAGE TO THE SHAFT THREAD. Magnetic Braking System Chain Driven Belt Driven ELITE PHOENIX SPIN BIKE ASSEMBLY MANUAL... -
Page 26: Maintenance Log
MAINTENANCE LOG MECHANICAL FRAME MAINTENANCE SERVICE DATE HOURS DISTANCE COMMENTS Chain / Seat / Brake Cleaned Belt Pedals 01/06 16.5km none... -
Page 27: Limited Warranty
LIMITED WARRANTY Warranty Range Warranty Time HOME USE The following conditions are not under warranty range: The Spin bike should not be: Repair and Maintenance Service ELITE PHOENIX SPIN BIKE ASSEMBLY MANUAL... -
Page 28: Warm-Up Exercise
WARM-UP EXERCISE... -
Page 29: Training Stages
TRAINING STAGES ELITE PHOENIX SPIN BIKE ASSEMBLY MANUAL... - Page 30 NOTES...
- Page 31 @EliteFitnessTV @EliteFitnessNZ...
Need help?
Do you have a question about the PHOENIX and is the answer not in the manual?
Questions and answers